| Oracle® Argus Insight Installation Guide Release 7.0.1 E28479-01 |
|
|
PDF · Mobi · ePub |
| Oracle® Argus Insight Installation Guide Release 7.0.1 E28479-01 |
|
|
PDF · Mobi · ePub |
The Argus Insight Schema Creation Tool lets you create the Argus Insight data mart structure. It creates a link between your source Argus database and your new Argus Insight data mart. The Extract Transform and Load (ETL) process uses this link to transfer data from your Argus database to the Argus Insight data mart for reporting purposes.
During the schema creation process, you are required to create four database users: one user for logging in to the Argus Insight application, two other users who are schema owners, and one user for supporting private database links (DB Links).
This chapter includes the following topics:
Creating a Database Link from Argus Safety to Insight Database
Upgrading Database from Argus Insight 7.0 to Argus Insight 7.0.1
Note:
The Argus Insight database must be created with the same character set as the Argus Safety database. Make sure you have installed the requisite software as explained in Section 1.2, "Software and Hardware Requirements."The GLOBAL_NAME and NLS_LENGTH_SEMANTICS database parameters must be configured properly in order for the Argus Insight Schema Creation Tool to run. You must check those settings before you run the Argus Insight Schema Creation Tool. If the parameters are not set properly, the Schema Creation Tool will fail.
In addition, you may want to set the value of the ARRAYSIZE parameter to ensure optimal performance of the Schema Creation Tool.
To review and modify these database settings:
Contact your database administrator (DBA).
Verify that the database configuration file for the Argus Insight database defines the following database parameter values:
GLOBAL_NAME = FALSE (This parameter must be set to FALSE for Argus Insight to be able to create the database links.)
NLS_LENGTH_SEMANTICS = CHAR
Open the glogin.sql file:
$ORACLE_HOME/sqlplus/admin/glogin.sql
Add the following line to the file:
SET ARRAYSIZE 5000
Setting the array size to the recommended value (or higher) ensures optimal performance of the Schema Creation Tool.
Restart the database instance for your changes to take effect.
This section lists the required and recommended values for:
Database parameters
Database I/O configuration
RAM and CPU
Table 3-1 lists the database parameters and the values that must be set for Argus Insight.
For those parameters that require a numeric value, Table 3-1 lists the minimum value recommended. You may need to increase the value depending on your system configuration and the number of cases. It is the responsibility of the database administrator to monitor the system and adjust the database parameters as necessary.
Table 3-1 Database Parameters for Argus Insight
| Database Parameter | Required Value |
|---|---|
|
COMPATIBLE (for Oracle 11gR2) |
11.2.0.0.0 or later |
|
CURSOR_SHARING |
EXACT |
|
GLOBAL_NAME |
FALSE |
|
JOB_QUEUE_PROCESSES |
10 (Minimum value recommended) |
|
NLS_LENGTH_SEMANTICS |
CHAR |
|
OPTIMIZER_MODE |
ALL_ROWS |
|
OPTIMIZER_SECURE_VIEW_MERGING |
TRUE |
|
PARALLEL_MAX_SERVERS |
Minimum value recommended based on the total number of cases:
|
|
PGA_AGGREGATE_TARGET |
Minimum value recommended based on the total number of cases:
|
|
QUERY_REWRITE_ENABLED |
TRUE (if computing statistics regularly) FALSE (if not computing statistics regularly) |
|
SGA_MAX_SIZE |
Greater than or equal to the value of the SGA_TARGET parameter. |
|
SGA_TARGET |
Minimum value recommended based on the total number of cases:
The 32-bit architecture allows for 4 GB of physical memory to be addressed. DBAs should verify the maximum addressable RAM for their respective architectures. |
|
UNDO_MANAGEMENT |
AUTO |
|
WORKAREA_SIZE_POLICY |
AUTO |
|
DB_BLOCK_BUFFERS (in MB) / DB_CACHE_SIZE |
Leave set to the Oracle default value |
|
DB_BLOCK_SIZE (in bytes) |
Leave set to the Oracle default value |
|
QUERY_REWRITE_INTEGRITY |
Leave set to the Oracle default value |
|
SHARED_POOL_SIZE |
Leave set to the Oracle default value |
Table 3-2 lists the minimum amount of disk space to allocate for the redo log files, TEMP tablespace, and UNDO tablespace.
Table 3-2 Recommended Database I/O Configuration for Argus Insight
| Total Number of Cases | ||||
|---|---|---|---|---|
| Database I/O Configuration | Small (< 30,000) | Medium (30,000 to 200,000) | Large (200,000 to 1,000,000) | Extra Large (> 1,000,000) |
|
Number and Size of Redo Log Files |
Default |
3 X 500 MB |
5 X 500 MB |
5 X 500 MB |
|
The value depends on the characteristics of the I/O subsystem such as the I/O bandwidth, storage disks type, and RAID level. (Oracle recommends RAID 1+0 or similar.) |
||||
|
TEMP Tablespace Size |
32 GB |
32 GB |
64 GB |
128 GB |
|
UNDO Tablespace Size |
16 GB |
32 GB |
64 GB |
128 GB |
|
The recommended UNDO tablespace size is based on the projections with the following two parameter values: RETENTION=NOGUARANTEE UNDO_RETENTION=900 (seconds) |
||||
Table 3-3 lists the recommended configuration (RAM and CPU) for the Argus Insight Database Server.
Table 3-3 Recommended Configuration for the Argus Insight Database Server
| Total Number of Cases | ||||
|---|---|---|---|---|
| Database Server Configuration | Small (< 30,000) | Medium (30,000 to 200,000) | Large (200,000 to 1,000,000) | Extra Large (> 1,000,000) |
|
RAM |
4–8 GB |
8–16 GB |
16–32 GB |
16–32 GB |
|
CPU |
Equivalent to 2–4 Dual Core, 3 GHz |
Equivalent to 4–8 Dual Core, 3 GHz |
Equivalent to 8–12 Dual Core, 3 GHz |
Equivalent to 8–12 Dual Core, 3 GHz |
Note:
The Argus Insight Database and Argus Database TNS names entry must be available in both Argus Insight Database Server and Argus Safety Database Server. Argus Safety Database TNS should also be present in the Argus Insight Web Server.Table 3-4 lists the tablespaces for the Argus Insight data mart. Argus Insight creates these tablespaces when you create a database schema.
Note that the tablespace names begin with APR. The Argus Power Reports (APR) product was renamed to Argus Insight.
Table 3-4 Tablespaces Created for the Argus Insight Data Mart
|
APR_CFG_DATA_01 |
APR_MEDM_DATA_01 |
APR_MRPT_INDEX_01 |
|
APR_MCAS_DATA_01 |
APR_MEDM_INDEX_01 |
APR_MRPT_INDEX_02 |
|
APR_MCAS_DATA_02 |
APR_MEDM_LOB_01 |
APR_MRPT_INDEX_03 |
|
APR_MCAS_HIST_DATA_01 |
APR_MFACT_DATA_01 |
APR_MWHOC_DATA_01 |
|
APR_MCAS_HIST_DATA_02 |
APR_MFACT_HIST_DATA_01 |
APR_MWHOC_INDEX_01 |
|
APR_MCAS_HIST_INDEX_01 |
APR_MFACT_HIST_INDEX_01 |
APR_SESM_DATA_01 |
|
APR_MCAS_HIST_LOB_01 |
APR_MFACT_INDEX_01 |
APR_SESM_INDEX_01 |
|
APR_MCAS_INDEX_01 |
APR_MRPT_DATA_01 |
APR_SESM_LOB_01 |
|
APR_MCAS_INDEX_02 |
APR_MRPT_DATA_02 |
APR_STAGE_DATA_01 |
|
APR_MCAS_LOB_01 |
APR_MRPT_DATA_03 |
APR_STAGE_DATA_02 |
|
APR_MCFG_DATA_01 |
APR_MRPT_HIST_DATA_01 |
APR_STAGE_DATA_03 |
|
APR_MCFG_HIST_INDEX_01 |
APR_MRPT_HIST_DATA_02 |
APR_STAGE_INDEX_01 |
|
APR_MCFG_HIST_LOB_01 |
APR_MRPT_HIST_DATA_03 |
APR_STAGE_INDEX_02 |
|
APR_MCFG_INDEX_01 |
APR_MRPT_HIST_INDEX_01 |
APR_STAGE_INDEX_03 |
|
APR_MCFG_LOB_01 |
APR_MRPT_HIST_INDEX_02 |
APR_STAGE_LOB_01 |
|
APR_MCFG_LOG_01 |
APR_MRPT_HIST_INDEX_03 |
APR_SWHOC_DATA_01 |
To start the Argus Insight Schema Creation Tool:
Log in to the Argus Insight Web Server.
Click Start.
Navigate to Programs, Oracle, Argus Insight, and then select Schema Creation Tool. The main window for the Schema Creation Tool opens.
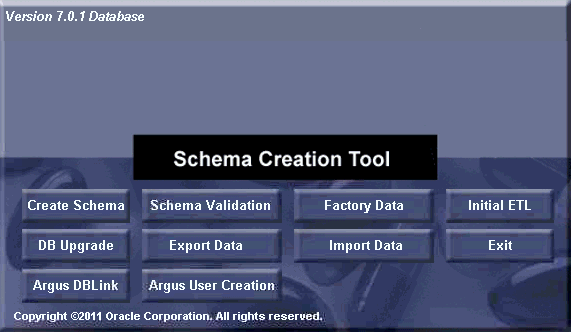
Summary of the Schema Creation Tool options:
Create Schema — Creates a new database schema for Argus Insight. See Section 3.5, "Creating the Database Schema" for more information.
Schema Validation — Validates a newly-created database schema. See Section 3.6, "Validating the Schema" for more information.
Factory Data — Loads the factory data into the database. See Section 3.5.4, "Loading Factory Data" for more information.
Initial ETL — Runs the initial process of extracting, transforming, and loading data. See Chapter 5, "Extracting, Transforming, and Loading Data" for more information.
DB Upgrade — Upgrades an existing Argus Insight 7.0 database to an Argus Insight 7.0.1 database. See Section 3.8, "Upgrading Database from Argus Insight 7.0 to Argus Insight 7.0.1" for more information.
Export Data — Exports data. For details, see Section 4.10.1, "Exporting Data" for more information.
Import Data — Imports data. For details, see Section 4.10.2, "Importing Data" for more information.
Argus DBLink — Creates a link between Argus Insight and Argus Safety. See Section 3.7, "Creating a Database Link from Argus Safety to Insight Database" for more information.
Argus User Creation — Lets you create Argus Insight users and roles. See Section 3.5.1, "Creating Users and Roles in the Argus Safety Database" for more information.
Exit — Exits from the Schema Creation Tool.
This section describes the tasks associated with creating the database schema:
To create users and roles:
Start the Argus Insight Schema Creation Tool.

Click Argus User Creation. The Oracle Database Connect dialog box opens.
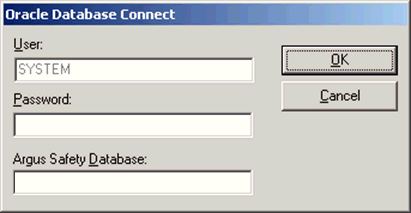
Connect to the Oracle Database:
In the Password field, type the password for the SYSTEM user.
In the Argus Safety Database field, type the name of your Argus Safety Database instance.
Click OK. The Argus Safety Read Only User Creation dialog box opens.
Click New User. The New User dialog box opens.
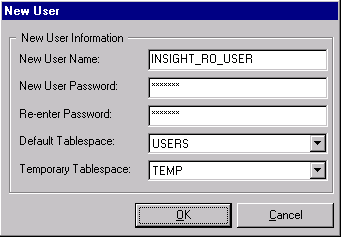
Complete the New User dialog box as follows:
Enter a name for the new user.
Specify and confirm the password for the user.
Select the default and temporary tablespaces required by your corporate standards, or leave the default values.
Click OK. The system returns to the Argus Safety Read Only User Creation dialog box.
Note:
You must create the INSIGHT_RO_USER and INSIGHT_RO_ROLE even if they already exist in the Argus Safety schema. Make the appropriate selection in Step 8 below for New User Name and New Role drop downs and proceed.Click New Role. The New Role dialog box opens:
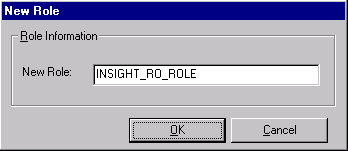
Enter the name of the new role to create and then click OK. The system returns to the Argus Safety Read Only User Creation dialog box.
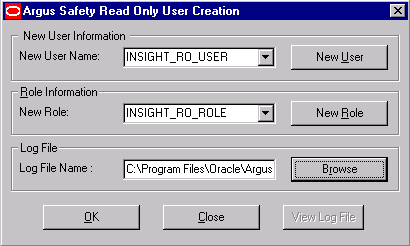
Complete the Argus Safety Read Only User Creation dialog box as follows:
In the New User Name field, select INSIGHT_RO_USER.
In the New Role field, select INSIGHT_RO_ROLE.
In the Log File Name field, enter the complete path for the location and name of the log file. Alternatively, you can click Browse to select the location for the log file, enter the file name, and then click Save.
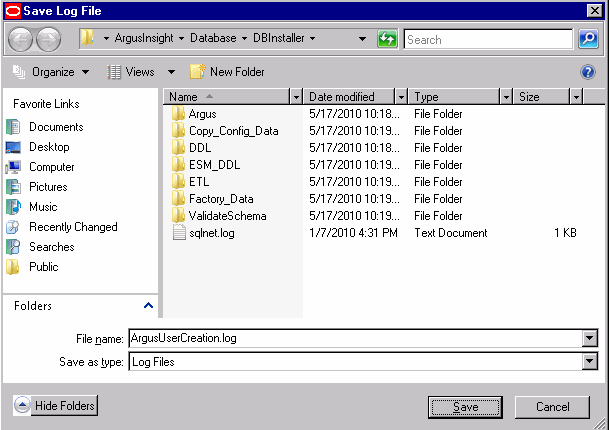
Click OK when you are ready to create the specified user with the specified role. The system displays information about the Argus Insight version, the Argus Safety database name, the name of the user to create, the role to assign to the user, and the name of the log file.
Verify that the information is correct, and then press Enter to continue. The system displays additional information about creating the user and granting privileges.
Press Enter to complete the installation. The system displays a message that the user account has been created successfully and lists the folder location of the log files.
Click OK to close the message box. The system returns to the Argus Safety Read Only User Creation dialog box.
Click View Log File.
Review the information in the log file and check for any errors.
Close the log file when you are done reviewing.
Click Close to close the Argus Safety Read Only User Creation dialog box.
If you are using the same Database Installer used to create an earlier schema, you must clear its cache.
To clear the cache:
Press and hold the CTRL key and right-click the mouse. Argus Insight prompts for confirmation that you want to reset the Cache.
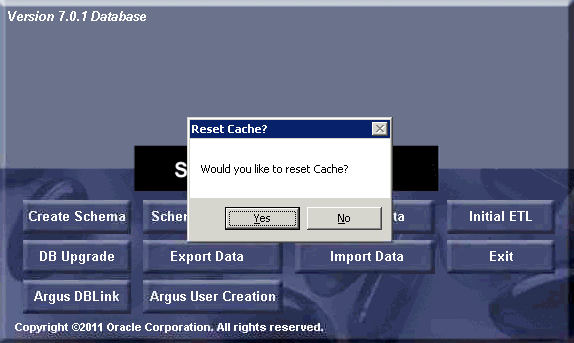
Click Yes.
Argus Insight clears the cache and logs the action in the createlog.rtf file.
To create a new schema for Argus Insight:
Start the Argus Insight Schema Creation Tool.
Click Create Schema. The Oracle Database Connect dialog box opens.
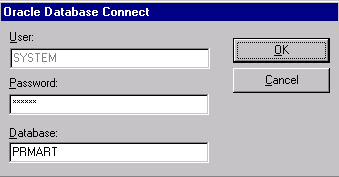
Connect to the Oracle Database:
In the Password field, type the password for the SYSTEM user.
In the Database field, type the TNS entry for the Argus Insight Database.
Click OK.
Note that:
If the NLS_LENGTH_SEMANTICS database parameter is not set to CHAR, the system displays an error message. You cannot proceed with the process of creating a new schema. You must set the NLS_LENGTH_SEMANTICS parameter to CHAR in the Argus Insight data mart and then restart the database instance. See Section 3.1, "Before You Run the Argus Insight Schema Creation Tool" for details.
If the NLS_LENGTH_SEMANTICS database parameter is set to CHAR, the system opens the New User dialog box for the APR_MART user.
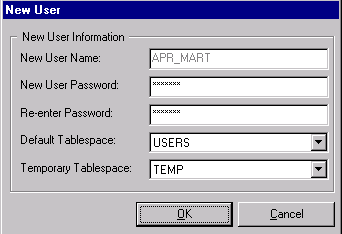
Enter a password for the APR_MART user (which is the schema owner), and then re-enter to confirm the password.
Click OK. The system opens the New User dialog box for the APR_APP user.
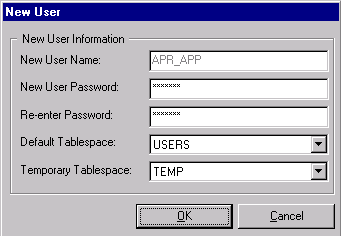
Enter a password for the APR_APP user, and then re-enter to confirm the password.
Note:
Argus Insight uses the APR_APP user account for all application access and reporting. The password for this user is stored in encrypted form in the CMN_PROFILE_GLOBAL table. If you need to change this password in the future or if you forget the password, you must contact Oracle Support for assistance in resetting the APR_APP password in the CMN_PROFILE_GLOBAL table. If the password for this user is not in synch with the value in the CMN_PROFILE_GLOBAL table, the Argus Insight application will not work.Click OK. The Argus Insight Schema Creation Options dialog box opens.
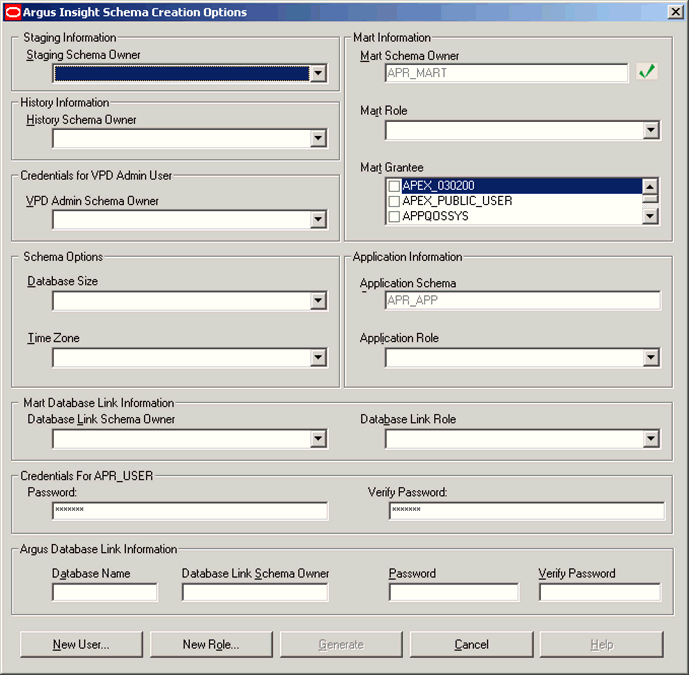
Click New User. The New User dialog box opens.
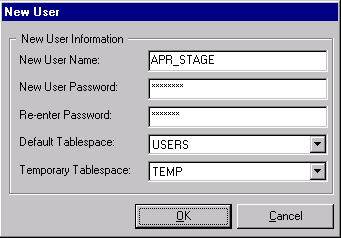
In the New User Name field, type one of the following names:
APR_STAGE
APR_LOGIN
APR_LINK_USER
APR_HIST
RLS_USER
In the New User Password field, type the password for the specified user.
In the Re-enter Password field, type the user password again for verification.
Click OK. The system returns to the Argus Insight Schema Creation Options screen.
Repeat this step until you have created all five (5) users.
Click New Role. The New Role dialog box opens.
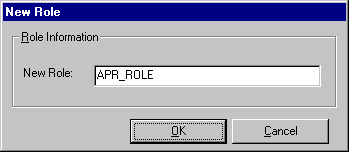
Enter one of the following names in the New Role field:
APR_ROLE
APR_LINK_ROLE
APR_APP_ROLE
Click OK. The system returns to the Argus Insight Schema Creation Options screen.
Repeat this step until you have created all three (3) roles.
Define the following users and roles in the Argus Insight Schema Creation Options screen:
In the VPD Admin Schema Owner field of the Credentials for VPD Admin Users section, select RLS_USER.
In the Database Link Schema Owner field of the MART Database Link Information section, select APR_LINK_USER.
In the Database Link Role field of the MART Database Link Information section, select APR_LINK_ROLE.
In the Database Link Schema Owner field of the Argus Database Link Information section, enter INSIGHT_RO_USER.
Note:
The value you enter in the Database Link Schema Owner field should be the name of the Argus Insight read-only user that you created earlier in the installation process. See Section 3.5.1, "Creating Users and Roles in the Argus Safety Database" for details.Optionally, in the Credentials for APR_USER section, enter and verify a new password only if you want to change the password for APR_USER.
Click Generate. The system prompts for the password of the staging user (APR_STAGE user).
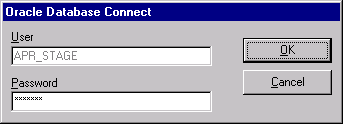
Enter the password and click OK. The system checks that Argus Insight and Argus Safety use the same character set. How the system continues depends on the result:
Different Character Set — If the character set for the Argus Insight database (that is, the MART character set) is different from the character set for the Argus Safety database, the system displays a warning message and prompts for confirmation that you want to proceed.

Determine whether you want to continue with the schema creation.
If the Argus Safety database uses the UTF character set and the Argus Insight database uses the ISO character set, the ETL process may fail due to the different character sets. In this case, Oracle recommends that you click No, fix the character set issue, and restart the create schema process.
If the Argus Safety database uses the ISO character set and the Argus Insight database uses the UTF character set, then the system can proceed by ignoring the character set difference. In this case, you can click Yes.
Same Character Set — If the character set for the Argus Insight database is the same as the character set for the Argus Safety database, the Enterprise Information dialog box opens.
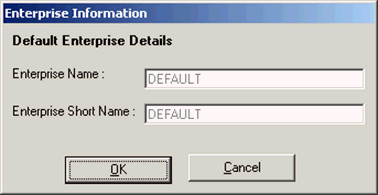
Click OK to accept the default enterprise information. The Check SYS Access dialog box opens.
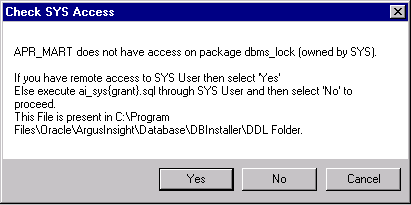
Respond to the Check SYS Access dialog box as follows:
If you do not have remote access to SYS user, execute the ai_sys{grant}.sql script through SYS user. This SQL script is located in the following folder:
drive:\Program Files\Oracle\ArgusInsight\Database\DBInstaller\DDL Folder
After you execute the ai_sys{grant}.sql script, click No and then continue with the next step.
If you have remote access to SYS user, click Yes. The Oracle Database Connect dialog box opens. Enter the password for the SYS user and click OK to continue.
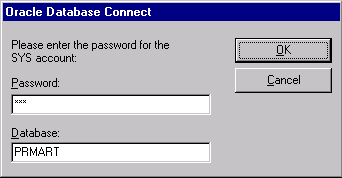
Wait until the Tablespace Creation dialog box opens.
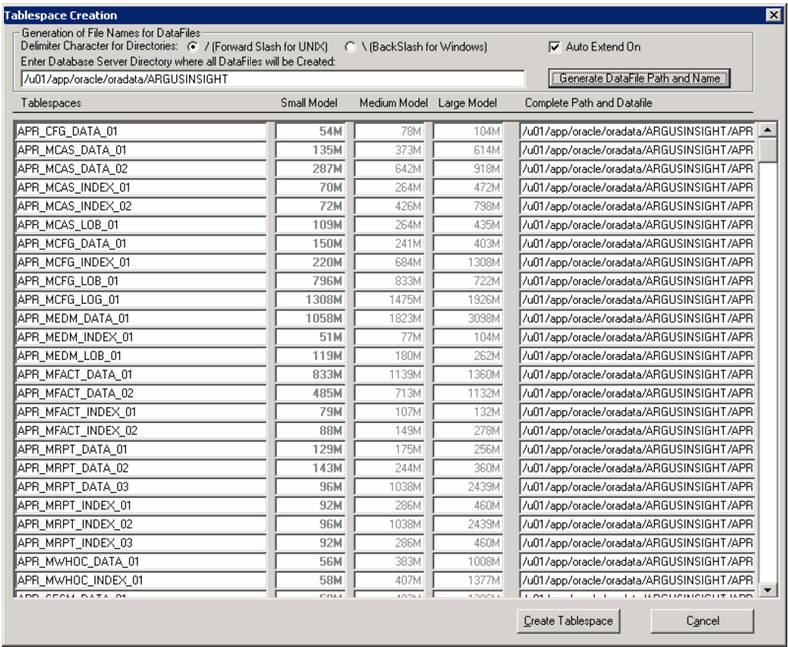
Complete the Tablespace Creation screen as follows:
In the Enter Database Server Directory where all Data Files will be Created field, enter the complete path to the directory for the tablespace data files that will be used by Argus Insight. For example, /u01/app/oracle/SMTEST. Note that the directory you specify must already exist.
Click Generate DataFile Path and Name. The system automatically fills in the Complete Path and Datafile column for all tablespaces.
Note that the system automatically selected the delimiter character to use for the directory path based on the Database Server operating system.
Click Create Tablespace to create all tablespaces.
Wait until the system creates the tablespaces and opens the Argus Insight Database Installation dialog box.
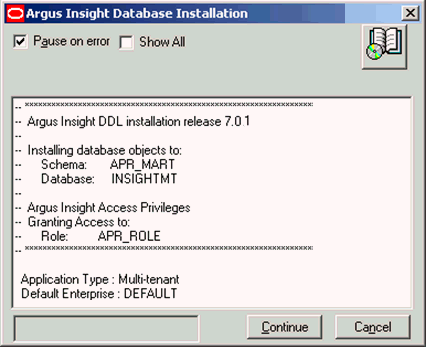
Click Continue to start the schema creation. The system executes the scripts, displays status information during the schema creation process, and reports when the update is completed.
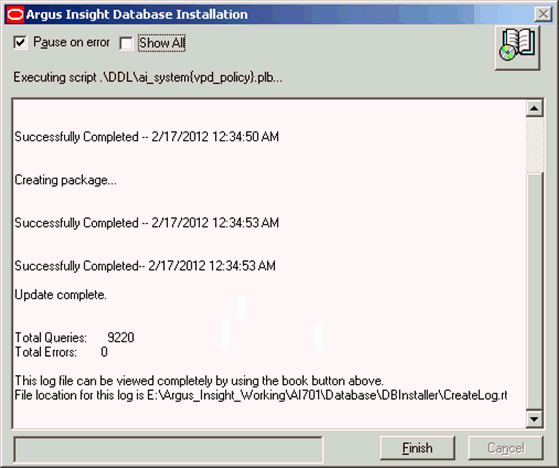
Click the Book icon to view the log file and check for errors.
Alternatively, you can view the log file at any time at the following location:
drive:\Argus_Insight_Working\AI701\Database\DBInstaller\CreateLog.rtf
Click Finish to close the dialog box.
To load the factory data:
Start the Argus Insight Schema Creation Tool.

Click Factory Data to load the factory data. Argus Insight displays the following message when it finishes loading the factory data:

To validate the database schema:
Start the Argus Insight Schema Creation Tool.
Click Schema Validation. The Oracle Database Connect dialog box opens.
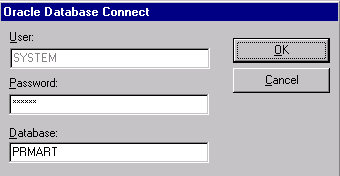
Connect to the Oracle Database:
In the Password field, type the password for the SYSTEM user.
In the Database field, type the name of the Argus Insight Data Mart instance.
Click OK. The Schema Validation Utility dialog box opens.
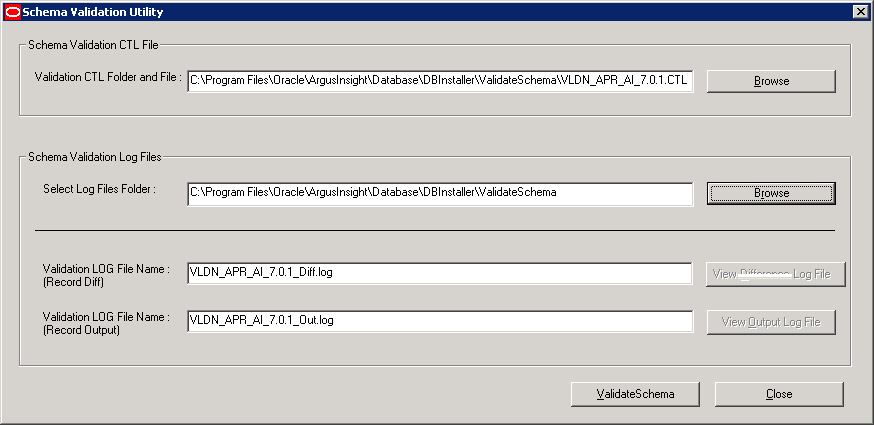
Complete the Schema Validation Utility dialog box as follows:
For the Validation CTL Folder and File field, click Browse next to the field to navigate to the location of the CTL file that you want to verify. Select the CTL file and then click Open. The system returns to the Schema Validation Utility dialog box.
For the Select Log Files Folder field, click Browse next to the field to navigate to and select the log files folder. Click OK to close the Select Folder dialog box and return to the Schema Validation Utility dialog box.
Note that the system automatically inserts the default file names into the Validation LOG File Name (Record Diff) and Validation LOG File Name (Record Output) fields. You can change the log file names if you want.
Click Validate Schema. The system begins to validate the Argus Insight Database and displays a series of command screens during the validation process. For example:
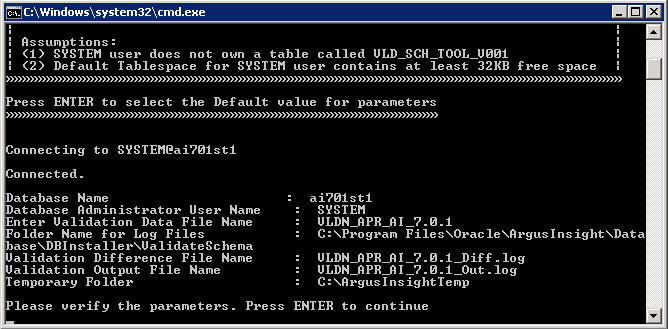
Review the information on the command screen and press Enter.
Continue to review the information on each screen and press Enter until the system displays a message that the validation of the Argus Insight Database is completed:
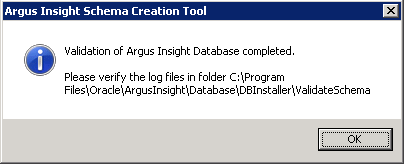
Click OK. The system displays the log file:
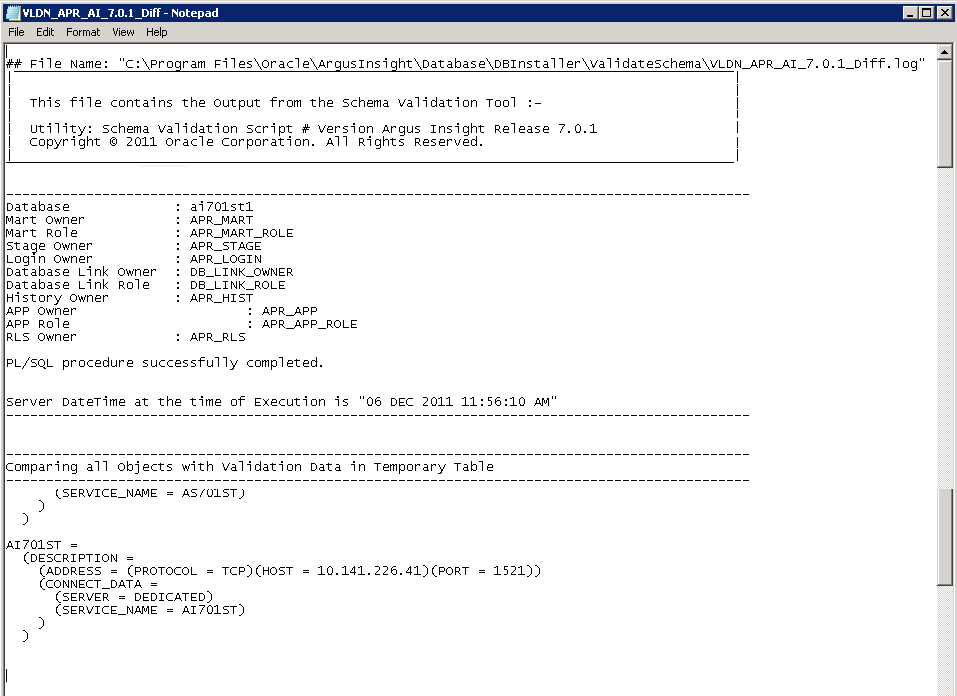
When the system returns to the Schema Validation Utility dialog box, you can:
Click View Difference Log File to check for any schema discrepancies, such as missing objects.
Click View Output Log File to see the list of errors, if any, that occurred during schema validation.
This link allows real-time updates of some of the values from Argus Console to Argus Insight data mart.
To create the database link from the Argus Safety database to the Argus Insight database:
Start the Argus Insight Schema Creation Tool.
Click Argus DBLink.
Connect to the Oracle Database:
In the Password field, type the password for the SYSTEM user.
In the Argus Safety Database field, type the name of your Argus Safety database.
Click OK.
The Argus To Insight Database Link Creation dialog box opens.
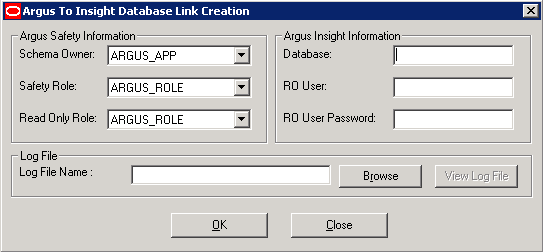
Complete the fields in the Argus Safety Information section as follows:
In the Schema Owner field, select the user account that owns the Argus Safety schema.
In the Safety Role field, select the Argus Safety role.
In the Read Only Role field, select the INSIGHT_RO_ROLE, which was created in Argus Safety.
Complete the fields in the Argus Insight Information section as follows:
In the Database field, enter the name of the Argus Insight database.
In the RO User field, enter the name of the read-only user.
In the RO User Password field, enter the password for the read-only user.
Click the Log File Name field to specify the name of the log file that will store the DBLink creation information. You can click Browse to navigate to the file location, select the file, and Save your selection.
Click OK to create the database link. The system first prompts for the information required to connect to the database as the ARGUS_APP user.
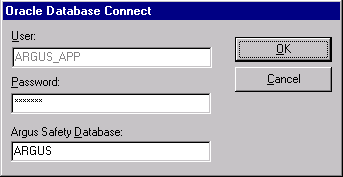
Enter the ARGUS_APP password and the Argus Safety database information. Click OK.
The system then prompts for the information to connect to the database as the SYSTEM user.
Enter the password for the SYSTEM user. Click OK.
The system displays status information as it creates the public synonyms:
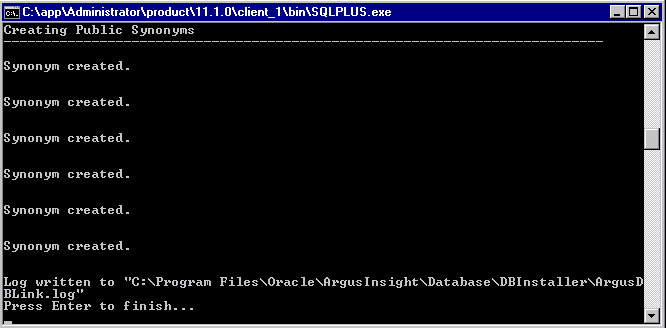
Press Enter to finish. Wait until the system reports that the Argus to Insight database link was created successfully:
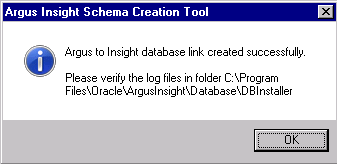
Click OK.
Check the log files located in the following folder for status information:
drive:\Program Files\Oracle\ArgusInsight\Database\DBInstaller
To upgrade the database from Argus Insight 7.0 to Argus Insight 7.0.1:
Start the Argus Insight Schema Creation Tool.
Click DB Upgrade. The Oracle Database Connect dialog box opens.

Connect to the Oracle Database:
In the Password field, type the password for the SYSTEM user.
In the Database field, type the name of your Argus Insight database.
Click OK. The Upgrade Parameters dialog box opens.
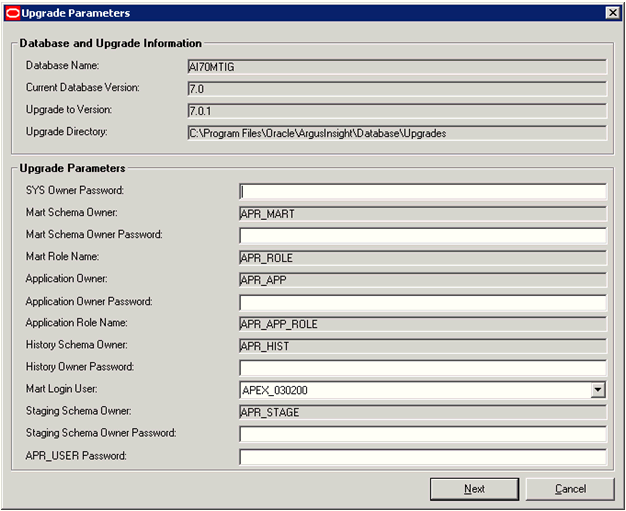
Complete the Upgrade Parameters dialog box as follows:
In the top section, verify that the database and upgrade information is correct. If the information is incorrect, click Cancel.
In the Upgrade Parameters section, enter the correct password for each owner and user.
In the Mart Login User field, select the user defined as mart login user (APR_LOGIN user).
Click Next. The Tablespace Management dialog box opens.
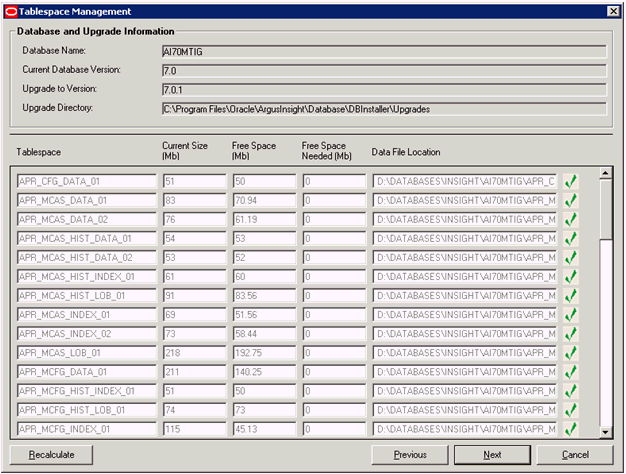
Verify that all tablespaces have enough free space.
The green check mark indicates that the tablespace has enough free space.
If the tablespace does not have enough free space, click the Add button corresponding to the tablespace name to increase the size.
Click Next.
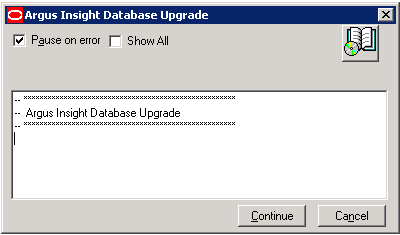
Click Continue to start the upgrade process. During the upgrade process, the system loads the factory data, and then displays a message reminding you to check the Factory_Data folder for any .BAD files. 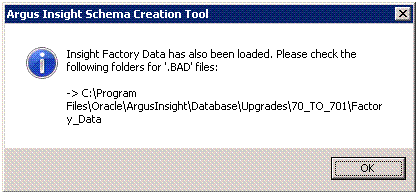
Click OK to continue. The system executes the upgrade scripts, displays status information during the update, and reports when the update is completed.
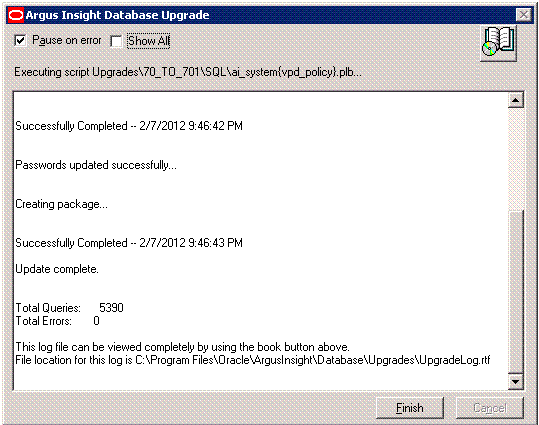
Click the Book icon to view the log file and check for errors.
Alternatively, you can view the log file at any time at the following location:
drive:\Program Files\Oracle\ArgusInsight\Database\Upgrades\UpgradeLog.rtf
Click Finish to close the dialog box.