7 Previewing Assets
This chapter describes how to use the Preview function to preview assets as they will be displayed on the website once they are published. Since websites change from moment to moment and day to day, WebCenter Sites offers the Future Preview feature. Future Preview enables you to view site assets as they will be displayed on the website at any particular moment in the future. This chapter is illustrated with examples from the FirstSite II sample site.
This chapter contains the following sections:
7.1 Overview
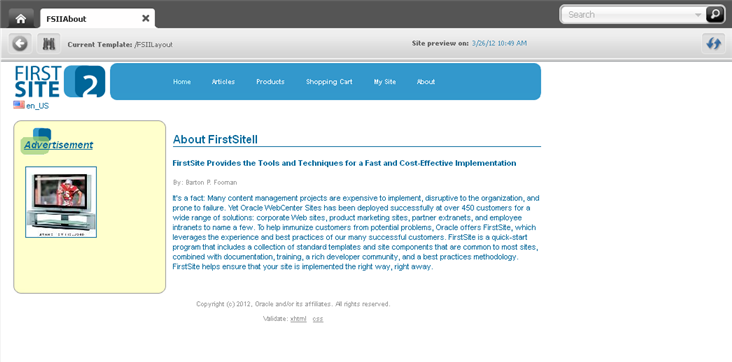
The Contributor interface allows you to preview how an asset will be displayed on the website once it is published (as shown in Figure 7-1). When you preview an asset, you cannot modify its content. However, you can choose to preview how the asset would look if it were rendered by a different template or wrapper.
Figure 7-1 Preview of the FirstSite II Sample Site's FSIIAbout Asset
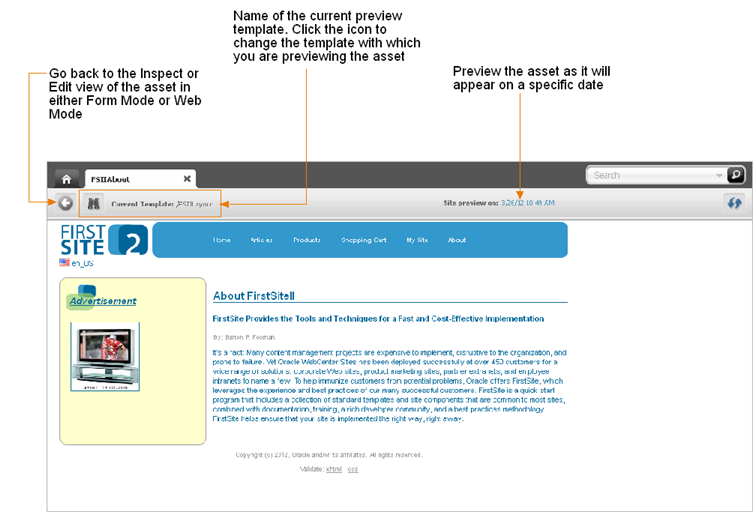
Description of "Figure 7-1 Preview of the FirstSite II Sample Site's FSIIAbout Asset"
While previewing an asset, you can choose to preview how the asset will look on the website at a future date. This feature is called Future Preview and is discussed later in this chapter. Future preview combines the use of start and end dates (also discussed later in this chapter) with the preview feature to show how an asset will be displayed on the website at a given time and date in the future.
7.2 How Do I Preview Assets?
Previewing an asset renders the asset as it would be displayed on the website if it were published. To preview an asset, the following conditions must be satisfied:
-
You must have the appropriate permissions.
-
The asset must have a template assigned to it.
You can preview an asset in several ways. For example:
-
Use the Search field in the Contributor interface to find the desired asset. You can either open the asset and then preview it or preview the asset directly from the search results list.
-
Drill down the Site Tree or My Work tree in the navigation pane. You can either right-click the desired asset and preview it directly from the tree or open the desired asset in its Inspect or Edit view and then preview it.
-
Drill down the Content Tree and double-click the parent asset associated with the asset you wish to preview. In the "Browse" tab that lists the assets associated with the selected parent asset, navigate to and preview the desired asset.
-
Preview an asset you are currently working with.
Note:
This chapter shows you how to preview an asset by using the Search field in the WebCenter Sites Contributor interface.
-
Log in to WebCenter Sites, select the site you want to work with and select the icon for the WebCenter Sites Contributor interface.
-
Find and open the asset you want to preview. Do the following:
-
In the Search field, enter search criteria identifying the asset and click the magnifying glass button.
For more information about searching for assets, see Section 6.1, "Overview of Finding Assets."
-
In the list of search results, navigate to and click the desired asset's name.
A tab opens displaying the asset's Inspect view in either Form Mode or Web Mode.
-
-
Preview the asset. In the asset's toolbar, click the Preview icon.
The tab displays the preview of the asset.
-
Preview how the asset would look on the website if it were rendered by a different template.
-
Do one of the following:
-
In the asset's toolbar, click the Preview with Page Layout icon.
-
In the menu bar, select View, then select Preview with Page Layout.
The "Select preview template" dialog box is displayed.
Figure 7-3 'Select Preview Template' Dialog Box
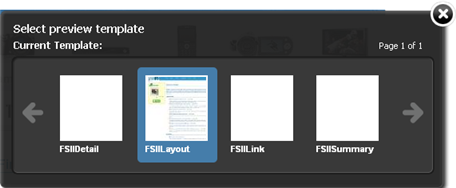
Description of "Figure 7-3 'Select Preview Template' Dialog Box"
-
-
Select the template with which you wish to preview the asset. (In this example, we selected the
/FSIIDetailtemplate, which renders the content of the asset without a surrounding layout). -
Click Apply.
The asset is displayed in the tab as it would be displayed on the website if it were rendered by the template you selected. For example:
Figure 7-4 Asset Previewed with a Different Template
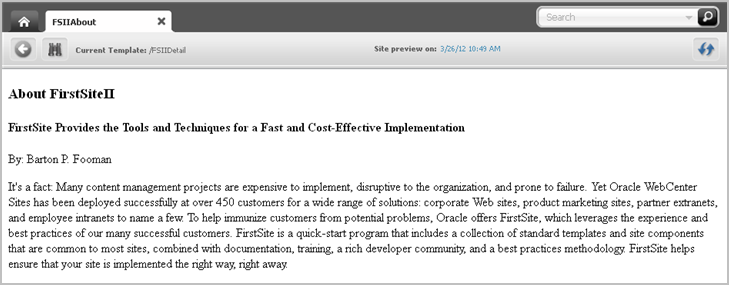
Description of "Figure 7-4 Asset Previewed with a Different Template"
-
-
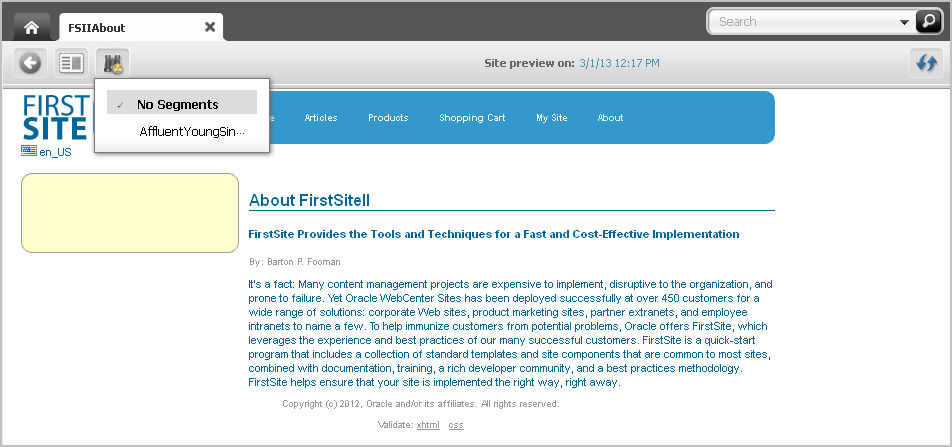
Preview the asset with segments:
-
In the menu bar, select the Preview with Segments icon.
A drop-down menu is displayed listing the available segments.
-
In the drop-down menu, select the segment with which you wish to preview the asset.
The preview of the asset with the selected segment is displayed in the tab. For information about segments, see Chapter 18, "Grouping Visitors into Segments with Engage."
-
-
Preview the asset with a different site wrapper. In the menu bar, select View, then select Preview with Wrapper, and then select the wrapper with which you wish to preview the asset.
The preview of the asset is displayed in the tab with the wrapper you selected.
Figure 7-6 Preview Asset with a Different Wrapper
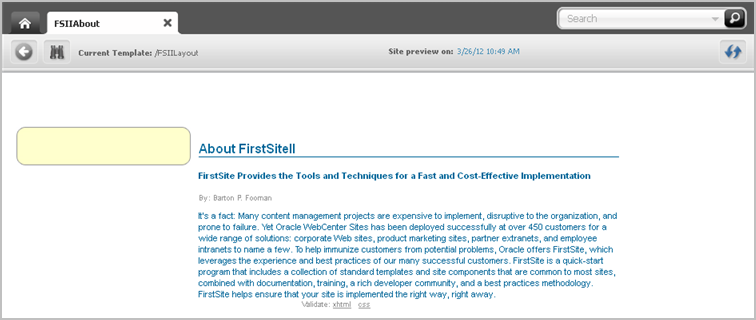
Description of "Figure 7-6 Preview Asset with a Different Wrapper"
-
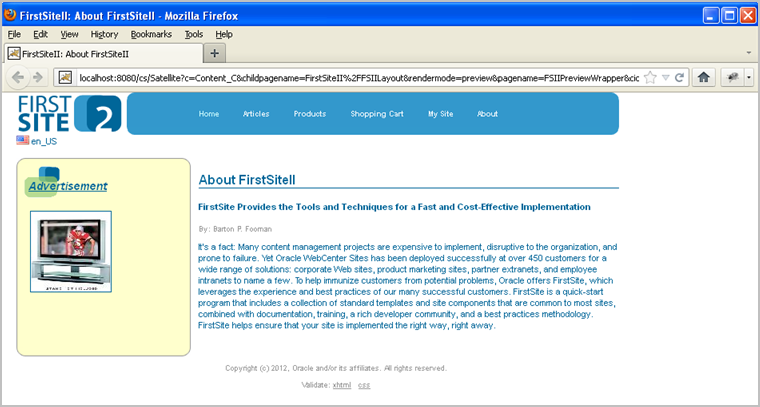
Preview the asset in a new window. In the menu bar, select View, then select Preview in New Window.
A new browser window opens displaying the preview of the asset.
7.3 Previewing Future Sites
While you are planning upcoming changes to a website, you can assign start and end dates to an asset. Once start and end dates are assigned, you can preview site assets as they will be displayed on a site at different times in the future. The feature you use to generate future versions of the website is known as "Future Preview."
Start and end dates are a key part of Future Preview, which is an enhanced function of Site Preview. You can preview how an asset will appear without setting start and end dates (the regular Site Preview), but by assigning a start and end date range to an asset, you gain the ability to visualize upcoming changes to the website. Once you assign a start and/or end date to an asset, you can see how the asset will change over time by selecting dates from the date picker on an asset's toolbar when its preview is displayed.
This section contains the following:
-
Section 7.3.3, "Impact of Start and End Dates on Future Preview"
-
Section 7.3.5, "Previewing a Site as It Will Appear at a Future Time"
7.3.1 About Start and End Dates
Start and end dates are optional field values you can assign to assets. This date range indicates when assets will appear on a website, should they be published. Fill in these dates when you are working with an asset in Form Mode (located on the Metadata tab).
Start and end dates affect the function of Future Preview, as discussed in this chapter.
Start and end dates also appear in the "Advanced Search" options, giving you the ability to search for assets based on the date range in which they will appear on the website.
7.3.2 About Future Preview
Future Preview is a tool for visualizing your website as you strategize upcoming content changes. With Future Preview, you can preview an asset's web page as it will appear at any selected moment in the future. By generating possible versions of a web page, you can more easily decide what to publish and when.
With Future Preview, you can select any particular date in the future and see what all the changes you and other content contributors are making will look like on the website at that time. WebCenter Sites uses the assigned start and end dates to determine whether to display the preview of the asset. The asset's preview is displayed only when the selected date falls within the asset's start/end date range.
Note:
To preview an asset as it will appear at future dates:
-
Start and end dates must be assigned in the Metadata section of an asset's content entry form (in Form Mode).
-
The template for the page in which the asset appears must contain the
asset:filterassetsbydatetag. See your site administrator for further information.
7.3.3 Impact of Start and End Dates on Future Preview
You will need to consider the following factors when assigning start and end dates:
-
The start and end date range are the times you expect the asset to be displayed on the website.
Once you set a start and end date range, you can use Future Preview to compare how the page on which the asset appears will look on dates before, during, and after the date range.
When you first preview an asset, you see its web page as it would appear on the asset's start date. If no start date is assigned, the current date is used for preview.
Choose a future date from the date picker in the asset's toolbar to view how the page will appear at the selected time. When you select a date that falls during the asset's start and end date range, the preview shows how the asset's web page will look during the period the asset is visible on the website. Conversely, if you choose a date that falls outside that date range, you see the asset's web page as it will appear before the item is published or after the item is no longer visible on the page.
Note:
The publication date of the asset does not affect when and how long the asset displays on the website; this is controlled by the start and end dates.
-
Neither the start nor end date is a required field:
-
An asset without both start and end dates is always displayed in the Site Preview, regardless of the date with which you choose to preview it.
-
An asset with an explicitly set start and end date is displayed conditionally; that is:
-
If the asset has both a start and an end date, it is displayed only when the specific date range is selected.
-
If the asset has only a start date, the asset is displayed on all dates including and after the start date. (It never expires.)
-
If the asset has only an end date, the asset is displayed on all dates up to and including the end date.
-
-
7.3.4 Assigning Start and End Dates
Start and end dates are optional fields you can assign to assets. This date range indicates when assets will be displayed on the website and how those assets will be displayed at any given time.
To assign a date range to an asset
-
Log in to WebCenter Sites, select the site you want to work with and select the icon for the WebCenter Sites Contributor interface.
-
Find the asset to which you are assigning a start and/or end date. Do one of the following:
-
In the Search field, enter search criteria identifying the asset and click the magnifying glass button.
-
If you are modifying an asset that has previously been assigned a start and/or end date, you can search by the previously assigned dates using the "Advanced Search" function. For more information about Advanced Search, see Section 6.3, "Performing an Advanced Search."
-
If you previously bookmarked the asset, expand the Bookmarks node in the My Work tree in the navigation pane. (If the My Work tree is collapsed, expand it by clicking the My Work bar.)
For more information on finding assets, see Chapter 6, "Finding and Organizing Assets."
-
-
Edit the asset in Form Mode.
-
In the list of assets, navigate to the desired asset, right-click it, and select Edit from the context menu.
The tab displays the asset's Edit view in either Form Mode or Web Mode.
-
If the asset opens in Web Mode, switch to Form Mode by clicking the Mode switch in the asset's toolbar.
-
-
In the asset's form section selector, select Metadata.
-
In the asset's Metadata section, set the asset's start and/or end date and (optionally) time.
In the "Start Date" and/or "End Date" fields, select the date and time from the date picker by clicking the Pick a date icon next to the field.
Figure 7-8 'Metadata' Section of an Asset's Form
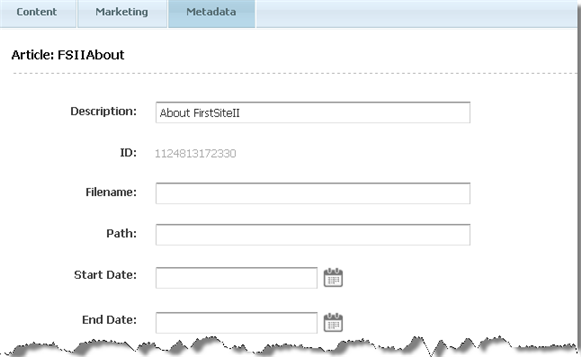
Description of "Figure 7-8 'Metadata' Section of an Asset's Form"
Note:
Your administrator may have selected default start and end dates for this asset type. You can change the settings if you wish.
For more information about using the date picker, see Section 3.5.4, "Working with the Date Picker."
-
In the asset's toolbar, click the Save icon to update the asset.
-
To preview the asset as it will appear at a future time, see Section 7.3.5, "Previewing a Site as It Will Appear at a Future Time."
7.3.5 Previewing a Site as It Will Appear at a Future Time
When assets have been assigned start and/or end dates, you can preview assets and the pages on which those assets are displayed as they will appear at future times of your choice.
Note:
To preview an asset as it will appear at future dates:
-
Start and end dates must be assigned in the Metadata section of an asset's content entry form.
-
The template for the page in which the asset appears must contain the
asset:filterassetsbydatetag. See your site administrator for further information.
To preview a site as it will appear at a future time
-
Log in to WebCenter Sites, select the site you want to work with and select the icon for the WebCenter Sites Contributor interface.
-
Find an asset to which you have assigned a start and/or end date. Do one of the following:
-
In the Search field, enter search criteria identifying the asset and click the magnifying glass button.
-
To search for assets by their start and/or end dates, use the "Advanced Search" function. For more information about Advanced Search, see Section 6.3, "Performing an Advanced Search."
-
If you have previously bookmarked the asset, expand the Bookmarks node in the My Work tree in the navigation pane. (If the My Work tree is collapsed, expand it by clicking the My Work bar.)
For more information about finding assets, see Chapter 6, "Finding and Organizing Assets."
-
-
In the list of assets, click the name of the desired asset.
A tab opens displaying the Inspect view of the asset in either Form Mode or Web Mode.
-
Preview the asset. In the asset's toolbar, click the Preview icon.
The tab displays the preview of the asset as it appears (or would appear) on the website on the current date.
-
Preview the asset as it will appear on a future date:
-
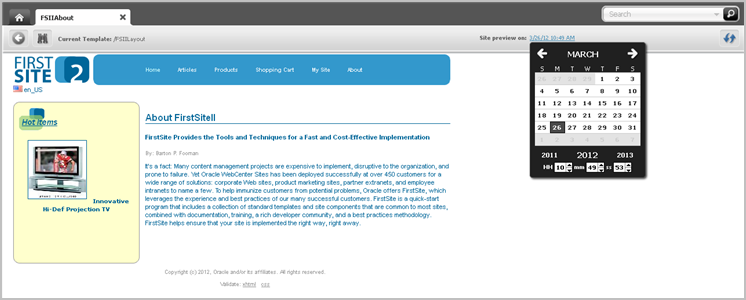
In the asset's toolbar, click the date link in the "Site preview on" section to render the date picker.
Figure 7-9 Date Picker Rendered in an Asset's Preview
Description of "Figure 7-9 Date Picker Rendered in an Asset's Preview"
-
In the date picker, select the desired date and time. For instructions on using the date picker, see Section 3.5.4, "Working with the Date Picker".
The preview displays the asset's web page as it will appear on the selected date.
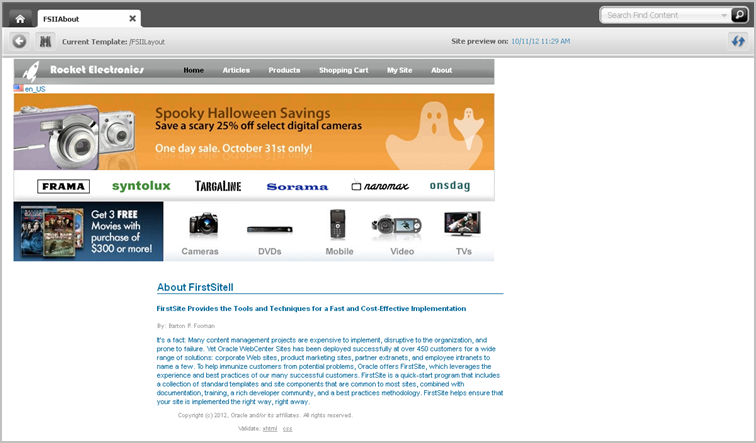
For example, if you preview the "FSIIAbout" asset's web page on a date in October, the screen in Figure 7-10 is displayed:
Figure 7-10 Future Preview of an Asset as it will be Displayed in October
Description of "Figure 7-10 Future Preview of an Asset as it will be Displayed in October"
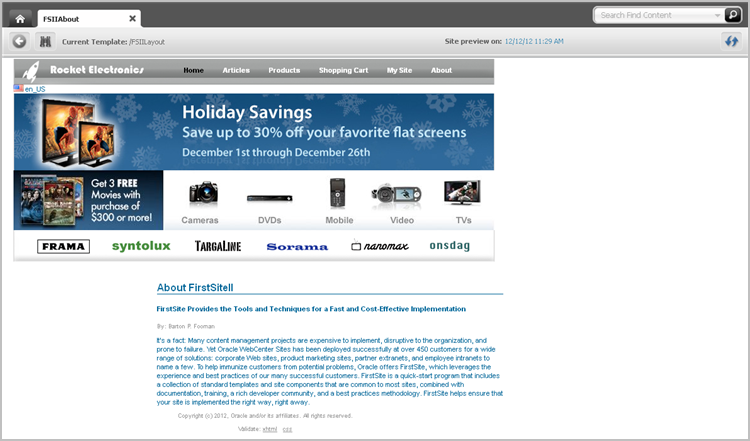
If you preview the same asset on a date in December, the screen in Figure 7-11 is displayed:
Figure 7-11 Future Preview of an Asset as it will be Displayed in December
Description of "Figure 7-11 Future Preview of an Asset as it will be Displayed in December"
-
7.3.6 Approval for Publishing
Before an asset is published to a website, you must approve the asset and all of its dependents for publishing. This process ensures that all the assets published at the same time are up to date prior to publishing.
The start date that you set does not necessarily have to be the date on which the item gets published. However, the asset will not display on the website until its start date. This is true for all the dependent assets that you are approving as well.
If you publish an asset after its end date, the asset will be published to its destination; however, the asset will not appear on the website (the asset has expired).
For more information on approving assets, see Chapter 14, "Approval for Publishing."
