4 Working with ACLs and Roles
Several user management components are used to control access to a WebCenter Sites system: ACLs, user accounts, user profiles, roles, and sites. Site configuration, itself, begins with ACLs, with the creation of user accounts, and with the creation of roles.
ACLs can be used on both your management and your delivery systems. However, the main focus of this chapter is user management on the management system. For information about user management on your delivery system, see the Oracle Fusion Middleware WebCenter Sites Developer's Guide.
This chapter contains the following sections:
4.1 Overview
ACLs and roles are of paramount importance in WebCenter Sites.
ACLs are used to regulate entry in to the WebCenter Sites system. The assignment of ACLs to users, database tables, and WebCenter Sites Pages determines users' permissions to operate on WebCenter Sites' database tables. If the user's ACLs match the database ACLs, the user has certain permissions (defined by the ACLs) to operate on the database tables. ACLs therefore serve as the foundation of the security and user management model. Without ACLs user accounts cannot be created.
Roles are used to manage access to sites and their components. The assignment of roles to users and interface functions on a given site determines whether the interface functions are enabled for the users or hidden from them. If the user's roles match the roles that are assigned to the interface functions, the functions are enabled for the user. Otherwise, the functions are hidden.
Before you can establish users you must determine which ACLs and roles the users need to be assigned. If the ACLs and roles do not already exist, you must create them in WebCenter Sites, even if you intend to use LDAP plug-ins to create the user accounts.
This chapter provides you with a basic explanation of ACLs and roles, and shows you how to create, modify, and delete ACLs and roles.
4.2 ACLs
Access Control Lists, called ACLs for short, are named sets of database operation permissions such as read, write, create, and retrieve. Because just about everything in WebCenter Sites (and the WebCenter Sites content applications) is represented as one or more rows in one or more database tables, user management on any of your Sites systems starts with ACLs.
With ACLs, you can limit access to the following items:
-
Individual database tables
-
Individual WebCenter Sites pages
WebCenter Sites and the Sites content applications use ACLs to enforce access restrictions to the various functions of those applications by controlling the user's access rights to the database tables that represent those functions. How? By verifying that the users attempting the function have the same ACL assigned to their user accounts as are assigned to the database table.
For example, user account information is contained in the system tables named SystemUsers and SystemUserAttrs. Because certain ACLs are assigned to those system tables, only a user with the same ACLs assigned to his or her user account is able to create new users or edit existing user information.
ACLs serve as the foundation of the security and user management model in your Sites system by providing authorization functionality. Even if you are using an external user manager like LDAP to store user information, you must use WebCenter Sites ACLs.
A user must always have at least the Browser ACL in order to view WebCenter Sites pages. However, additional ACL restrictions are enforced only when the cc.security property in the futuretense.ini file is set to true. For information about the cc.security property, see futuretense.ini in the Oracle Fusion Middleware WebCenter Sites Property Files Reference. For information about configuring security on your WebCenter Sites system, see Chapter 6, "Setting Up External Security."
ACLs are assigned to three things: user accounts, database tables, and page entries in the SiteCatalog table (that is, WebCenter Sites pages).
Note:
User Management on the Delivery System. User management on your delivery system is also based on ACLs. If your online site is designed to require visitors to register or log in before they can access areas of the site, you create the ACLs that are needed on the delivery system and then assign them to the appropriate database tables.Typically your site designers take care of assigning ACLs to WebCenter Sites pages. The Oracle Fusion Middleware WebCenter Sites Developer's Guide discusses how to design a user management process on the delivery system and provides code samples for pages that log visitors in to the site and verify their identities.
Every user must be assigned at least one ACL and the ACLs assigned to a user define that user's access to the WebCenter Sites system.
While users have one user account and one set of ACLs, no matter how many sites they have access to, they can have one set of roles for one site and a different set of roles for another site. Therefore, users must be assigned all the ACLs necessary to provide them the permissions that they need to fulfill all of their site-specific roles.
For example, if you create a role that allows a user with the role the ability to create template assets, the user assigned that role must also be assigned the ElementEditor ACL, because creating templates writes data to the ElementCatalog table.
To restrict access to the data in a table, assign an ACL to it through the WebCenter Sites Database forms available through the Admin tab. Then, only those users with the same ACL have access to the data in that table.
If you assign more than one ACL to a table, a user needs only one of those ACLs to access the table. The user's access rights to that table (read, write, create, and so on) are the ones defined by the ACL.
All of the WebCenter Sites system tables (and several of the Sites content applications tables) have ACL restrictions. The SystemInfo table lists all the tables in the WebCenter Sites database and the ACLs assigned to them.
Note:
Do not add ACLs to database tables through the WebCenter Sites Explorer application. Instead, use the WebCenter Sites Database form in the Admin tab.With one exception—to register a foreign table in the WebCenter Sites database—never attempt to change the information in the SystemInfo table even if your user account has the ACL that allows you to do so.
For information about:
-
Assigning ACLs to database tables, see Section 4.3.4, "Assigning ACLs to Custom Tables"
-
Registering foreign tables, see the Oracle Fusion Middleware WebCenter Sites Developer's Guide.
Page Entries in the SiteCatalog Table
The SiteCatalog table holds page entries for all the pages displayed for the Sites content applications as well as the pages displayed for your online site (that is, the site that you are delivering from the delivery system.) If you want to restrict access to a page, assign an ACL to it.
Typically, site developers determine how page restrictions should be configured on the delivery system. If you are customizing the user interface on the management system, however, you might need to use ACLs to restrict access to your custom pages.
This section contains the following topics:
4.2.1 System ACLs
WebCenter Sites and the Sites content applications use a number of system ACLs to control user access to their features and functions. Different combinations of these ACLs must be assigned to users. Information about system ACLs and their permissions are given in Chapter 31, "System Defaults."
4.2.2 Sample ACLs
A newly installed WebCenter Sites system contains only system ACLs. No additional ACLs have been created for any of the sample sites that are packaged with WebCenter Sites.
4.2.3 Custom ACLs
Because WebCenter Sites provides a comprehensive set of ACLs, it is unlikely that you will need to create your own. However, situations can arise where user management needs on the management or delivery systems require you to create ACLs. For example,
-
If your online site requires user registration, you may need to create a set of ACLs for site visitors.
-
If your developers create new functions and put them on new tabs to customize the management system, you might need to create additional ACLs (or roles) to support the new functions and tabs.
Although creating and applying ACLs is an administrative task, you must first work with your site designers and developers to determine which ACLs you need and how to apply them. Once you have determined the ACLs, create them by following procedures in the rest of this chapter.
4.3 Working with ACLs
This section shows you how to create ACLs, edit, and delete custom ACLs; apply ACLs to the database tables and WebCenter Sites pages; and customize access restricted messages
Note:
When using an LDAP integration option, be aware of system response to user and site management operations. For information about system response, see Chapter 33, "Managing Users, Sites, and Roles in LDAP-Integrated Sites Systems."This section contains the following topics:
4.3.1 Creating a New ACL
Note:
When creating ACLs, consider the roles you will be using in order to ensure that the ACLs are commensurate with the roles. For example, if you will be creating a role that allows a user to create template assets, the user who is assigned that role must also be assigned the ElementEditor ACL, because creating templates writes data to theElementCatalog table.-
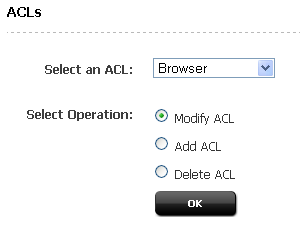
In the Admin tab, expand User Access Management, then double-click ACLs.
The ACLs form appears.
-
Select Add ACL and click OK. The value in the Select an ACL field does not matter at this point.
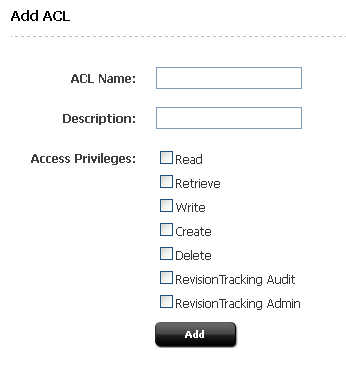
The Add ACL form appears.
-
In the ACL Name field, enter a unique name.
-
Select the access privileges you want to assign to this ACL. For information on each privilege, see Section 31.1.1, "Permissions."
-
Click Add.
WebCenter Sites creates the ACL and writes it to the
SystemACLtable. The new ACL appears in the drop-down list in the form described in step 1 of this procedure. -
If you are using LDAP, create a group (on your LDAP server) that exactly matches the ACL you just created. After you create the group, assign it to the appropriate users.
4.3.2 Editing a Custom ACL
Caution:
Never modify any of the system ACLs. For a list of these ACLs, see Section 31.2, "System ACLs."-
In the Admin tab, expand User Access Management, then double-click ACLs.
The ACLs form appears.
-
In the Select an ACL field, select the ACL to edit.
-
Select Modify ACL and click OK.
If the ACL you selected is a system ACL, an alert will display. Do not modify system ACLs.
-
In the Modify ACL form, make the desired changes to the Description and Access Privileges. For information on the displayed options, see Section 31.1.1, "Permissions."
-
Click Modify.
WebCenter Sites writes your changes to the
SystemACLtable.
4.3.3 Deleting a Custom ACL
Caution:
Never delete a system ACL. For a list of these ACLs, see Section 31.2, "System ACLs".-
If you are using LDAP, delete (from your LDAP server) the group corresponding to the ACL you will be deleting.
-
In the Admin tab, expand User Access Management, then double-click ACLs.
The ACLs form appears.
-
In the Select an ACL field, select the ACL to delete.
-
In the form that appears, select the desired ACL from the drop-down list and click OK.
WebCenter Sites displays a warning message.
-
Click OK.
The ACL has been deleted.
4.3.4 Assigning ACLs to Custom Tables
If you or the site designers create new tables, you might need to restrict access to those tables by assigning ACLs to them. Typically, you assign ACLs to new tables when you create those tables. (For more information, see the Oracle Fusion Middleware WebCenter Sites Developer's Guide.)
Note:
Do not assign additional ACLs (beyond the ones assigned by default) to system or core product tables.To assign ACLs to an existing table
-
In the Admin tab, expand User Access Management, then double-click Sites Database.
WebCenter Sites displays the Sites Database form.
-
Enter the name of the table to which you want to assign ACLs. If you do not know the name of the table you want to work with, do one of the following:
-
Leave the field blank. WebCenter Sites will return a list of all tables in the database.
-
Enter a partial name, ending with the wildcard character (%). WebCenter Sites will return a list of tables named similarly to your criteria.
-
-
Select Modify Table and click OK.
-
In the list of tables, select the desired table.
WebCenter Sites displays the Modify Catalog form.
-
In the ACL field, select the ACL(s) you want to assign to the selected table. To select multiple ACLs, Ctrl-click each desired ACL. You can also select a range of ACLs by selecting the first and last ACL in the range with Shift-click.
Note:
Do not change the value of the File Storage Directory field. For information about this field, look up thedefdirproperty in the Oracle Fusion Middleware WebCenter Sites Developer's Guide. -
Click Modify.

4.3.5 Assigning ACLs to WebCenter Sites Pages (SiteCatalog Page Entries)
There are at least two ways to assign ACLs to SiteCatalog page entries.
-
When developers create SiteEntry or template assets, they can assign ACLs to the page entry created for that asset through a field in the Create or Edit form.
-
For page entries that are not associated with a SiteEntry or template asset, developers can use the User Access Management.
To assign ACLs to a page entry that is not associated with a SiteEntry or template asset
-
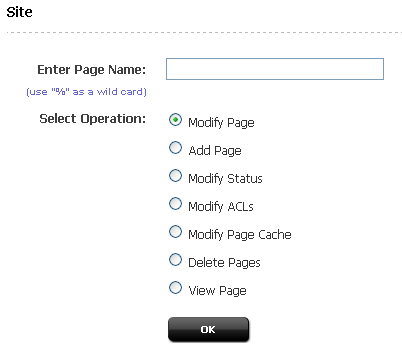
In the Admin tab, expand User Access Management, then double-click Site.
WebCenter Sites displays the Site form:
-
Enter the full path and name of the page to which you want assign ACLs. If you do not know the name of the page you want to work with, do one of the following:
-
Leave the field blank. WebCenter Sites will return a list of all page entries in the
SiteCatalogtable. -
Enter a partial name, ending with the wildcard character (%). WebCenter Sites will return a list of pages named similarly to your criteria.
-
-
Select Modify ACLs and click OK.
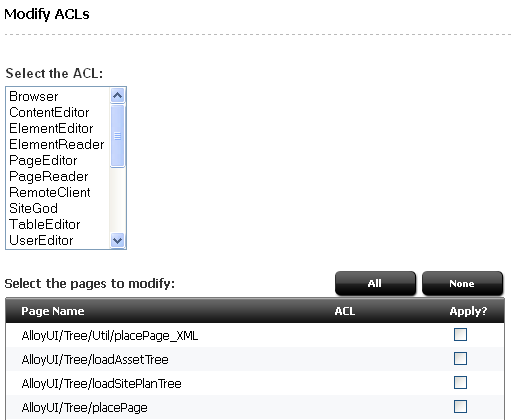
The Modify ACLs form appears.
-
In the scrolling list at the top of the window, select the ACLs you want to assign to one or more pages. To select multiple ACLs, Ctrl-click each desired ACL. You can also select a range of ACLs by Shift-clicking the first and last ACLs in the range.
-
In the list of pages, select the Apply? check box next to each page to which you want to assign the ACLs you selected in step 4. ACLs currently assigned to each page are shown in the ACL column. (To select all of the pages in the list, click All. To deselect all of the pages in the list, click None.)
-
At the bottom of the form, click Apply.
4.3.6 Setting the ACL Restriction Error Message
When users attempt to access a page for which they do not have the appropriate permissions, WebCenter Sites displays an error message. This message is stored in the following file:
<cs_install_dir>/futuretense_cs/formpriv.html
You can customize this and other error message pages in the futuretense_cs directory, with the following restrictions:
-
Do not rename any of the files.
-
Do not alter any occurrences of the
{0}string in any of the files. WebCenter Sites uses the{0}string to automatically generate these error messages.
4.4 Roles
User management includes the concept of roles. Roles complement users in the following ways:
-
Whereas the user definition (account) describes an individual's access to the underlying WebCenter Sites functionality (database tables) through ACLs, roles are used to manage site-specific access to WebCenter Sites' interface functions.
-
A role represents a job description or the title of individuals with similar functions: for example, content provider, editor, site designer, and administrator.
-
Each WebCenter Sites user has one user definition (account) no matter how many sites have been created. However, the user's roles can vary by site.
-
When you enable a user for a site, you enable that user within the context of the roles that user is to fulfill for that site.
The roles assigned to a user for a site determine the following:
-
Which assets the user can create on that site.
-
Which assets the user can search for on that site.
-
Which tabs are displayed in the tree when the user logs in to the site.
-
Whether the user is eligible for participation in any workflow processes, and, if so, for which steps in those workflow processes.
-
Which functions a user can or cannot perform on an asset while it is moving through a workflow process.
-
Whether the user can administer a workflow process or create or modify a workflow group on that site.
This section contains the following topics:
4.4.1 System Roles
Several system roles are installed by WebCenter Sites. One role is required for the Sites content applications to function, and three are required for the WebCenter Sites administrators to function. For more information, see Section 31.5, "System Roles."
4.4.2 Sample Roles
If you installed one or more sample sites, you will have access to a number of sample roles that are included with the sites. The roles permit the sample site users to access different tree tabs. You can use the sample roles as examples of how you can configure access control on your sites.
4.4.3 Custom Roles
Unlike ACLs, roles are objects that you will most likely need to create in order to account for the full range of users' responsibilities on your sites. To create roles, follow instructions in the next section, Section 4.5, "Working with Roles."
4.5 Working with Roles
This section shows you how to create, edit, and delete roles.
Note:
If you are using LDAP, be aware of system responses to user and site management operations. For information about system responses, see Chapter 33, "Managing Users, Sites, and Roles in LDAP-Integrated Sites Systems."This section contains the following topics:
4.5.1 Creating a Role
-
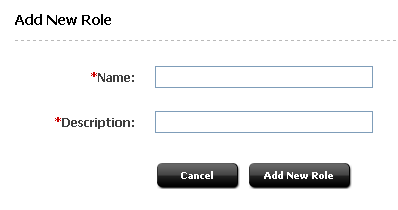
In the Admin tab, expand User Access Management, then expand Roles, then double-click Add New.
WebCenter Sites displays the Add New Role form.
-
In the Name field, enter a unique name of up to 32 characters.
-
In the Description field, enter a short and informative description of no more than 255 characters.
-
Click Add New Role.
-
Add the role to the default tree tabs (Workflow, Bookmarks, Site Admin, Admin, Site Plan, and Active List), as appropriate. For instructions, see Section 9.5.3, "Editing Tree Tabs."
4.5.2 Editing a Role
Although you cannot change the name of a role after you have created it, you can edit the description of the role.
To edit the description of a role
-
In the Admin tab, expand User Access Management, then double-click Roles. A list of all roles appears in the main window.
-
In the list of roles, navigate to the role you want to edit and click its Edit (pencil) icon.
-
In the Edit Role form, make your changes, then click Save.
4.5.3 Deleting a Role
Caution:
Do not delete any of the system default roles: GeneralAdmin, SiteAdmin, WorkflowAdmin, AdvancedUser, SitesUser.-
In the Admin tab, expand User Access Management, then double-click Roles. A list of all roles appears in the main window.
-
In the list of roles, navigate to the role you want to delete and click its Delete (trash can) icon.
WebCenter Sites displays a confirmation message.
-
Click Delete Role.
The role has been deleted.