22 On Demand Publishing and Asset Unapproval
If you are using the RealTime publishing method, you can selectively publish approved assets. You can also unapprove multiple assets in bulk.
This chapter contains the following sections:
22.1 Using On-Demand Publishing
In RealTime publishing, you can publish assets on-demand. That is, you can immediately and selectively publish any of the assets on the approved assets list.
As with scheduled RealTime publishing, an asset will be published with all its dependent assets. Therefore, the dependent assets are also placed in the On-Demand Queue.
The list of approved assets is searchable, making it easier to find the assets you need to publish. After the selected assets are published, they are removed from the approved assets list for the next publishing session.
Note:
On Demand publishing can be either complete or delayed. For more information about publishing modes, see Chapter 21, "Working with RealTime Publishing Modes."To select approved assets for immediate publication
-
Open the Publish Console by clicking Publishing on the button bar.
-
From the Publish Destination drop-down list:
-
Select the RealTime publishing destination to which you will publish the assets.
-
Click Select Destination.
-
-
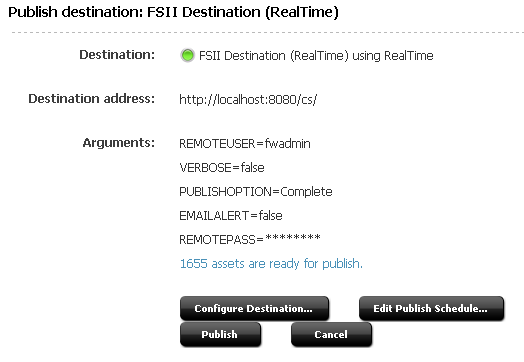
On the Publish Destination form, click the x assets are ready for publish link.
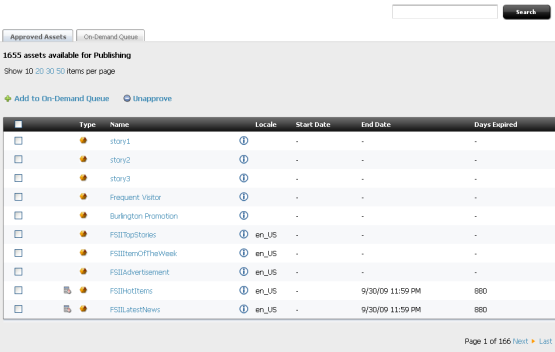
The On Demand Queue tab opens. The Approved Assets tab lists all assets approved for the upcoming publishing session.
-
(Optional) Search through the approved assets.
-
Enter a search term in the Search text box.
-
Search runs across asset names and descriptions.
-
You cannot use wildcard and boolean operators.
-
-
Click Search.
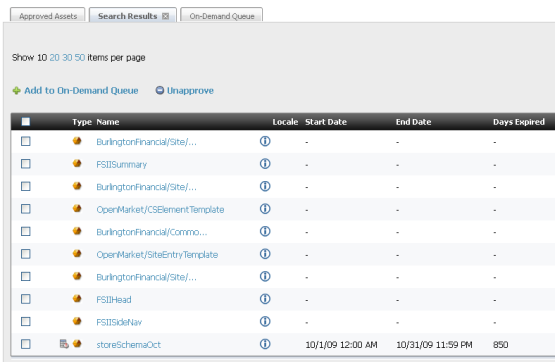
The Search Results tab opens, displaying the results of your search.
-
-
Add assets to the On-Demand Queue.
Note:
On-Demand supports immediate publication. Therefore, selections that you place into the On-Demand queue remain there only throughout the current WebCenter Sites session. Once you log out (or the system logs you out), the On-Demand queue is cleared.On either the Approved Assets tab or the Search Results tab, select the assets you wish to add to the On-Demand Queue, then click Add to On-Demand Queue.
A message is displayed while the dependencies are calculated. Once this process completes, the selected assets are removed from the Approved Assets tab (and Search Results tab, if open). The On-Demand Queue is updated with the selected assets and their dependent assets.
-
Publish the On-Demand Queue. Do one of the following:
-
If you are sure that the assets you selected can be published, click Publish On-Demand Queue (on the Approved Assets tab).
-
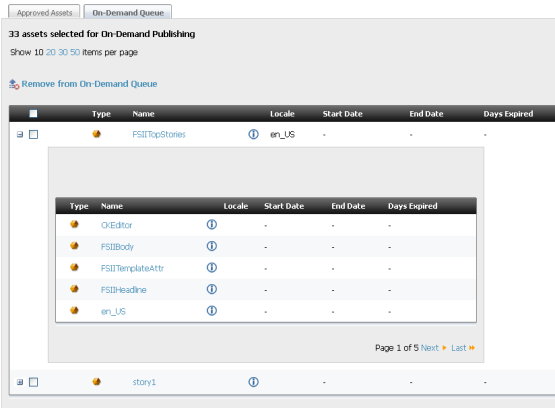
If you wish to review the assets before you publish them, switch to the On-Demand Queue by clicking the On Demand Queue tab.
-
To view an asset's dependencies, click the plus mark at the far left of the asset's row.
-
If you decide not to publish assets after you place them in the On-Demand Queue, select them and click Remove from On-Demand Queue. The assets will be removed from the On-Demand Queue and placed back in the Approved Assets list. (A dialog box prompts you to confirm your action.)
-
-
Click OK.
The Publish Console opens showing the publishing session in process.
-
For instructions on observing the publishing session, see Chapter 21, "Working with RealTime Publishing Modes."
22.2 Unapproving Selected Assets from a Publishing Session
If you change your mind about publishing approved assets, you can selectively remove them from the approved assets list.
-
Open the Publish Console by clicking Publishing on the button bar.
-
From the Publish Destination drop-down list:
-
Select the RealTime publishing destination you wish to publish assets to.
-
Click Select Destination.
-
-
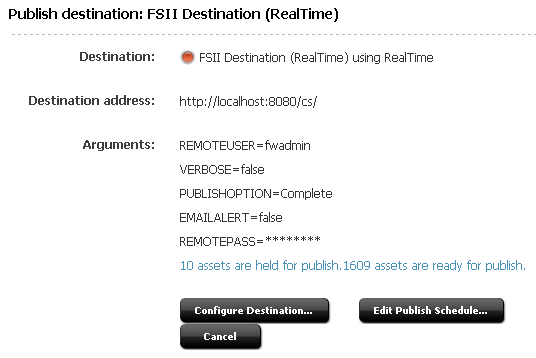
On the Publish Destination form, click the link x assets ready for publish.
The On Demand Publishing form opens. This form displays the Approved Assets tab and the On-Demand Queue. The Approved Assets tab lists all assets approved for the upcoming publishing session.
-
(Optional) Search through the approved assets.
-
Enter a search term in the Search text box.
-
Search runs across asset names only.
-
You cannot use wildcard and boolean operators.
-
-
Click Search.
The Search Results tab opens, displaying the results of your search.
-
-
On either the Approved Assets tab or the Search Results tab, select assets to unapprove. Click Unapprove.
The assets you selected are removed from the Approved Assets list.
If the asset you unapprove has a dependent asset that is approved for this publishing session, it is placed into a hold queue.
-
(Optional) Approve assets held from publishing:
-
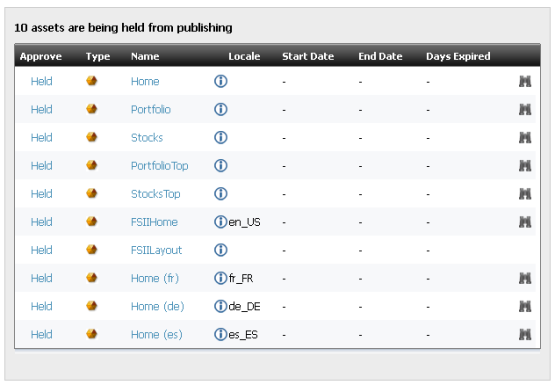
Click Back to return to the Publish Destination form. Note that there are now two text links. One lists the assets held for publishing, the other the assets ready for publishing. Click the x assets are held for publish link.
The held queue opens.
-
Click the Held link for the asset you wish to approve for the publishing session.
The Assets Preventing Asset From Being Published to Destination form opens.
-
If the asset has no dependencies, a message appears stating that the asset is approved.
-
If the asset has dependencies, a list of those dependent assets is shown.
Figure 22-10 Assets Preventing Site From Being Published Form
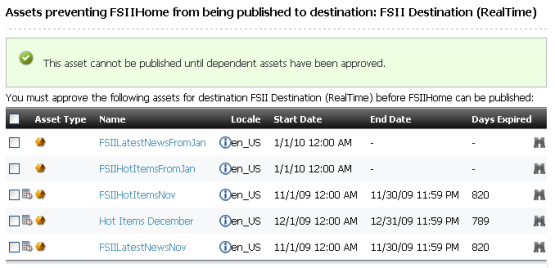
Description of ''Figure 22-10 Assets Preventing Site From Being Published Form''
After reviewing the list of dependent assets, select all of the assets on the list by checking the check box in the header row of the table. Then click Approve.
The following occurs: A message indicates that the assets have been approved and are ready for publishing, the asset and its dependent assets are placed in the approved assets queue, and you are returned to the held queue.
-
-
(Optional) Repeat step b to approve another held asset.
-