16 Installing Microsoft Active Directory 2012
This chapter provides instructions for configuring the Microsoft Windows Server 2012 system settings, configuring network settings, installing Microsoft Windows Active Directory 2012, checking and changing group policies, and connecting to the Active Directory Server using an LDAP browser.
This chapter contains the following sections:
16.1 Configuring OS System Settings
Follow these steps to configure the OS system settings:
-
Install Windows Server 2012 (any Windows server except Web).
-
When the installation is complete, leave the installation disc in the drive, you will need it to complete the installation of Active Directory Server.
-
Set the computer name and DNS suffix.
-
Open the System Properties dialog (Figure 16-1), and select Advanced system settings.
Figure 16-1 Windows Server 2012 Control Panel: System
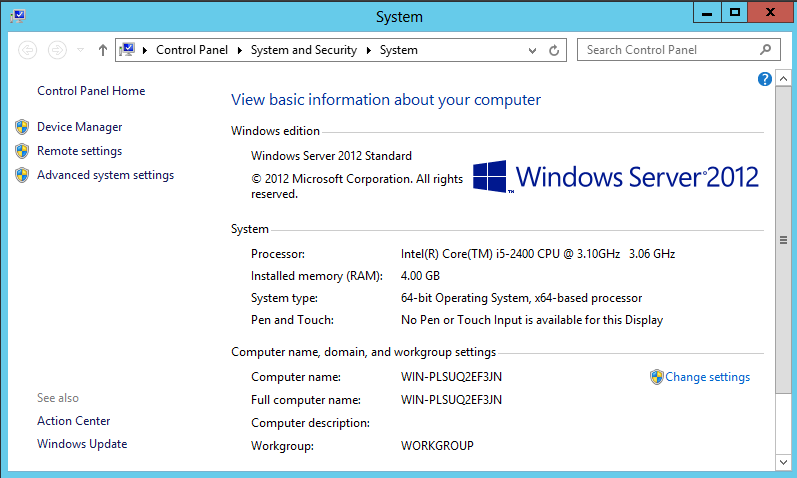
Description of ''Figure 16-1 Windows Server 2012 Control Panel: System''
-
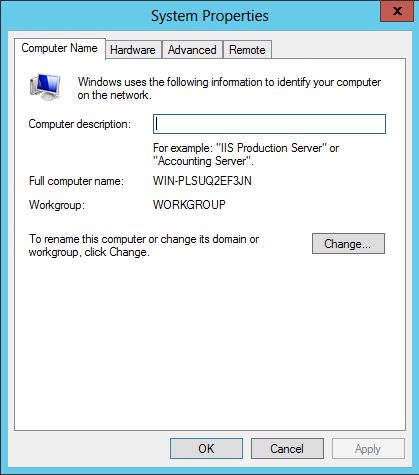
On the System Properties dialog, select the Computer Name tab (Figure 16-2) and click Change.
-
On the Computer Name/Domain Changes dialog (Figure 16-3), complete the following fields:
-
Computer name: Enter the name you wish to designated for your computer. Make a record of this name.
-
Member of: Select the Workgroup option, then enter a unique workgroup name. Make a record of this name.
Figure 16-3 Computer Name/Domain Changes
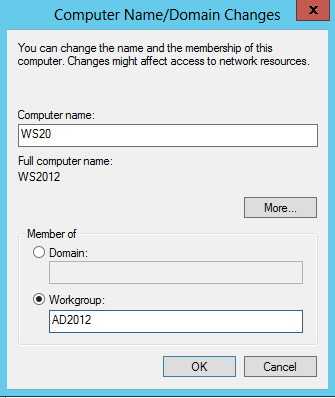
Description of ''Figure 16-3 Computer Name/Domain Changes''
-
-
Click More.
-
On the DNS Suffix and NetBIOS Computer Name dialog (Figure 16-4), complete the following fields:
-
Primary DNS suffix of this computer: Enter the DNS suffix of your computer. Make a record of this suffix.
-
Change Primary DNS Suffix when domain membership changes: If this option is selected, deselect it.
Figure 16-4 DNS Suffix and NetBIOS Computer Name
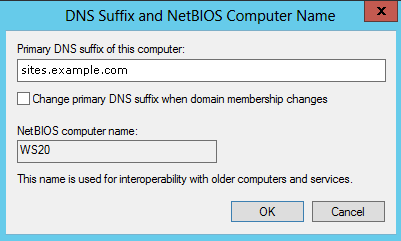
Description of ''Figure 16-4 DNS Suffix and NetBIOS Computer Name''
-
-
Click OK to close the dialog.
-
On the Computer Name/Domain Changes dialog (Figure 16-5), click OK.
Figure 16-5 Computer Name/Domain Changes
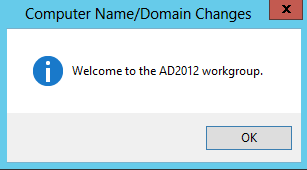
Description of ''Figure 16-5 Computer Name/Domain Changes''
-
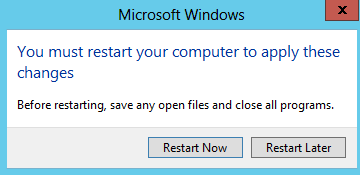
On the restart request dialog (Figure 16-6), click Restart Later.
16.2 Configuring the Network Settings
Follow these steps to configure the network settings:
-
Open the Network and Sharing Center dialog (Figure 16-7).
-
Select the Network Connection to edit (if you have more than one
ipconfigresult, make sure to select the correct connection). -
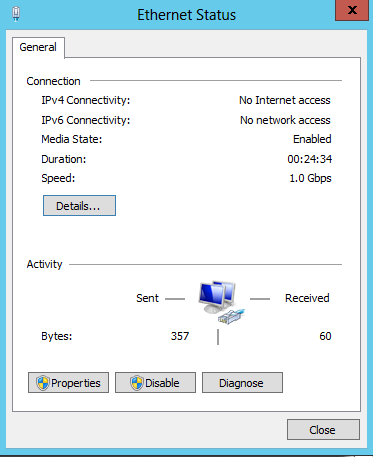
On the Ethernet Status dialog (Figure 16-8) of your selected network, click Properties.
-
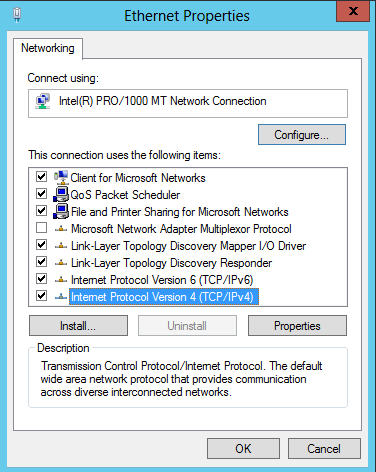
On the Ethernet Properties dialog (Figure 16-9), select Internet Protocol Version 4 (TCP/Iv4).
-
Set the IP address to an unused, static IP address. Set the preferred DNS server to your computer's IP address.
-
Click Advanced.
-
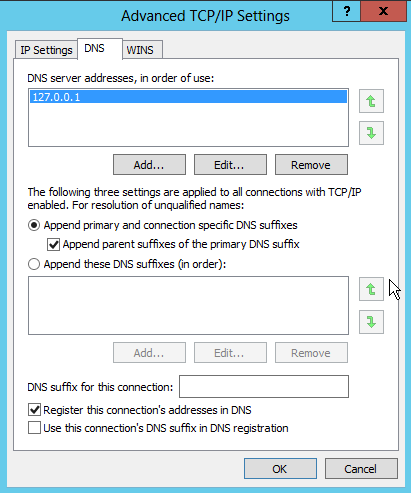
On the Advanced TCP/IP Settings dialog (Figure 16-10), select the DNS tab and complete the following tasks:
-
Enable the Append primary and connection specific DNS suffixes option.
-
Enable the Append parent suffixes of the primary DNS suffix option.
-
-
Click OK to close the Advanced TCP/IP Settings dialog.
-
Click OK to close the Ethernet Properties dialog.
-
Close the Network Connections dialog.
-
Restart the machine.

16.3 Installing Active Directory 2012
Follow these steps to install Active Directory 2012.
-
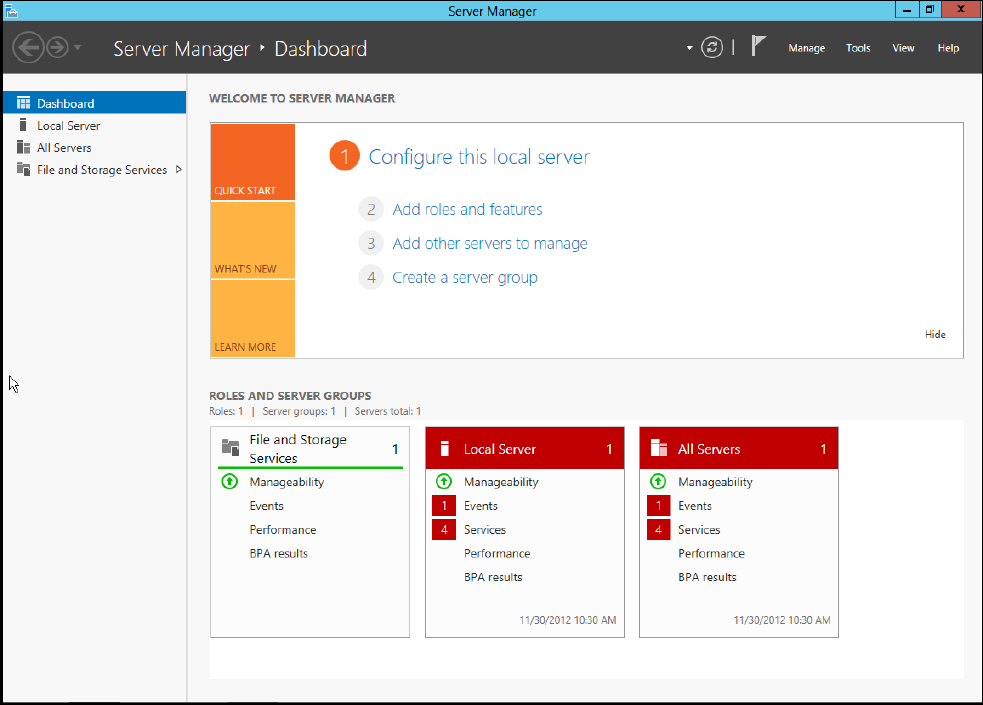
From the Server Manager Dashboard (Figure 16-11) click Add roles and features.
-
On the Add Roles and Features Wizard, read the Before you begin information (Figure 16-12) and click Next.
Figure 16-12 Add Roles and Features Wizard: Before You Begin
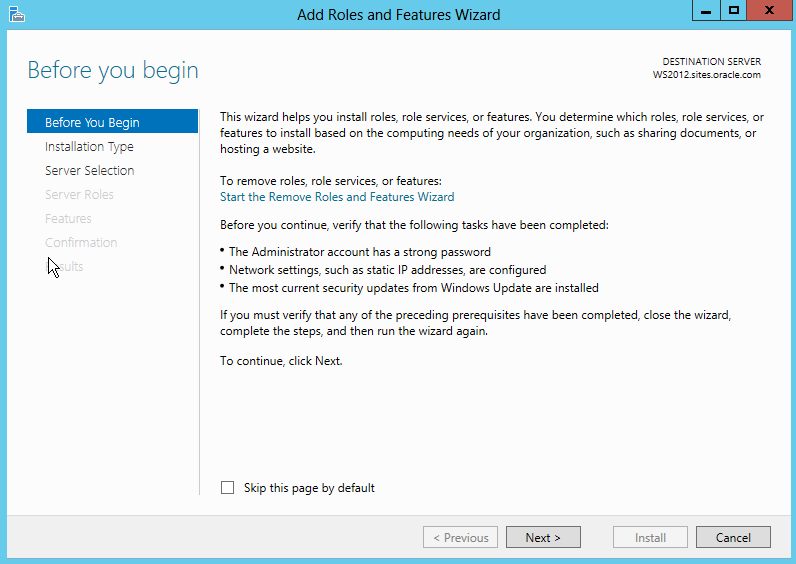
Description of ''Figure 16-12 Add Roles and Features Wizard: Before You Begin''
-
On the Select Installation Type step (Figure 16-13), select the role-based or feature-based installation option and click Next.
Figure 16-13 Add Roles and Features Wizard: Select Installation Type
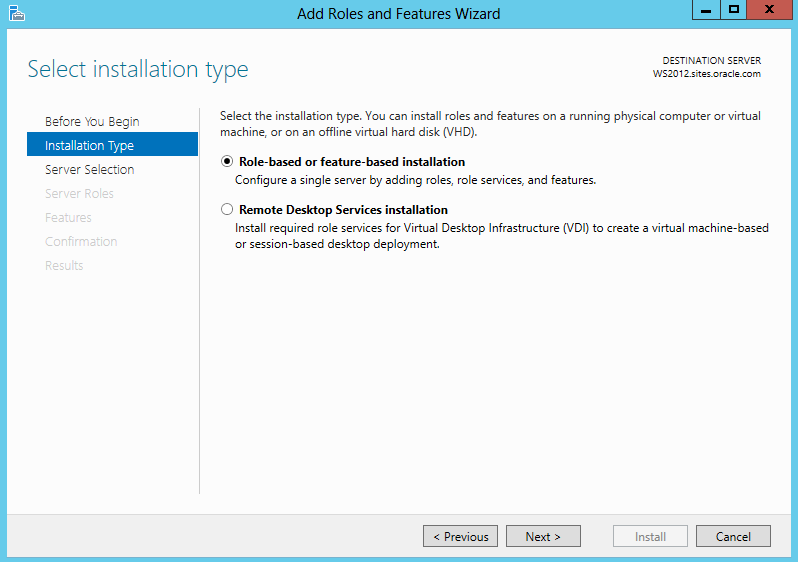
Description of ''Figure 16-13 Add Roles and Features Wizard: Select Installation Type''
-
On the Select Destination Server step (Figure 16-14), enable the Select a server from the server pool option, select your server, and click Next.
Figure 16-14 Add Roles and Features Wizard: Select Destination Server
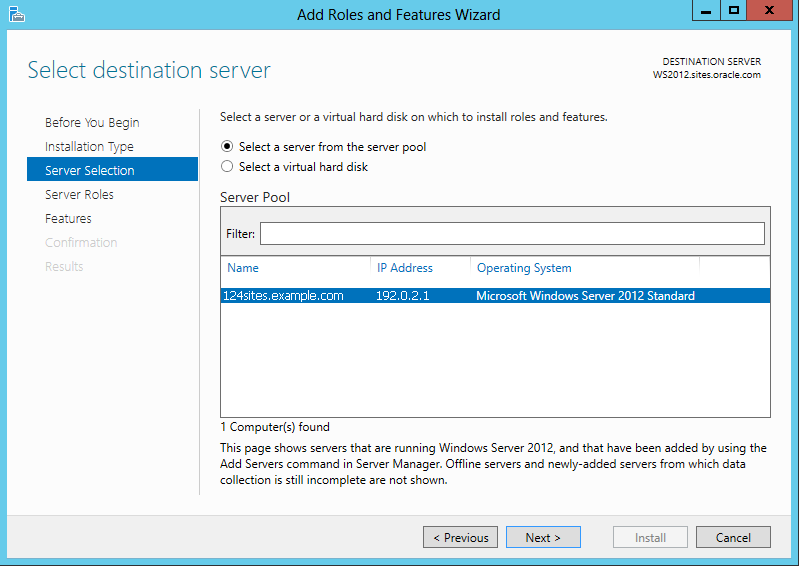
Description of ''Figure 16-14 Add Roles and Features Wizard: Select Destination Server''
-
On the Select Server Roles step (Figure 16-15), select the Active Directory Domain Services option and click Next.
Figure 16-15 Add Roles and Features Wizard: Select Server Roles
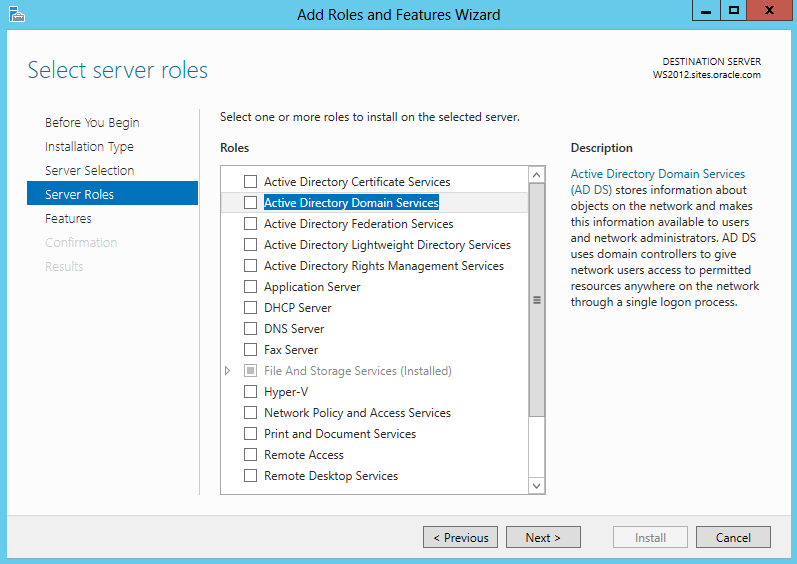
Description of ''Figure 16-15 Add Roles and Features Wizard: Select Server Roles''
-
On the Add Roles and Features Wizard notice (Figure 16-16), click Add Features to install roles, services, and features that are needed by Active Directory Domain Services.
Figure 16-16 Add Roles and Features Wizard: Notice
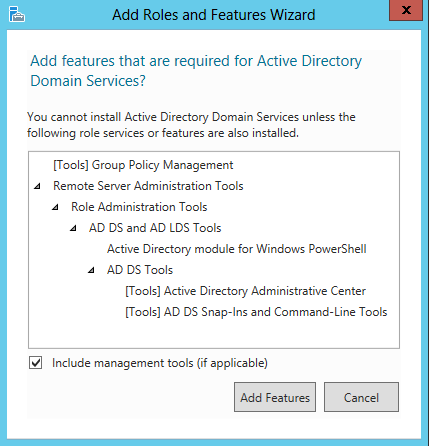
Description of ''Figure 16-16 Add Roles and Features Wizard: Notice''
-
On the Select Features step (Figure 16-17), enable the .NET Framework 3.5 Features option (if it is not already enabled). Active Directory 2012 requires .NET Framework 3.5 be installed. Click Next.
Figure 16-17 Add Roles and Features Wizard: Select Features
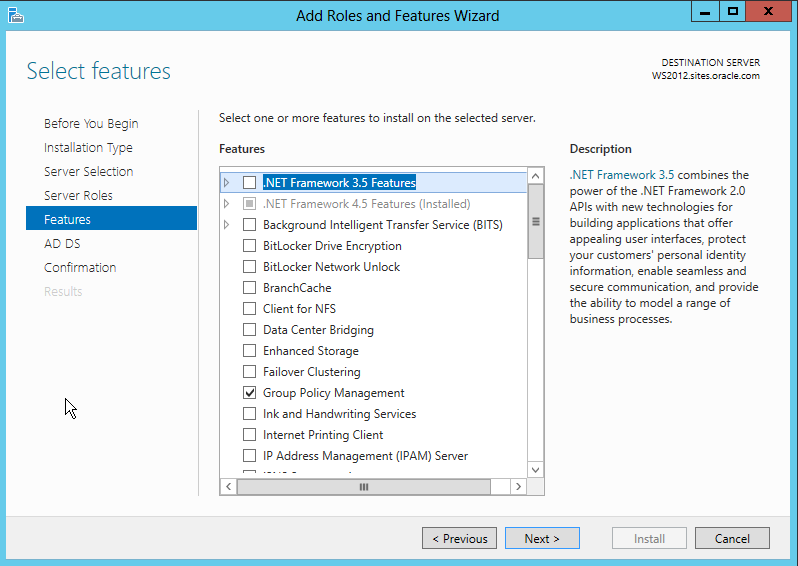
Description of ''Figure 16-17 Add Roles and Features Wizard: Select Features''
-
On the Active Directory Domain Services step (Figure 16-18), click Next.
Figure 16-18 Add Roles and Features Wizard: Active Directory Domain Services
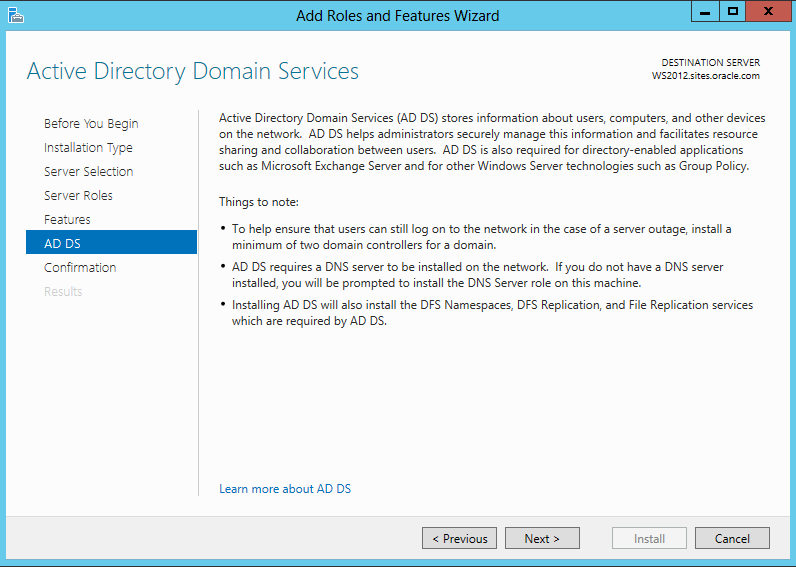
Description of ''Figure 16-18 Add Roles and Features Wizard: Active Directory Domain Services''
-
On the Confirm Installation Selections step (Figure 16-19), review you selections, and click Install
Figure 16-19 Add Roles and Features Wizard: Confirm Installation Selections
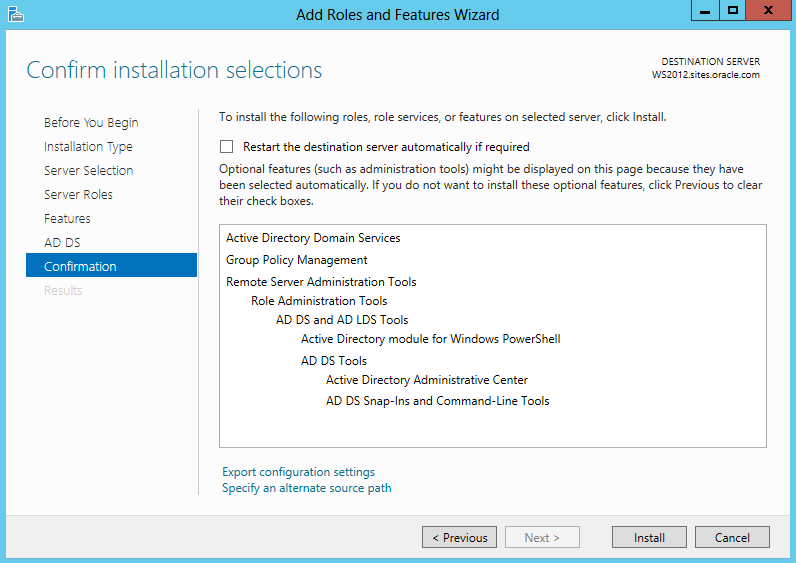
Description of ''Figure 16-19 Add Roles and Features Wizard: Confirm Installation Selections''
-
Wait for successful completion of the installation (Figure 16-20). Do not close the wizard. On successful completion, click the Promote this server to a domain controller link in the wizard. This will open Active Directory Domain Services Configuration Wizard.
Figure 16-20 Add Roles and Features Wizard: Promote This Server to a Domain Controller
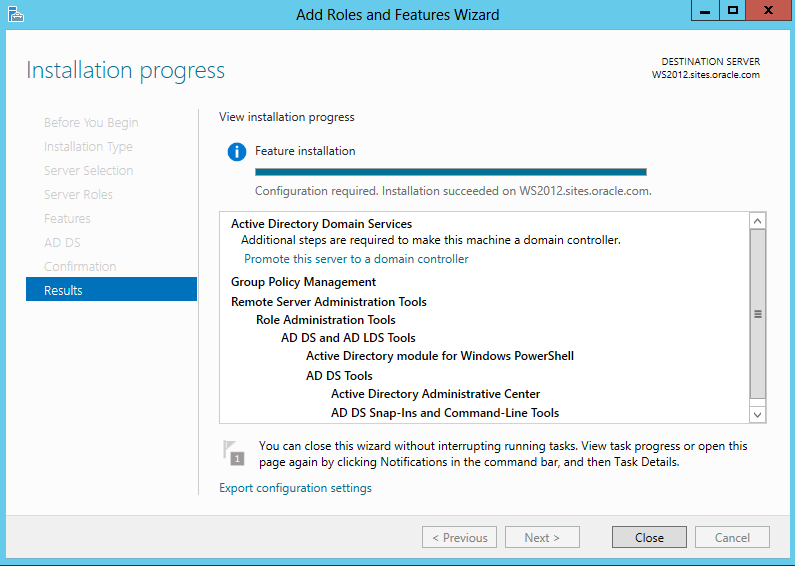
Description of ''Figure 16-20 Add Roles and Features Wizard: Promote This Server to a Domain Controller''
-
On the Deployment Configuration screen (Figure 16-21) of the Active Directory Domain Services Configuration Wizard, select the Add a new forest option and specify the Root domain name. Click Next.
Figure 16-21 Active Directory Domain Services Configuration Wizard: Deployment Configuration (Add a New Forest)
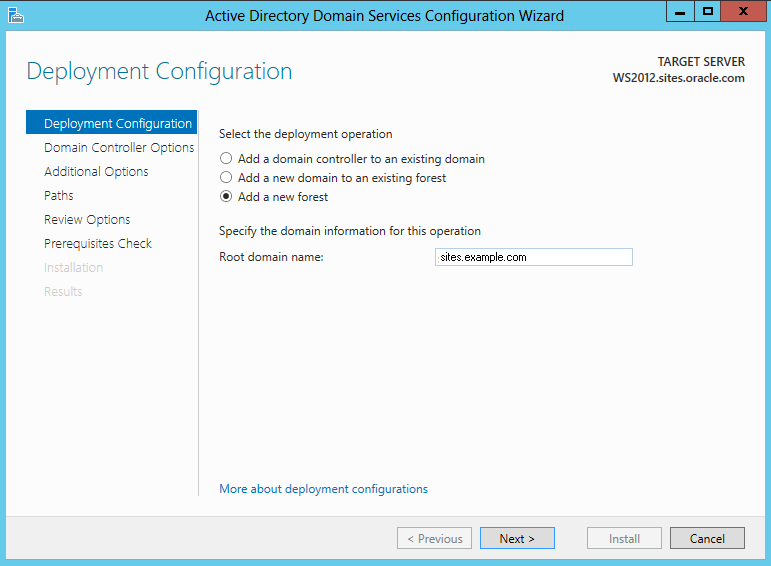
Description of ''Figure 16-21 Active Directory Domain Services Configuration Wizard: Deployment Configuration (Add a New Forest)''
-
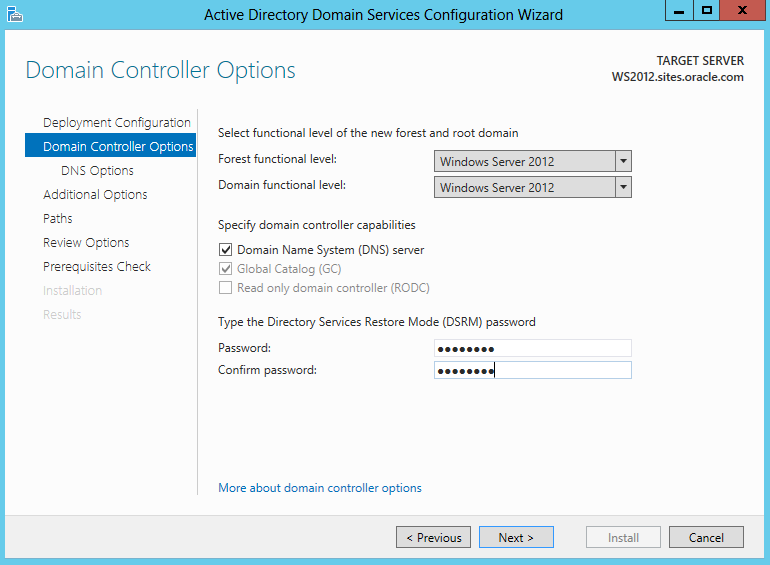
On the Domain Controller Options step (Figure 16-22), complete the following tasks:
-
For Forest functional level, select Windows Server 2012.
-
For Domain functional level, select Windows Server 2012.
-
For Specify domain controller capabilities, enable the Domain Name System (DNS) Server option.
-
Provide a DSRM password.
-
Click Next.
If you have a DHCP based adapter, it will assign static IP addresses to all physical adapters to continue with the installation. After the installation completes you can change any DHCP adapter back
Figure 16-22 Active Directory Domain Services Configuration Wizard: Domain Controller Options
Description of ''Figure 16-22 Active Directory Domain Services Configuration Wizard: Domain Controller Options''
-
-
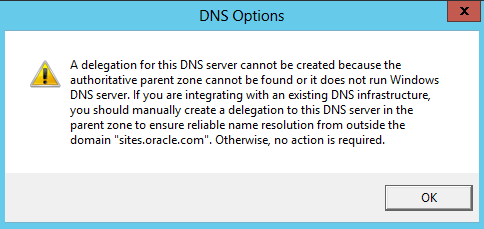
On the DNS Options step (Figure 16-23), a warning message will be displayed if the DNS zone you are creating does not have an authoritative parent zone. Click Next.
Figure 16-23 Active Directory Domain Services Configuration Wizard: DNS Options
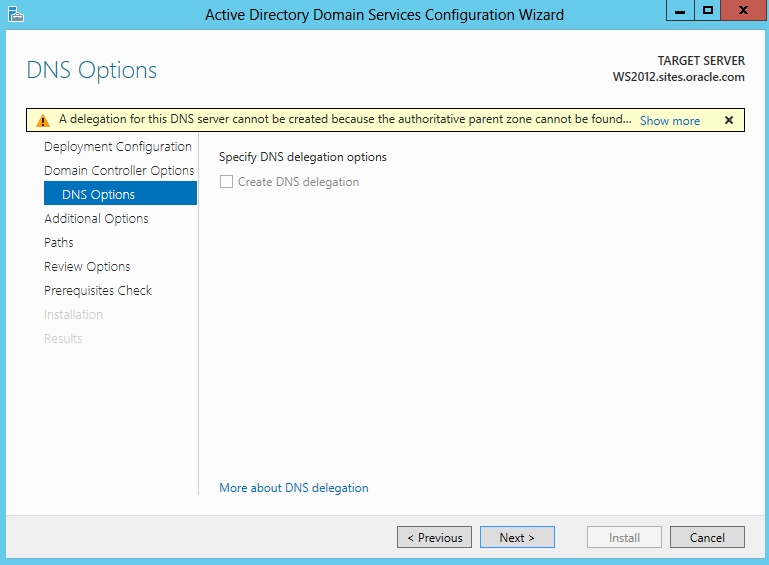
Description of ''Figure 16-23 Active Directory Domain Services Configuration Wizard: DNS Options''
-
On the DNS Options notice (Figure 16-24), click OK.
-
Verify the NetBIOS name on the Additional Options step (Figure 16-25).
Figure 16-25 Active Directory Domain Services Configuration Wizard: Additional Options
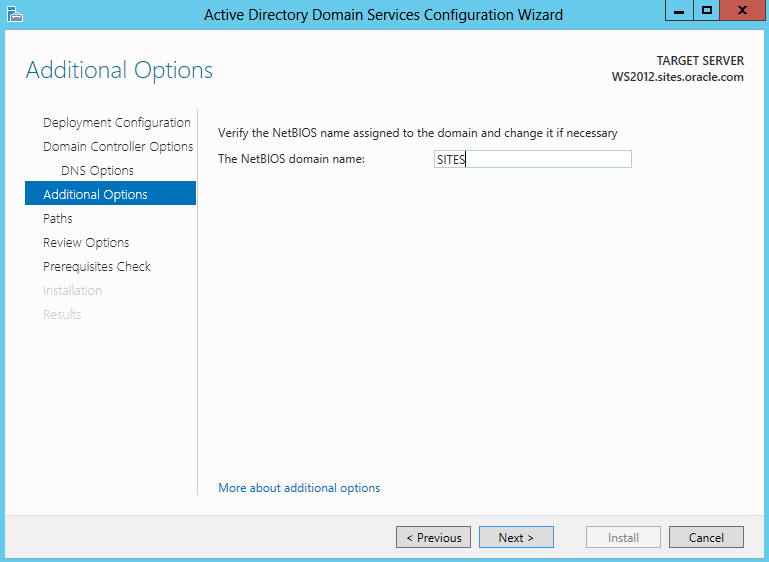
Description of ''Figure 16-25 Active Directory Domain Services Configuration Wizard: Additional Options''
-
On the Paths step (Figure 16-26), accept the defaults and click Next.
Figure 16-26 Active Directory Domain Services Configuration Wizard: Paths
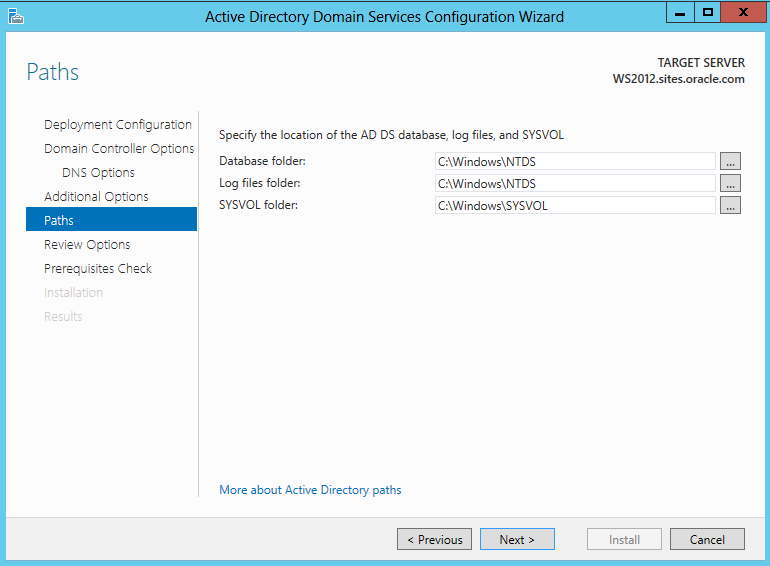
Description of ''Figure 16-26 Active Directory Domain Services Configuration Wizard: Paths''
-
On the Review Options step (Figure 16-27), complete the following tasks:
-
Review you settings.
-
Export your setting to script.
-
Click Next.
Figure 16-27 Active Directory Domain Services Configuration Wizard: Review Options
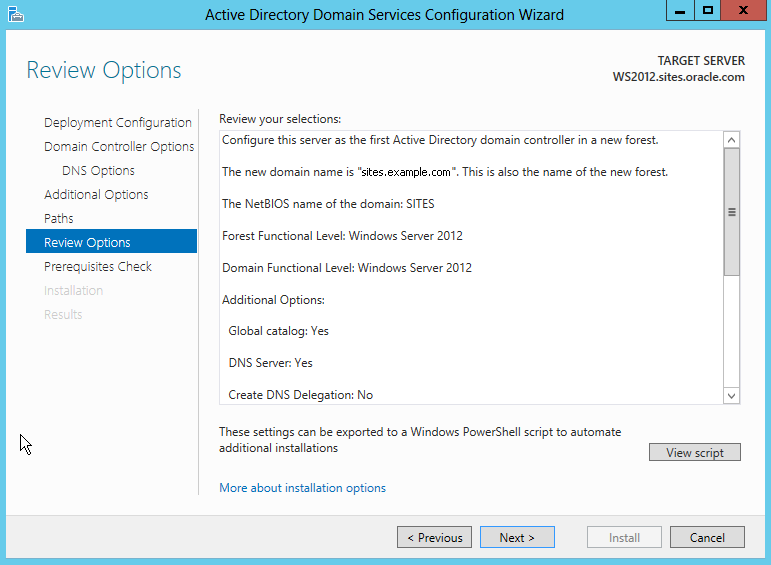
Description of ''Figure 16-27 Active Directory Domain Services Configuration Wizard: Review Options''
-
-
Make sure all prerequisite checks (Figure 16-28) pass successfully and review the results. On successful completion of the prerequisite checks, click Install.
Figure 16-28 Active Directory Domain Services Configuration Wizard: Prerequisites Check Results
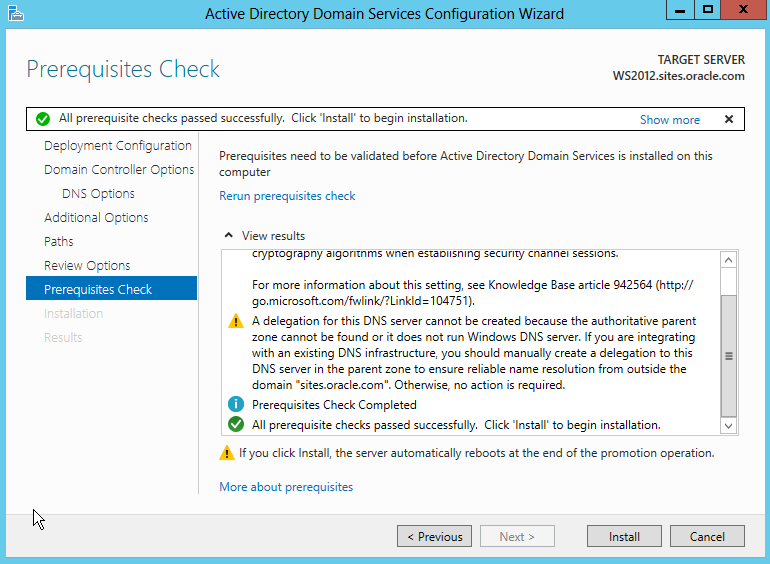
Description of ''Figure 16-28 Active Directory Domain Services Configuration Wizard: Prerequisites Check Results''
-
On the Prerequisites Check success notice (Figure 16-29), click OK.
Figure 16-29 Prerequisites Check Successful Confirmation
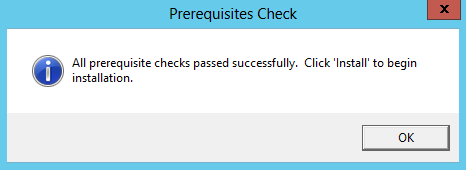
Description of ''Figure 16-29 Prerequisites Check Successful Confirmation''
-
After the system has completed installation, then reboot the system.
16.4 Checking Group Policies
Follow these steps to check group policies:
-
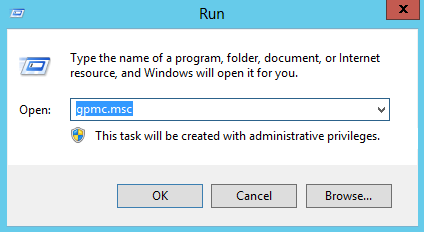
Execute
gpmc.mscfrom the Run dialog (Figure 16-30). -
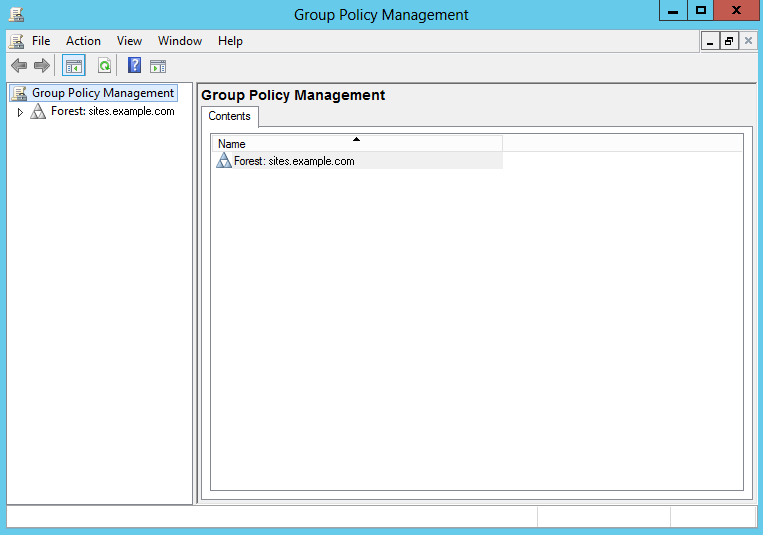
The Group Policy Management utility opens (Figure 16-31).
-
Expand the navigation to Domains, then your domain, then Default Domain Policy (Figure 16-32).
Figure 16-32 Group Policy Management: Default Domain Policy
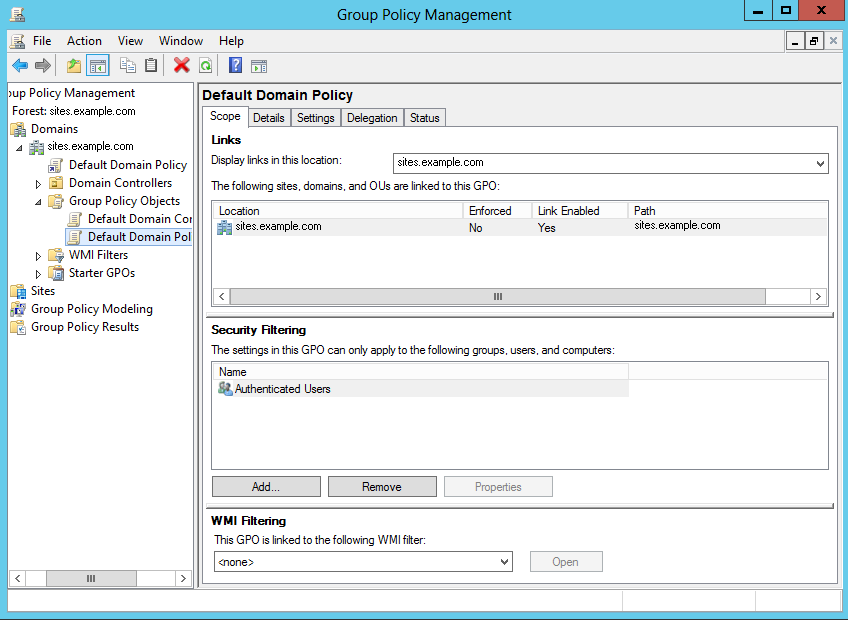
Description of ''Figure 16-32 Group Policy Management: Default Domain Policy''
-
Select the Settings tab (Figure 16-33).
Figure 16-33 Group Policy Management: Settings Tab
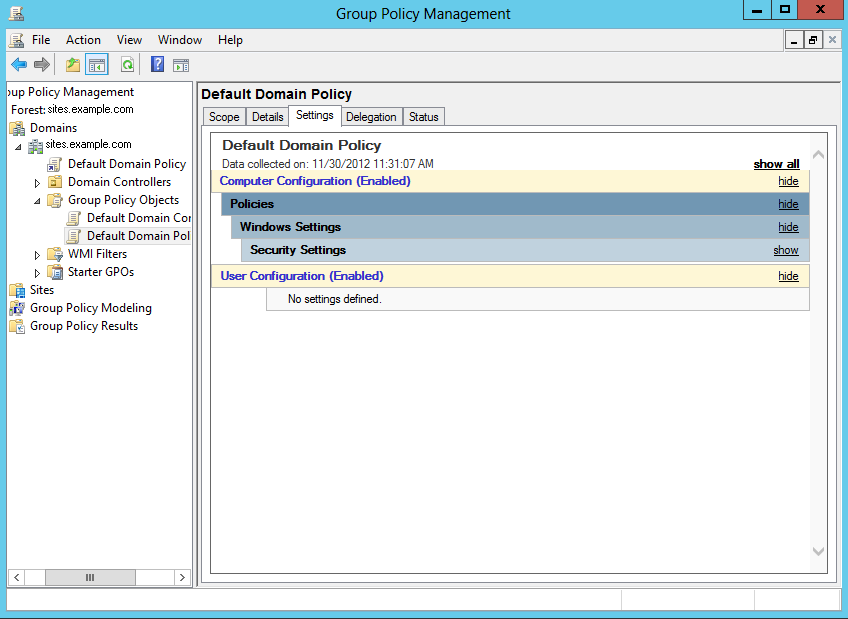
Description of ''Figure 16-33 Group Policy Management: Settings Tab''
-
Expand the Security Settings section (Figure 16-34), then the Account Policy/Password Policy section, by clicking Show.
Figure 16-34 Group Policy Management: Settings Tab
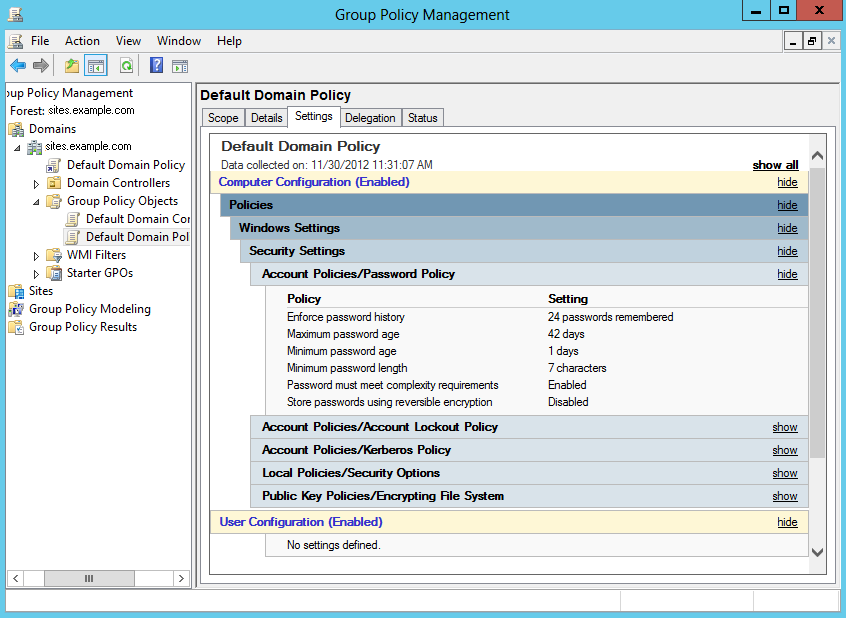
Description of ''Figure 16-34 Group Policy Management: Settings Tab''
-
Review the Policy list. Set the Password must meet complexity requirements to Disabled. WebCenter Sites passwords do not meet these requirements.
16.5 Changing Group Policies
Follow these steps to change group policies:
-
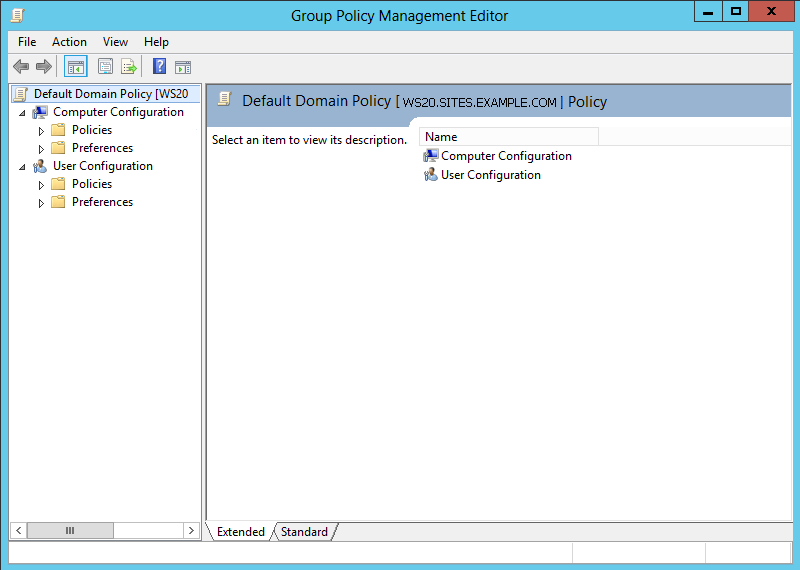
From the Group Policy Management utility (Figure 16-35), right-click on Default Domain Policy and select Edit. This will open the group policy Management Editor.
Figure 16-35 Group Policy Management Editor
Description of ''Figure 16-35 Group Policy Management Editor''
-
Expand the navigation to, Computer Configuration, then Policies, then Windows Settings, then Security Settings, then Account Settings, and then Password Policy.
-
Right-click Password must meet complexity requirements, located on the right side of the screen (Figure 16-36), and select Properties.
Figure 16-36 Group Policy Management Editor
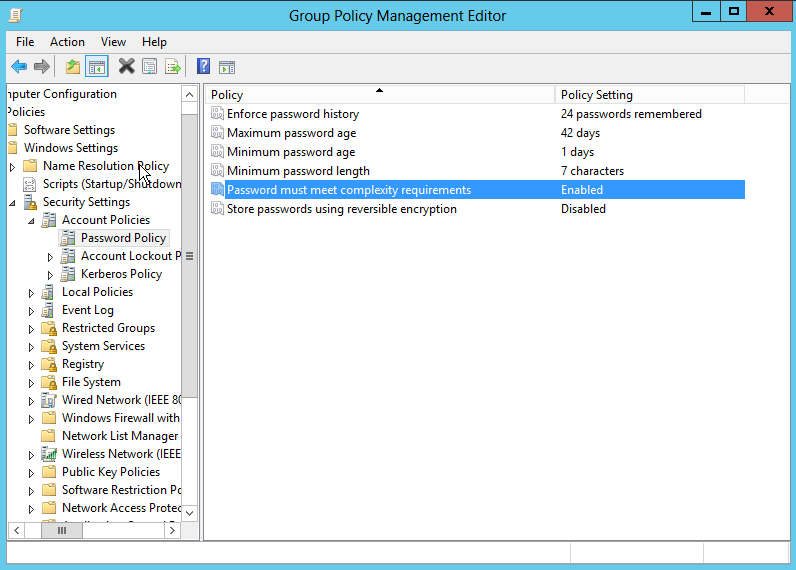
Description of ''Figure 16-36 Group Policy Management Editor''
-
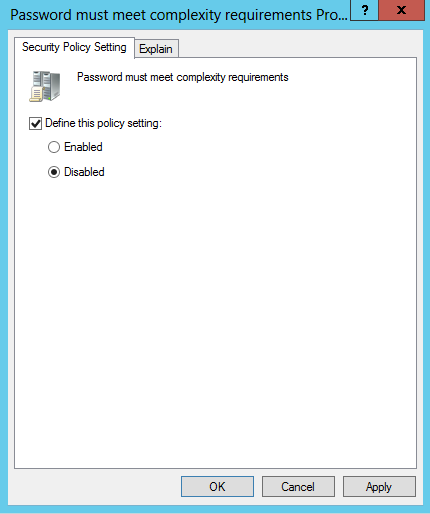
On the Security Policy Setting tab, select the Disabled option (Figure 16-37). Click OK.
-
Click OK and close the Group Policy Management Editor and Group Policy Management utility.
The domain will no longer check for password complexity. WebCenter Sites default passwords can now be used. When WebCenter Sites is installed you can change the settings by clicking Enabled on Security Policy Setting to re-engage the security settings.
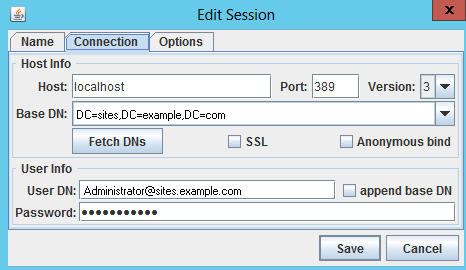
16.6 Connecting to Active Directory Server Using an LDAP Browser
This section describes how to connect to Active Directory Server using an LDAP browser. Note that you cannot add groups, set passwords, or activate accounts using an LDAP browser.
-
Open the LDAP browser.
-
Select the Connection tab.
-
Provide the following information (Figure 16-38):
-
Host: localhost (if connecting remotely, enter the actual host name)
-
Base DN:
<DNS_suffix>(the part of the DNS name after the host name) -
Anonymous bind: deselect
-
User DN:
administrator@<DNS_suffix> -
Append base DN: deselect
-
Password:
<ADS_password>
-
-
Click Save.
-
Show the default view on the LDAP tree.