6 Upgrading to Community-Gadgets
This chapter contains instructions for upgrading Oracle WebCenter Sites: Community 11gR1 (11.1.1.6.x) and Oracle WebCenter Sites: Gadgets 11gR1 (11.1.1.6.x) to Oracle WebCenter Sites: Community-Gadgets, which provides the Community and Gadgets WEM applications.
This chapter contains the following sections:
-
Section 6.1, "Summary of Steps for the Community-Gadgets Upgrade Process"
-
Section 6.2, "Upgrading Community and Gadgets to Community-Gadgets"
6.1 Summary of Steps for the Community-Gadgets Upgrade Process
This section provides a summary of the steps for upgrading to Community-Gadgets:
-
Export data from the Community 11gR1 (11.1.1.6.x) and Gadgets 11gR1 (11.1.1.6.x) applications to a specified location.
Note:
Ensure that WebCenter Sites is running during the export process.
-
Upgrade WebCenter Sites 11gR1 (11.1.1.6.x) to version 11gR1 (11.1.1.8.0), and then delete the
FW_ViewandFW_Applicationassets specific to Community 11gR1 (11.1.1.6.x) and Gadgets 11gR1 (11.1.1.6.x). -
Install and verify the Community-Gadgets web application. For instructions, see the Oracle Fusion Middleware WebCenter Sites Installation Guide.
-
Import the Community and Gadgets data to Community-Gadgets and then verify the imported data.
Note:
For better performance, run the migration tool on the production WebCenter Sites instance to reduce the time for the import process.
-
Manually merge all templates and client-side tags from Community 11gR1 (11.1.1.6.x) and Gadgets 11gR1 (11.1.1.6.x) with the new functionality supported by Community-Gadgets.
6.2 Upgrading Community and Gadgets to Community-Gadgets
The steps in this section provide instructions for upgrading to Community-Gadgets:
-
Section 6.2.1, "Step 1: Exporting Community and Gadgets Data"
-
Section 6.2.3, "Step 3: Install and Verify the Community-Gadgets Web Application"
-
Section 6.2.4, "Step 4: Importing Community and Gadgets Data to Community-Gadgets"
-
Section 6.2.5, "Step 5: Clearing the Community-Gadgets Application Server Cache"
-
Section 6.2.6, "Step 6: Migrating Templates, Custom Skins, and Client-Side Deployment Tags"
-
Section 6.2.7, "Step 7: Integrating with Oracle Access Manager (OAM)"
6.2.1 Step 1: Exporting Community and Gadgets Data
In this section you will first export data from Community 11gR1 (11.1.1.6.x), and then export data from Gadgets 11gR1 (11.1.1.6.x) to the location specified in the <config>.properties file. To do so, you will run the export (migration) tool on the production (delivery) system where WebCenter Sites is installed.
This section contains the following topics:
6.2.1.1 Exporting Community Data
-
Prepare to export the data from Community 11gR1 (11.1.1.6.x):
-
In the
WCS_CommunityGadgets_MigrationTools.ziparchive, extractCommunity_11.1.1.6_MigrationToolinto a temporary directory. -
Go to the
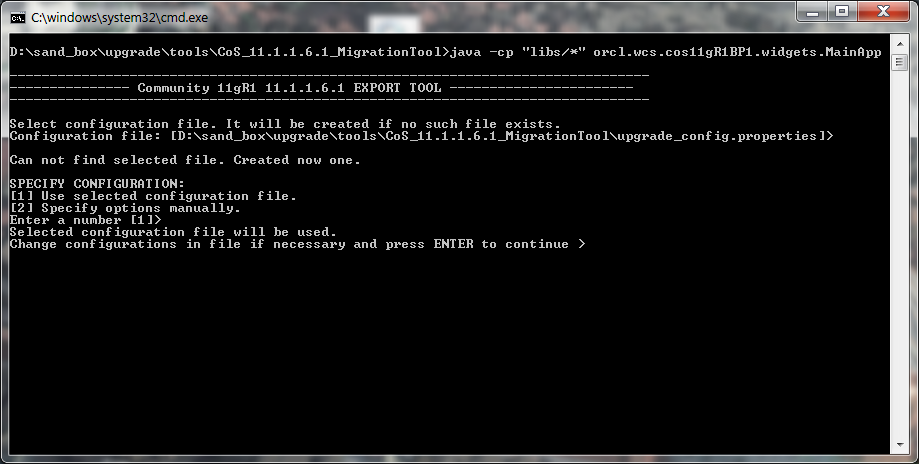
Community_11.1.1.6_MigrationTooldirectory (created in step a) and executerun.batfor Windows (run.shfor Linux), as shown in Figure 6-1.On the first run of the migration tool, a new configuration file (
<config>.properties) is generated in the specified directory (by default, it is the folder containing therun.bat/run.shfile used to start the migration tool).Figure 6-1 Migration Tool Running in Command Line
Description of "Figure 6-1 Migration Tool Running in Command Line"
-
Open the generated
<config>.propertiesfile and specify the following properties:-
folder: Folder where all files and logs containing data from the database will be stored. -
sitesToProcess: Comma-separated list of sites that need to be migrated. -
processAdminSite: If the AdminSite needs to be processed, set this property totrue. -
adminSiteName: Name of the content management site used for storing visitor data in the production database. The default value isAdminSite. -
casUrl: WebCenter Sites Production CAS URL. -
restUrl: WebCenter Sites Production REST URL. -
username: SiteAdmin user name. -
password: SiteAdmin user password. -
importNamespace: During the export process, this property is ignored. -
exportNamespace: Community namespace for export.
Note:
The value of the
exportproperty specifies whether Community data will be exported. The value of thecleanExportNamespaceproperty specifies whether the database tables in the namespace specified in theexportNamespaceproperty will be deleted after the export process has completed.The way in which you set values for the
exportandcleanExportNamespaceproperties determines how Community data will be exported (if at all). You can set these properties in one of the following ways:-
To export Community data only: Set
exporttotrueandcleanExportNamespacetofalse.The Community data will be exported, but the database tables in the namespace specified in the
exportNamespaceproperty are not deleted. -
To export Community data and delete the database tables in the namespace specified in the
exportNamespaceproperty: SetexporttotrueandcleanExportNamespacetotrue. -
To delete the database tables in the namespace specified in the
exportNamespaceproperty only: SetexporttofalseandcleanExportNamespacetotrue.The data will not be exported, however, the database tables in the namespace specified in the
cleanExportNamespaceproperty are deleted.
-
export: See the above note for information about setting this property. -
cleanExportNamespace: See the above note for information about setting this property.
-
-
Save the file and continue with the export process.
-
-
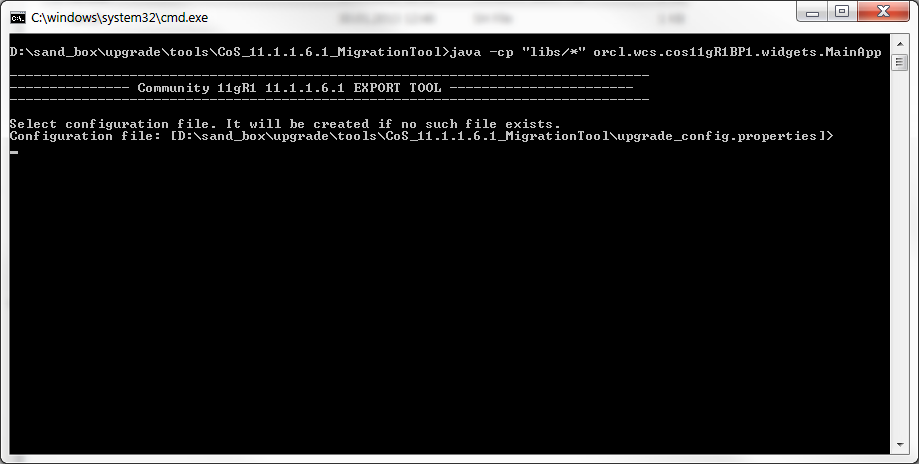
Start the export process by pressing Enter (Figure 6-2).
-
Verify the results of the export process:
-
Verify that no errors have occurred by viewing the log file created in the folder specified in the configuration file.
-
Verify that the following sub-folders are in the folder that contains the configuration file:
-
Sub-folder for each site specified in the configuration file.
-
Log file.
-
BlobStoragefolder containing all blobs.
-
-
-
Continue to Section 6.2.1.2, "Exporting Gadgets Data."
6.2.1.2 Exporting Gadgets Data
-
Prepare to export the data from Gadgets 11gR1 (11.1.1.6.x):
-
In the
WCS_CommunityGadgets_MigrationTools.ziparchive, extractGadgets_11.1.1.6_MigrationToolinto a temporary directory. -
Go to the
Gadgets_11.1.1.6_MigrationTooldirectory (created in step a) and copy the following.jarfiles from theadditionalfolder to thelibsfolder. The.jarfiles you need to move are determined by your current version of Gadgets, described in Table 6-1.Note:
The
libsfolder must not contain both versions of the.jarfiles at the same time.Gadgets Version Files to Copy Gadgets 11gR1 (11.1.1.6.0)
-
gas-core-11.1.1.6.0.jar -
cos-core-11.1.1.6.0-gas.jar
Gadgets 11gR1 (11.1.1.6.0) Bundled Patch 1
-
gas-core-11.1.1.6.1.jar -
cos-core-11.1.1.6.1-gas.jar
Gadgets 11gR1 (11.1.1.6.1)
-
gas-core-11.1.1.6.1.jar -
cos-core-11.1.1.6.1-gas.jar
-
-
In the
Gadgets_11.1.1.6_MigrationTooldirectory, executerun.batfor Windows (run.shfor Linux).On the first run of the migration tool, a new configuration file (
<config>.properties) is generated in the selected directory (by default, it is the folder containing therun.bat/run.shfile used to start the migration tool). -
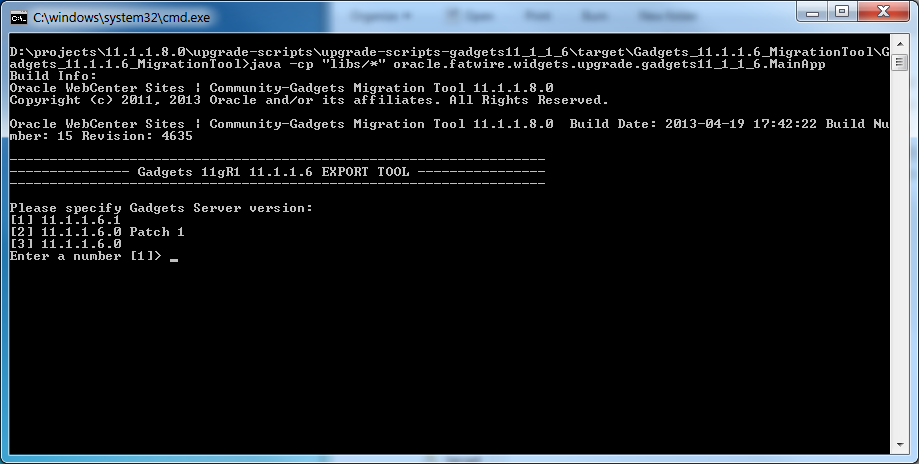
In the Export Tool, specify your current version of Gadgets (the version from which you are exporting data), as shown in Figure 6-3.
-
Open the configuration file (
<config>.properties) and specify the following properties:-
folder: Folder where all files and logs containing data from the database will be stored. -
sitesToProcess: Comma-separated list of sites that need to be migrated. -
processAdminSite: If the AdminSite needs to be processed, set this property totrue. -
adminSiteName: Name of the content management site used for storing visitor data in the database. The default value isAdminSite. -
casUrl: WebCenter Sites Production CAS URL. -
restUrl: WebCenter Sites Production REST URL. -
username: SiteAdmin user name. -
password: SiteAdmin user password. -
importNamespace: Gadgets namespace for import. During the export process, this property is ignored. -
exportNamespace: Gadgets namespace for export.
Note:
The value of the
exportproperty specifies whether Gadgets data will be exported. The value of thecleanExportNamespaceproperty specifies whether the database tables in the namespace specified in theexportNamespaceproperty will be deleted after the export process has completed.The way in which you set values for the
exportandcleanExportNamespaceproperties determines how Gadgets data will be exported (if at all). You can set these properties in one of the following ways:-
To export Gadgets data only: Set
exporttotrueandcleanExportNamespacetofalse.The Gadgets data will be exported, but the database tables in the namespace specified in the
exportNamespaceproperty are not deleted. -
To export Gadgets data and delete the database tables in the namespace specified in the
exportNamespaceproperty: SetexporttotrueandcleanExportNamespacetotrue. -
To delete the database tables in the namespace specified in the
exportNamespaceproperty only: SetexporttofalseandcleanExportNamespacetotrue.The data will not be exported, however, the database tables in the namespace specified in the
cleanExportNamespaceproperty are deleted.
-
export: See the above note for information about setting this property. -
cleanExportNamespace: See the above note for information about setting this property.
-
-
Save the file and continue with the export process.
-
-
Start the export process by pressing Enter.
The export process starts.
-
Verify the results of the export process:
-
Verify that no errors have occurred by viewing the log file created in the folder specified in the configuration file.
-
Verify that the following sub-folders are in the folder that contains the configuration file:
-
Sub-folder for each site specified in the configuration file.
-
Log file.
-
BlobStoragefolder containing all blobs.
-
-
6.2.2 Step 2: Upgrading WebCenter Sites and Deleting the Community and Gadgets Applications
After you have successfully exported all Community 11gR1 (11.1.1.6.x) and Gadgets 11gR1 (11.1.1.6.x) data, complete the steps outlined below:
-
Upgrade your current version of WebCenter Sites to WebCenter Sites 11gR1 (11.1.1.8.0). For instruction on upgrading to WebCenter Sites 11gR1 (11.1.1.8.0), see Part I, "Upgrading to Oracle WebCenter Sites 11gR1 (11.1.1.8.0)."
-
Delete the
FW_ApplicationandFW_Viewassets for Community 11gR1 (11.1.1.6.x) and Gadgets 11gR1 (11.1.1.6.x). This enables the upgraded Community and Gadgets applications to be registered automatically to WebCenter Sites. For more information aboutFW_ApplicationandFW_Viewassets, see the Oracle Fusion Middleware WebCenter Sites Developer's Guide.
6.2.3 Step 3: Install and Verify the Community-Gadgets Web Application
The basic steps for installing and verifying the Community-Gadgets web application are as follows:
-
Install the Community-Gadgets web application. For instructions, see the Oracle Fusion Middleware WebCenter Sites Installation Guide.
-
Verify that the Community and Gadgets WEM applications have been installed successfully:
-
Start the Community and Gadgets WEM applications (provided by Community-Gadgets).
-
Test the Community and Gadgets interfaces:
-
To test the Community interface, log in to WebCenter Sites as an administrator, select the site on which the Community application is enabled, and then select the Community icon. (The Community application initializes all the necessary data on the first run). Repeat this step for all sites on which the Community interface is enabled.
-
To test the Global Gadget Catalog interface, log in to WebCenter Sites as a general administrator, select the site on which the Global Gadget Catalog interface is enabled (AdminSite by default), and then select the Gadgets icon. Ensure that you see the "Global Catalog." (The Gadgets application initializes all the necessary data on the first run).
-
To test the Gadgets User interface, log in to WebCenter Sites as an administrator, select the site on which the Gadgets User interface is enabled, and then select the Gadgets icon. (The Gadgets application initializes all the necessary data on the first run). Repeat this step for all sites on which the Gadgets User interface is enabled.
-
For detailed instructions, see the Oracle Fusion Middleware WebCenter Sites Installation Guide.
-
6.2.4 Step 4: Importing Community and Gadgets Data to Community-Gadgets
In this section, you will first import the data from Community 11gR1 (11.1.1.6.x), and then import the data from Gadgets 11gR1 (11.1.1.6.x) into Community-Gadgtes. To do so, you will run the import (migration) tools on the production (delivery) system where WebCenter Sites is installed.
Note:
For the import process to be successful, you must first import Community data and then import Gadgets data.
This section contains instructions for the following steps:
-
Section 6.2.4.1, "Importing Community Data to Community-Gadgets"
-
Section 6.2.4.2, "Importing Gadgets Data to Community-Gadgets"
6.2.4.1 Importing Community Data to Community-Gadgets
-
Prepare to import the data from Community 11gR1 (11.1.1.6.x) into Community-Gadgets:
-
In the
WCS_CommunityGadgets_MigrationTools.ziparchive, extractCG_11.1.1.8_MigrationToolinto a temporary directory. -
Go to the
CG_11.1.1.8_MigrationTooldirectory and executerun.batfor Windows (run.shfor Linux). -
Open the generated configuration file (
config.properties) and specify the following properties:-
folder: The folder that contains all the exported data from the database (created in step 2 of Section 6.2.1.1). -
sitesToProcess: Comma-separated list of sites that need to be migrated. -
processAdminSite: If the AdminSite needs to be processed, set this property totrue. -
adminSiteName: Name of the content management site used for storing visitor data in the production database. The default value isAdminSite. -
casUrl: WebCenter Sites Production CAS URL. -
restUrl: WebCenter Sites Production REST URL. -
username: SiteAdmin user name. -
password: SiteAdmin user password. -
importNamespace: Community namespace for import. -
exportNamespace: During the import process, this property is ignored. -
export: During the import process, this property is ignored. -
cleanExportNamespace: During the import process, this property is ignored.
-
-
Save the file and continue with the upgrade process.
-
-
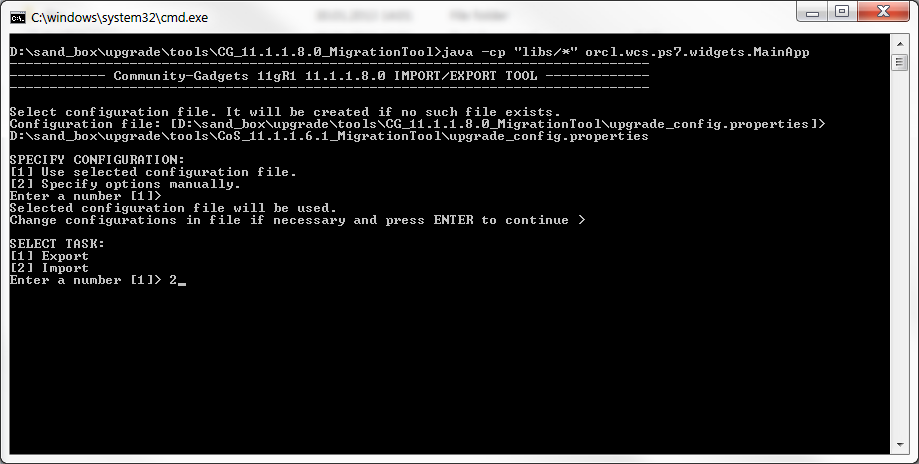
Start the import process by selecting the
Importtask in the migration tool (Figure 6-4).The import process starts.
-
When the import process has completed, verify that no errors have occurred by reviewing the log file that was created in the folder specified in the configuration file.
-
Continue to Section 6.2.4.2, "Importing Gadgets Data to Community-Gadgets."
6.2.4.2 Importing Gadgets Data to Community-Gadgets
-
Prepare to import data into Community-Gadgets.
-
In the
WCS_CommunityGadgets_MigrationTool.ziparchive, extractCG_11.1.1.8_MigrationToolinto a temporary directory. -
Go to the
CG_11.1.1.8_MigrationTooldirectory and executerun.batfor Windows (run.shfor Linux). -
Open the generated configuration file and specify the following properties:
-
folder: The folder that contains all the exported data from the database (created in step 2 of Section 6.2.1.2). -
sitesToProcess: Comma-separated list of sites that need to be migrated. -
processAdminSite: If the AdminSite needs to be processed, set the value of this property totrue. -
adminSiteName: Name of the content management site used for storing visitor data in the database. The default value isAdminSite. -
casUrl: WebCenter Sites Production CAS URL. -
restUrl: WebCenter Sites Production REST URL. -
username: SiteAdmin user name. -
password: SiteAdmin user password. -
importNamespace: Gadgets namespace for import. -
exportNamespace: During the import process, this property is ignored. -
export: During the import process, this property is ignored. -
cleanExportNamespace: During the import process, this property is ignored.
-
-
Save the file and continue with the upgrade process.
-
-
Start the import process by selecting the
importtask in the migration tool.The import process starts.
-
When the import process has completed, verify that no errors have occurred by reviewing the log file that was created in the folder specified in the configuration file.
-
Continue to Section 6.2.5, "Step 5: Clearing the Community-Gadgets Application Server Cache."
6.2.5 Step 5: Clearing the Community-Gadgets Application Server Cache
After the import process, clear the management and production caches for the Community-Gadgets application servers. Then, restart the Community-Gadgets application servers.
6.2.6 Step 6: Migrating Templates, Custom Skins, and Client-Side Deployment Tags
The migration tool migrates all custom skins that were uploaded to the Community interface and the Gadgets User interface (in the "Appearance" screen for the comments widgets, reviews widgets, and gadgets) and stored in the WebCenter Sites database. However, Community-Gadgets supports new functionality that must be manually merged with the custom skins that were migrated from 11gR1 (11.1.1.6.x).
This section provides basic steps for manually merging the new functionality provided by Community-Gadgets with the custom skin files, templates, and client-side tags that were migrated from 11gR1 (11.1.1.6.x):
-
Merge all custom skins for the comments widgets, reviews widgets, and gadgets that are stored in the WebCenter Sites database with the new skins (CSS files) provided by Community-Gadgets.
-
Merge all custom widget templates (SHTML files) and skins (CSS files) that were stored on the file system with a default template or skin provided by Community-Gadgets. This enables the custom skin to support the new functionality provided by Community-Gadgets.
Note:
If you wish to use the default templates provided by Community-Gadgets instead of your custom templates, change the
widgets.developing.attrs.template_prefixproperty in thesetup_cos.propertiesfile to a value that is different from the prefix under which the custom templates are store. By default, the prefix usescos. -
All widget deployment tags from Community 11gR1 (11.1.1.6.x) are supported by Community-Gadgets. Therefore, community widgets do not need to be re-deployed. However, keep in mind that the Community-Gadgets web application root (
cosby default), host name, and port number must be the same as they were for Community 11gR1 (11.1.1.6.x). In other cases, those values must be changed manually so widgets deployed on a page can connect to Community-Gadgets.For example:
<div id="comments_container"></div>
<script type="text/javascript">
...
                script.src = 'http://localhost:80/cg/wsdk/widget/'
                        + cos.pageScripts.join(':') + '.js?site_
                        id=FirstSiteII';
...
</script>
If you wish to re-use the deployment tags from Community 11gR1 (11.1.1.6.x) in the upgraded Community application, use the same context root for Community-Gadgets as was used for Community 11gR1 (11.1.1.6.x).
Note:
In Community-Gadgets, the view of the Top Ranked Reviews widget has changed. The Top Ranked Reviews widget lists and provides links to the highest rated topics on the website.
In Community 11gR1 (11.1.1.6.x), the average rating of each topic included in this list is displayed next to the topic as numbers. In Community-Gadgets, the average rating of each topic included in the list is displayed next to the topic as either a "Stars" rating or a "Thumbs Up/Down" rating. For more information about the Top Ranked Reviews widget, see the Oracle Fusion Middleware WebCenter Sites User's Guide.
-
All gadgets registered to the Global Gadget Catalog and site gadget catalogs in Gadgets 11gR1 (11.1.1.6.x) are automatically registered to the Global Gadget Catalog and the appropriate site gadget catalogs in Community-Gadgets. However, you must manually re-deploy each gadget for it to be rendered on the website after the upgrade process has completed successfully.
Note:
OAuth is not supported in Community-Gadgets. If you deployed gadgets with OAuth support on your website, the message "Unsupported feature: [oauthpopup]" will be displayed in place of the gadget.
6.2.7 Step 7: Integrating with Oracle Access Manager (OAM)
If the management WebCenter Sites is integrated with Oracle Access Manager (OAM), Community-Gadgets must be enabled to communicate with that WebCenter Sites through its OAM. For information about enabling communications with OAM-integrated WebCenter Sites, see Oracle Fusion Middleware WebCenter Sites: Installing and Configuring Supporting Software.
6.3 Post-Upgrade Steps
This section contains information about the steps you need to take after successfully migrating all Community and Gadgets 11gR1 (11.1.1.6.x) data to Community-Gadgets.
This section contains information about the following topics:
-
Section 6.3.1, "If You Were Running WebCenter Sites with the Community Blogs Module"
-
Section 6.3.2, "Integrating Community-Gadgets with the Contributor Interface"
-
Section 6.3.3, "Integrating with Oracle Social Access Services"
6.3.1 If You Were Running WebCenter Sites with the Community Blogs Module
If you upgraded WebCenter Sites 11gR1 (11.1.1.6.x) and it was running with the Community Blogs module, there will be two duplicate GetRecentBlogs Page assets in the WebCenter Sites Contributor interface. One GetRecentBlogs Page asset has a unique identifier of 1270137813575 and the other Page asset has a unique identifier of 112844596316. Delete the Page asset with the ID of 112844596316.
In addition, if your developers were using the default blog templates prior to the upgrade to Community-Gadgets, change the resource IDs of those blog templates to make each template unique. For information about the default blog templates, see the Oracle Fusion Middleware WebCenter Sites Developer's Guide.
6.3.2 Integrating Community-Gadgets with the Contributor Interface
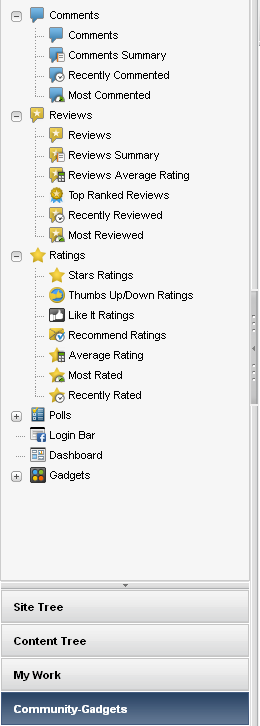
Integrating Community-Gadgets with WebCenter Sites creates a Community-Gadgets tree in the Contributor interface (see Figure 6-5). Users can then access and deploy widgets and gadgets directly from the Contributor interface.
Figure 6-5 'Community-Gadgets' tree in Contributor interface
Description of "Figure 6-5 'Community-Gadgets' tree in Contributor interface"
For information about integrating Community-Gadgets with WebCenter Sites, see the Oracle Fusion Middleware WebCenter Sites Installation Guide. For more information about using the Community-Gadgets tree, see the Oracle Fusion Middleware WebCenter Sites User's Guide.
6.3.3 Integrating with Oracle Social Access Services
The production Community-Gadgets application can be integrated with external identity providers, which enables website visitors to log in through the following social networks: Facebook, Twitter, LinkedIn, Google, and Yahoo.
Social Access Services become available when the production Community-Gadgets is integrated with Oracle Mobile and Social Access Services (the mobile component is not used). For more information about Social Access Services, see the Oracle Fusion Middleware WebCenter Sites Developer's Guide.
6.4 Implementing Security
In Community-Gadgets, security settings are shared with WebCenter Sites and can be customized in the SitesSecurityContext.xml file.
Note:
If the SitesSecurityContext.xml file, is customized for one instance of WebCenter Sites, the same changes must be made on all other instances of WebCenter Sites.
For more information about security, see the Oracle Fusion Middleware WebCenter Sites Administrator's Guide.
