1 Integrating Oracle WebCenter Sites: Analytics with Oracle Web Center Sites
Integrating Analytics with WebCenter Sites is required when the Analytics system is newly installed. Part of a bigger process, integration helps enable users to access the Analytics application and generate reports.
This chapter describes the integration process. It also provides procedures for integrating Analytics with WebCenter Sites.
This chapter contains the following sections:
-
Section 1.3, "Steps for Integrating Analytics with Oracle WebCenter Sites"
-
Section 1.4, "Managing Your Integrated Analytics Installation"
-
Section 1.11, "Managing Permissions to Reports (and to Analytics)"
1.1 About the Integration Process
Integrating Analytics with WebCenter Sites is an administrator's job. Integration is one part of a collaborative process that enables users to generate Analytics reports. The other part involves developers to ensure reports are filled with data, a set of statistics quantifying visitors' browsing patterns on websites powered by WebCenter Sites.
Administrators and developers can complete their parts either concurrently or in any order, as long as they work with the same parameters, assets, and asset types. Steps to be taken by administrators and developers are outlined next:
-
During the integration process, you, the administrator registers pages and other asset types with Analytics to enable their recognition and inclusion in reports. The registration process, alone, does not ensure that reports will be filled with data. Reports will remain empty unless developers enable data capture on assets of the types you have registered. Developers may also need to complete other steps, depending on the nature of the reports, as described next.
-
To enable data capture, developers tag published pages with the
AnalyticsImgTagin which they specify the assets and asset types on which data must be captured. If a page is left untagged, no data will be collected for that page (even if the types of assets on that page are already registered with Analytics).In addition to tagging pages, developers need to consider the nature of the reports. When standard data capture parameters are used, captured data is processed automatically by standard Hadoop jobs. If custom data capture parameters are created, developers must add the custom parameters to the Analytics database, create Hadoop jobs to statistically process the captured data, and code reports to display the statistics.
When the set of conditions outlined in this section are satisfied, data capture begins. Statistics for Analytics reports become available at the end of the data processing cycle, typically 24 hours following the start of data capture.
For more information about enabling data capture and processing, the Oracle Fusion Middleware WebCenter Sites: Analytics Developer's Guide. The same guide contains a tutorial on creating reports with custom data capture parameters. To start the integration process, continue to Section 1.2, "Pre-Integration Checklist."
1.2 Pre-Integration Checklist
Integrating Analytics with WebCenter Sites requires experience with the WebCenter Sites administrative interface. If you need to enable generation of reports on WebCenter Sites: Engage assets, you must have a thorough understanding of recommendations and segments.
Before starting the Analytics-WebCenter Sites integration process, ensure you have the following information readily available:
-
Which users must be given access to Analytics.
-
Which roles must be assigned to the users.
-
Which WebCenter Sites asset types, on which content management sites, must be registered with (identified to) Analytics in order to enable the generation of reports in the "General Information," and "Content Information" report groups.
-
If Engage assets will be tracked, which segments and recommendations must be enabled for data capture.
-
An asset report remains empty until developers enable data capture (and data processing, if necessary) for the assets to be tracked. Data capture (and processing) can be enabled now, or after the integration process is completed. Information about enabling data capture and processing can be found in the Oracle Fusion Middleware WebCenter Sites: Analytics Developer's Guide.
1.3 Steps for Integrating Analytics with Oracle WebCenter Sites
To integrate Analytics with WebCenter Sites and its users
-
Create the
Analyticsrole on your WebCenter Sites system and grant it to the appropriate WebCenter Sites users and yourself. For instructions, see Section 1.5, "Granting Users Access to Analytics." -
Register content management sites with Analytics. For instructions, see Section 1.6.1, "Registering CM Sites."
-
Configure the Page Views report. This report configures the
Pageviewobject on which reports in the General Information and Content Information groups are based. Reports in these groups will not function until you configure the Page Views report.-
If you wish to track the searches that visitors perform on your site, you can configure an internal searches report.
-
You can also configure a custom report.
For instructions on configuring reports, see Section 1.7, "Managing Asset Reports."
-
-
If you are using Oracle WebCenter Sites: Engage and wish to track recommendations and segments, register their asset types with Analytics. For instructions see the following sections:
-
(Optional) Enable the performance indicator for assets of the types you selected for tracking by Analytics. For instructions, see Section 1.9, "Managing the Performance Indicator."
-
Register CM site users with Analytics. For instructions, see Section 1.10.1.1, "Registering Users."
-
Create user groups. For instructions, see Section 1.10.2.1, "Creating Groups."
-
Grant permissions to user groups to access reports. For instructions, see Section 1.11, "Managing Permissions to Reports (and to Analytics)."
-
Assign users to user groups. For instructions, see Section 1.10.3, "Assigning Users to User Groups."
Note:
At this point, users can generate the reports you have configured, but the reports will remain empty until developers complete their steps, as outlined in Section 1.1, "About the Integration Process." Statistics for Analytics reports become available at the end of the data processing cycle, typically 24 hours following the start of data capture.
-
Once you have integrated Analytics with your WebCenter Sites system, you can use the procedures in this chapter to continue managing your Analytics installation. For instructions, see Section 1.4, "Managing Your Integrated Analytics Installation."
1.4 Managing Your Integrated Analytics Installation
Once you have integrated Analytics with your WebCenter Sites system, use procedures in the following sections to manage your Analytics installation:
1.5 Granting Users Access to Analytics
In this step you will create the Analytics role, which grants users access to the Analytics installation, and the permissions to access and generate reports. You will then assign the role to users on your WebCenter Sites system.
To grant users access to Analytics
-
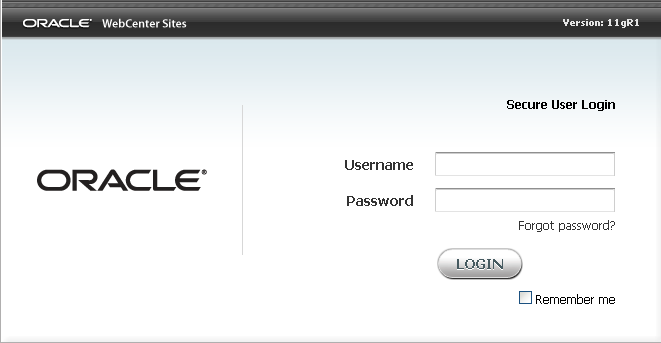
Log in to the WebCenter Sites Admin interface as the administrator (Figure 1-1). For a new installation, the default administrator user name and password are as follows:
-
User name:
fwadmin -
Password:
xceladmin
-
-
Create a role named
Analytics. For instructions, see the Oracle Fusion Middleware WebCenter Sites Administrator's Guide.Note:
If the FirstSite II sample site is installed, it is unnecessary to create the
Analyticsrole. -
Assign the
Analyticsrole to the WebCenter Sites users who need to have access to Analytics. For instructions, see the Oracle Fusion Middleware WebCenter Sites Administrator's Guide. -
Assign the
Analyticsrole to yourself (the logged in administrator). You will need this role in order to complete the steps necessary to integrate Analytics with your WebCenter Sites system.
1.6 Managing CM Sites
The first step towards enabling visitor activity tracking on your website is registering the underlying content management sites with Analytics. Once you have registered one or more sites, you can change their registration data, or unregister them (that is, delete them from Analytics).
This section contains the following procedures:
1.6.1 Registering CM Sites
This procedure shows you how to register a CM site with Analytics.
To register a CM site with Analytics
-
Log in to the Analytics administration interface as the
csuseruser (password:csuser) via the following URL:http://<host>:<port>/analyticsadmin/Admin
-
In the Sites Management pane on the left, click Register.
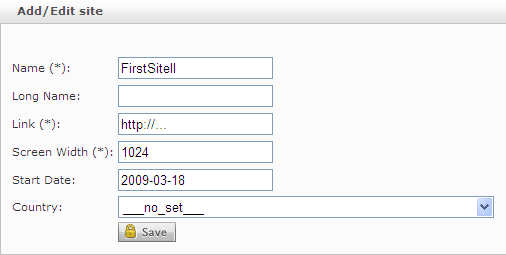
Analytics displays the Add/Edit Site form (Figure 1-2).
-
Fill in the form as follows:
-
Name – enter the name of the site, as it appears in the WebCenter Sites Admin interface.
-
Long name – enter a short, informative description of the site.
-
Link – enter the URL of the site.
-
Screen Width – enter the target pixel width for which the site was designed.
-
Start Date – specify when Analytics should start capturing data on this site.
-
Country – select the country targeted by the site. The selection you make here is used to calculate the PV/MIO statistic in the Overview report.
-
-
Click Save.
1.6.2 Editing CM Sites
This procedure shows you how to edit a CM site in Analytics.
-
Log in to the Analytics administration interface as the
csuseruser (password:csuser) via the following URL:http://<host>:<port>/analyticsadmin/Admin
-
In the Sites Management pane on the left, click View/Edit.
Analytics displays a list of currently registered sites (Figure 1-3).
-
In the list of sites, select the desired site.
Analytics displays an Add/Edit Site form populated with values for the selected site (Figure 1-4).
-
In the form, make your changes, then click Save.
1.6.3 Deleting CM Sites
This procedure shows you how to delete a CM site from Analytics.
To delete a CM site from Analytics
-
Log in to the Analytics administration interface as the
csuseruser (password:csuser) interface via the following URL:http://<host>:<port>/analyticsadmin/Admin
-
In the Sites Management pane on the left, click View/Edit.
Analytics displays a list of currently registered sites (Figure 1-5).
-
In the list of sites, click the Delete (trash can) icon next to the site you want to delete.
-
In the pop-up warning dialog that appears, click OK.
1.7 Managing Asset Reports
Before users can generate reports on WebCenter Sites assets, you must first configure the reports. Configuring an asset report enables Analytics to:
-
Recognize WebCenter Sites asset types that you register for the report
-
Configure report menu options in the Content Information report groups
-
Generate reports on assets of the registered types
This section contains the following topics:
1.7.1 Required Configurations
After you install Analytics, you must configure the Page Views report. When you configure this report, you configure the Pageview object, a system default that specifies the type (or types) of assets Analytics will track. Configuring the Pageview object enables default reports that are based on the Pageview object.
The following reports can function only when the Pageview object is configured:
-
Page Views
-
Site Information
-
Clickstream
For more information about the Pageview object, see the glossary at the end of this guide. For instructions on configuring the Page Views report, follow the steps in Section 1.7.4, "Configuring an Asset Report."
Note:
Once you configure the Page Views report, users will be able to generate the reports. To ensure the reports are filled with data, contact developers to enable data capture on assets of the types you specify in the Pageview object.
1.7.2 Optional Configurations
If you want Analytics to capture data on the keywords and phrases visitors enter into the site's internal search engine, configure an internal searches report (which will be listed in the Content Information group.) For instructions on configuring reports on internal searches, follow the steps in Section 1.7.4, "Configuring an Asset Report."
1.7.3 Configuring Reports with Custom Parameters
Reports with custom parameters are configured in the same way as reports with default parameters. Custom parameters will be included in the reports only if developers complete the steps that are outlined in Section 1.1, "About the Integration Process."
For instructions on configuring a custom asset report, follow the steps in Section 1.7.4, "Configuring an Asset Report."
1.7.4 Configuring an Asset Report
In this procedure, you will name the asset report, and specify the types of assets that Analytics will track for the report.
Note:
Remember the following:
-
Reports that you configure will be part of the Content Information report group.
-
Configure reports judiciously:
Deleting reports from the system (if necessary) is not trivial. A report deleted from the registration screen is not deleted as a report option. It remains as a menu item in the user's report generation interface and must be removed programmatically.
Deleting a report from the registration screen disables Analytics from analyzing data for that report. Previously analyzed report data is not deleted.
If you need to delete a report from the Administration interface, follow the steps in Section 1.7.5, "Deleting an Asset Report."
To configure a report (register one or more asset types)
-
Log in to the Analytics administration interface as the
csuseruser (password:csuser) via the following URL:http://<host>:<port>/analyticsadmin/Admin
-
In the Reports on Assets section of the Asset Management pane on the left, click Configure.
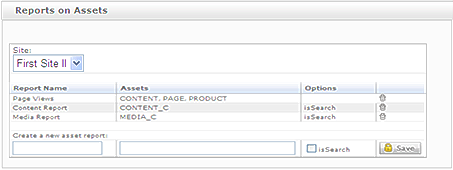
Analytics displays the Reports on Assets form (Figure 1-6).
-
In the form, do the following:
-
In the Site drop-down list, select the target site.
-
In the Report Name column, go to the Create a new asset report field, and enter a short, descriptive name for the report.
Note:
Remember the following:
-
If you are configuring a Page Views report, enter Page Views. Analytics will not recognize the report under any other name.
-
If you are configuring an internal searches report, enter a name for your report and select the isSearch check box (in the Options column).
-
-
In the Assets field, enter the name(s) of the asset type(s) whose assets will be tracked for this report.
-
If you are configuring the Page Views report, use the following convention:
AssetType1, AssetType2,..., AssetTypeN
Note:
Remember the following:
-
Enter asset type names exactly as they appear in the WebCenter Sites database.
-
Instead of commas, you can also use semicolons (;) to separate asset types in the list.
-
-
If you are configuring an internal searches report, enter
Searchin the Assets field.
-
-
-
Click Save.
-
Next steps:
-
(Optional) Enable the performance indicator for assets of the types you selected for tracking by Analytics. For instructions, see Section 1.9.1, "Enabling the Performance Indicator."
-
Grant permissions to users to generate the report you configured:
-
Register CM site users with Analytics. For instructions, see Section 1.10.1.1, "Registering Users."
-
Create user groups. For instructions, see Section 1.10.2.1, "Creating Groups."
-
Grant permissions to user groups. For instructions, see Section 1.11, "Managing Permissions to Reports (and to Analytics)."
-
Assign users to user groups. For instructions, see Section 1.10.3, "Assigning Users to User Groups."
-
-
An asset report remains empty until data capture is enabled for assets of the specified types. Data capture can be enabled now, or after the integration process is completed. Instructions for enabling data capture can be found in the Oracle Fusion Middleware WebCenter Sites: Analytics Developer's Guide.
-
If developers have created reports with custom parameters, they must also add the parameter to the Analytics database, develop an Analytics job to statistically process data captured on the custom parameter, and code the reports to display the processed data in the desired layout. Instructions are available in the Oracle Fusion Middleware WebCenter Sites: Analytics Developer's Guide.
-
1.7.5 Deleting an Asset Report
This procedure shows you how to delete an asset report from the registration screen (in the Analytics Administration interface).
Note:
Remember the following:
-
Deleting a report disables Analytics from analyzing data for that report. Previously analyzed report data is not deleted.
-
A report deleted from the registration screen (in the Analytics Administration interface) remains as a menu item in the user's report generation interface and must be removed programmatically.
To delete an asset report
-
Log in to the Analytics administration interface as the
csuseruser (password:csuser) via the following URL:http://<host>:<port>/analyticsadmin/Admin
-
In the Reports on Assets section of the Asset Management pane on the left, click Configure.
Analytics displays the Reports on Assets form (Figure 1-7).
-
In the form, do the following:
-
In the Site drop-down list, select the target site.
-
Click the Delete (trash can) icon next to the report you want to delete.
The report you selected is removed from the Reports on Assets list.
-
1.8 Managing Engage Asset Reports
This section shows you how to configure Analytics to support Engage assets (recommendations and segments). This allows Analytics to:
-
Track usage statistics for recommendations and the assets they reference
-
Track segment membership for each visitor
This section contains the following procedures:
1.8.1 Managing Recommendations
This section shows you how to manage recommendations in Analytics. It contains the following procedures:
1.8.1.1 Registering Recommendations
This procedure shows you how to register recommendations with Analytics. You must register each recommendation you want Analytics to track.
To register a recommendation with Analytics
-
Log in to the Analytics administration interface as the
csuseruser (password:csuser) via the following URL:http://<host>:<port>/analyticsadmin/Admin
-
In the Recommendations section of the Engage pane on the left, click Register.
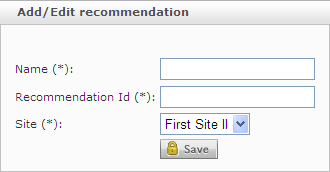
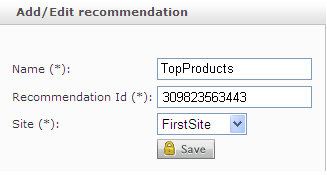
Analytics displays an empty Add/Edit Recommendation form (Figure 1-8).
-
Fill in the form as follows:
Note:
An asterisk (*) next to a field name indicates that the field is required. You cannot leave required fields blank.
-
In the Name field, enter the name of the recommendation asset. The name can, but is not required to, be the same as the name in the WebCenter Sites database.
-
In the Recommendation ID field, enter the asset ID of the recommendation asset, exactly as it appears in the WebCenter Sites database.
-
In the Site drop-down list, select the CM site for which you are registering the recommendation.
-
-
Click Save.
1.8.1.2 Editing Recommendations
This procedure shows you how to edit recommendations registered with Analytics.
To edit a recommendation registered with Analytics
-
Log in to the Analytics administration interface as the
csuseruser (password:csuser) via the following URL:http://<host>:<port>/analyticsadmin/Admin
-
In the Recommendations section of the Engage pane on the left, click View/Edit.
Analytics displays a list of currently registered recommendations (Figure 1-9).
Figure 1-9 Currently Registered Recommendations

Description of "Figure 1-9 Currently Registered Recommendations"
-
In the list, click the desired recommendation.
Analytics displays an Add/Edit Recommendation form populated with values for the selected recommendation (Figure 1-10).
-
In the form, make your changes, then click Save.
Note:
An asterisk (*) next to a field name indicates that the field is required. You cannot leave required fields blank.
1.8.1.3 Deleting Recommendations
This procedure shows you how to delete recommendations from Analytics.
To delete a recommendation from Analytics
-
Log in to the Analytics administration interface as the
csuseruser (password:csuser) via the following URL:http://<host>:<port>/analyticsadmin/Admin
-
In the Recommendations section of the Engage pane on the left, click View/Edit.
Analytics displays a list of currently registered recommendations (Figure 1-11).
Figure 1-11 Currently Registered Recommendations

Description of "Figure 1-11 Currently Registered Recommendations"
-
In the list, click the Delete (trash can) icon next to the desired recommendation.
-
In the pop-up warning dialog that appears, click OK.
1.8.2 Managing Segments
This section shows you how to manage segments in Analytics. It contains the following procedures:
-
Section 1.8.2.3, "Deleting Segments"
Note:
Before you register segments from your site, you must configure a segment named
NoSegwith segment ID of 0 (zero), so that visitors that do not belong to any segments can be tracked. You must do this even if all visitors on your site have been assigned to segments.
1.8.2.1 Registering Segments
This procedure shows you how to register segments with Analytics. You must register each segment for which you want to track visitor membership.
To register a segment with Analytics
-
Log in to the Analytics administration interface as the
csuseruser (password:csuser) interface via the following URL:http://<host>:<port>/analyticsadmin/Admin
-
In the Segments section of the Engage pane on the left, click Register.
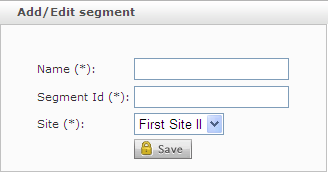
Analytics displays an empty Add/Edit Segment form (Figure 1-12).
-
Fill in the form as follows:
Note:
An asterisk (*) next to a field name indicates that the field is required. You cannot leave a required field blank.
-
In the Name field, enter the name of the segment asset. The name can, but is not required to, be the same as in the WebCenter Sites database.
-
In the Segment ID field, enter the asset ID of the segment asset.
-
In the Site drop-down list, select the site for which you are registering the segment.
-
-
Click Save.
1.8.2.2 Editing Segments
This procedure shows you how to edit segments registered with Analytics.
To edit a segment registered with Analytics
-
Log in to the Analytics administration interface as the
csuseruser (password:csuser) via the following URL:http://<host>:<port>/analyticsadmin/Admin
-
In the Segments section of the Engage pane on the left, click View/Edit.
Analytics displays a list of currently registered segments (Figure 1-13).
Figure 1-13 Currently Registered Segments

Description of "Figure 1-13 Currently Registered Segments"
-
In the list, click the desired segment.
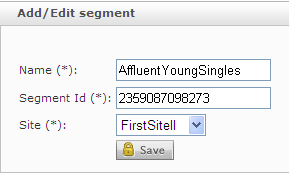
Analytics displays an Add/Edit segment form populated with values for the selected segment (Figure 1-14).
-
In the form, make your changes, then click Save.
Note:
An asterisk (*) next to a field name indicates that the field is required. You cannot leave a required field blank.
1.8.2.3 Deleting Segments
This procedure shows you how to delete segments registered with Analytics.
To delete a segment from Analytics
-
Log in to the Analytics administration interface as the
csuseruser (password:csuser) via the following URL:http://<host>:<port>/analyticsadmin/Admin
-
In the Segments section of the Engage pane on the left, click View/Edit.
Analytics displays a list of currently registered segments (Figure 1-15).
Figure 1-15 Currently Registered Segments

Description of "Figure 1-15 Currently Registered Segments"
-
In the list, click the Delete (trash can) icon next to the desired segment.
-
In the pop-up warning dialog that appears, click OK.
1.9 Managing the Performance Indicator
The performance indicator is a bar that shows how often a given asset is visited during a seven-day period, a 30-day period, and a full year. The performance indicator is an option that can be enabled in the Inspect form of every asset being tracked by Analytics. Figure 1-16 shows the performance indicator.
This section shows you how to enable and disable the performance indicator for tagged assets on your WebCenter Sites delivery system. This section contains the following procedures:
1.9.1 Enabling the Performance Indicator
This procedure shows you how to enable the performance indicator for one or more asset types on your WebCenter Sites system.
To enable the performance indicator
-
Log in to the Analytics administration interface as the
csuseruser (password:csuser) via the following URL:http://<host>:<port>/analyticsadmin/Admin
-
In the Performance Indicator section of the Asset Management pane on the left, click Configure.
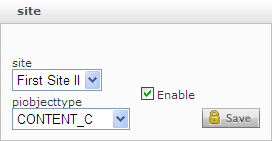
Analytics displays the Site form (Figure 1-17).
-
In the form, do the following:
-
In the Site drop-down list, select the target site.
-
In the piobjecttype drop-down list, select the desired asset type.
-
Select the Enable check box.
-
-
Click Save.
1.9.2 Disabling the Performance Indicator
This procedure shows you how to disable the performance indicator for an asset type on your WebCenter Sites system.
To disable the performance indicator
-
Log in to the Analytics administration interface as the
csuseruser (password:csuser) via the following URL:http://<host>:<port>/analyticsadmin/Admin
-
In the Performance Indicator section of the Asset Management pane on the left, click Configure.
Analytics displays the Site form (Figure 1-18).
-
In the form, do the following:
-
In the Site drop-down list, select the target site.
-
In the piobjecttype drop-down list, select the desired asset type.
-
Deselect the Enable check box.
-
-
Click Save.
1.10 Managing Users and Groups
Access to reports and Analytics interfaces (User and Admin) is granted to WebCenter Sites users through membership in user groups, to which you assign the desired permissions. When integrating Analytics with your WebCenter Sites system, you register the WebCenter Sites users individually, in the Analytics Admin interface, and then add them to a user group.
This section contains the following procedures:
1.10.1 Managing Users
This section shows you how to manage WebCenter Sites users in Analytics. It contains the following procedures:
1.10.1.1 Registering Users
This procedure shows you how to register WebCenter Sites users with Analytics.
To register a WebCenter Sites user with Analytics
-
Log in to the Analytics administration interface as the
csuseruser (password:csuser) via the following URL:http://<host>:<port>/analyticsadmin/Admin
-
In the User section of the User Management pane on the left, click Register.
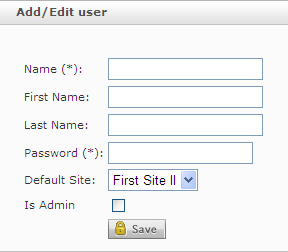
Analytics displays an empty Add/Edit User form (Figure 1-19).
-
Fill in the form as follows:
-
Name (required) – enter the user name of the user as it appears in the WebCenter Sites interface.
-
First name – enter the user's first name.
-
Last name – enter the user's last name.
-
Password – enter the password you want to assign to the user.
-
Default Site – select the which the user will see when he/she logs in to the Analytics interface.
-
Is Admin – grants the user access to the Analytics administration interface.
-
-
Click Save.
1.10.1.2 Editing Users
This procedure shows you how to edit WebCenter Sites users that have been registered with Analytics.
To edit a registered WebCenter Sites user
-
Log in to the Analytics administration interface as the
csuseruser (password:csuser) via the following URL:http://<host>:<port>/analyticsadmin/Admin
-
In the User section of the User Management pane on the left, click View/Edit.
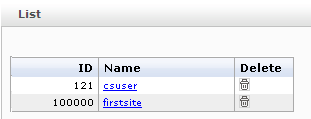
Analytics displays a list of currently registered users (Figure 1-20).
-
In the list, click the desired user.
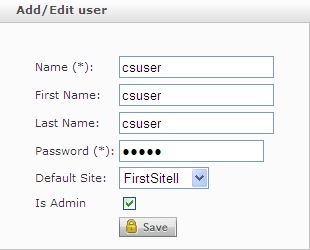
Analytics displays an Add/Edit User form populated with values for the selected user (Figure 1-21).
-
In the form, make your changes, then click Save.
1.10.1.3 Deleting Users
This procedure shows you how to delete WebCenter Sites users from Analytics.
To delete a WebCenter Sites user from Analytics
-
Log in to the Analytics administration interface as the
csuseruser (password:csuser) via the following URL:http://<host>:<port>/analyticsadmin/Admin
-
In the User section of the User Management pane on the left, click View/Edit.
Analytics displays a list of currently registered users (Figure 1-22).
-
In the list, click the Delete (trash can) icon next to the desired user.
-
In the pop-up warning dialog that appears, click OK.
1.10.2 Managing User Groups
The purpose of user groups is to grant permissions to group members. This section shows you how to manage user groups in Analytics. It contains the following sections:
1.10.2.1 Creating Groups
This procedure shows you how to add a user group to Analytics.
To add a user group
-
Log in to the Analytics administration interface as the
csuseruser (password:csuser) via the following URL:http://<host>:<port>/analyticsadmin/Admin
-
In the Usergroups section of the User Management pane on the left, click Register.
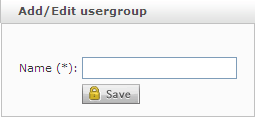
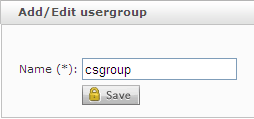
Analytics displays an empty Add/Edit Usergroup form (Figure 1-23).
-
In the form, enter a name for the group and click Save.
1.10.2.2 Editing Groups
This procedure shows you how to edit a user group in Analytics.
To edit a user group
-
Log in to the Analytics administration interface as the
csuseruser (password:csuser) via the following URL:http://<host>:<port>/analyticsadmin/Admin
-
In the Usergroups section of the User Management pane on the left, click View/Edit.
Analytics displays a list of existing user groups (Figure 1-24).
-
In the list, click the desired user group.
Analytics displays the name of the user group you wish to edit in the Add/Edit Usergroup form (Figure 1-25).
-
In the form, make your changes and click Save.
1.10.2.3 Deleting Groups
This procedure shows you how to delete a user group from Analytics.
To delete a user group
-
Log in to the Analytics administration interface as the
csuseruser (password:csuser) via the following URL:http://<host>:<port>/analyticsadmin/Admin
-
In the Usergroups section of the User Management pane on the left, click View/Edit.
Analytics displays a list of existing user groups (Figure 1-26).
-
In the list, click the Delete (trash can) next to the desired user group.
-
In the pop-up warning dialog that appears, click OK.
1.10.3 Assigning Users to User Groups
This procedure shows you how to assign users to user groups in Analytics. The users can access only the reports to which their group has permissions.
To assign users to a user group
-
Log in to the Analytics administration interface as the
csuseruser (password:csuser) via the following URL:http://<host>:<port>/analyticsadmin/Admin
-
In the User to Usergroup section of the User Management pane, click Register.
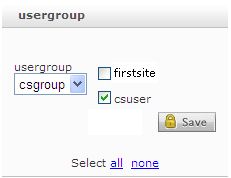
Analytics displays the Usergroup form (Figure 1-27).
-
In the form, do the following:
-
In the usergroup drop-down list, select the target group.
-
Select the users that you want to add to the user group. Deselect the users you want to remove from the group.
-
-
Click Save.
1.11 Managing Permissions to Reports (and to Analytics)
When you assign reports to a user group, users in the group gain access to the reports. This procedure shows you how to grant permissions to a user group to access Analytics reports.
Note:
At the very least, a user group – and therefore its users must be given access to at least one report on one of the content management sites they work with. Otherwise, they will not be able to log in to the Analytics interface.
To grant or deny users permissions to reports
-
Log in to the Analytics administration interface as the
csuseruser (password:csuser) via the following URL:http://<host>:<port>/analyticsadmin/Admin
-
In the Permissions pane on the left, click Grant Rights.
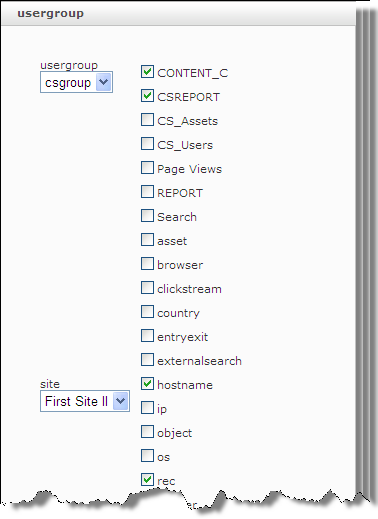
Analytics displays the Grant Rights form (Figure 1-28).
-
In the form, do the following:
-
In the Usergroup drop-down list, select the desired group.
-
In the Site drop-down list, select the target site.
-
Select the reports that the user group may access. Users in the group will be able to access only those reports.
-
-
Click Save.
