11g Release 1 (11.1.1.7.0)
Part Number E10537-05
Contents
Previous
Next
| Oracle Fusion Middleware Adapter for Oracle Applications User's Guide 11g Release 1 (11.1.1.7.0) Part Number E10537-05 | Contents | Previous | Next |
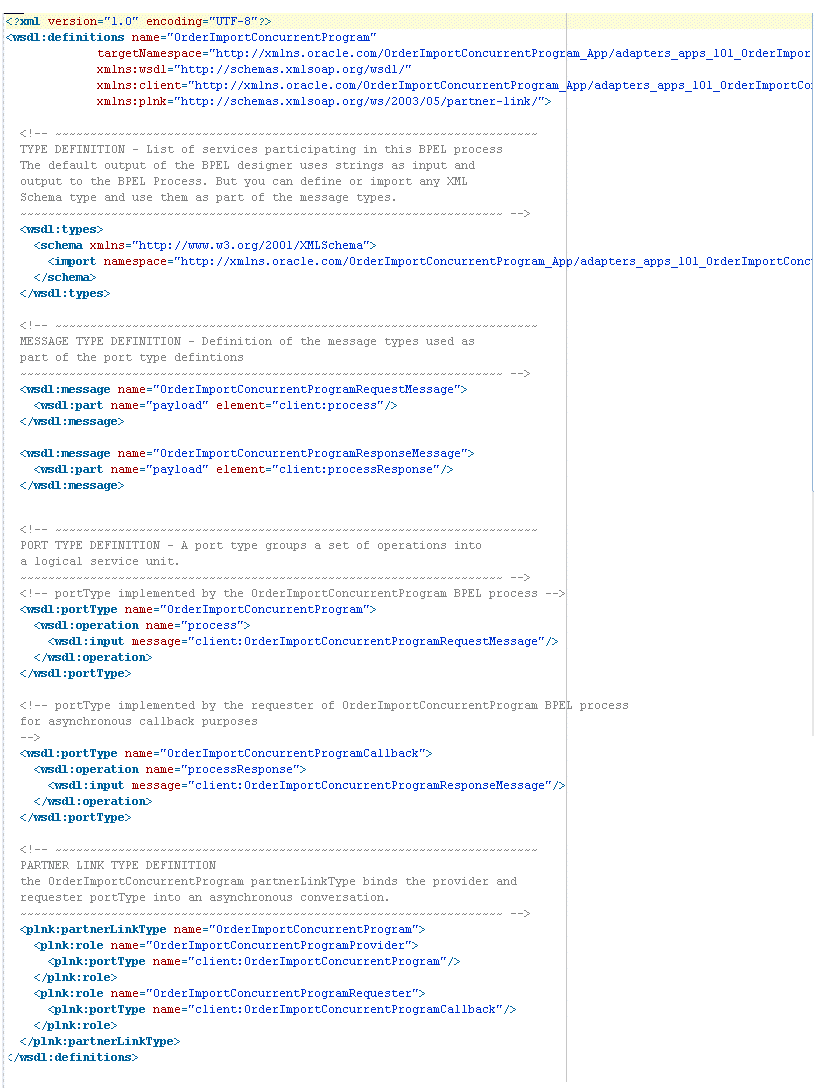
Web Service Definition Language (WSDL) is generated by the JDeveloper BPEL Designer during design time. The WSDL file generated by the Adapter Wizard is the adapter service definition. In addition, it specifies various operations exposed by the service. The operations are based on user input to the Adapter Wizard. An operation either retrieves or inserts data to Oracle Applications and is represented by a JCA activation or interaction spec.
Example of a WSDL File
Oracle Adapter for Oracle Applications is deployed as JCA 1.5 resource adapter within the Oracle WebLogic Server container.
Although Oracle Adapter for Oracle Applications is physically deployed as JCA 1.5 resource adapter, the logical deployment of the Adapter involves creating the connection entries for the JCA 1.5 resource adapter. This connection information is for tying up the database connection information provided when you create a partner link or service and is used by iAS at run time in the background.
The following example of connection configuration for Adapter for Oracle Applications can be used with the Oracle Applications adapter tutorials packaged with the product. For the logical deployment changes to take effect, the Oracle WebLogic Server container process must be restarted.
The following topics are included in this section:
Oracle WebLogic Server consists of a JCA container for hosting JCA resource adapters. JCA defines standard Java interfaces for simplifying the integration of a J2EE server with various back-end applications. All client applications run within the Oracle WebLogic Server environment.
The JCA resource adapter is a WebLogic Server component contained in a Resource Adapter Archive (RAR) file within the applications/directory. An RAR file contains a correctly formatted deployment descriptor. In addition, it contains declarative information about the contract between the Oracle WebLogic Server and resource adapter.
The weblogic-ra.xml file is the deployment descriptor for a WebLogic resource adapter. It contains deployment configurations for deploying resource adapters to Oracle WebLogic Server, which includes the back-end application connection information as specified in the deployment descriptor of the resource adapter, Java Naming and Directory Interface (JNDI) name to be used, connection pooling parameters, security identities, Work Manager properties, logging, and resource principal mapping mechanism and configurations.
Note: A WebLogic resource adapter also uses ra.xml descriptor that describes the resource adapter-related attributes type and its deployment properties using the standard XML schema specified by the JCA 1.5 Specification.
After successfully installing Oracle WebLogic Server, use the following steps to configure the data sources in the Oracle WebLogic Server Administration Console:
Note: How to install Oracle WebLogic Server and create connection factory, see Oracle WebLogic Server Installation Guide for details.
Navigate to http://servername:portnumber/console.
Enter the server administrator's username and password to log on to the Oracle WebLogic Server Administration Console.
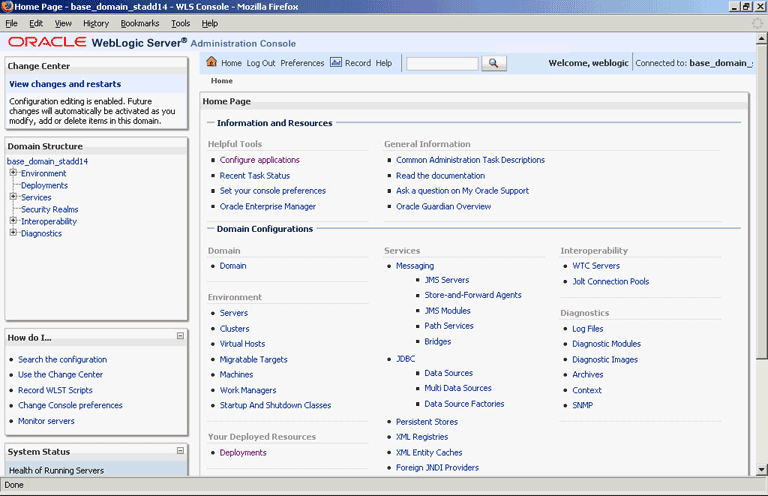
The Home page of the Oracle WebLogic Server Administration Console appears.
Oracle WebLogic Server Administration Console Home Page
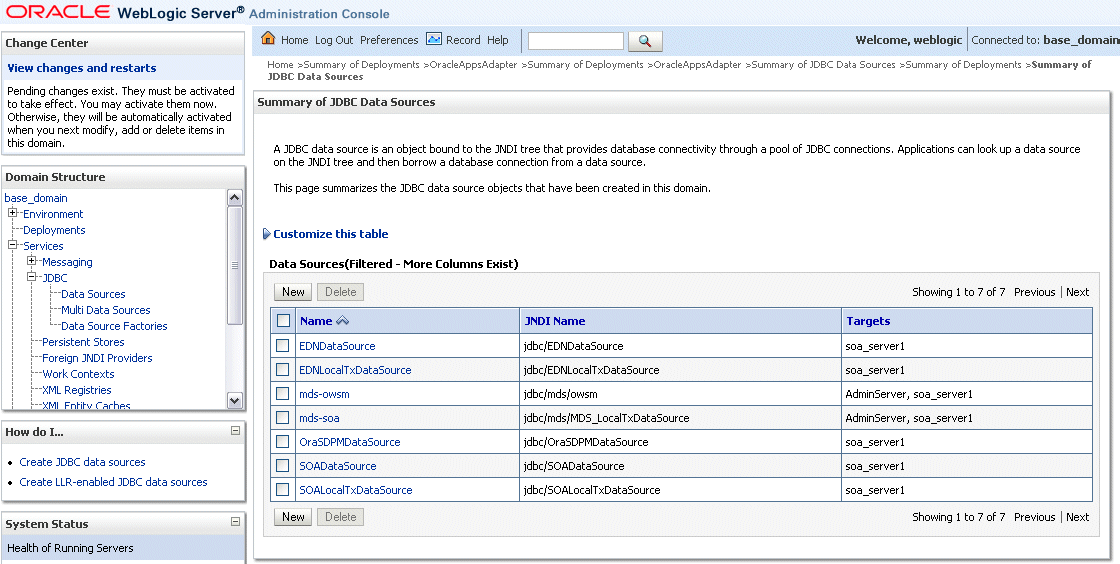
Under the Domain Structure section, select Services > JBDC > DataSources.
The Summary of JDBC Data Sources page is displayed.
The Summary of JDBC Data Sources Page
In the Summary of JDBC Data Sources section, click New and select the option Generic Datasource to create a new data source. The Create a New JDBC Data Source page is displayed.
Enter the values for the properties to be used to identify your new JDBC data source.
The Create a New JDBC Data Source - JDBC Data Source Properties Page
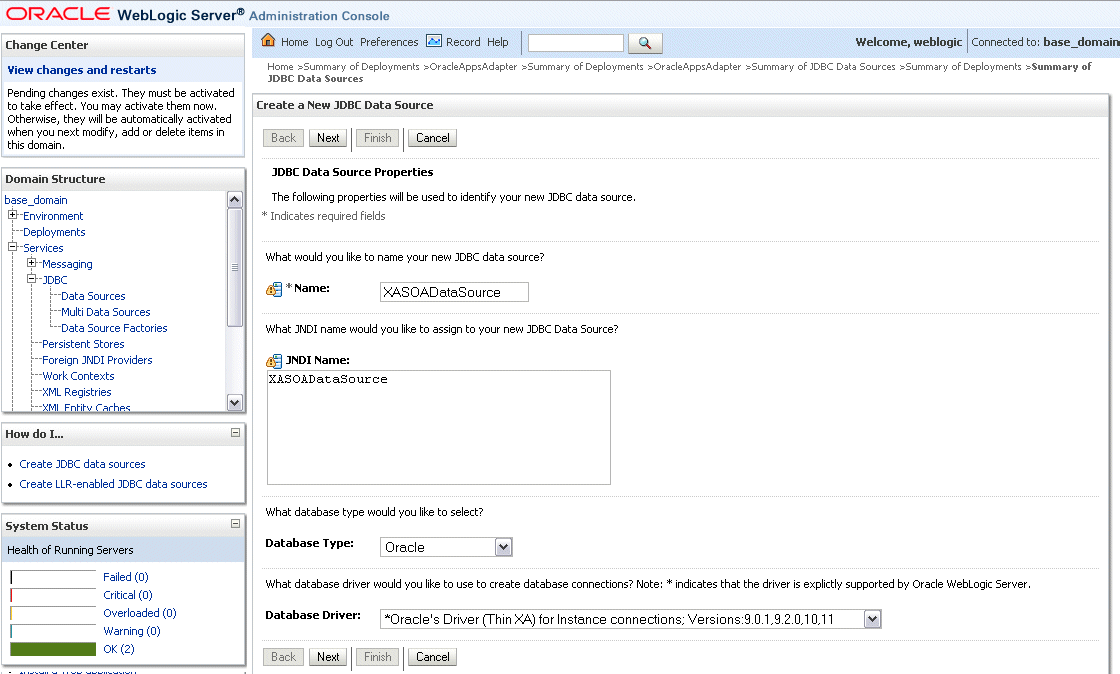
Name: Enter a desired new JDBC data source name.
JNDI Name: Enter a JNDI name that you like to assign to your new JDBC Data Source.
Database Type: Select Oracle as database type from the drop-down list.
Database Driver: Select Oracle's Driver (Oracle's Driver (Thin and ThinXA) is the only supported version).
Note: A driver name with '*' indicates that the driver is explicitly supported by Oracle WebLogic Server.
Click Next. The Create a New JDBC Data Source - Transaction Options page is displayed.
Click Next. The Create a New JDBC Data Source - Connection Properties page is displayed.
The Create a New JDBC Data Source - Connection Properties page
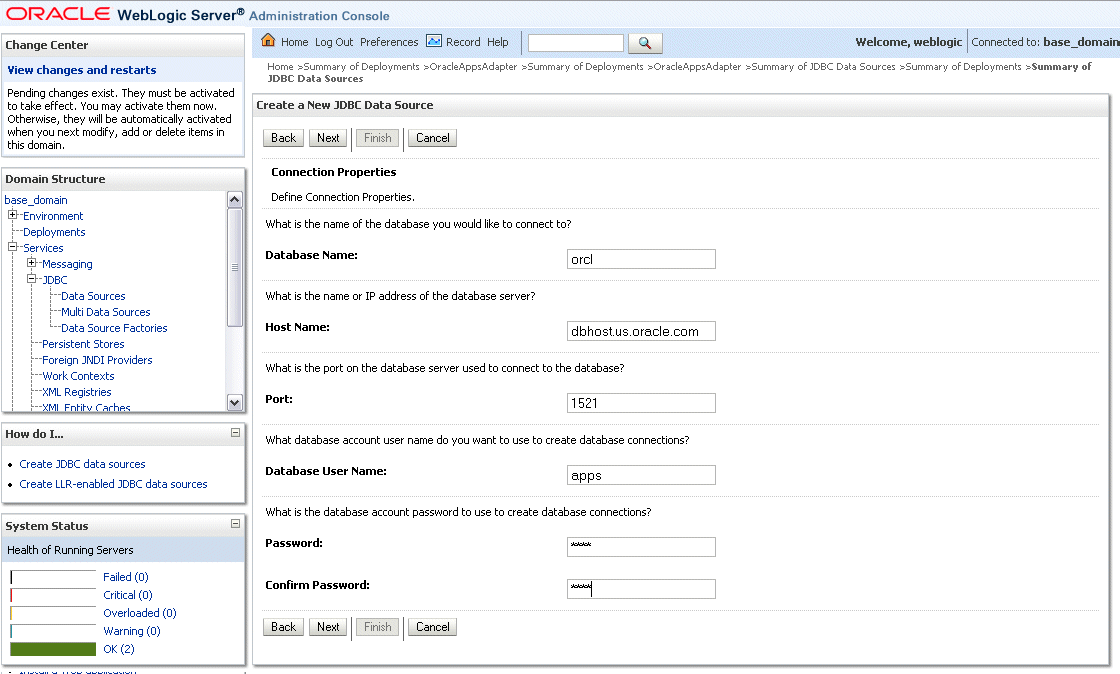
Enter the connection properties in the Connection Properties page.
Database Name: Enter a database name that you would like to connect.
Host Name: Enter a host name or IP address of the database server.
Port: Enter a database port on the database server used to connect to the database.
Database User Name: Enter the database account username that you want to use to create the database connections.
Password: Enter the database account password that you want to use to create the database connections.
Confirm Password: Enter the same password for confirmation.
Click Next. The Create a New JDBC Data Source - Test Database Connection page is displayed.
The Create a New JDBC Data Source - Test Database Connection Page

Click Test Configuration to test the database availability and the connection properties you provided.
A 'Connection test succeeded' message appears at the top of the Create a New JDBC Data Source - Test Database Connection page.
Click Next. The Create a New JDBC Data Source - Select Targets page is displayed.
The Create a New JDBC Data Source - Select Targets Page
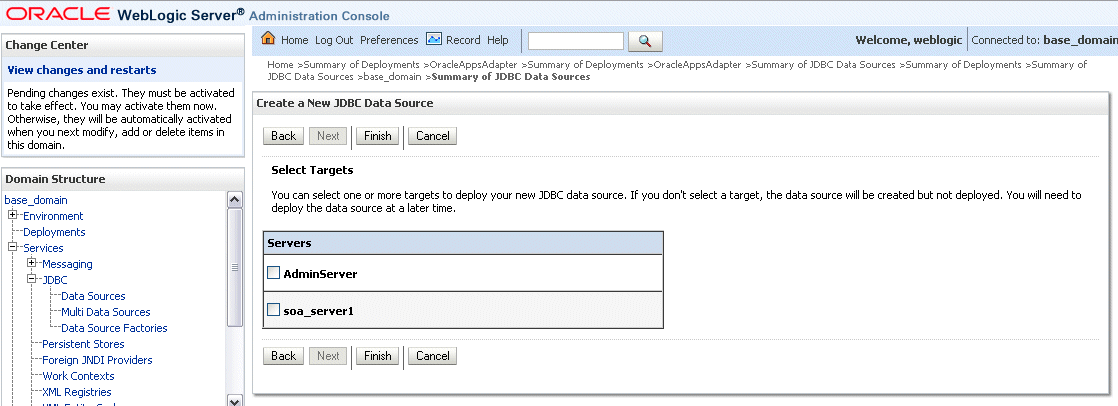
Select the 'soa_server1' check box, and then click Finish.
The Summary of JDBC Data Sources page is displayed. This page summarizes the JDBC data source objects that have been created in this domain. The Data Source that you created appears in this list.
The deployment descriptor of the Adapter for Oracle Applications must associate with the Java Naming and Directory Interface (JNDI) name with configuration properties required by the adapter to access the database.
Use the following steps to configure the JNDI and additional settings for Adapter for Oracle Applications through the Oracle WebLogic Server Administration Console:
Navigate to http://servername:portnumber/console.
Enter the server administrator's username and password to log on to the Oracle WebLogic Server Administration Console.
The Home page of the Oracle WebLogic Server Administration Console appears.
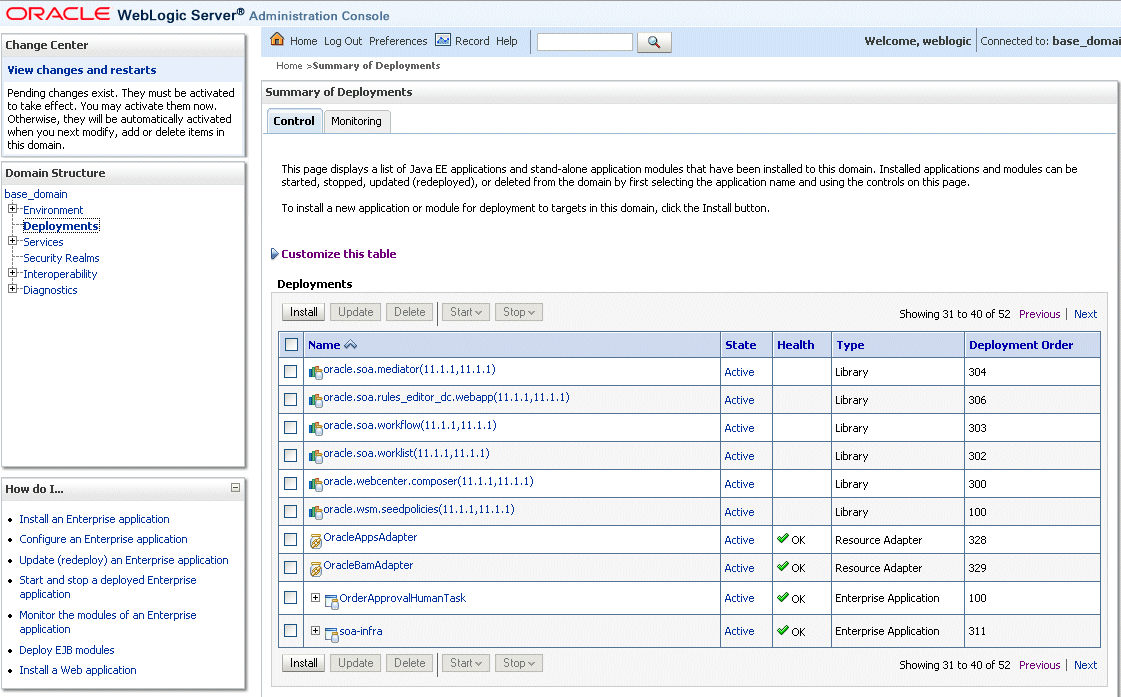
Under the Domain Structure section, select Deployment.
The Summary of Deployments page appears where you can find a list of Java EE applications and standalone application modules that have been installed to this domain.
Locate an appropriate link for Oracle Adapter for Oracle Applications from the summary of deployment table first and then click the link.
Summary of Deployments
The Overview Settings for the selected application name appears.
Click the Configuration tab and the Outbound Connection Pools subtab to display the Outbound Connection Pool groups and instances for this selected resource adapter.
Outbound Connection Pool Configuration Table
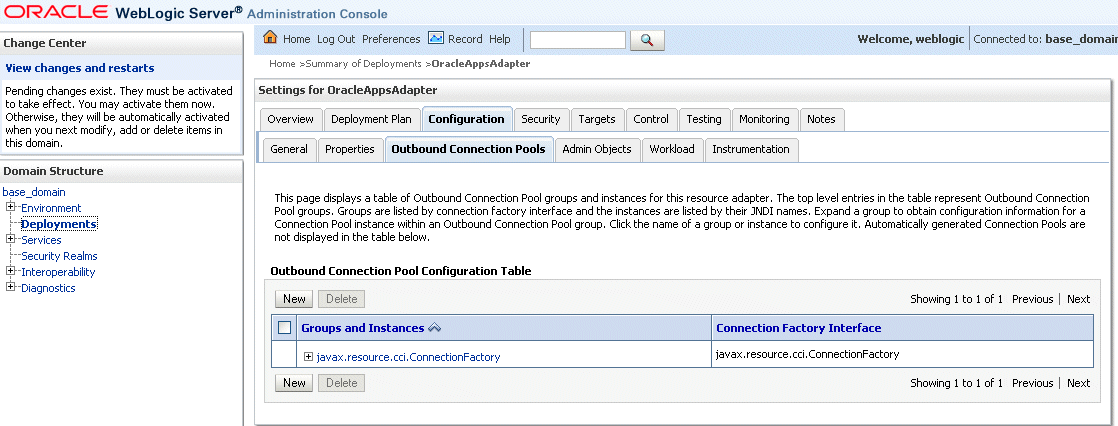
You can click the javax.resource.cci.ConnectionFactory link to expand this group and obtain configuration information for a Connection Pool instance.
Click New and select the javax.resource.cci.ConnectionFactory radio button to create an instance. Click Next to create a new outbound connection.
Enter a JNDI name that you want to use to obtain the new connection instance. For example, enter eis/Apps/Apps.
Create a New Outbound Connection
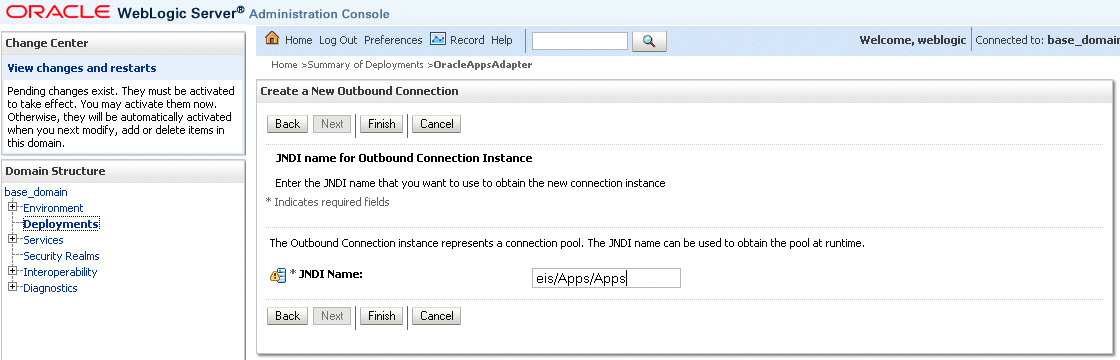
The Outbound Connection instance represents a connection pool. The JNDI name can be used to obtain the pool at run time.
Click Finish.
This opens the Save Deployment Plan Assistant page where you can find the new deployment plan information including plan path with an XML extension (.xml), recently used paths, and current location.
Note: The plan path must have an XML extension (.xml). It is recommended that this file be called Plan.xml, and that each plan be located in a unique directory. If the plan file exists it will be overwritten. Other files in the plan directory may be overwritten as well.
Click OK to save the configuration change for a deployment plan.
You may find some unexpected exception messages populated while processing the request. Use the following steps to resolve the issue:
Click the Adapter link that you selected earlier on the breadcrumb navigation path.
Click the Configuration tab and the Outbound Connection Pools subtab to display the Outbound Connection Pool groups and instances.
Click the javax.resource.cci.ConnectionFactory expand node to display the newly configured JNDI (such as eis/Apps/Apps) for the outbound instance in the configuration table.
Click the outbound instance name (such as eis/Apps/Apps) to display the outbound connection properties.
Outbound Connection Properties Page
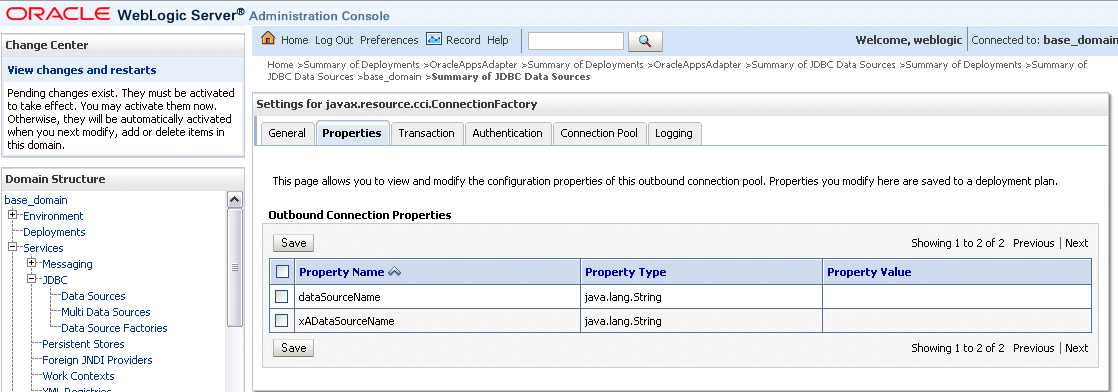
Place your mouse in the Property Value column for the 'xADataSourceName' property name and click to enable the input text box.
Enter xADataSourceName in the text box, press [Enter] key, and then click Save to update the deployment plan.
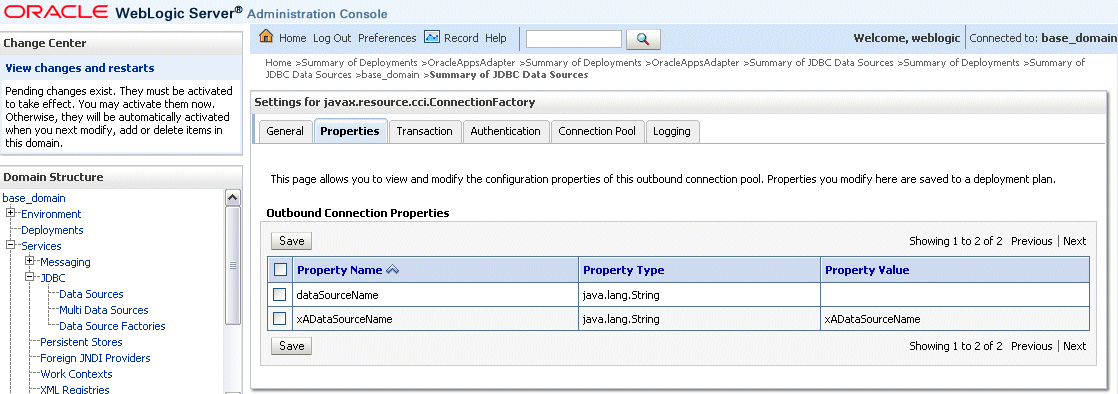
The Summary of JDBC Data Source page appears with xADataSourceName listed in the table.
Outbound Connection Properties Page
Select 'OracleAppsAdapter' from Deployments and click Update to complete the update wizard. The new Connection Factory settings would be applied without restarting.
You must establish a connectivity between the design-time environment and the server you want to deploy it to. In order to establish such a connectivity, you must create the application server connection.
Use the following steps to create the application server connection:
From Oracle JDeveloper, select View > Application Server Navigator to open the Application Server tab.
Create a New Application Server Connection
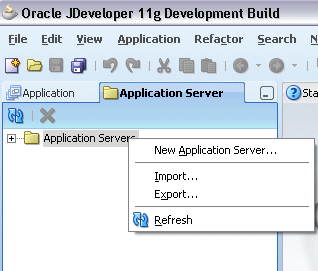
Right-click on the Application Server and select New Application Server to open the Create Application Server Connection wizard.
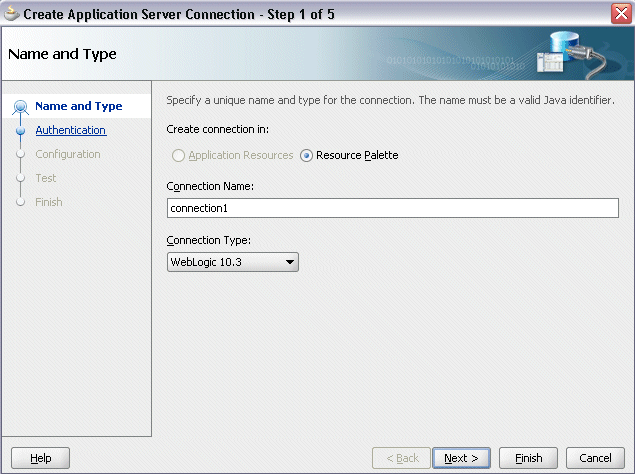
Enter the connection name and select WebLogic 10.3 as the connection type.
Click Next.
Select the Server Name and Type
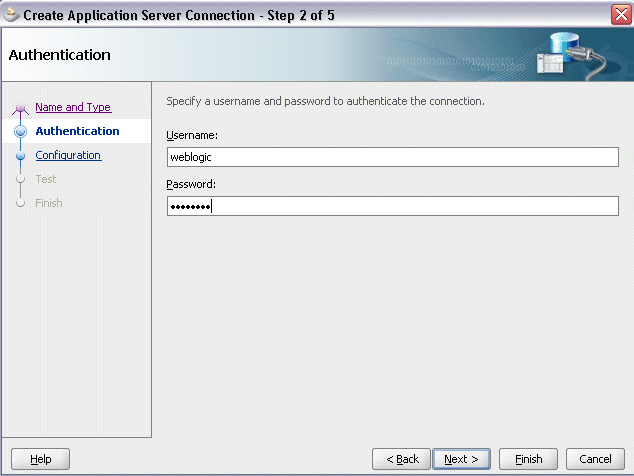
Enter the username (such as weblogic) and password specified during installation and click Next.
Enter Server Authentication Information
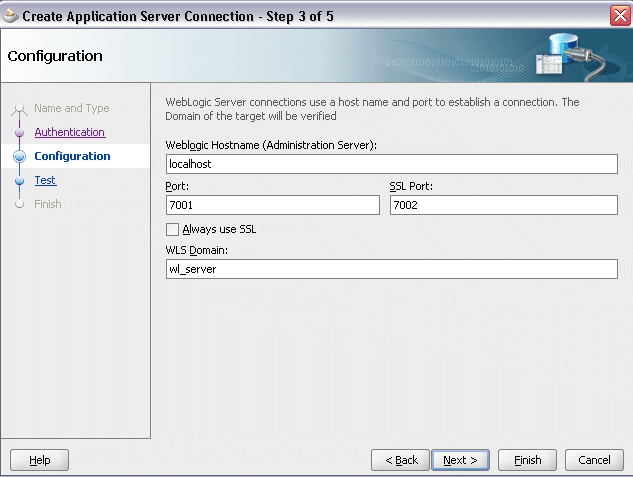
Enter the WebLogic Server connection host name and port information. Leave the default domain name unchanged in the WLS Domain field.
Click Next.
Specifying Server Configuration Information
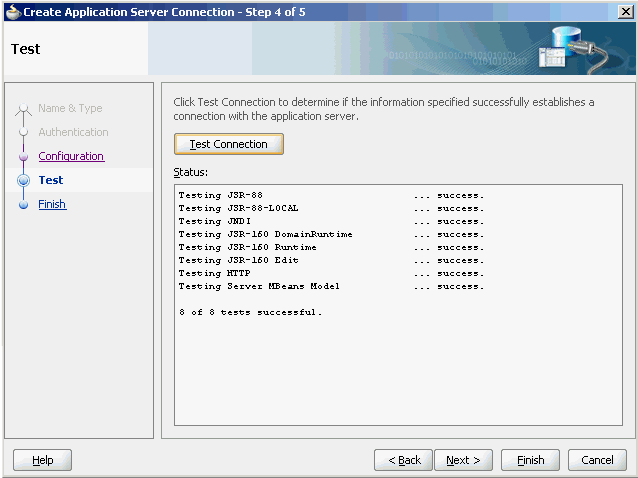
Click Test Connection to validate your server configuration. You should find success messages populated in the Status window.
Validating the Server Configuration
Click Finish.
![]()
Copyright © 2005, 2013, Oracle and/or its affiliates. All rights reserved.