| Oracle® Fusion Applications Upgrade Guide 11g Release 6 (11.1.6) Part Number E35833-07 |
|
|
PDF · Mobi · ePub |
| Oracle® Fusion Applications Upgrade Guide 11g Release 6 (11.1.6) Part Number E35833-07 |
|
|
PDF · Mobi · ePub |
This appendix presents the Language Pack Installer screens and describes the purpose of each of the following screens:
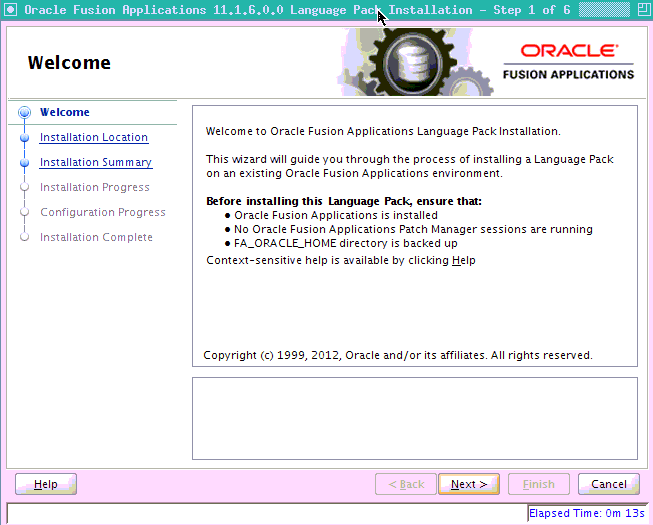
This screen appears each time you start Language Pack Installer. This screen does not appear if you restart Language Pack Installer after a failure. The standard Welcome screen is read-only. It contains a navigation pane on the left-hand side that summarizes the tasks the installer will take. Each item in the pane represents an installer screen, which contains prompts for the necessary information.
Click Next to continue.
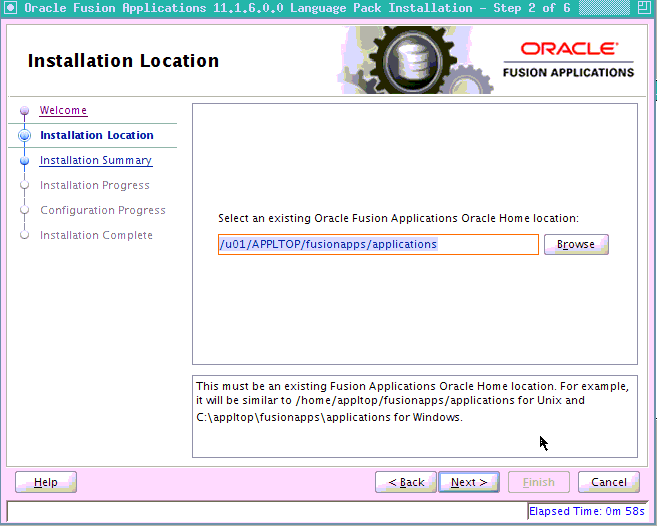
Specify the location of the existing Oracle Fusion Applications home (FA_ORACLE_HOME) where you want to install the language.
Click Next to continue.
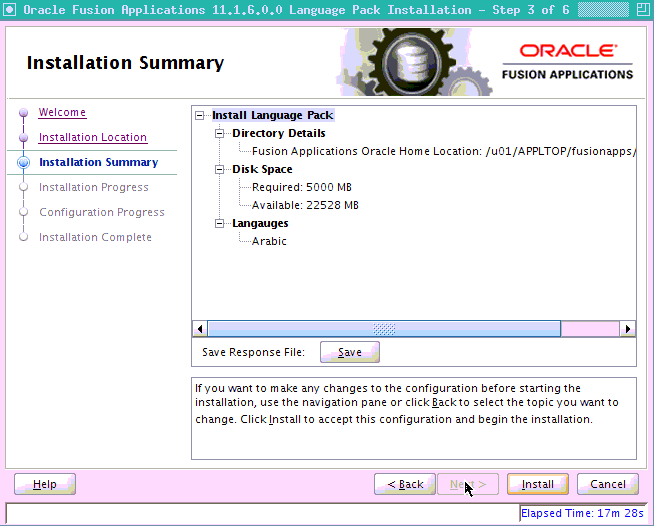
Summarizes the selections you made during this installation session. It includes the Oracle home, required and available disk space, and the language to be installed. Review the information displayed to ensure that the installation details are what you intend.
To make changes before installing, click Back to return to previous screens in the interview.
Click Install to start installing this language.
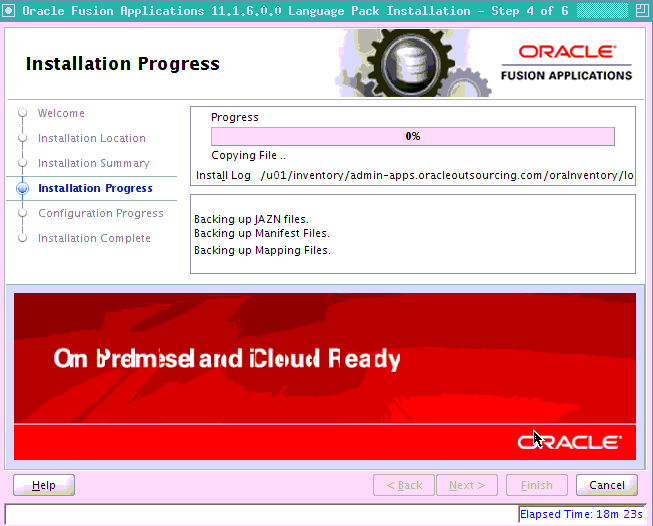
Displays a progress indicator that shows the percentage of the installation that is complete and indicates the location of the installation log file. The installation task consists of copying files from the Language Pack to the appropriate Oracle homes.
When the installation progress indicator shows 100 percent, click Next to continue.
Note:
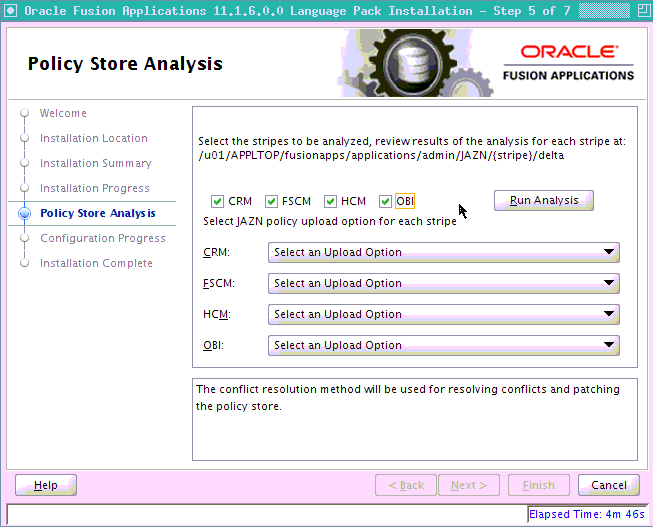
(This screen displays only when the J-DupdateJAZNPolicyStore option is set to true with the runInstaller command.
Analysis is available for the following policy store stripes: hcm, crm, fscm, and obi. Select the stripes to be analyzed and then click Run Analysis to identify any conflicts or deletions. Only the stripes that are included in the language pack are enabled for analysis and the analysis could run for several minutes. After the analysis runs, review the results of the analysis to determine which deployment method you want Language Pack Installer to use for policy store changes to each stripe. Oracle recommends that you select Apply safe changes only. This is the safest method unless you have read and totally understood the consequences of the other three options. If you decide to resolve the conflicts or deletions before the actual JAZN upload from Language Pack Installer, you should run the Policy Store Analysis step again to get the most accurate analysis report. The choices for deployment method are:
Apply safe changes only (choose this method if there are no conflicts)
Apply all changes and overwrite customizations
Append additive changes
Manually resolve conflicts and upload changes using Authorization Policy Manager.
If you choose Apply safe changes only or Append additive changes, then you must review the results of the analysis to manually upload any changes not applied by Language Pack Installer with the choice you selected, after the installation is complete. If you choose Apply all changes and overwrite customizations, then you may need to reapply the customizations that are overwritten after the installation is complete. If you choose one of these options, click Next after you make your selection.
If you choose Manually resolve conflicts and upload changes using Authorization Policy Manager (APM), you must pause the installation while you bring up the APM application and upload the changes. For more information, see the "Upgrading Oracle Fusion Applications Policies" chapter in the Oracle Fusion Middleware Oracle Authorization Policy Manager Administrator's Guide (Oracle Fusion Applications Edition). Note the location of the following files:
Baseline file: FA_ORACLE_HOME/admin/JAZN/stripe/baseline
Patch file for fscm, crm, and hcm stripes: FA_ORACLE_HOME/stripe/deploy/system-jazn-data.xml
Patch file for the obi stripe: FA_ORACLE_HOME/com/acr/security/jazn/bip_jazn-data.xml
When you complete this task in APM, shut down the APM application, return to Language Pack Installer, and click Next.
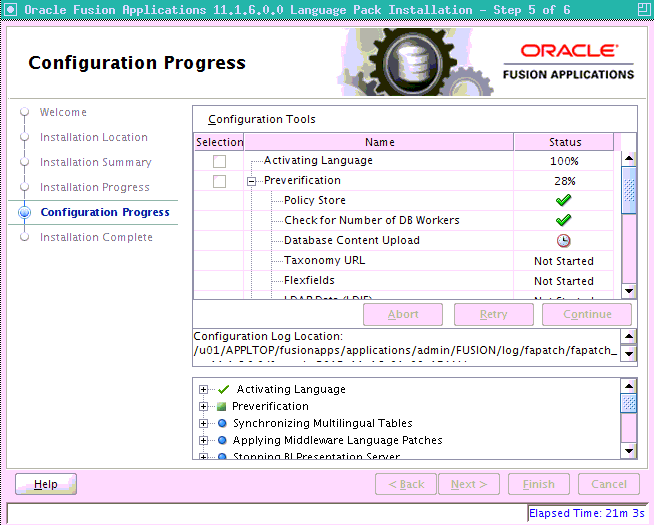
Displays a progress indicator that shows the percentage of the configuration that is complete. It displays each task in the message pane as it is performed. Tasks that could be included in the configuration phase are described in "Language Pack Installer Configuration Assistants" in the Oracle Fusion Applications Upgrade Guide.
No additional user action is required in the Configuration Progress screen unless a failure occurs. For more information, see "General Troubleshooting During the Configuration Phase in GUI Mode" in the Oracle Fusion Applications Upgrade Guide.
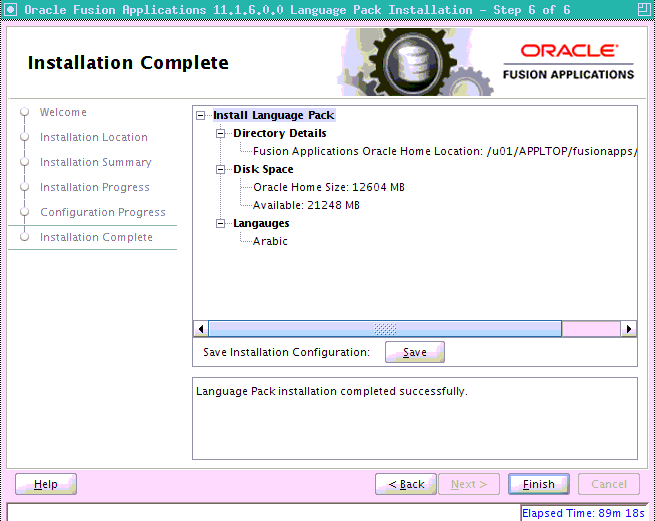
Summarizes the installation just completed. If you want to save this configuration to a response file, click Save. For more information, see "How Response Files Work" in the Oracle Database Installation Guide 11g Release 2 (11.2) for Linux.
To complete a successful installation, click Finish. The Finish button is activated only if all mandatory tasks completed successfully. If you want to rerun this session after you resolve failed tasks, click Cancel.