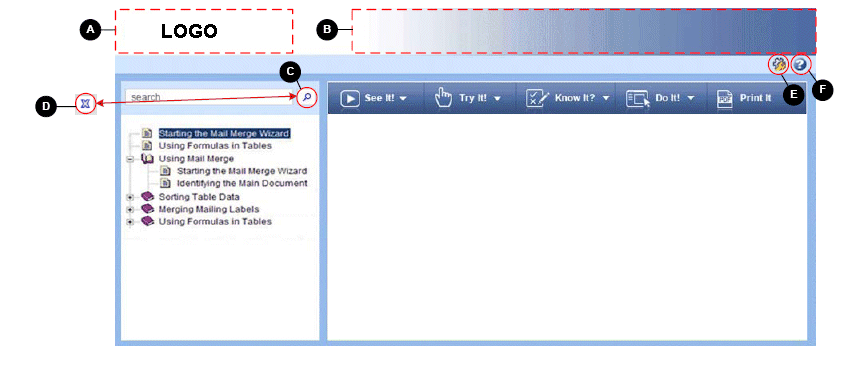
You can customize many of the graphics in the Player interface to fit your corporate look and feel.
There are two basic steps. First, create a graphic file that is the correct size and save it with the correct name. Then, insert the graphic in the style so that it appears in the proper Player location.
Gateway page

The logo can be customized in two locations in the Player. The first location is on the Gateway page when you start up the Player. This graphic is called large_logo.gif. The second location is in the top left corner of the Player interface. This graphic is called small_logo.gif.
Note: You can also use the Customize Logo tool in the Developer to replace the logo. If you use this tool, the logo should be no larger than 230x44 pixels.
Other Player graphics, such as the banner, search, preferences, help, and log out icons can also be customized.
Note: When See Also links are present in the published content, the See Also menu displays next to the preferences and help buttons.
The See Also text style and background color can be changed in the .TocFrameText element in the skin.css file. The arrow button can be replaced in the img folder of the Player style (seealsoarrow.png).
When you have modified the file to the correct size, save it as the appropriate .gif file name and copy it into the publishing project files or the published content located in the Library.