Before you upgrade your Oracle VM Servers, you must upgrade the Oracle VM Manager which manages them. See Section 5.2, “Upgrading Oracle VM Manager” for information on upgrading Oracle VM Manager.
There are two methods you can use to upgrade Oracle VM Servers:
There are two supported ways to upgrade: you must use either Oracle VM Manager to perform an Oracle VM Server upgrade from a Yum repository, or the Oracle VM Server CD.
This section directs you to the location in the Oracle VM
documentation which discusses upgrading the Oracle VM Servers in your
Oracle VM Release 3.x environment
using a Yum Repository. This is the preferred method for
upgrading Oracle VM Servers.
To upgrade Oracle VM Server using a Yum repository, you must first set
up a Yum repository based on the Oracle VM Release
3.x channel on ULN. When you have
created the Yum repository, add the Yum repository to Oracle VM Manager.
You then use Oracle VM Manager to perform the upgrades on the Oracle VM Servers.
For information on setting up an Oracle VM Server Yum repository and
using Oracle VM Manager to perform the upgrade of Oracle VM Servers, see
Updating and Upgrading Oracle VM Servers in the
Oracle VM User's Guide.
To upgrade the Oracle VM Server using the Oracle VM Server CD:
Burn the Oracle VM Server ISO file to a bootable CD.
Start the Oracle VM Server installer by following the steps in Section 2.2, “Installing Oracle VM Server From a CD”.
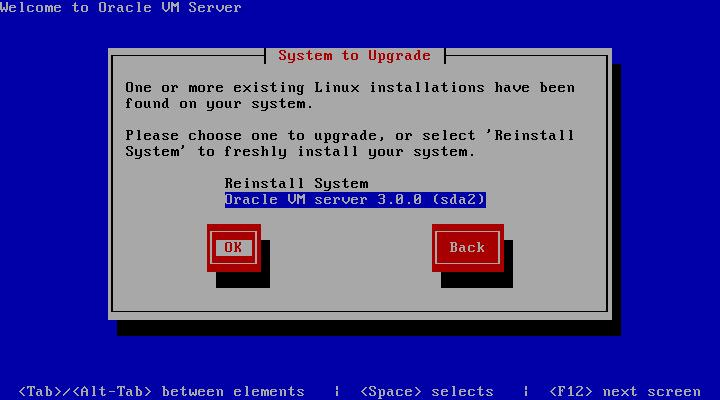
If an existing Oracle VM Server installation is found on the computer, the System to Upgrade screen is displayed.
Select Oracle VM Server 3.x (disk) to upgrade the existing installation.
Select OK and press Enter.
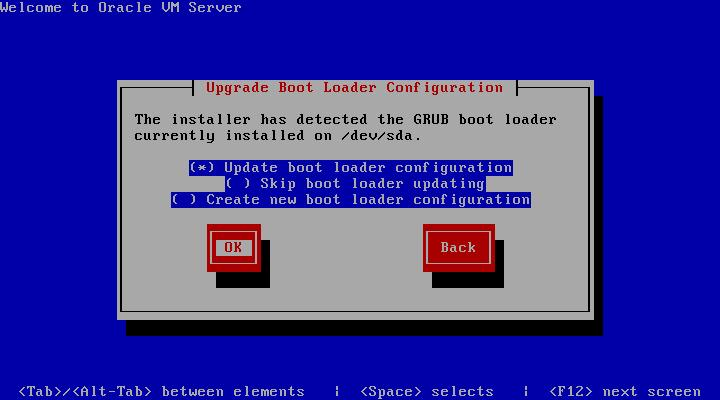
The Upgrade Boot Loader Configuration screen is displayed.
Select Update boot loader configuration to update the existing boot loader. Select Skip boot loader updating to make no changes to the boot loader. Select Create new boot loader configuration to create a new boot loader.
Select OK and press Enter.
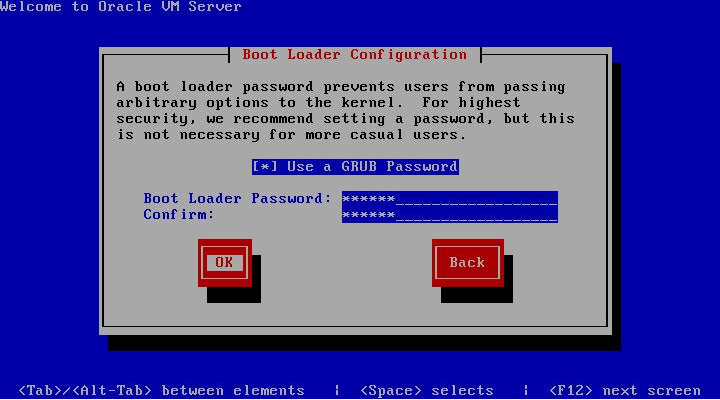
If you selected Create new boot loader configuration, the Boot Loader Configuration screen is displayed.
The Boot Loader Configuration screen is displayed.
If you want to set a boot loader password to increase security of your machine, select Use a GRUB Password, enter a password in the Boot Loader Password field, and re-enter the password in the Confirm field.
WarningDo not use boot loader passwords if Distributed Power Management (DPM) is used. A boot loader password has to be entered manually with every boot, which prevents DPM from starting a server successfully. For more information about DPM, see Server Pool Policies in the Oracle VM User's Guide
Select OK and press Enter.
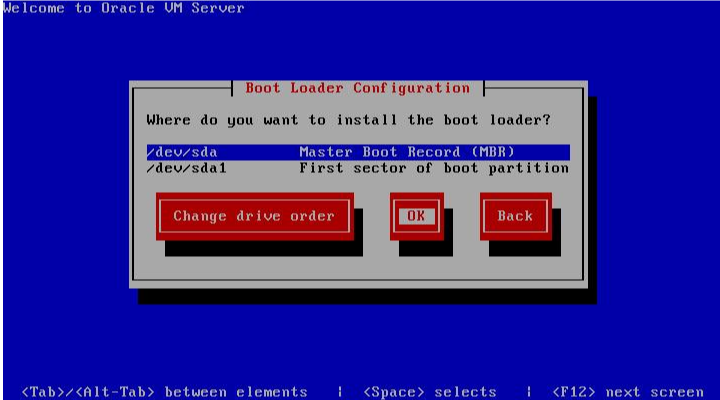
The Boot Loader Configuration screen is displayed.
Select Master Boot Record (MBR) or First sector of boot partition as the location to install the boot loader. If you want to change the drive order, select Change drive order and follow the prompts to change the drive order.
Select OK and press Enter.
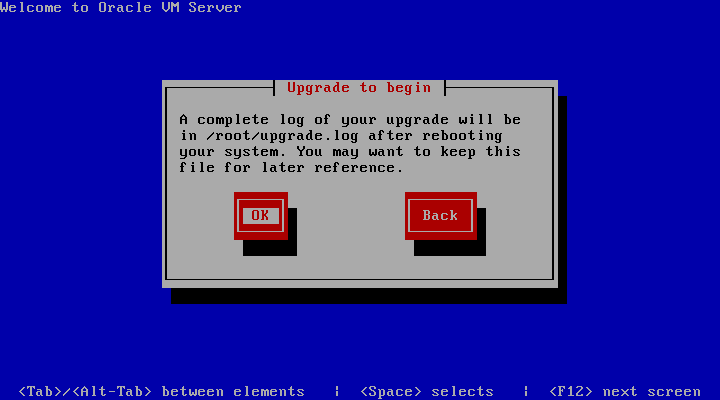
The Upgrade to begin screen is displayed.
Select OK and press Enter. The installer installs and configures Oracle VM.
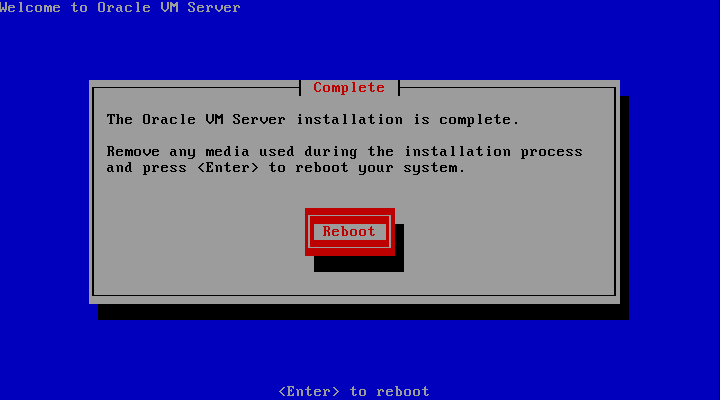
When all files are installed and configuration complete, the Complete screen is displayed.
If you performed the upgrade from the CDROM drive, remove the Oracle VM CDROM.
Select Reboot and press Enter. The computer reboots.
The Oracle VM console is displayed.
The Oracle VM Server upgrade is complete.
A log of the install is located in /root/upgrade.log. If the installation fails, review this log file for help identify the cause of any installation problems.
Upgrading Oracle VM Server from Release 3.0.3 or 3.1.1 to Release 3.2 using the CD or a YUM repository in a multipath boot from SAN environment is not supported. If this type of upgrade is attempted the Oracle VM Server panics after a reboot. You can, however, upgrade Oracle VM Server using a YUM repository in a single path (no multipath) boot from SAN environment.
To upgrade Oracle VM Server from Release 3.0.3 or 3.1.1 to Release 3.2 using multipath boot from SAN, follow which ever instructions below apply to your configuration.
For more information on configuring multipath SANs, see Enabling Multipath I/O Support.
To upgrade Oracle VM Server with multiple paths:
Revert the Oracle VM Server to use single path SAN boot by removing all disk paths, leaving only one path visible to the Oracle VM Server.
Update the Oracle VM Server grub.conf file to use the no multipath support initrd.
Add the boot disk wwid to /etc/blacklisted.wwids, for example:
wwid "3600805f3000dd9c0000000006745005b"
Restart the Oracle VM Server. Make sure the Oracle VM Server boots and mounts over the single path SAN disk, for example, sdX 3.
Now the Oracle VM Server is configured to boot from a single path SAN, follow the steps in the next procedure to upgrade the Oracle VM Server and reconfigure multiple paths.
To upgrade Oracle VM Server with a single path:
Upgrade Oracle VM Server using a YUM repository. See Section 5.3.1, “Upgrading Oracle VM Server Using a Yum Repository” for information on upgrading using a YUM repository. Alternatively use a CD to perform the Oracle VM Server upgrade. See Section 5.3.2, “Upgrading Oracle VM Server Using the CD” for more information on upgrading using a CD.
Delete the /etc/multipath/bindings file if it exists.
Run mkinitrd to include multipath, for example:
# mkinitrd --add-multipath -f /boot/initrd-2.6.39-200.0.13.el5uek_mp.img 2.6.39-200.0.13.el5uek
Edit the /etc/fstab file to make sure the entries refer to the /dev/mapper devices of your boot disk:
#UUID=363ca8da-b927-4ace-9b24-d06edb0dba5c /          ext3    defaults       1 1
#UUID=d6be5e20-5946-4ca9-aa88-2e7937461b03 /boot      ext3    defaults       1 2
/dev/mapper/360060160d3102200dcd34d042424e111p2 /          ext3    defaults       1 1
/dev/mapper/360060160d3102200dcd34d042424e111p1 /boot      ext3    defaults       1 2
/dev/mapper/360060160d3102200dcd34d042424e111p3 swap  swap    defaults        0 0
NoteIf you do not know the /dev/mapper device of your boot disk, save the WWID from the /etc/blacklisted.wwids file.
Remove the boot disk entry from the /etc/blacklisted.wwids file.
Edit the grub.conf file to boot the multipath initrd-xxxx_mp.img.
Add additional disk paths.
Restart the Oracle VM Server. The upgrade is completed.