You can convert the operating system and application software on a computer to an Oracle VM hardware virtualized guest image using the Physical to Virtual (P2V) conversion utility. The P2V utility is included on the Oracle VM Server CD. The operating system must be one of the Oracle VM supported guest operating systems. See the Oracle VM Release Notes for a list of the supported guest operating systems. To perform a P2V conversion, the host computer must have a CPU that supports PAE (Physical Address Extension).
The P2V conversion process creates a virtual machine configuration file (vm.cfg), allows you to make some modifications in terms of sizing of the virtual machine hardware, and then replicates the physical image and transfers it over the network to a storage repository using Oracle VM Manager. The image on your physical computer is not changed in any way.
The P2V utility converts disks on the computer to virtual disk images. The first four virtual disk images are created as IDE disks (hda, hdb, hdc, and hdd) on the guest, using the original disk names. Up to seven additional disks are created as SCSI devices (sda, sdb, sdc, and so on). The disk entries in the vm.cfg file look similar to:
disk = ['file:System-sda.img,hda,w',
'file:System-sdb.img,hdb,w',
'file:System-sdc.img,hdc,w',
'file:System-sdd.img,hdd,w',
'file:System-sde.img,sda,w',
'file:System-sdf.img,sdb,w',
'file:System-sdg.img,sdc,w',
'file:System-sdh.img,sdd,w',
'file:System-sdi.img,sde,w',
'file:System-sdj.img,sdf,w',
'file:System-sdk.img,sdg,w',
]
The hardware virtualized guest created by the P2V utility must have it's own network configuration. If you use the same network configuration as the original computer, a network clash may occur as two computers on the network may have the same IP and MAC address. When the guest is started, make sure the network device is detected and a new network device is configured.
You can run the P2V utility interactively, or as an automated process using a kickstart configuration file. When you use the P2V utility with a kickstart file, no user intervention is required.
When you use the P2V utility, you are prompted for all required information.
To create a virtual machine image of a computer:
Insert the Oracle VM Server CDROM into the CDROM drive of the computer you want to image.
NoteThis procedure is for 64-bit computers. If you want to convert a 32-bit host computer to a virtual machine template, you must use the Oracle VM 2.x CD.
Start the computer with the Oracle VM Server CDROM.
The Oracle VM Server screen is displayed.
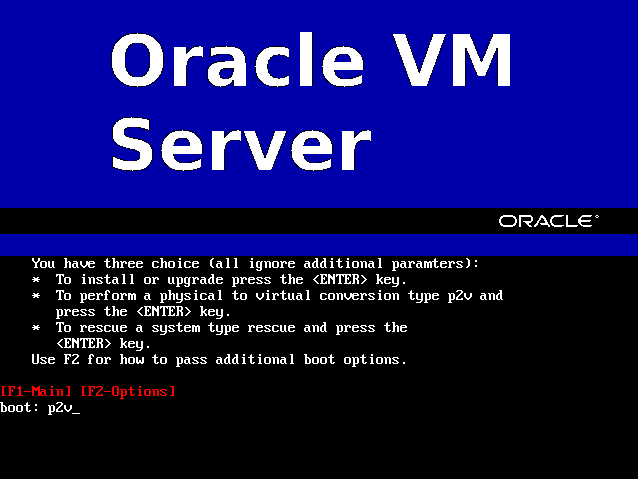
At the
boot:prompt, enter:p2v
Press Enter.
The CD Found screen is displayed.
If you want to make sure the CDROM is error free, you can have the installer test it for errors. To test the CDROM, select OK and press Enter. The CDROM is tested and any errors are reported.
To skip media testing and continue with the installation, select Skip and press Enter.
The P2V Network Configuration screen is displayed.
Select your Ethernet driver from the list displayed.
If your computer uses DHCP to assign its IP address, select Automatically obtain via DHCP.
If your computer uses a static IP address, select Manually configure, and enter the IP address and netmask, gateway, domain and name server for your computer.
Select OK and press Enter.
The disk selection screen is displayed.
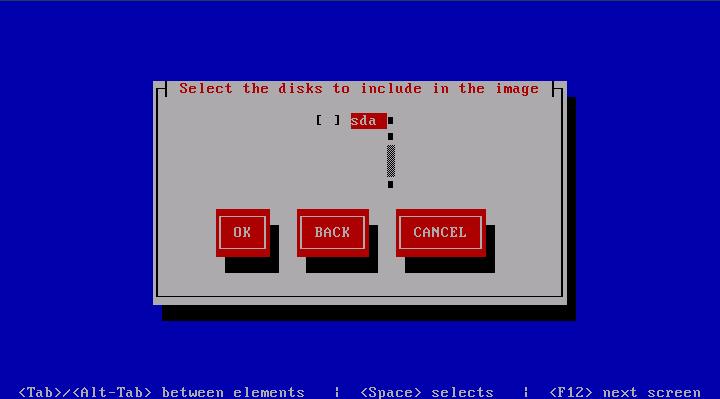
Select the disk partition(s) on the computer to include in the guest image. Select OK and press Enter.
The Other parameters for VM screen is displayed.
Enter information about the guest image for:
VM (guest) name
VM (guest) memory
Number of virtual CPUs
Console password. This is no longer required, but you must enter a value.
Select OK and press Enter.
A secure web server (HTTPS) is started. The IP address of the computer, and port number the web server is available on is displayed.
Open a web browser on another computer and enter the URL created using the information displayed on the computer running the P2V utility, for example
https://192.168.2.6/
You do not need to enter the port number as this is the default port number for HTTPs connections. A directory listing is displayed which contains the files created by the P2V utility. Take a note of the URLs for the vm.cfg and *.img files as you use them in the next step when importing the virtual machine into Oracle VM Manager.
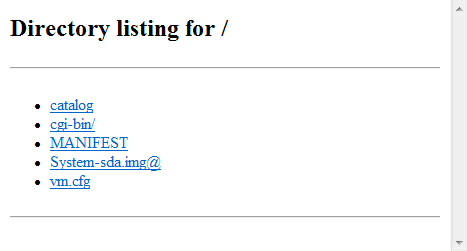
Log in to Oracle VM Manager and import the guest using the import template feature. When you import the guest, you should add the URLs for each virtual disk image and the virtual machine configuration file on a new line in the Template URLs field in the Import Template dialog, for example:
https://192.168.2.6/System-sda.imghttps://192.168.2.6/vm.cfg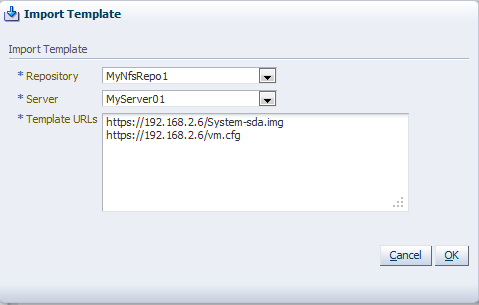
See Section 7.5.3.2, “Importing a Virtual Machine Template” for information on importing templates.
When the virtual machine template is added to the repository, you should terminate the P2V utility on the host computer. Press Control+C to terminate the P2V utility on the computer. Remove the Oracle VM Server CDROM from your CDROM drive. Restart the computer.
The guest image is created and available in the repository as a hardware virtualized virtual machine template.
You can use a kickstart file to automate the creation of a guest image of a physical computer using the P2V utility. When you use the P2V utility with a kickstart file, no user intervention is required. If there are any missing parameters in the kickstart file, you are prompted to enter them.
To use a P2V kickstart file, you must create a file with the P2V configuration options and parameters and place it on a kickstart server. The kickstart server can be made available using NFS, FTP, or HTTP. The kickstart server is set up in the same way as a standard Oracle Linux or Red Hat kickstart server and is beyond the scope of this book.
The following example P2V kickstart file starts sends the guest image to an instance of Oracle VM Manager via network device eth0, which obtained an IP address via DHCP:
p2v
cdrom
lang en_US.UTF-8
keyboard us
target --ovmmanager
network --device eth0 --bootproto dhcp
diskimage --device /dev/sda --type IDE
vm_options --name myGuest --mem 1024 --vcpus 1 --consolepasswd mypassword
See Appendix A, P2V Parameters for detailed information on the P2V kickstart file options and parameters.
To create an Oracle VM virtual machine image of a computer using the P2V utility with a kickstart file:
Create a P2V kickstart file and copy it to your kickstart server.
Insert the Oracle VM Server CDROM into your CDROM drive of the computer you want to image.
Restart the computer with the Oracle VM Server CDROM.
The Oracle VM Server screen is displayed. At the
boot:prompt, enterp2vand the protocol and location for the kickstart file. For example, to use a kickstart file called ks.cfg on an HTTP server named http://example.com, enter:p2v ks=http://example.com/mypath/ks.cfg
Press Enter.
If there are any missing parameters in the kickstart file, you are prompted to enter them.
If the kickstart file includes the directive to import the guest image to Oracle VM Manager, a secure web server (HTTPS) is started. A screen is displayed giving the IP address of the computer, and port number the web server is available on. Log in to Oracle VM Manager and import the guest using the import template feature as described in Section 8.1.1, “Using the P2V Utility”.
When the virtual machine template is added to the repository, you should terminate the P2V utility on the host computer. Press Control+C to terminate the P2V utility on the computer. Remove the Oracle VM Server CDROM from your CDROM drive. Restart the computer.
The guest image is created and available in the repository as a hardware virtualized virtual machine template.