| Oracle® Enterprise Data Quality for Product Data Application Studio Reference Guide Release 11g R1 (11.1.1.6) Part Number E29128-03 |
|
|
PDF · Mobi · ePub |
| Oracle® Enterprise Data Quality for Product Data Application Studio Reference Guide Release 11g R1 (11.1.1.6) Part Number E29128-03 |
|
|
PDF · Mobi · ePub |
This chapter explains how to manage your DSAs and associated tasks including the following:
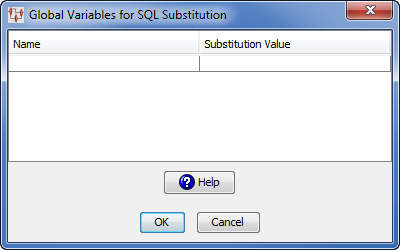
You can quickly change variables that appear in your SQL statements throughout your DSA globally. This is useful to ensure that variables are modified in all places to avoid errors, improves consistency, and avoids opening each SQL statement to modify it manually. The following two types of global variables can be changed:
There are two System Defined Variables, &JOBID& and &USERID&. If a SQL statement contains one of these two strings, the entire string, including the ampersands (&), is replaced with the ID of the current job, or the ID of the user who created the job.
Defined by specifying a name and a value in the table. The name must consist of letters and numbers only; all other characters are invalid.
Use the following steps to change global variables:
From the Edit menu, select Edit Global Variables.
Note:
All values entered are case insensitive.Enter the names of the variables you want replaced in the Name field.
Enter the substitution values for each variable in the Substitution Value field.
Click OK.
All values are globally replaced in all SQL statements that contain the named values in your DSA.
The Application Studio DSA options that you can configure are restricting the use of DSAs to specific server types, running them with ultra-high priority, and the allowable number of database errors per job.
From the Tools menu, select DSA Options.
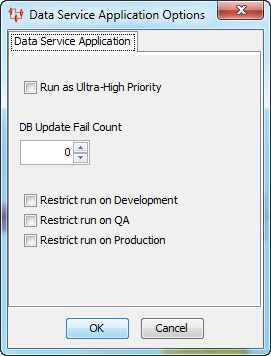
Select the Run Ultra-High Priority DSA check box to run all DSA jobs with the highest priority and click OK. You should use this option for DSAs that are designed to deliver super fast, single-line requests to the Oracle DataLens Server.
Note:
No logging takes place so nothing is displayed in the Job Status page and the Job Id number is negative. Jobs that start and finish with a negative Job Id are shown in thedataserver.log file.Select the number of database errors that you want to allow before a job is terminated by the Oracle DataLens Server with the DB Update Fail Count control. When set to zero (the default), jobs continue to run regardless of a database failure and do not terminate.
Select one or more check boxes to indicate the Oracle DataLens Servers on which this DSA will be restricted for use and viewing by users.
You can restrict users from using and viewing DSAs on your various types of servers by using these check boxes in conjunction with editing a user's roles for the use of the Application Studio on Role Administration page in the Oracle DataLens Servers Administration Web pages. For more information about role administration, see Oracle Enterprise Data Quality for Product Data Oracle DataLens Server Administration Guide.
Click OK to use the changed options immediately.
To set the global Application Studio options to be used throughout the application:
From the Tools menu, select Options.
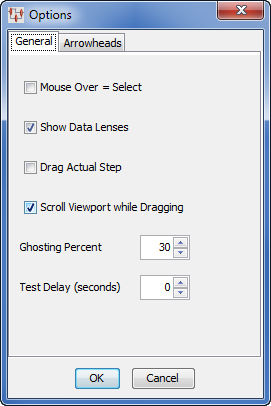
Select the available controls as appropriate from the following:
Mouse Over = Select Check Box
Allows you to select nodes in the DSA simply by hovering over a node with the mouse pointer. This option is set by default.

Show Data Lenses Check Box
Allows you to toggle the display of data lenses in use in the DSA Component Tree pane. This option is set by default.
Drag Actual Step Check Box
Enables a visual effect that causes a step's connection lines to follow the step when it is being dragged to a new position; it has no impact on system processing. When disabled, the visual effect is that the step appears to be unconnected.
Scroll Viewport while Dragging Check Box
Enables a visual effect that automatically scrolls the view in the Graphical DSA Builder pane when you drag a node to the edge of the pane. This is useful for DSAs that are larger than the pane. When deselected, you must manually scroll the display when you drag a node to the edge of the pane to view the rest of the DSA and continue dragging the node.
Ghosting Percent List
Allows you to select the level of ghosting on the steps when the Show All Lines option is not selected. This option is set to 100% by default. For more information about toggling the lines in the Graphical DSA Builder, see "Graphical DSA Builder Pane".
Test Delay List
This setting controls the delay between consecutive steps changing color during single-line testing of a map. This option is set to 0% by default.
Click the Arrowheads tab.
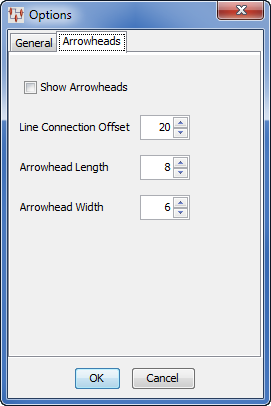
Select the available controls as appropriate from the following:
Show Arrowheads Check Box
Allows you to toggle the arrowheads on the DSA connection lines on and off.
Line Connection Offset List
Allows you to set how far away the connection line is from the step. The maximum is 40 pixels.
Arrowhead Length and Width Lists
Allows you to set how long and wide you want the arrowheads to appear in the Graphical DSA and Map Builders. The maximum length is 20 pixels; the maximum width is 12 pixels.
Click OK.
All of your selections are immediately implemented.
You must check in a DSA to the Oracle DataLens Server so that you can use it to process your data.
From the DSA menu, click Check-In… or use the toolbar button of the same name.

Enter a check in comment, which will be associated with the new revision.
You can use the Previous Comments button to view prior check-in comments.
Tip:
Change history can also be viewed on the Oracle DataLens Server Administrator Web pages. See Oracle Enterprise Data Quality for Product Data Oracle DataLens Server Administration Guide.Make selections from the check boxes that function as follows:
Deploy to Development after Check-In
The DSA is available for use by others after check-in. This allows you to deploy the DSA to the Oracle DataLens Server for testing or not deploy to the Oracle DataLens Server it if you are simply checking in work-in-progress.
Keep locked for more editing
Clearing this check box will make the DSA 'read-only' and activates the Delete local Data Service Application check box.
Delete local Data Service Application
Deletes this DSA from your local drive.
Click OK.
Upon successful check-in and deployment, the Status Field in the client workspace frame is updated.
You can check out a local copy of a DSA from the current Oracle DataLens Server for review, maintenance, or as a new DSA.
From the DSA menu, click Check-Out… or use the toolbar button of the same name.
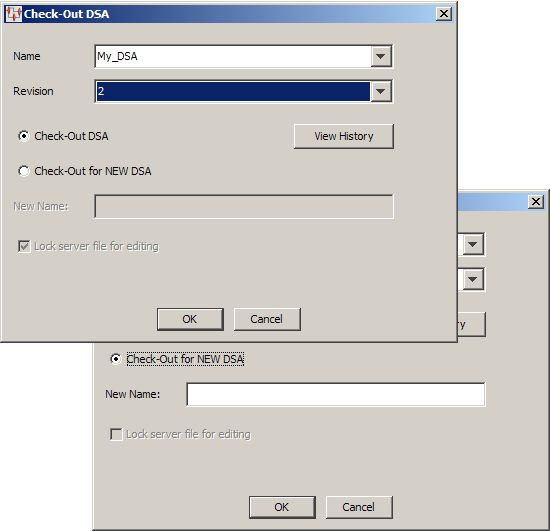
Select a DSA from the Name list.
Select the DSA revision that you want to check out.
You can use the View History button to view prior check-in comments.
Select the appropriate option for the action you want to take.
If you select Check-Out for NEW DSA, a new DSA will be created based on the DSA revision you have selected and you must enter a name for the new DSA.
Note:
The Oracle DataLens Server file is automatically locked for editing only when you select the Check-Out DSA option.If you want to lock the DSA on the server, select the Lock Server file for editing check box.
Click OK.
The selected DSA is checked out or created and opened for editing.
Validates the entire DSA and informs you of any issues found so that you can correct them to ensure that the DSA operates properly. You must validate a DSA before you can test it, check it in, or save it.
From the DSA menu, select Validate or use the toolbar button of the same name.
The DSA is validated. A message appears indicating that there were no problems found or listing all errors found. The specific steps and transformation types found to be in error are reported.
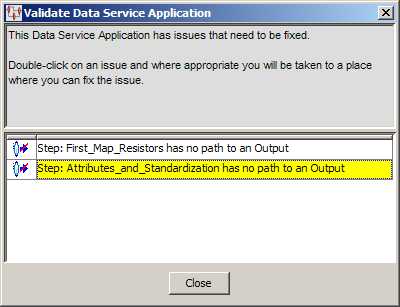
The most common errors are steps that do not flow to an output, and mismatches between the output of a step and the input of the next.
Note:
Successful map validation is required prior to checking in a DSA.After you have completed your DSA, it is recommended that you perform a unit test. If your DSA calls for Text input, you can perform a unit test by performing the following steps. If your DSA calls for database input, this procedure for unit testing is not applicable. To test the open DSA, select Test Data Service Application from the DSA menu or click the button of the same name on the toolbar.
Note:
If you have unsaved changes or errors are found when the save is attempted, you are alerted and can choose to correct these errors by clicking No or Cancel.
The Test Data Service Application dialog box appears and is used as follows:
Select an output step to test from the Output Step list.
Click Test to review your testing results.
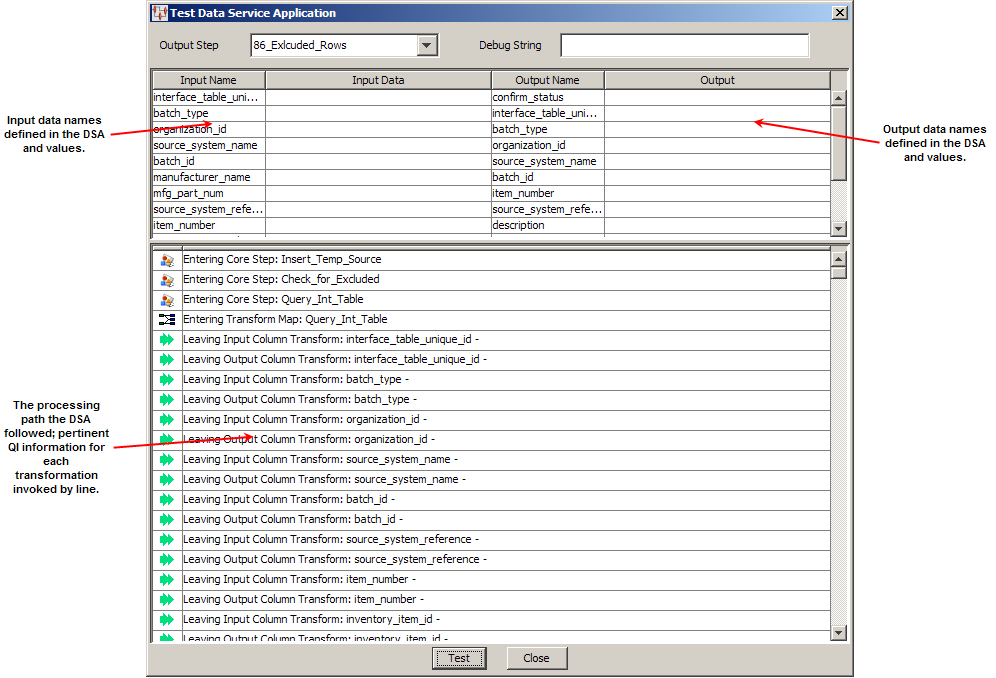
You can enter data into any of the Input Data fields then click the Test button to view the results in the corresponding Output field. This can help you verify the operation of the map and isolate any errors that may exist.
Click Close to conclude testing.
You can check out a DSA and all or some of the data lenses associated with it all at one time.
From the DSA menu, select Check-Out Package.
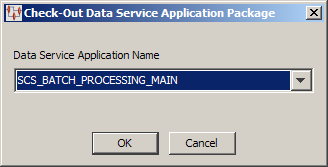
Select the DSA that you want to check out and click OK.
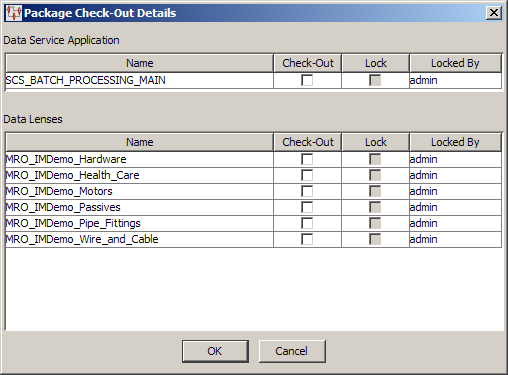
Next, select the check boxes for each individual component to check-out, which automatically sets the component to be locked upon check out. Click OK to check out all selected components to your local machine for modification.
A verification prompt appears. If you select OK, the check out continues; selecting Cancel stops the action. A progress dialog box appears so that you can view the checkouts as they occur and details any errors found.
Similar to checking out a DSA package, you can check in a DSA and all or some of the data lenses associated with it at one time.
From the DSA menu, select Check-In Package.
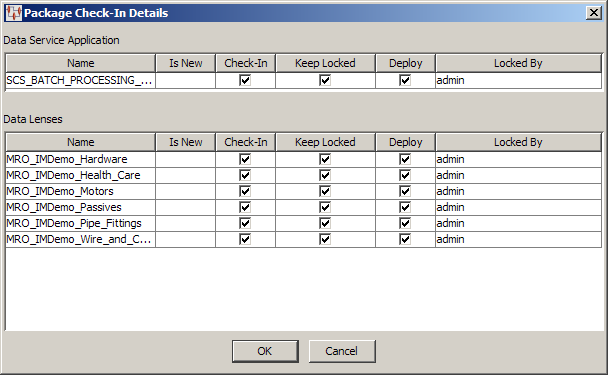
Use the check boxes to select whether you want the DSA and/or the data lenses checked in, kept locked for more editing, or deployed. Click OK to execute the actions that you have selected. A progress dialog box appears so that you can view the check ins as they occur and details any errors found.
You use this option to set the test server to the location of the Oracle DataLens Server that you want to use to test your DSAs and maps.
From the Tools menu, click Set Test Server.
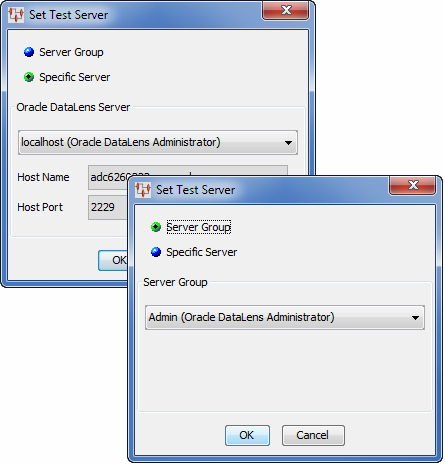
You can choose to select a specific test (development) Oracle DataLens Server or an Administrator or Development server group to use for DSA testing.
Select either the Server Group or Specific Server option.
Click the down arrow to view your Oracle DataLens Server options, and select the appropriate server.
If selecting a server group, you can choose any of your Administrator or Development server groups; the Administrator server group is the default.
Click OK.
The test server is contacted and this new Oracle DataLens Server is used for all testing.
The description that was provided when you created a DSA can be changed to provide a different or more detailed description as to the use of the DSA.
From the Edit menu, click Edit Description.
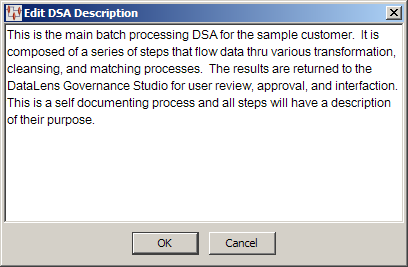
Modify or add to the existing description of the DSA
Click OK.
You can create a specific group of data lenses for use with all Item Definition transformations in your DSA instead of selecting them individually in each transform. A data lens group can be used in one or multiple DSA steps and in multiple DSAs.
Data lens groups allow you to update the lens group and have it automatically apply that change across all DSAs and DSA transform steps using that data lens. This avoids the need to update each Transformation Map throughout the DSA when you want to add or remove a data lens. This feature greatly increases consistency and reduces errors in DSAs.
You can view and delete all data lens groups from the Oracle DataLens Server though you must create and edit them in the Application Studio. See Oracle Enterprise Data Quality for Product Data Oracle DataLens Server Administration Guide.
Note:
If your process requires the use of multiple data lenses, you must use a Decision Map.To create an Item Definition transformation lens group:
Close any open DSA. Data lens groups cannot be created or edited when a DSA is open.
From the Edit menu, select Create/Edit Lens Group....
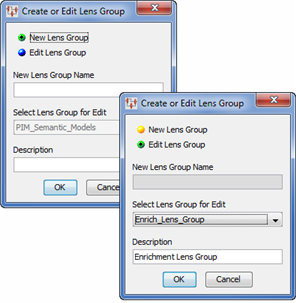
Select one of the following options:
New Lens Group then enter a descriptive name for the new lens group and a description that indicates its purpose. Both of these fields must be completed
Edit Lens Group then select an existing lens group from the Select Lens Group for Edit list box. (Optionally) You can change the description.
Click OK.
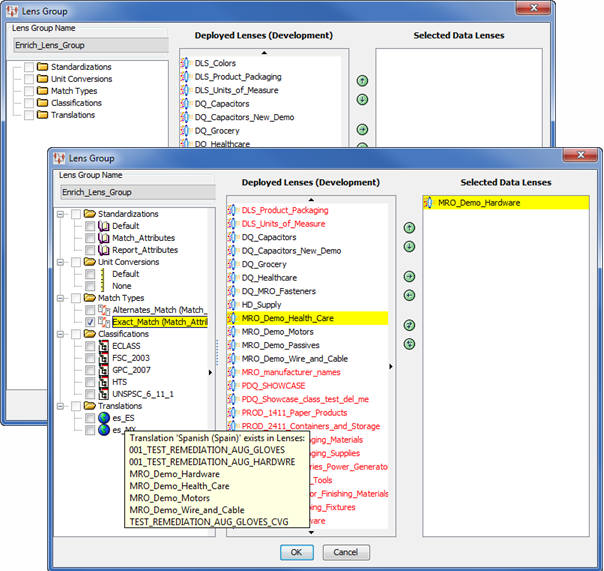
The three panes are:
Left pane—Lists all of the Standardization, Unit Conversion, Match, Classification Types (or customization types) and translations that appear in the selected data lenses. It populates and is refreshed with each data lens selection. Initially when only one lens is selected, all values appear in black. As more lenses are selected to be a part of the data lens group, some items appear red; these red items are not compatible with one or more data lenses in the overall data lens group and cannot be selected. The black items represent the intersection of all of the compatible available items between the lenses in the data lens group.
Deployed Lenses (Development) center pane—All of the data lenses that are deployed on your Oracle DataLens Server and that you have been granted access to are displayed. Only Development data lenses can be used to create a lens group. Initially when no data lenses are selected, all data lenses appear in black. When a data lens is selected, some of the data lenses appear red; these red data lenses are not compatible with one or more data lenses in the overall data lens and cannot be selected. The black data lenses represent the intersection of all of the compatible available items between the data lenses in the data lens group.
For lengthy lists, arrows appear at the top, bottom, and right so that you can view the entire list.
Selected Data Lenses right pane—Displays your data lens selections. When creating a lens group this pane is empty while when editing this list is populated.
Data Lenses are moved between center and right panes using the right and left arrows or by double-clicking on a data lens. The up and down arrows are used to change the data lens processing order.
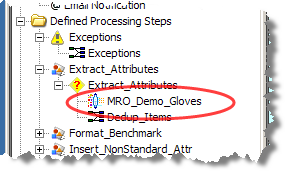
Once you select a data lens, the left and center panes redisplay as in this example. The left pane displays all of the customization types and translations that each of the selected data lenses contain. The center pane displays the data lenses that are available for your selection. Any deployed customization type, translation, or data lenses that appear in red in either pane are not compatible with one or more of the selected data lens in the right pane because there is an incompatibility due to the Unit Conversion, Standardization, or Match types being different.
As you make selections using the check boxes in the left pane to create the lens group that fits your needs, the left and center panes are continuously filtered to indicate what is available for application in your lens group.
In the left pane, you can hover over any of the check boxes to view a list of lenses which contain the selected customization type. Hovering over any of the items shows either where it exists or does not exist in the selected data lenses.
Complete your lens group selections and click OK.
The lens group is created on your Oracle DataLens Server and a confirmation message is displayed.
Click OK.
Note:
Data lens groups can only be deleted using the Oracle DataLens Server. For more information, see Oracle Enterprise Data Quality for Product Data Oracle DataLens Server Administration Guide.You can see if you have any tasks assigned to use with this feature.
From the View menu, select View My Tasks.
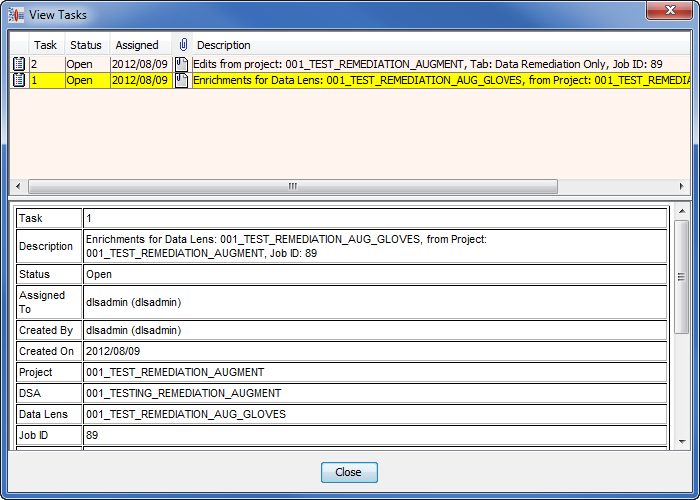
All assigned tasks are displayed in the top pane, while the bottom pane provides the details for the selected task.
Note:
Though the fields in the bottom pane appear to be editable, the changes are not saved.The context-sensitive menu in the top pane is activated by right-clicking a task and is used as follows:
| Change Task Status
You can changes the status of the task, see "Changing the Task Status". |
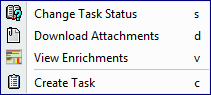 |
| Download Attachments
This option is displayed if the task has a file attached. You can download the file that was saved when the task was created for use in completing the task. If this is a data enrichment task, this is the file that you can import into your data lens in the Knowledge Studio. A file save dialog appears for you to select the directory in which to save the file. The default download directory is in the user's View Enrichments This option is displayed when there are data enrichment tasks available for review; these tasks are identified with "Enrichments for Data Lens" prepending the task description. See "Viewing Data Enrichment Tasks". |
|
| Create Tasks
You can create a new task a new task. See "Creating a Task". |
|
Selecting this option allows you to change the status of the task and/or reassign the task to another user.
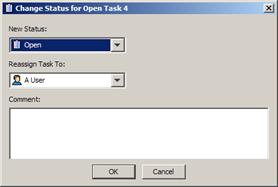
Select a new status and/or a user to reassign the task to from the list.
Tip:
You can use the Unassigned Tasks user if you are unsure who you want to review this task and intend to assign it the proper person later.Enter a comment that reflects why you have affected the change for future reference or to alert the new recipient of the task why they are now responsible for it.
Click OK.
Selecting this option allows you to create an entirely new review task.
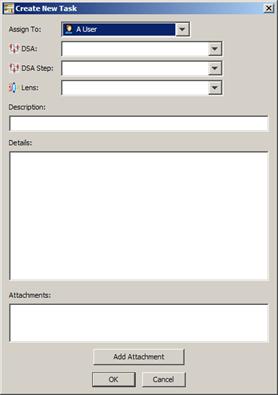
Select a user to complete this task.
Select the DSA and the DSA step that you want to change.
Select the data lens to which the change is to be applied.
Enter a description and specific instructions on how to perform the task.
If you have a data file or other information that you want to attach, click Add Attachment, locate the file, and then click OK.
Repeat this step until all necessary files are attached.
Click OK.
The task is created and an email containing the task details is sent to the assigned user.
Selecting this option displays the proposed data enrichment tasks in the upper pane. You may which of these enrichments you wish to import into your data lens. Additionally, any data enrichment suggestions submitted by user's for you to consider manually adding to your data lens are displayed in the lower pane.

There are no actions available in the View Enrichments dialog box as this is informational only. You can use it before attempting to import enrichments into your data lens and is particularly helpful when you are importing all of the enrichments in Knowledge Studio from the file available for download from the View Tasks dialog box. See Oracle Enterprise Data Quality for Product Data Knowledge Studio Reference Guide.
|
Copyright © 2001, 2013, Oracle and/or its affiliates. All rights reserved. Legal Notices |
|