| Oracle® Enterprise Data Quality for Product Data Oracle DataLens Server Installation Guide Release 11g R1 (11.1.1.6) Part Number E29137-05 |
|
|
PDF · Mobi · ePub |
| Oracle® Enterprise Data Quality for Product Data Oracle DataLens Server Installation Guide Release 11g R1 (11.1.1.6) Part Number E29137-05 |
|
|
PDF · Mobi · ePub |
This chapter describes how to run the EDQP installer in console mode in different operating system environments.
This chapter contains the following sections:
This section describes how to start the installation program in console mode in different environments. It contains the following sections:
Section 3.1.1, "Starting Installation Programs in Console Mode on Linux and UNIX"
Section 3.1.2, "Starting the Installation Program in Console Mode on Windows"
Note:
When installing EDQP on a UNIX or Linux operating system, do not run the installation program as the root user.To start the installation program in console mode on a Linux or UNIX system using a .sh installation file, follow these steps:
Log in to the target system as your administrator user. See Section 2.3.2, "Establishing the Required User Accounts".
Go to the installation directory, /opt/edqp_install/edqp/Disk1.
Note:
Ensure that all files in the directory have executable permissions for the user you logged in with before continuing.Start the installation by entering the following command:
./file_name.sh
file_name.sh is the name of your installation program; for Linux it is dlsinstall_linux.sh, for Solaris it is dlsinstall_solaris.sh.
***************************************************************************
*
Welcome to the Oracle Enterprise Data Quality for Products 11.1.1.6 Installation
.
Copyright (c) 2012, Oracle and/or its affiliates. All rights reserved.
***************************************************************************
*
Please Enter the location of the JDK directory: (/opt/jdk1.6.0_30)
The installation program begins to install the software. Proceed to Section 3.2, "Installing EDQP in Console Mode," to continue.
To start the installation program in console mode on a Windows platform, follow these steps:
Log in to the target Windows system as your administrator user. See Section 2.3.2, "Establishing the Required User Accounts".
Locate the MS-DOS Command Prompt (cmd.exe), right-click on it, and then select Run as administrator.
Go to the installation directory C:\edqp_install\edqp\Disk1.
Start the installation by entering the following command:
dlsinstall_windows.bat.
***************************************************************************
*
Welcome to the Oracle Enterprise Data Quality for Products 11.1.1.6 Installation
.
Copyright (c) 2012, Oracle and/or its affiliates. All rights reserved.
***************************************************************************
*
Please Enter the location of the JDK directory: (C:\Program Files\Java\jdk1.6.0_30)
The installation program begins to install the software. Proceed to Section 3.2, "Installing EDQP in Console Mode," to continue.
After starting the installation program, follow these steps to complete the installation:
At the JDK directory prompt, press Enter to use the displayed default JDK directory location or enter the directory you installed your JDK in.
Will this be a full installation ( including the WebLogic Server)? [Y/N]: (Y)
Enter Y if you want to install EDQP and WebLogic Server or N to install EDQP only. You should only answer N if you have already installed WebLogic Server.
On Linux and UNIX:
Please enter the path to the Weblogic installation jar file: ( /opt/edqp_install/edqp/Disk1/wls1036_generic.jar)
On Windows:
Please enter the path to the Weblogic installation jar file: ( Please enter the path to the WLS installation Jar file: (C:\edqp_install\edqp\Disk1\wls1036_generic.jar)
Press Enter to use the displayed default installation directory location or enter the full path of the directory you copied the wls1036_generic.jar file into (for example, /scratch/installs/wls1036_generic.jar.)
The default installation directories that this file may be in are:
On Linux and UNIX: /opt/edqp_install/edqp/Disk1
On Windows: C:\edqp_install\edqp\Disk1
See Section 2.3.4, "Downloading the WebLogic Server Installer From Oracle E-Delivery".
On Linux and UNIX:
Please enter the location for the new WLS Middleware home directory: (/opt/Oracle/Middleware)
On Windows:
Please enter the location for the new WLS Middleware home directory: (C:\Oracle\Middleware)
Enter the Middleware home directory that will serve as the central support directory for all Fusion Middleware products (including WebLogic Server) installed on the target system. See Section 2.4, "Selecting Directories for Installation".
If you specify a directory that does not exist, the installation program creates it for you.
Please enter the name of the new WLS Administrator: (dlsadmin)
Press Enter to use the recommended WebLogic domain administrator name, dlsadmin, or enter a name and press Enter. See Section 2.3.2, "Establishing the Required User Accounts".
Please enter a password for the new WLS Administrator (dlsadmin1)
Press Enter to use the recommended WebLogic domain administrator password, dlsadmin1, or enter a password and press Enter. The password must be at least eight characters.
Will this be an EDQP Admin Server or EDQP Transform Server Installation?[A/T] (A)
Specify the type of server you want to install, an A for Administration Server or T for a Transform Server, and press Enter.
The following additional steps occur when you are installing a Transform Server:
This Transform server should be added to a server group in the server topology before continuing with the install.
Continue with the installation? [Y/N]: (Y)
Ensure that you have added the Transform Server you want to install to a server group so that communication between it and an Administration Server can be established during installation. See Oracle Enterprise Data Quality for Product Data Oracle DataLens Server Administration Guide.
Enter Y and press Enter to continue the installation.
The EDQP Transform Server needs to communicate with the datasource on the EDQP Admin Server.
Please enter the hostname of the Admin Server: (myexample.com)
Enter the fully qualified host name or the IP of the Oracle DataLens Administration Server that this Transform Server will communicate with.
Please enter the port number to use for the new WLS domain: (2229)
Press Enter to use the default port, 2229, or enter the port number for your Oracle DataLens Server to listen and press Enter. The port must be between 1024 and 65536.
On Linux and UNIX:
The Max Heap space should be set to a max of 80% of the physical memory
Please enter the maxheap size (in Mb):
On Windows:
The Max Heap space should be set to a max of 80% of the physical memory (6494)
Please enter the maxheap size (in Mb):  (2048)
The Max Heap space should be set to a max of 80% of the physical memory (12720)
Enter the desired memory allocation or to allocate the recommended 80% enter
the calculated amount. The installation will not proceed if the memory
allocation is greater than 80% (in Mb):  (2048)
For maximum performance of both the Oracle DataLens Server and the WebLogic server, you should calculate what 80% of your total physical server memory is so that it can be correctly set. When installing on Windows, this value is calculated, as in the preceding example, and should be used; no memory calculations are made on Linux or UNIX.
Enter the server memory calculation and press Enter or on Windows simply press Enter.
The installation begins and runs as a background process. On all platforms you must allow the installation session to continue to completion.
Note:
It is normal for the installation program to pause for a long time, especially toward the end. The installation program is still working while this occurs.After the installation completes, the following message is displayed:
On Linux and UNIX:
You are returned to your operating system prompt once the installation completes.
On Windows:
Run the following script to start the domain.C:\Oracle\Middleware\user_projects\domains\dls_domain\bin\startWebLogic.cmd

Finished the Oracle Enterprise Data Quality for Products 11.1.1.6 Installation.(Enter to Exit)
Press Enter to exit the installer.
Start your WebLogic Server EDQP domain (the default is dls_domain) using one of the following where dls_domain is the name of your EDQP domain:
On Linux and UNIX:
cd /MW_HOME/user_projects/domains/dls_domain/bin/
nohup ./startWeblogic.sh &
On Windows:
cd \MW_HOME\user_projects\domains\dls_domain\bin\
startWeblogic.cmd
This section describes how to verify your Oracle DataLens Server installation and is applicable to all operating systems.
Verify that the server is up and running correctly:
Open one of the supported web browsers for your environment.
Enter the following URL:
http://hostname:port/datalens
where hostname is the DNS name or IP address of the Administration Server and port is the listen port on which the Administration Server is listening for requests (port 2229 by default).
If you configured the Administration Server to use Secure Socket Layer (SSL) you must add s after http as follows:
https://hostname:port/datalens
When the login page appears, enter a user name and the password. This is the user name and password you specified during the installation process.
The Oracle DataLens Server web pages are displayed and default to the Welcome tab.
If your browser displays, ”The page cannot be displayed”, then the problem could be one of the following:
The WebLogic domain has not been started.
The Oracle DataLens Server repository was removed or corrupted.
Click the Administration tab.
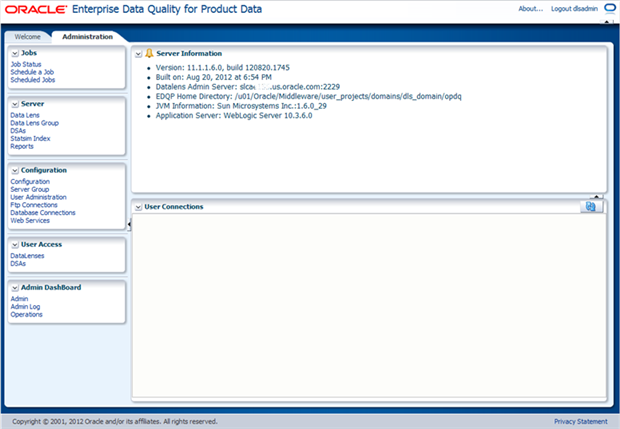
Ensure that the Oracle DataLens Server configuration parameters on the Oracle DataLens Administration Server home page are correct. The JSP Server indicates the version of WebLogic Server that is installed.
(Optional) From the Admin Dashboard panel, click Admin Log and review the Administration Server log file to verify that the server started with no errors.
If no server startup errors have been recorded, then the Oracle DataLens Administration Server installation was successful. For more information about the Oracle DataLens Administration web page, see the Oracle Enterprise Data Quality for Product Data Oracle DataLens Server Administration Guide.
Note:
Any known installation issues are detailed in "Known Issues".This section describes the post-installation steps necessary to completing your EDQP installation.
To avoid any issues with long running processing jobs or checking in large packages, the following post-installation steps must be performed to modify the WebLogic Server environment settings.
Ensure that your WebLogic Server is running on your Oracle DataLens Administration Server.
Open a supported web browser and enter the following URL:
http://hostname:port/console
where hostname is the DNS name or IP address of the Oracle DataLens Administration Server and port is the listen port on which the server is listening for requests (port 2229 by default).
If you configured the Oracle DataLens Administration Server to use Secure Socket Layer (SSL) you must add s after http as follows:
https://hostname:port/console
When the login page appears, enter the user name and the password you used to start the server, and then click Login.
Your WebLogic Administration Console log in web page is displayed.
In the Domain Structure panel for your EDQP domain (dls_domain is the default), click Deployments.
In the Deployments table, click the oracle-edqp link, and then click the Configuration tab.
Enter 3600 in the Session Timeout (in seconds) field, and then click Save.
Click OK to save this change to the deployment plane.
If you are running EDQP in an integrated Fusion PIM environment with EDQP hosted in a Fusion WebLogic Server domain continue to step12; do not perform these post-installation steps. The domain thread timeout parameters are optimized by the Fusion PIM installation and configuration.
For all other environments, in the Domain Structure panel for your EDQP domain (dls_domain is the default), expand Environment then click Servers.
Click the AdminServer(admin) Server Name link to open the settings for the EDQP domain.
Select the Tuning tab. See Oracle Fusion Middleware Oracle WebLogic Server Administration Console Online Help 11g Release 1 (10.3.6) at
http://docs.oracle.com/cd/E23943_01/apirefs.1111/e13952/taskhelp/tuning/TuningExecuteThreads.html
Enter 3600 in the Stuck Thread Max Time field, and then click Save.
Stop your WebLogic Server. See Oracle Fusion Middleware Oracle WebLogic Server Administration Console Online Help 11g Release 1 (10.3.6) at
http://docs.oracle.com/cd/E23943_01/apirefs.1111/e13952/taskhelp/startstop/StartAndStopServers.html
Start your WebLogic Server. See Oracle Fusion Middleware Oracle WebLogic Server Administration Console Online Help 11g Release 1 (10.3.6) at
http://docs.oracle.com/cd/E23943_01/apirefs.1111/e13952/taskhelp/startstop/StartAndStopServers.html
(Optional) Log out of your WebLogic Administration Console.
Ensure that you have configured a network shared disk space that all of your Oracle DataLens Servers, both Administration and Transform, can access. Your input text data files to the data quality process should be stored in this shared disk space and be referenced by all servers. You should configure your DSAs to store results files in this same space.
The following sections describe how to uninstall your software or individual components on Linux, Windows, and UNIX systems.
The uninstall program does not remove the home directory associated with the installation, the JDK, or any user-created WebLogic domains. Only the components that were installed by the installation program are removed.
Use the following procedure to uninstall the complete product installation using the command-line interface:
Shut down any servers that are running, both Oracle DataLens Servers and WebLogic Servers.
Start the uninstall program as described in Table 3-1.
Table 3-1 Starting the Uninstall Program in Console Mode
| Platform | Procedure |
|---|---|
|
Linux and UNIX |
|
|
Windows |
|
|
Copyright © 2001, 2013, Oracle and/or its affiliates. All rights reserved. Legal Notices |
|