| Oracle® Enterprise Data Quality for Product Data Oracle DataLens Server Installation Guide Release 11g R1 (11.1.1.6) Part Number E29137-05 |
|
|
PDF · Mobi · ePub |
| Oracle® Enterprise Data Quality for Product Data Oracle DataLens Server Installation Guide Release 11g R1 (11.1.1.6) Part Number E29137-05 |
|
|
PDF · Mobi · ePub |
This chapter describes how to start the installation program in graphical mode in the supported environments and all of the required manually post-configuration steps. It also describes the sequence of screens that appear in the installation and post-configuration processes.
This chapter contains the following sections:
Note:
Your 64-bit JDK must be installed in a directory that does not contain spaces otherwise the OUI install script will fail. See Section 2.3.3, "Installing the Java Development Kit."Note:
In order to run the installation program in graphical mode, the console attached to the machine on which you are installing the software must support a Java-based GUI. All consoles for Windows systems support Java-based GUIs, but not all consoles for Linux and UNIX systems do. Your display must support 256 colors and theDISPLAY variable must be set.This section contains the following:
Section A.1.1, "Starting the Installation Program in Graphical Mode on Linux and UNIX"
Section A.1.2, "Starting the Installation Program in Graphical Mode on Windows"
To start the installation program in graphical mode on Linux and UNIX platforms, follow these steps:
Log in to the target Linux or UNIX system as your administrator user. See Section 2.3.2, "Establishing the Required User Accounts".
Ensure that the supported WebLogic Server is installed.If you chose a Custom installation rather than Typical, you must ensure that you select the Evaluation Database option. See Oracle Fusion Middleware Installation Guide for Oracle WebLogic Server11g Release 1 (10.3.6) at
You must install the following WebLogic Server patch, using Oracle Smart Update, to ensure the proper operation:
Patch 9923849: SU Patch [7BWI]: Enable JPA2.0 support on Weblogic server. (9923849_1036_Generic.zip) found at My Oracle Support Patches and Updates Web site at
The patch For details about how to use Oracle Smart Update, see Oracle Smart Update Installing Patches and Maintenance Packs Release 3.2.1.
Change directories to the directory that contains the installation program.
Start the installation by entering the following commands:
chmod a+x runInstaller
./runInstaller -jreLoc JDK_directory
where JDK_directory is the absolute path to your Oracle JDK installation.
The installation program begins to install the software.
Go to Section A.1.3, "Installation Screen Responses" to complete of each installation program screen.
To start the installation program in graphical mode on Windows, follow these steps:
Log in to the target Windows system as your administrator user. See Section 2.3.2, "Establishing the Required User Accounts".
Ensure that the supported WebLogic Server is installed.If you chose a Custom installation rather than Typical, you must ensure that you select the Evaluation Database option. See Oracle Fusion Middleware Installation Guide for Oracle WebLogic Server11g Release 1 (10.3.6).
You must install the following WebLogic Server patch, using Oracle Smart Update, to ensure the proper operation:
Patch 9923849: SU Patch [7BWI]: Enable JPA2.0 support on Weblogic server. (9923849_1036_Generic.zip) found at My Oracle Support Patches and Updates Web site at
The patch For details about how to use Oracle Smart Update, see Oracle Smart Update Installing Patches and Maintenance Packs Release 3.2.1.
Locate the MS-DOS Command Prompt (cmd.exe), right-click on it, and then select Run as administrator.
Go to the installation directory C:\edqp_install\edqp\Disk1.
Enter setup.exe -jreLoc JDK_directory
where JDK_directory is the absolute path to your Oracle JDK installation.
The installation program begins to install the software.
Go to Section A.1.3, "Installation Screen Responses" to complete of each installation program screen.
The installation program displays a series of screens, in the order listed in Table A-1. Some screens are displayed only in certain situations, as noted in the table.
If you need additional help with any of the installation screens, see Appendix A, "Installation Screens," or click the link in the Screen column of the following table.
Table A-1 Running the Installation Program in Graphical Mode
| No. | Screen | When Does This Screen Appear? | Perform the Following Action |
|---|---|---|---|
|
1 |
Always |
Click Next to proceed with the installation. You may cancel the installation at any time by clicking Exit. |
|
|
2 |
Always |
Specify whether you want to register the product installation with My Oracle Support. By registering, Oracle Support notifies you immediately of any security updates that are specific to your installation. If you chose not to register, an Are You Sure? dialog box appears. Click Yes to continue. Click Next to continue. |
|
|
3 |
Always |
Click Next to continue. |
|
|
4 |
Always |
Specify the Middleware home directory that will serve as the central support directory for all Fusion Middleware products installed on the target system, including EDQP and WebLogic Server. Specify the home directory for theEDQP where the product will be installed and used. Click Next to continue. |
|
|
5 |
Always |
Click Next to continue. |
|
|
6 |
Always |
When the installation program progress has reached 100%, click Next to continue. |
|
|
7 |
Always |
Click Finish to exit the installation program. |
This appendix contains screenshots and descriptions for all of the EDQP installation screens.
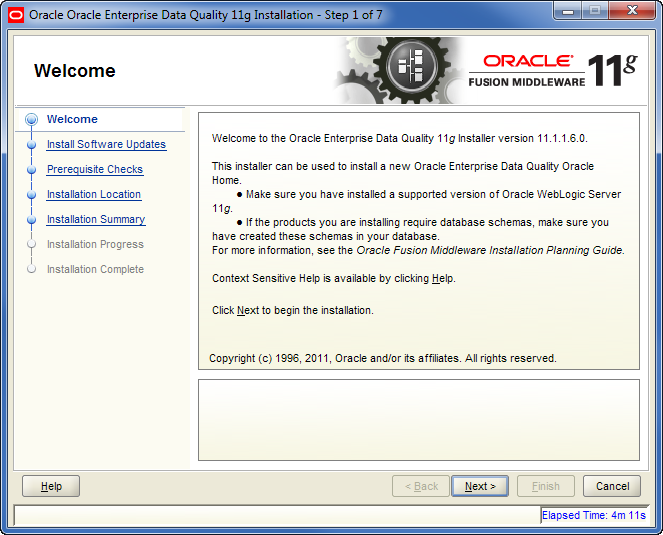
The Welcome screen is displayed each time you start the installer.
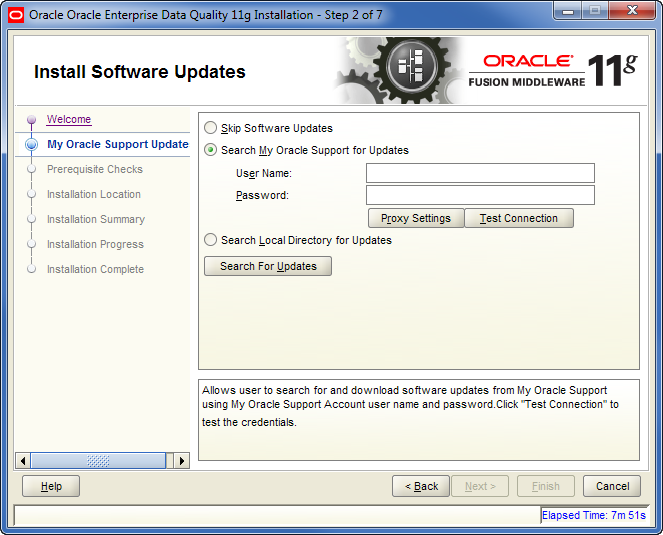
Specify whether you want to register the Oracle WebLogic Server installation with My Oracle Support. By registering, Oracle Support notifies you immediately of any security updates that are specific to your installation.
If you want to register your installation, enter your My Oracle Support email address and your My Oracle Support password.
If you want to decline registration, deselect the I wish to receive security updates via My Oracle Support check box. An Are You Sure? dialog box appears. Click Yes to continue.
Notes:
If you are using a Generic installer (JAR file) to install WebLogic Server, and $JAVA_HOME points to a JDK that is later than JDK 1.60_05, you cannot deselect the I wish to receive security updates via My Oracle Support check box. In this case, if you do not want to install security updates:Leave the Email and Support Password fields blank, and click Next. An Email Address Not Specified dialog box appears.
Click Yes. An Are You Sure? dialog box appears.
Click Yes to continue with the installation.
If a Connection Failed dialog box appears when you bypass security updates, select the I wish to remain uninformed of security updates check box and click Continue to continue the installation.
If you have not registered with Oracle Support, go to the My Oracle Support web site, https://support.oracle.com/CSP/ui/flash.html, and register to obtain a My Oracle Support account.
For more information about the benefits of registering your installation with My Oracle Support, see Oracle Configuration Manager Installation and Administration Guide.
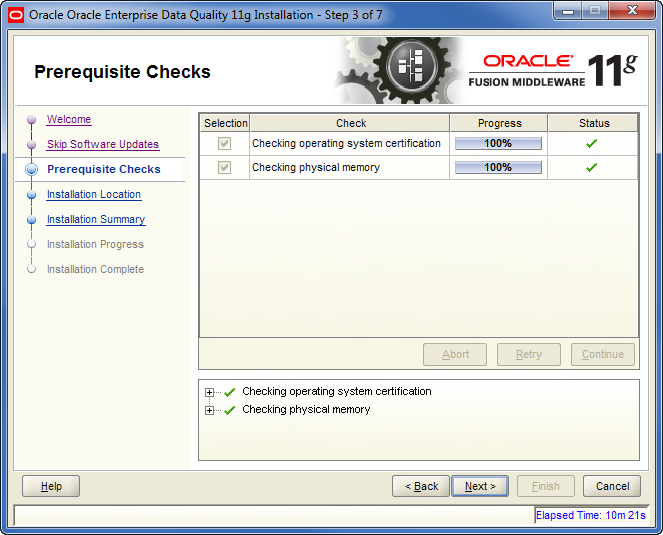
This screen displays a tree view of the operating system and physical memory checks and the status for each.
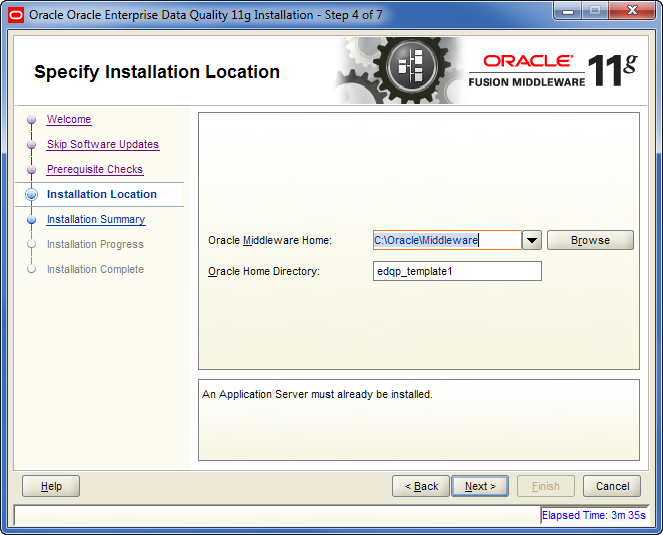
Specify the Middleware home directory that all Fusion Middleware products are installed on the target system; EDQP and WebLogic Server will be installed in this directory. You must already have a Middleware home directory on your system. See Section 2.4, "Selecting Directories for Installation".
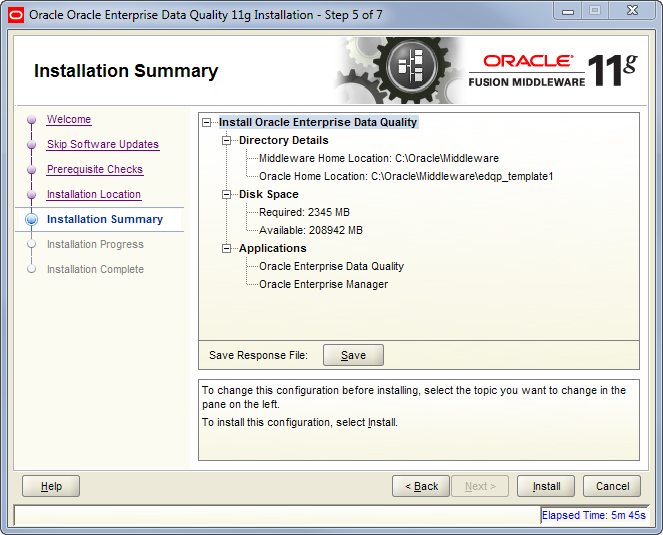
This screen displays a list of directory details, disk space (required and available), and the product components to be installed.
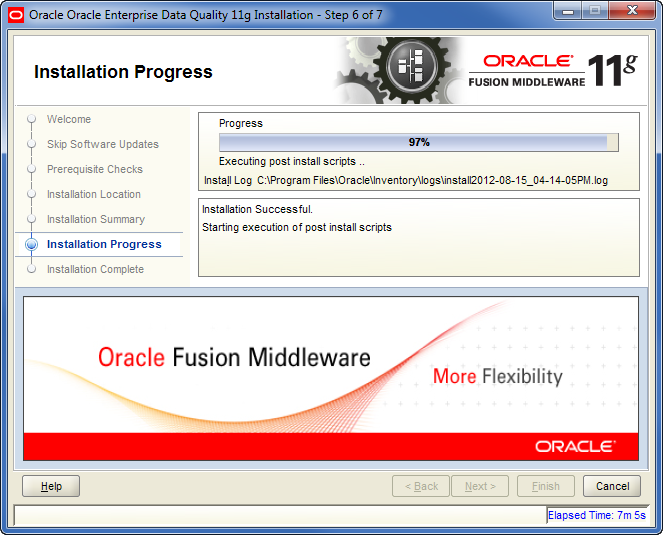
This screen shows the progress of the installation. When the progress bar reaches 100%, the installation is complete.
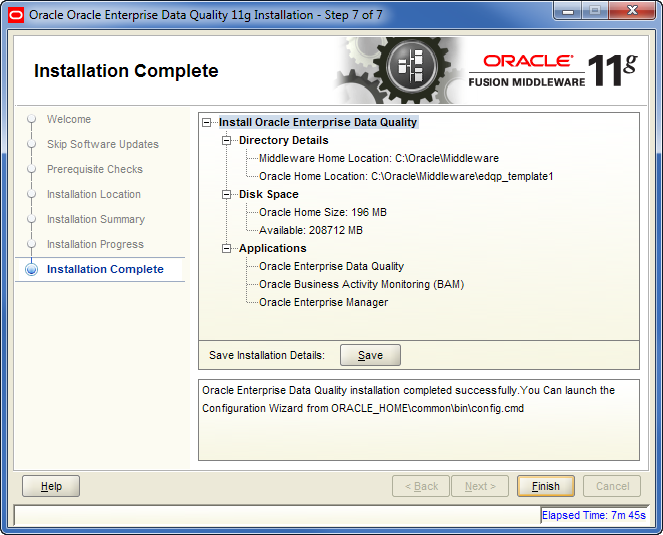
This screen shows the results of the completed installation. You can click Save to save the displayed details to a text file.
This section contains the following:
Section A.2.1, "Starting the Post-Installation Configuration Program on Linux and UNIX"
Section A.2.2, "Starting the Post-Installation Configuration Program in Graphical Mode on Windows"
Section A.2.3, "Post-Installation Configuration Screen Responses"
To start the post-installation WebLogic domain configuration program in graphical mode on Linux and UNIX platforms, follow these steps:
Log in to the target Linux or UNIX system as your administrator user. See Section 2.3.2, "Establishing the Required User Accounts".
Change directories to MW_HOME/epdq_templates1/common/bin, which contains the configuration program.
Start the configuration by entering the following commands:
chmod a+x config.sh
./config.sh
The configuration program begins.
To start the post-installation WebLogic domain configuration program in graphical mode on Windows, follow these steps.
Log in to the target Windows system as your administrator user. See Section 2.3.2, "Establishing the Required User Accounts".
Open a command window and go to the MW_HOME\epdq_templates1\common\bin directory, which contains the configuration program.
Enter config.cmd
The configuration program begins.
See Section A.2.3, "Post-Installation Configuration Screen Responses," for a description of each configuration program screen.
The post-installation configuration program displays a series of screens, in the order listed in Table A-2. Some screens are displayed only in certain situations, as noted in the table.
If you need additional help with any of the installation screens, see Appendix A, "Post-Installation Configuration Screens," or click the link in the Screen column of the following table.
Table A-2 Running the Configuration Program in Graphical Mode
| No. | Screen | When Does This Screen Appear? | Perform the Following Action |
|---|---|---|---|
|
1 |
Always |
Click Next to proceed with the configuration and accept the Create a new WebLogic domain default. You may cancel the installation at any time by clicking Exit. |
|
|
2 |
Always |
Select the correct EDQP Domain generation option for the type of server you are installing, Oracle Product Data Quality Administration Server Template -11.1.1.0 or Oracle Product Data Quality Admin_Transform Server TEMPLATE -11.1.1.0. The Oracle Product Data Quality Transform Server TEMPLATE -11.1.1.0 template should be selected only when you are installing a Transform Server on a managed server. The Oracle JRF - 11.1.1.0 [oracle_common] check box is automatically selected. Click Next to continue. |
|
|
3 |
Always |
Enter dls_domain in the Domain Name field. Enter Click Next to continue. |
|
|
4 |
Always |
Enter your WebLogic administration user name and password credentials. Click Next to continue. |
|
|
5 |
Always |
Ensure the Development Mode option is selected for your domain startup operation mode. Select the 64-bit JDK that you want to use from the Available JDKs list. Oracle recommends that you use the latest 64-bit JDK. Click Next to continue. |
|
|
6 |
Always |
Select the Administration Server check box. Click Next to continue. |
|
|
7 |
Always |
Change the listen port if necessary to the port your Oracle DataLens Administration Server is running on. Oracle recommends that you use port 2229, which is the default port for Oracle DataLens Servers. Click Next to continue. |
|
|
8 |
Always |
Click Create to create the domain and continue. |
|
|
9 |
Always |
Click Done to exit the installation program. |
This appendix contains screenshots and descriptions for all of the post- installation WebLogic domain configuration screens.
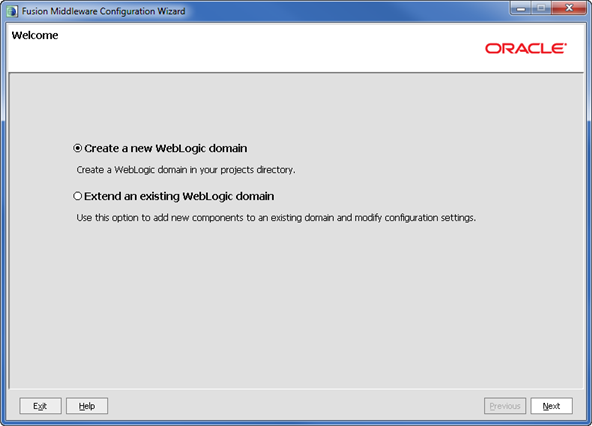
The Welcome screen is displayed each time you start the configuration wizard.
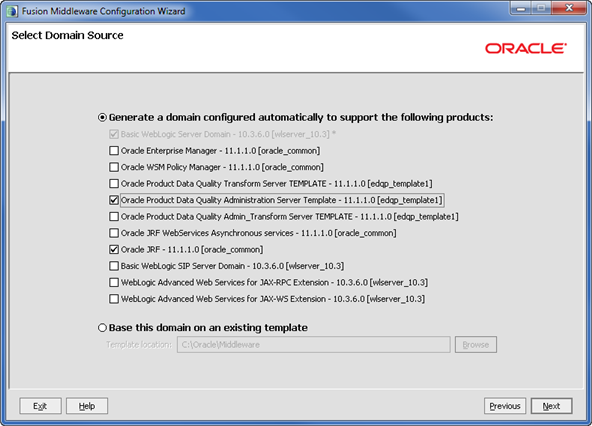
Select the correct EDQP Domain generation option for the type of server you are installing, Oracle Product Data Quality Administration Server Template -11.1.1.0 or Oracle Product Data Quality Admin_Transform Server TEMPLATE -11.1.1.0.
The Oracle Product Data Quality Transform Server TEMPLATE -11.1.1.0 template should be selected only when you are installing a Transform Server on a managed server.
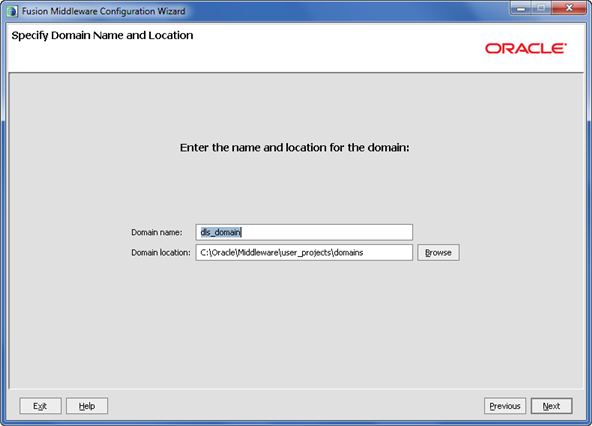
Specify your domain name and location. Oracle recommends that you use dls_domain as your domain name.
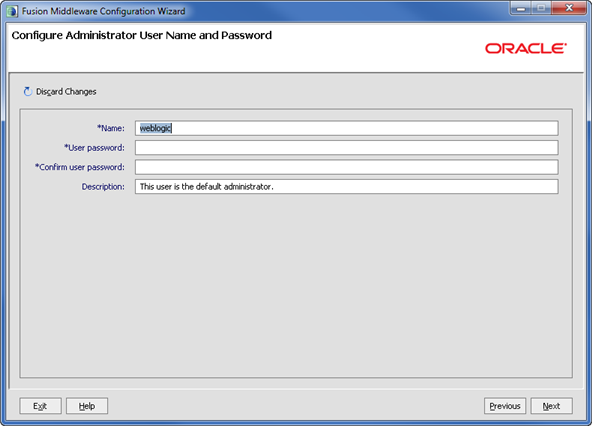
Specify your WebLogic administration user credentials.
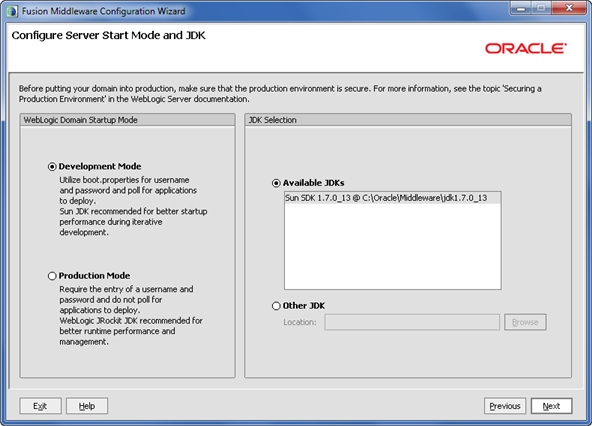
Select the Development Mode for your domain startup operation mode and JDK. Oracle recommends that you use the most current 64-bit JDK.
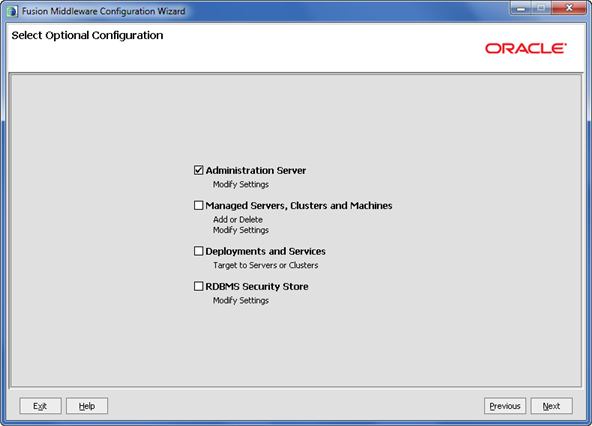
Select Administration Server for your server configuration type.
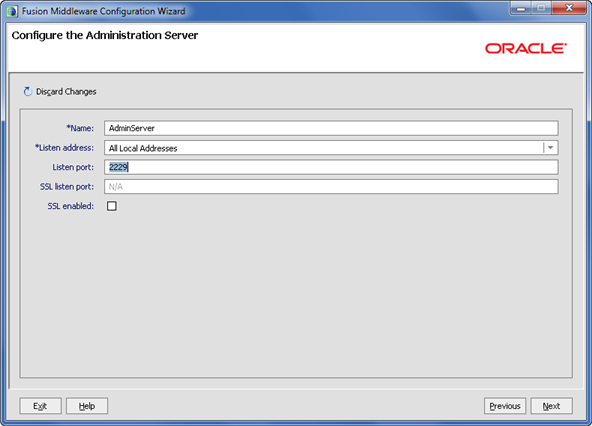
Specify your Oracle DataLens Server information. Oracle recommends that you use port 2229 for your server.
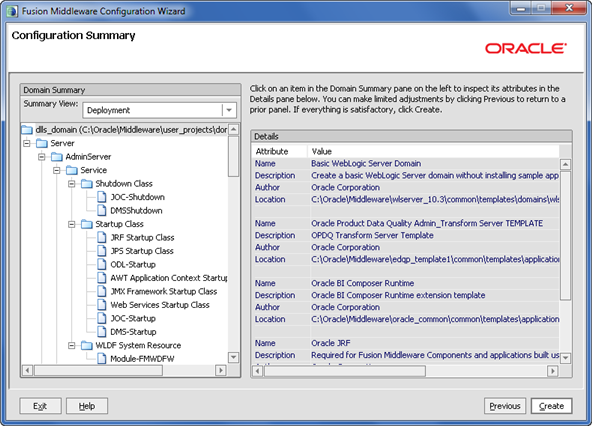
This screen displays a summary of your domain configuration selections.
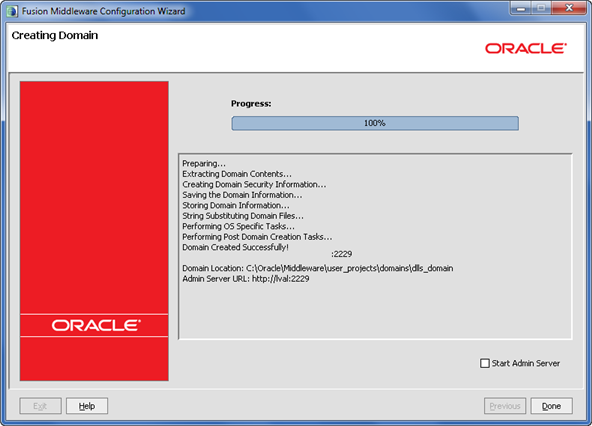
This screen shows you the progress of your domain creation until it completes at 100%.
Modify the environment variables set on your Oracle DataLens Server as follows:
Table A-3 Modifying Environment Variables
| Platform | Actions |
|---|---|
|
Linux and UNIX |
|
|
Windows |
|
You must start your WebLogic server to complete the installation.
| Platform | Run the Command |
|---|---|
| Linux and UNIX | ./MW_HOME/user_projects/domains/dls_domain/bin/startWebLogic.sh |
| Windows | \MW_HOME\user_projects\domains\dls_domain\bin\startWebLogic.cmd |
The PDQRespository data source must be configured for each server in your EDQP topology so you must run the following steps for each of your Oracle DataLens Servers.
Ensure that your WebLogic Server is running on your Oracle DataLens Administration Server.
Open a supported web browser and enter the following URL:
http://hostname:port/console
where hostname is the DNS name or IP address of the Oracle DataLens Administration Server and port is the listen port on which the server is listening for requests (port 2229 by default).
If you configured the Oracle DataLens Administration Server to use Secure Socket Layer (SSL) you must add s after http as follows:
https://hostname:port/console
When the login page appears, enter the user name and the password you used to start the server, and then click Login.
Delete the PDQRepository JDBC data source. See Oracle Fusion Middleware Oracle WebLogic Server Administration Console Online Help 11g Release 1 (10.3.6) at
A new PDQRepository data source that configures the new database connectivity is necessary. Adding a new JDBC Generic data source is simple using the corresponding multi-page process.
Review this process before beginning in the Oracle Fusion Middleware Oracle WebLogic Server Administration Console Online Help 11g Release 1 (10.3.6) at
Complete the Create a New JDBC Data Source pages as follows:
| No. | Screen | Perform the Following Action |
|---|---|---|
| 1 | JDBC Data Source Properties | Enter PDQRepository in the Name and JNDI name fields.
Select Derby from the Database Type list. Click Next. |
| 2 | JDBC Data Source Properties | Select Derby's Driver(Type 4 XA) Versions: Any from the Database Driver list.
Click Next. |
| 3 | Transaction Properties | Click Next. |
| 4 | Connection Properties | Enter scsdata in the Database Name: field.
Enter the host name of your Oracle Database Server in the Host Name: field. Enter 1527 in the Port: field. Enter scs in the Database User Name field. Enter and confirm 1realm1 in the password fields. Click Next. |
| 5 | Test Database Connection | Click Test Configuration to ensure that your database connection operates correctly. Make any necessary changes until the connection is successful.
Click Next. |
| 6 | Select Targets | Select the AdminServer check box to deploy the new data source on that server.
Click Finish. |
Navigate to the new PDQRepository data source. See Oracle Fusion Middleware Oracle WebLogic Server Administration Console Online Help 11g Release 1 (10.3.6) at
Select the Row Prefetch Enabled check box, and click Save.
Stop your WebLogic Server. See Oracle Fusion Middleware Oracle WebLogic Server Administration Console Online Help 11g Release 1 (10.3.6) at
http://docs.oracle.com/cd/E23943_01/apirefs.1111/e13952/taskhelp/startstop/StartAndStopServers.html
Start your WebLogic Server. See Oracle Fusion Middleware Oracle WebLogic Server Administration Console Online Help 11g Release 1 (10.3.6) at
http://docs.oracle.com/cd/E23943_01/apirefs.1111/e13952/taskhelp/startstop/StartAndStopServers.html
|
Copyright © 2001, 2013, Oracle and/or its affiliates. All rights reserved. Legal Notices |
|