How to Configure a Device by Using the Device Manager in Trusted Extensions
By default, an allocatable device has a label range from ADMIN_LOW to ADMIN_HIGH and must be allocated for use. Also, users must be authorized to allocate the device. These defaults can be changed on a windowed system. On a system without a desktop, only roles in the global zone can configure and use allocatable devices.
audion – Indicates a microphone and speaker
cdromn – Indicates a CD-ROM drive
mag_tapen – Indicates a tape drive (streaming)
rmdiskn – Indicates a removable disk, such as a JAZ or ZIP drive, or USB hot-pluggable media
On a windowed system, the following devices can be allocated for use:
Before You Begin
You must be in the Security Administrator role in the global zone.
- From the Trusted Path menu, select Allocate Device.
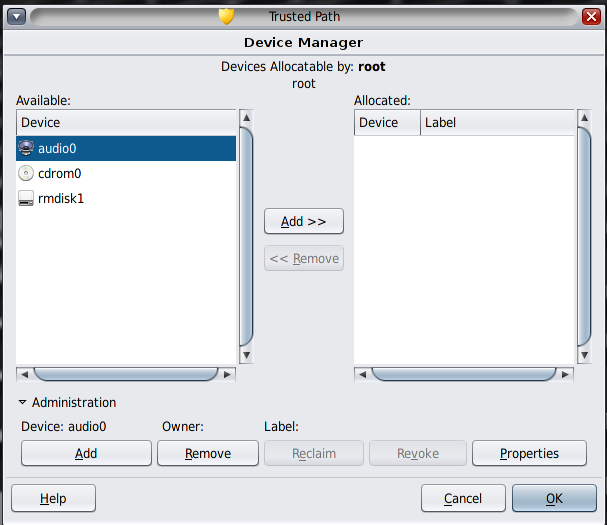
The Device Manager appears.

- View the default security settings.
Click Administration, then highlight the device. The following figure shows an audio device that is being viewed by the root role.

- (Optional)Restrict the label range on the device.
- Set the minimum label.
Click the Min Label button. Choose a minimum label from the label builder. For information about the label builder, see Label Builder in Trusted Extensions.
- Set the maximum label.
Click the Max Label... button. Choose a maximum label from the label builder.
- Set the minimum label.
- Specify if the device can be allocated locally.
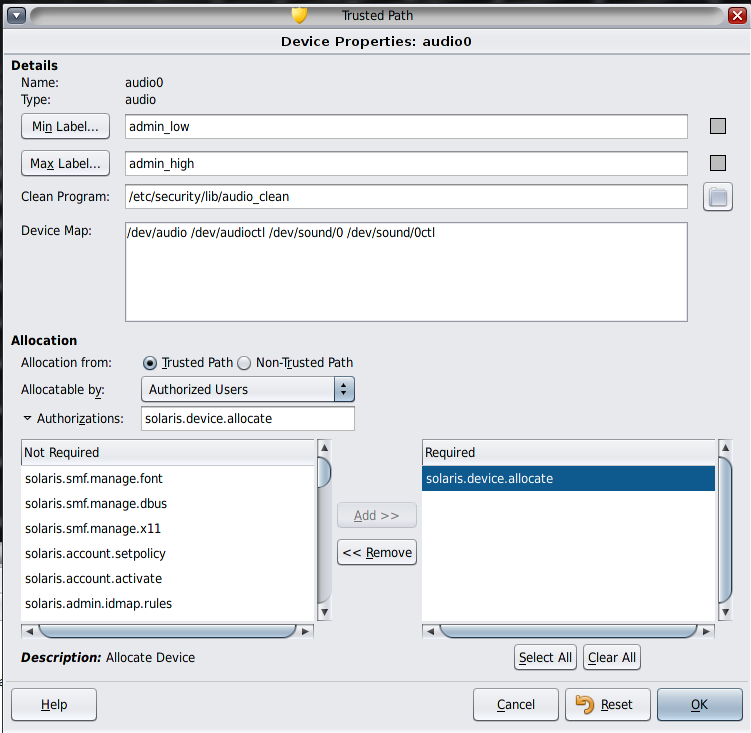
In the Device Configuration dialog box, under For Allocations From Trusted Path, select an option from the Allocatable By list. By default, the Authorized Users option is checked. Therefore, the device is allocatable and users must be authorized.
- To make the device nonallocatable, click No Users.
When configuring a frame buffer or other device that must not be allocatable, select No Users.
Note - You cannot configure a printer for allocation. - To make the device allocatable, but to not require authorization, click All Users.
- To make the device nonallocatable, click No Users.
- Specify if the device can be allocated remotely.
In the For Allocations From Non-Trusted Path section, select an option from the Allocatable By list. By default, the Same As Trusted Path option is checked.
- To require user authorization, select Allocatable by Authorized Users.
- To make the device nonallocatable by remote users, select No Users.
- To make the device allocatable by anyone, select All Users.
- If the device is allocatable, and your site
has created new device authorizations, select the appropriate authorization.
The following dialog box shows the solaris.device.allocate authorization is required to allocate the cdrom0 device.

To create and use site-specific device authorizations, see Customizing Device Authorizations in Trusted Extensions.
- To save your changes, click OK.