| Oracle® Fusion Middleware Enterprise Deployment Guide for Oracle Identity Management (Oracle Fusion Applications Edition) 11g Release 7 (11.1.7) Part Number E21032-21 |
|
|
PDF · Mobi · ePub |
| Oracle® Fusion Middleware Enterprise Deployment Guide for Oracle Identity Management (Oracle Fusion Applications Edition) 11g Release 7 (11.1.7) Part Number E21032-21 |
|
|
PDF · Mobi · ePub |
This chapter describes how to create a provisioning profile by using the Identity Management Provisioning Wizard.
Before you can perform provisioning, you must provide information about your topology to the Identity Management Provisioning Wizard. Once you have provided all the necessary input, the wizard will create a provisioning file that you can use to perform the provisioning operation.
Refer to the information you assembled in Section 6.1, "Assembling Information for Identity Management Provisioning."
This chapter contains the following sections:
Section 8.1, "Running the Identity Management Provisioning Wizard to Create a Profile"
Section 8.2, "Update User Names in Provisioning Response File"
To start the Identity Management Provisioning Wizard, execute the following commands from: IDMCLM_HOME/provisioning/bin
Set JAVA_HOME to REPOS_HOME/jdk6.
Issue the command:
./idmProvisioningWizard.sh
When the wizard starts, proceed as follows:
On the Welcome screen, click Next.

If you are prompted for the location of the Inventory Directory, proceed as described in Step 2 in Section 6.5, "Installing the IDM Provisioning Wizard."
Click OK to continue.
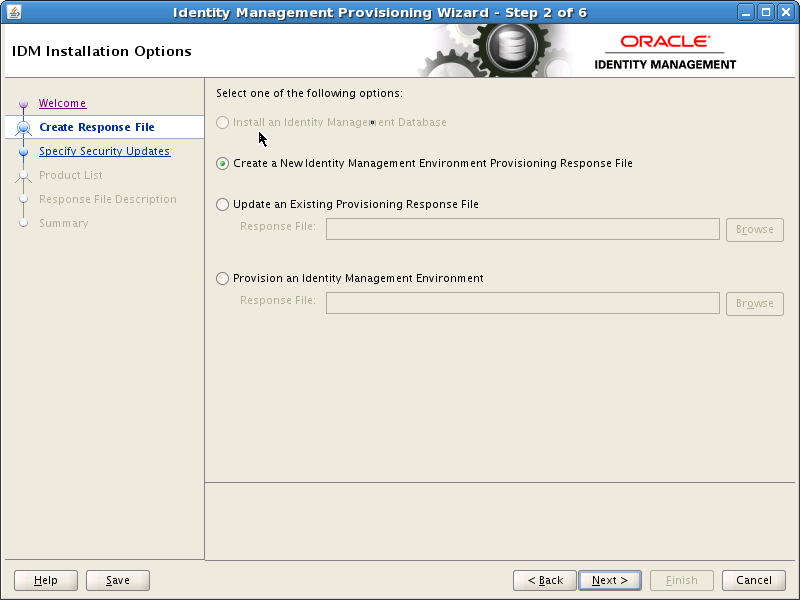
On the IDM Installation Options screen, select Create a New Identity Management Environment Response File, and click Next.
On the Specify Security Updates screen, choose whether to register with Oracle Support for updates or search for updates locally.
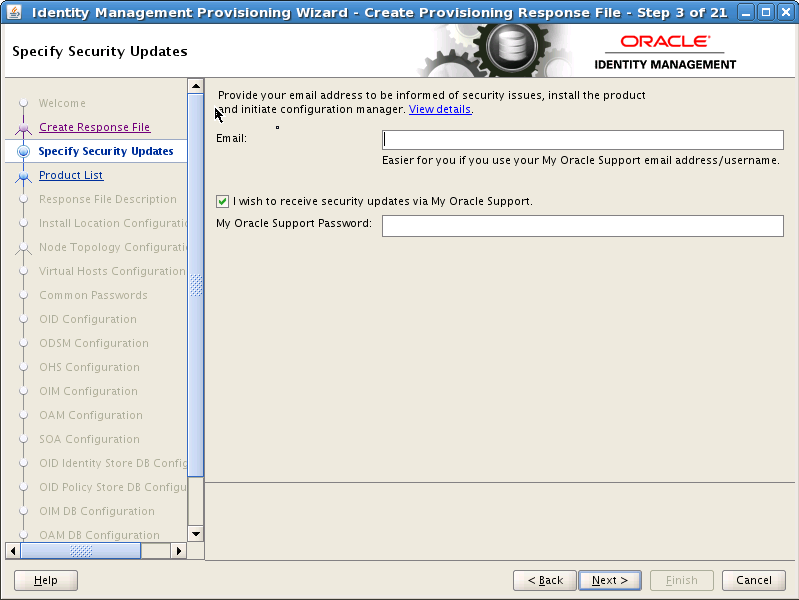
Click Next.
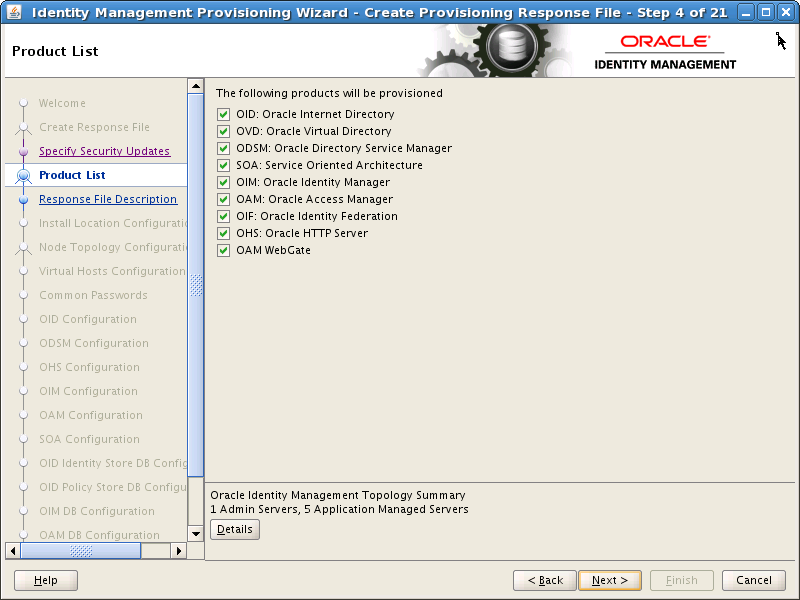
The Product List screen is purely informational. Click Next:
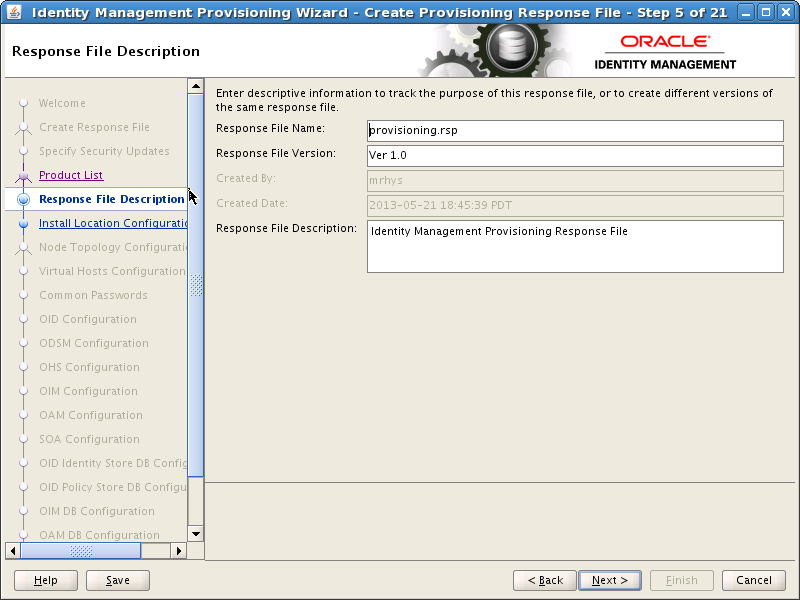
On the Response File Description Screen, enter the following information:
Response File Name: provisioning.rsp
Response File Version: Ver 1.0
Response File Description: A description such as Provisioning Response File
Click Next.
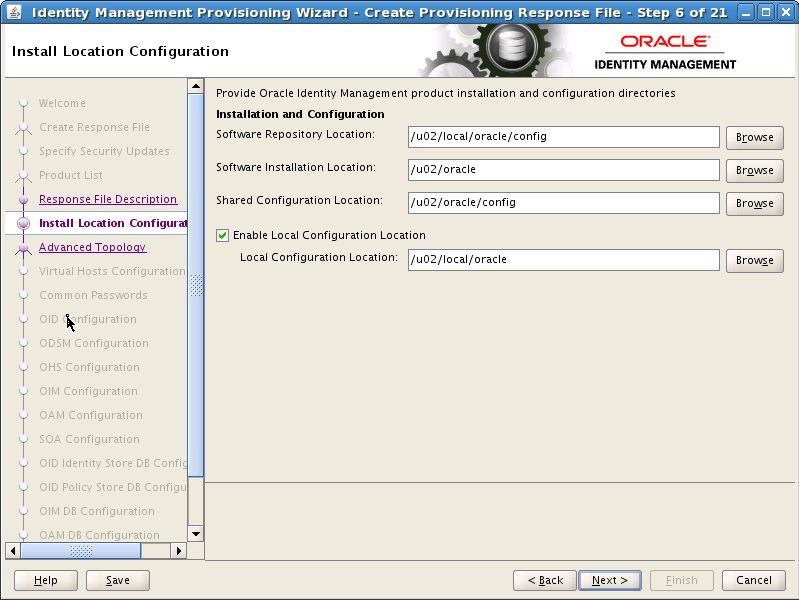
On the Install Location Configuration Screen, enter the following information:
Software Repository Location: This is the location of the Provisioning repository, for example: REPOS_HOME in the worksheet.
Software Installation Location: This is the location on shared storage under where you want the Middleware Home to be placed, for example: SHARED_ROOT
Note:
Note: The maximum length of this location is 59 characters in this release.
Shared Configuration Location Enter the location of shared configuration, for example SHARED_CONFIG_DIR.
Enable Local Applications Configuration Select this for Enterprise Deployments.
Local Configuration Location: This is the location on local storage where you want the Oracle HTTP Server Middleware home and local configuration files to be stored, for example: LOCAL_CONFIG_DIR. Click Next.
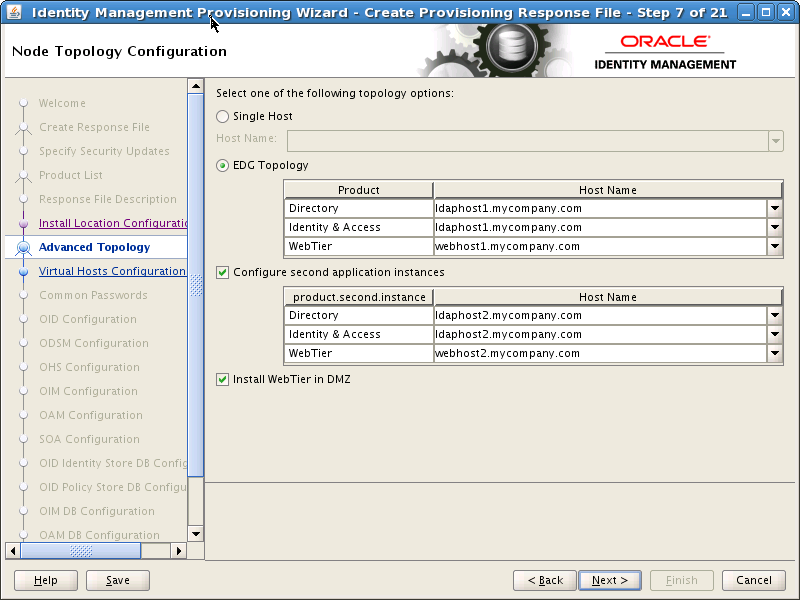
On the Node Topology Configuration screen, select EDG Topology and provide the following information:
Note:
All host names must be fully qualified.
Ensure Configure Secondary Instances is selected and enter:
Directory: LDAPHOST1.mycompany.com
Identity & Access: IDMHOST1.mycompany.com
Web Tier: WEBHOST1.mycompany.com
Ensure Install WebTier in DMZ is selected.
Directory: LDAPHOST2.mycompany.com
Identity & Access: IDMHOST2.mycompany.com
Web Tier: WEBHOST2.mycompany.com
Notes:
OHS is not placed on the same host as a mid tier or LDAP component. In the topologies described in this guide, OHS is located in a DMZ for added security.
OHS cannot be located on an LDAP host
Click Next.
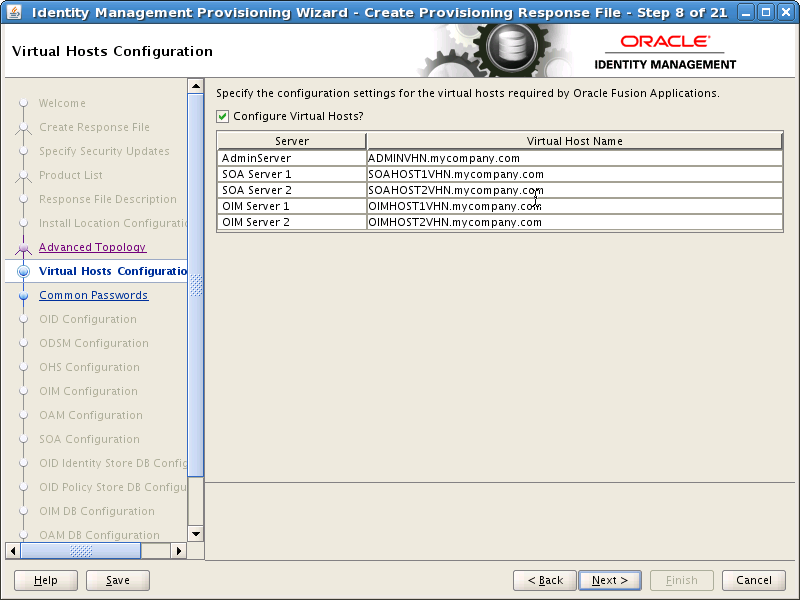
On the Virtual Hosts Configuration screen, select Configure Virtual Hosts.
Enter the Virtual Host Name for each managed Server in the topology, for example:
Admin Server: ADMINVHN.mycompany.com
SOA Server: SOAHOST1VHN.mycompany.com
SOA Server 2: SOAHOST2VHN.mycompany.com
OIM Server: OIMHOST1VHN.mycompany.com
OIM Server 2: OIMHOST2VHN.mycompany.com
Click Next.
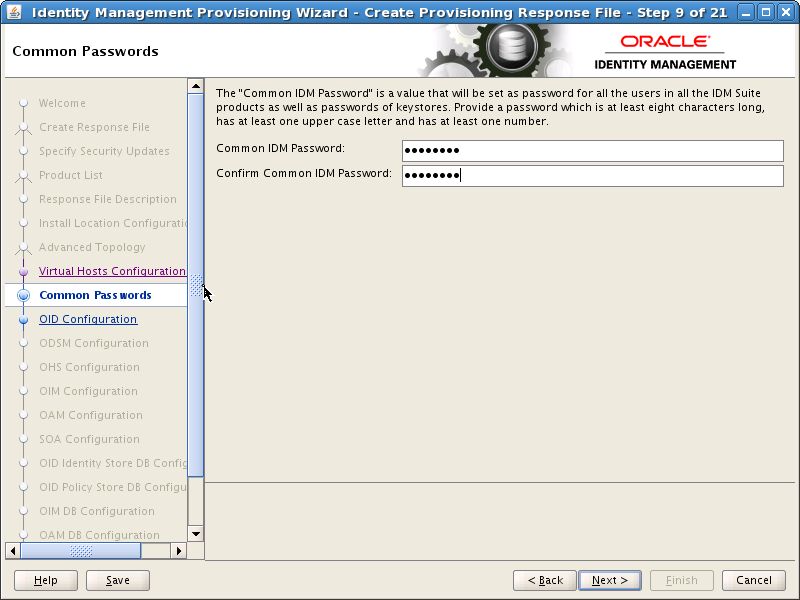
On the Common Passwords screen, enter a Common IDM Password (COMMON_IDM_PASSWORD) to be used for all accounts created as part of the provisioning. This password must be eight characters long and have at least one number and one uppercase letter.
Confirm the password in Confirm Common IDM Password
Click Next.
On the OID Configuration screen, enter the security Realm DN, for example: dc=mycompany,dc=com (REALM_DN).
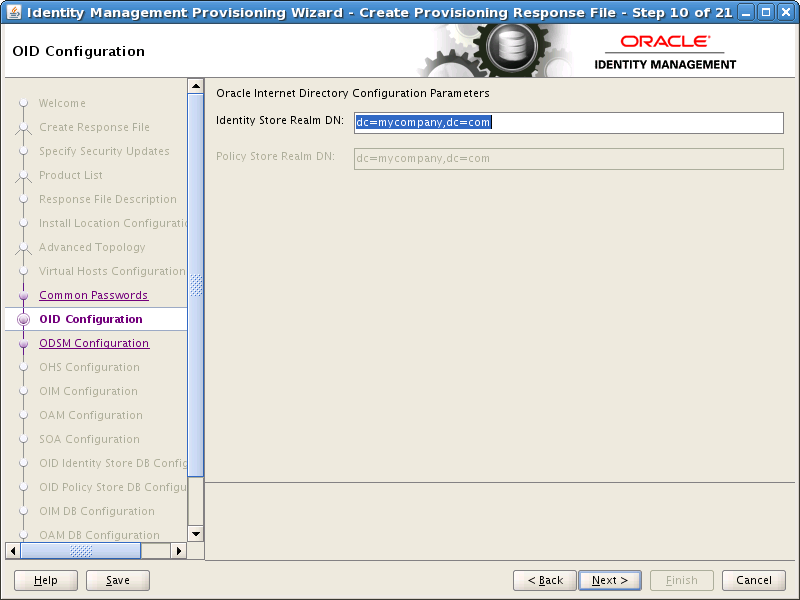
Click Next.
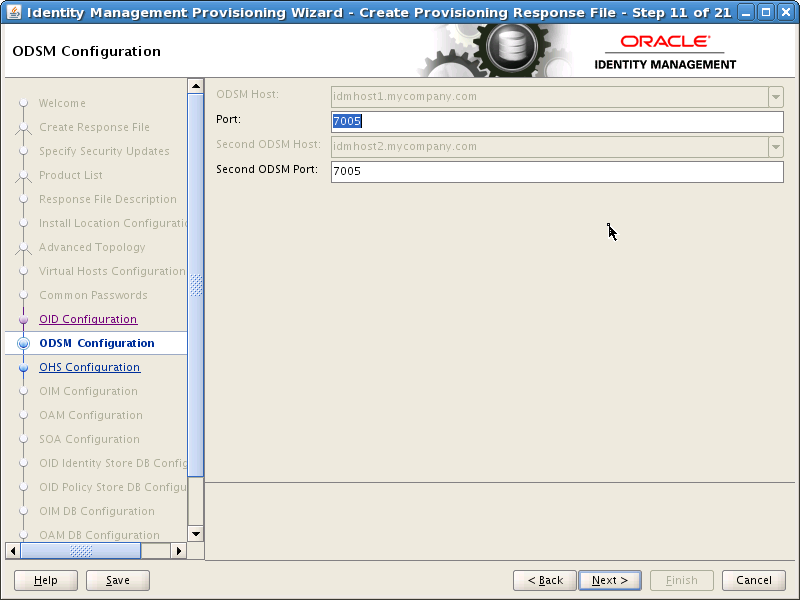
On the ODSM Configuration screen, change the ports that the ODSM managed servers will use (ODSM_PORT, Second_ODSM_PORT) if required, and click Next.
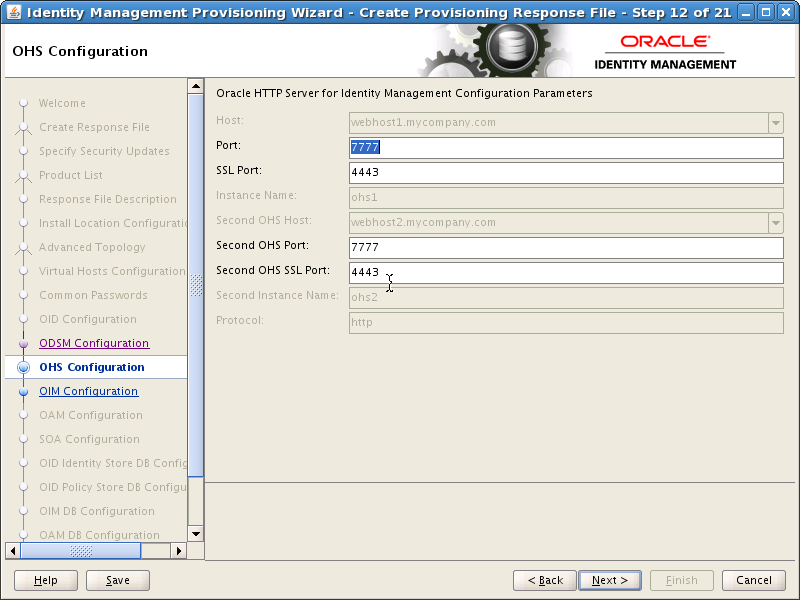
On the OHS Configuration screen, change the ports (OHS_PORT and OHS_SSL_PORT) that the Oracle HTTP Server managed servers will use, if required, and click Next.
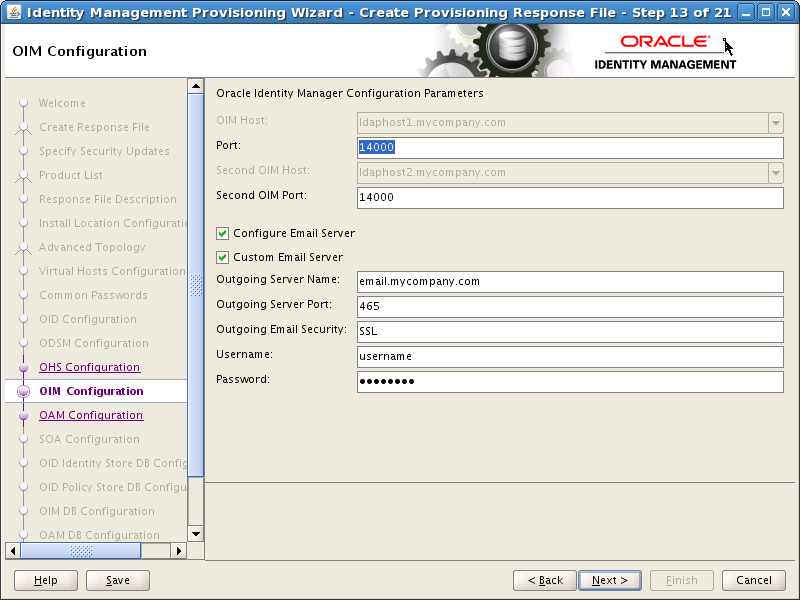
On the OIM Configuration screen, under Oracle Identity Manager Configuration Parameters, enter the ports to be used by the Oracle Identity Manager managed servers into the Port and Second OIM Port fields (OIM_PORT)
If you want to set up an email server then proceed as follows:
Select Configure Email Server
Select Custom Email Server
Enter:
Outgoing Server Name: The name of your outgoing email server, for example: mail.mycompany.com (EMAIL_SERVER)
Outgoing Server Port: The port your email server uses (EMAIL_PORT).
Outgoing Email Security: If this port is SSL enabled, enter SSL
Username: If you require a username to authenticate with the email server, enter that username (EMAIL_USER) here.
Password: Password (EMAIL_PASSWORD) for the above user.
Click Next.
On the OAM Configuration screen, enter the following information:
Change the ports that the OAM managed servers will use (OAM_PORT), if required.
Specify the OAM Transfer Mode. This must be Open on AIX and Simple on other platforms.
Enter a value for Cookie Domain, for example: .mycompany.com (OAM_COOKIE_DOMAIN).
Click Next.
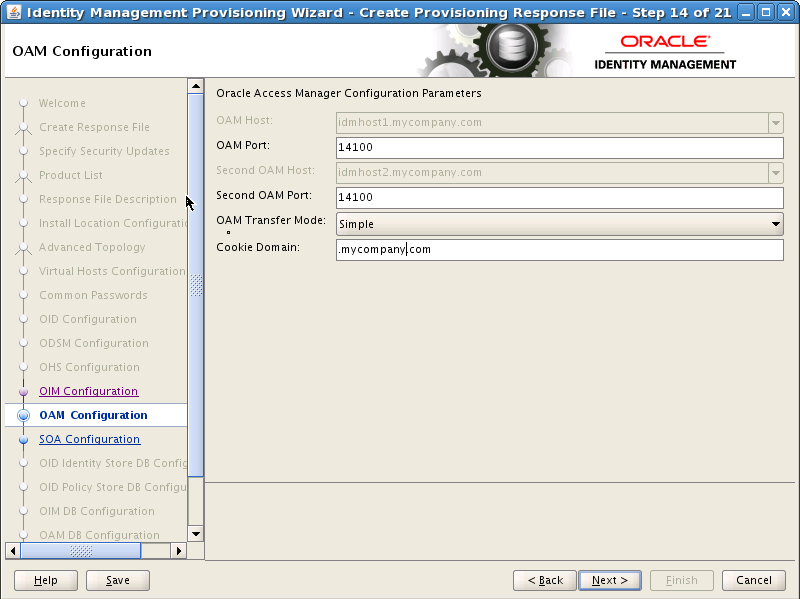
On the SOA Configuration screen, enter the ports to be used by the SOA Managed servers and click Next.
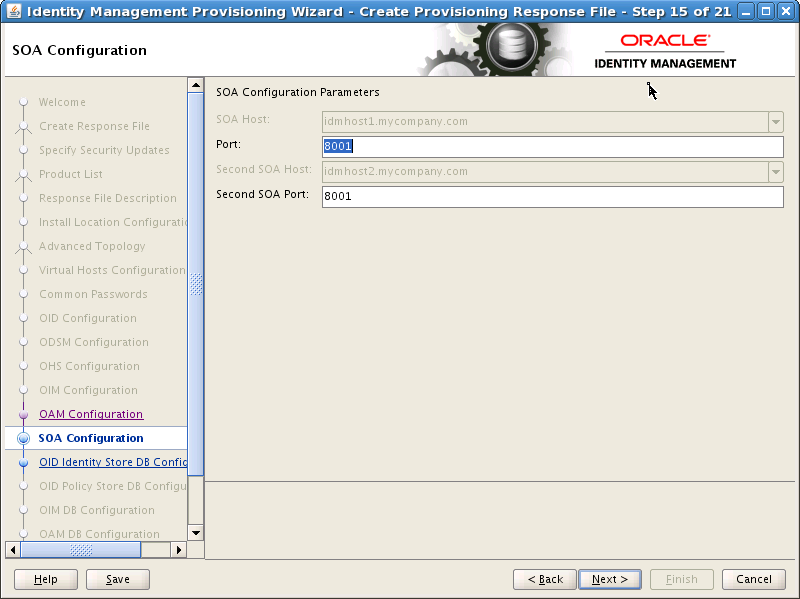
On the OID Identity Store DB Configuration screen, you enter the database connection details for your Oracle Internet Directory Database. Enter the following values:
Service Name: The service name of the database service, for example: oidedg.mycompany.com
Schema Password: The password you used when creating the OID schema in RCU
Select RAC DB.
Currently the wizard supports two RAC database instances. Provide the following information for each database instance.
Host VIP Name: This is the VIP name of the RAC database instance. If you are using Oracle Database 11.2, this must be the SCAN address.
Listener Port: This is the Listener Port DB_LSNR_PORT.
Instance Name: This is the instance name of the database instance. Use a different instance name for each entry.
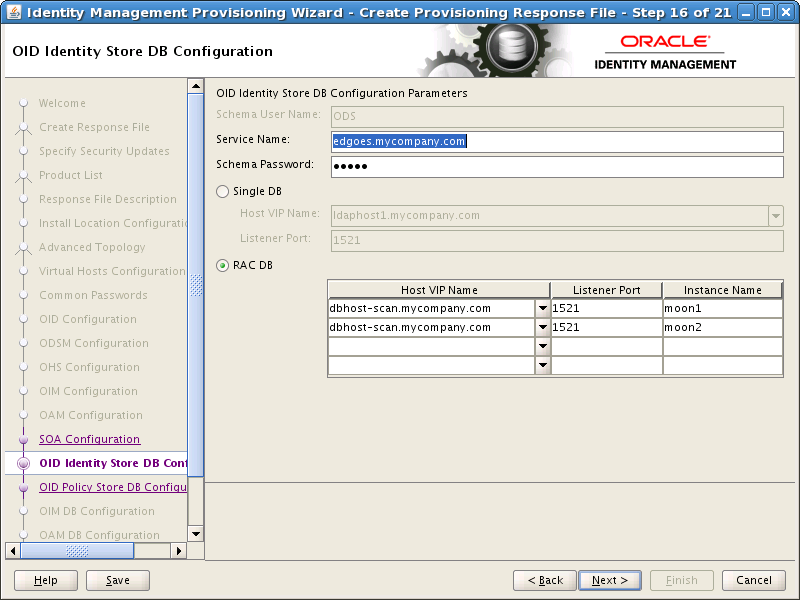
Click Next
The OID Policy Store DB Configuration screen is greyed out.
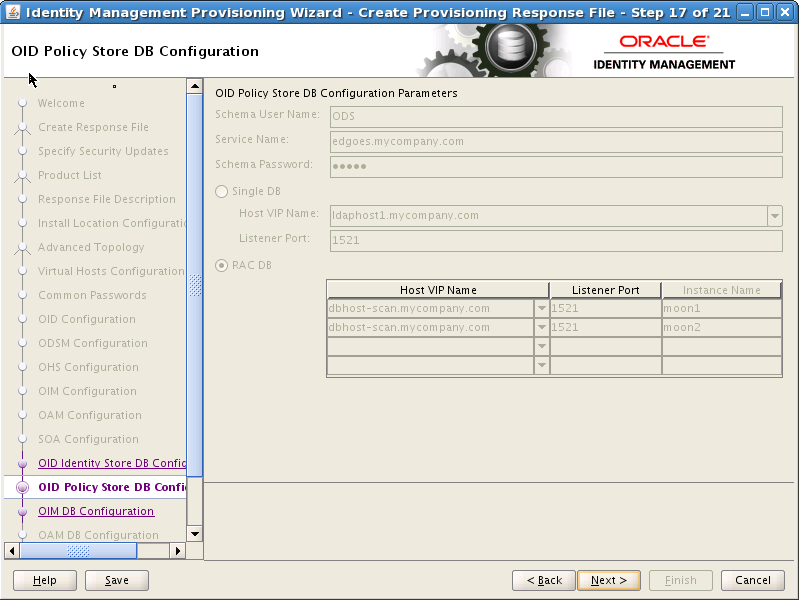
Click Next
On the OIM DB Configuration screen, enter the details about the Oracle Database where Oracle Identity Manager information will be stored.
OIM DB Service Name: The service name of the database service, for example: IAMEDG.mycompany.com
OIM Schema Password: The password you used when creating the Oracle Identity Manager schema in RCU.
Select RAC DB. Currently the wizard supports two RAC database instances. Provide the following information for each database instance.
Host Name: This is the VIP name of the RAC database instance. If you are using Oracle Database 11.2, this must be the SCAN address.
Port: This is the Listener Port
Instance Name: This is the instance name of the database instance. Use a different instance name for each entry.
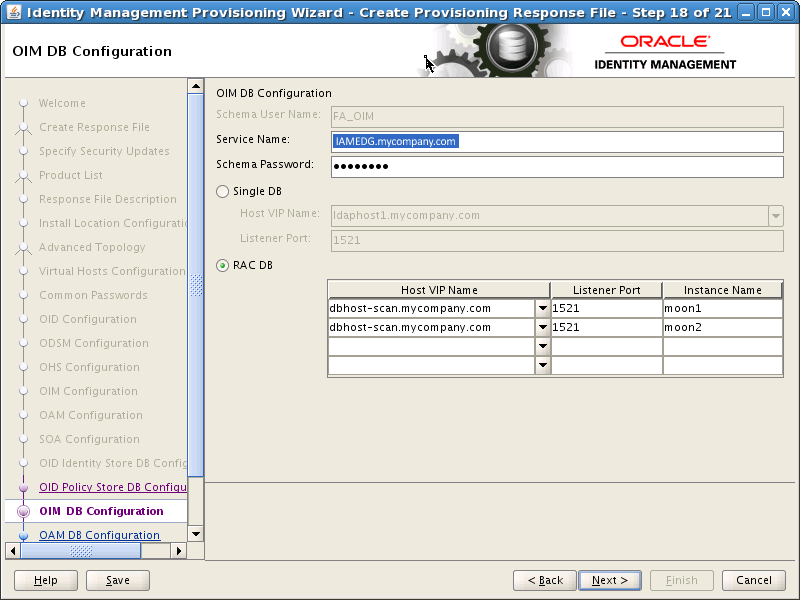
Click Next
The OAM DB Configuration screen is greyed out. The information on the screen is the same as on the OIM DB Configuration screen, except for the Schema User Name.
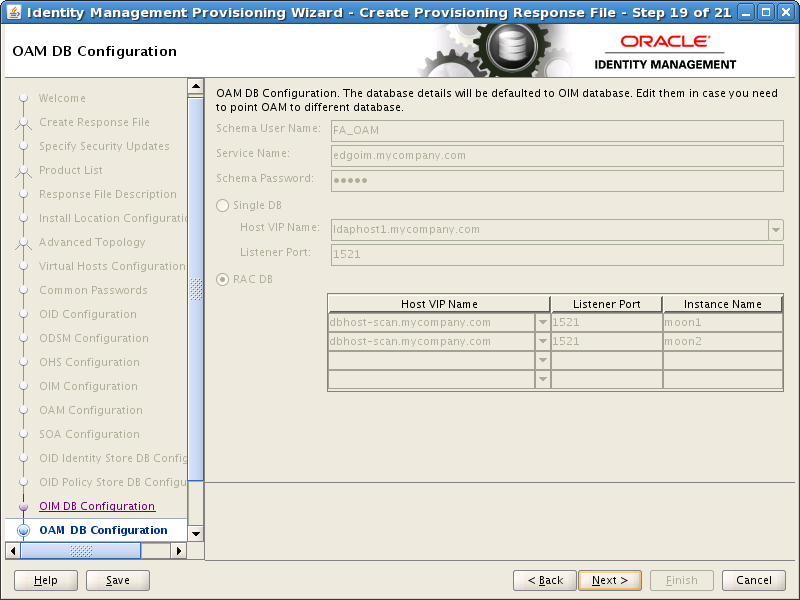
Click Next.
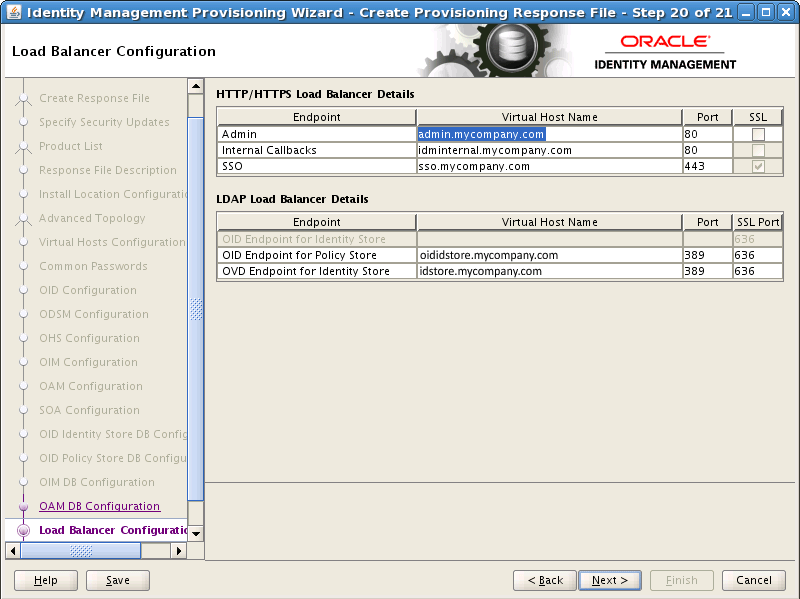
On the Load Balancer screen, enter details about your load balancer virtual hosts.
Under HTTP/HTTPS Load Balancer Details, enter the Virtual Host Name and Port for each Endpoint.
Admin: Admin Virtual Host and port, for example: admin.mycompany.com Port 80, deselect SSL.
Internal Callbacks: This is the internal call back virtual host and port, for example: idminternal.mycompany.com, Port 80
SSO: This is the main application entry point, for example: sso.mycompany.com Port 443
Under LDAP (OID) Load Balancer Details, enter the Virtual Host Name, Port, and SSL Port for each Endpoint.
ID Store: This is the virtual host of the Identity store, for example: idstore.mycompany.com, Port: 389
Policy Store: This is the virtual host of the Policy store, for example: oididstore.mycompany.com, Port 389
Note:
If your identity store and policy store are in the same internet directory, you can use the same virtual host name for both the Identity Store and the Policy Store End Points.
If you plan to use a different identity store, such as split profile or Active Directory, you must use different end points. The end point for your policy store must be the name of the load balancer that distributes requests across your Oracle Internet Directory instances. The Identity Store end point must be the name of the load balancer that distributes requests across your Oracle Virtual Directory instances.
On the Summary screen, enter the Provisioning Response File Name and the Directory where it is to be stored. Leave the Provisioning Summary field at the default value.
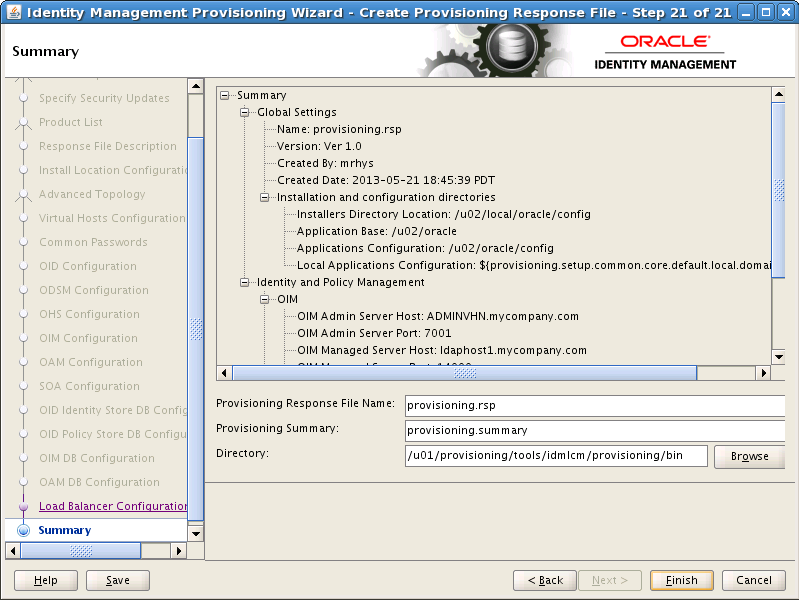
Click Finish to generate the provisioning response file.
Provisioning creates a number of users, with default user names. You can change three of these user names to more sensible names by editing the provisioning.rsp file created above.
In keeping with user names used in previous releases of this guide, change these entries as follows.
Note:
You can change these values to anything that matches your requirements.
#IDStore UserNames Configuration
IDSTORE_OAMADMINUSER=oamadmin
IDSTORE_OAMSOFTWAREUSER=oamLDAP
IDSTORE_OIMADMINUSER=oimLDAP
Save the file after you make the changes.
The process described in this chapter creates a provisioning file in the directory you specified on the Summary screen in Step 22. This file must be available to each host in the topology. If you have a shared provisioning directory, then this file is automatically available. If, however, you have not shared your provisioning directory, you must manually copy the file to the same location on the DMZ hosts, WEBHOST1 and WEBHOST2.