|
|
|
|
|
Processors
|
|
|
Enable or disable processor (CPU) features.
|
|
Hyper-threading
|
Disabled/
Enabled
|
Enabled
|
When enabled, two threads are available per enabled core. When
disabled, only one thread per enabled core is available.
|
|
Execute Disable Bit
|
Disabled/ Enabled
|
Enabled
|
When enabled, execute disable bit can prevent certain classes of
malicious buffer overflow attacks when combined with a supporting OS
(Oracle Solaris, Oracle VM, Windows Server, Red Hat Enterprise
Linux, SUSE Linux Enterprise Server, and VMware ESXi).
|
|
Hardware Prefetcher
|
Disabled/ Enabled
|
Enabled
|
Enable the mid-level cache (L2) streamer prefetcher.
|
|
Adjacent Cache Line Prefetcher
|
Disabled/ Enabled
|
Enabled
|
Enable the mid-level cache (L2) prefetching of adjacent cache
lines.
|
|
DCU Streamer Prefetcher
|
Disabled/ Enabled
|
Enabled
|
Enable prefetching of next L1 data line based on multiple loads in
same cache line.
|
|
DCP IP Prefetcher
|
Disabled/ Enabled
|
Enabled
|
Enable prefetching of next L1 line based on sequential load
history.
|
|
Intel Virtualization Technology
|
Disabled/ Enabled
|
Enabled
|
When enabled, a Virtual Machine Manager (VMM) can utilize the
additional hardware capabilities provided by Intel Virtualization
Technology.
|
|
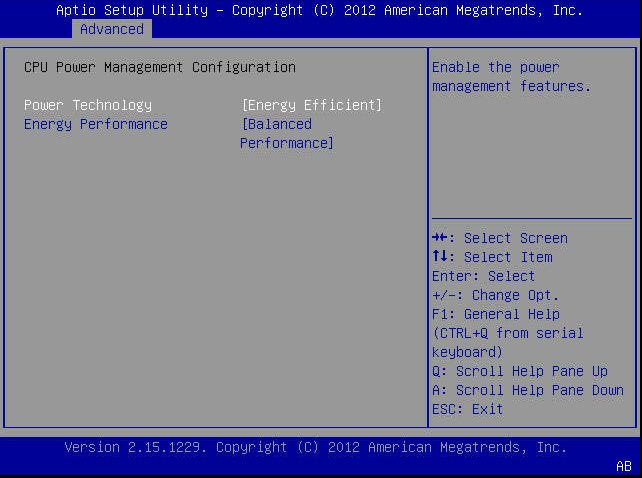
CPU Power Management
Configuration
|
|
|
Displays processor (CPU) information. BIOS provides C-states,
P-states, and T-states support in order for the OS to manage the
power utilization of the system. Power management is also controlled
by the service processor based on system policies.
|
|
Power Technology
|
Disabled/ Enabled/
Efficient/ Custom
|
Efficient
|
Enable the power management features. The following options are
not displayed if Power Technology is set to Disabled.
|
|
Intel SpeedStep
|
Disabled/ Enabled
|
Enabled
|
Displays only if Power Technology is set to Custom. Enable or
disable Intel SpeedStep. The Intel technology used to support
P-state transitions is referred to as Intel SpeedStep.
|
|
Turbo Mode
|
Disabled/ Enabled
|
Enabled
|
Displays only if Power Technology is set to Custom, Intel
SpeedStep is set to enabled, and Turbo Mode is supported in the CPU.
Enable or disable Turbo Mode.
|
|
CPU C3 Report
|
Disabled/ Enabled
|
Enabled
|
Displays only if Power Technology is set to Custom and power state
(C3) is supported in the CPU. Enable or disable CPU C3 (ACPI C2)
report to operating system.
|
|
CPU C6 Report
|
Disabled/ Enabled
|
Enabled
|
Displays only if Power Technology is set to Custom and power state
(C6) is supported in the CPU. Enable or disable CPU C6 (ACPI C3)
report to operating system.
|
|
CPU C7 Report
|
Disabled/ Enabled
|
Enabled
|
Displays only if Power Technology is set to Custom and power state
(C7) is supported in the CPU. Enable or disable CPU C7 (ACPI C3)
report to operating system.
|
|
Package C-States
|
Disabled/ Enabled
|
Enabled
|
Displays only if Power Technology is set to Custom. The power
state control is referred to as C-State. Enable or disable the
Package C-State limit.
|
|
Energy Performance
|
Performance/
Balanced Performance
|
Balanced Performance
|
Optimize between performance and power savings. Windows 2008 and
later operating systems override this value according to its power
plan.
|
|
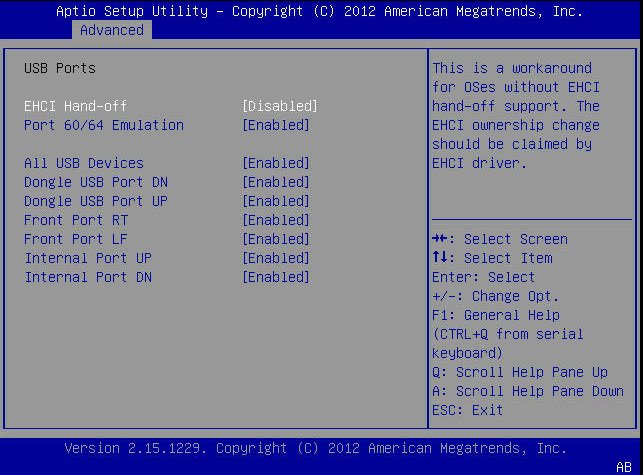
USB PORTS
|
|
|
Set USB port configuration parameters.
|
|
EHCI Hand-off
|
Disabled/ Enabled
|
Disabled
|
Enable or disable Enhanced Host Controller Interface (EHCI)
hand-off support.
|
|
Port 60/64 Emulation
|
Disabled/ Enabled
|
Enabled
|
Enable I/O port 60h/64h emulation support. Enable this setting for
the complete USB keyboard legacy support for non-USB aware operating
systems.
|
|
All USB Devices
|
Disabled/ Enabled
|
Enabled
|
Enable or disable all USB devices.
|
|
Rear Port 0
|
Disabled/ Enabled
|
Enabled
|
Enable or disable USB Port 0.
|
|
Rear Port 1
|
Disabled/ Enabled
|
Enabled
|
Enable or disable USB Port 1.
|
|
Front Port 0
|
Disabled/ Enabled
|
Enabled
|
Enable or disable USB Port 2
|
|
Front Port 1
|
Disabled/ Enabled
|
Enabled
|
Enable or disable USB Port 3.
|
|
Internal Port 0
|
Disabled/ Enabled
|
Enabled
|
Enable or disable USB Port 4.
|
|
Internal Port 1
|
Disabled/ Enabled
|
Enabled
|
Enable or disable USB Port 5.
|
|
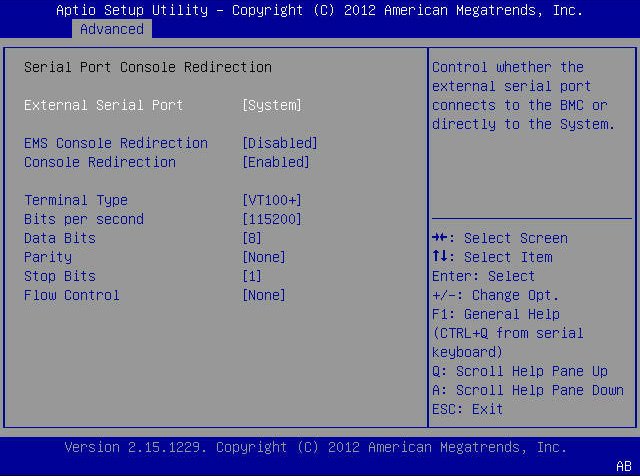
SERIAL PORT CONSOLE REDIRECTION
|
|
|
Provides the capability to redirect console output/input to the
serial port. Graphic output is not redirected. BIOS serial console
redirection lets you monitor BIOS POST messages and navigate the
BIOS Setup Utility menus and Option ROMs from a terminal connected
to the server using a serial connection.
|
|
External Serial Port
|
System/ BMC
|
System
|
Control whether the external serial port connects to the Baseboard
Management Controller (BMC) or directly to the system. Set to BMC
for serial link management.
|
|
EMS Console Redirection
|
Disabled/ Enabled
|
Disabled
|
Enable or disable console redirection for Windows Emergency
Management Service (EMS) administration.
|
|
Console Redirection
|
Disabled/ Enabled
|
Enabled
|
Enable or disable console redirection.
|
|
Terminal Type
|
VT100/
VT100+/
VT-UTF8/
ANSI
|
VT100+
|
Select the emulation for the terminal: VT100: ASCII character set.
VT100+: Extends VT100 to support color, function keys, etc. VT-UTF8:
Uses UTF8 encoding to map Unicode characters onto one or more bytes.
ANSI: Extended ASCII character set.
|
|
Bits per Second
|
9600/ 10200
/ 57600/ 115200
|
9600
|
Select the serial port transmission speed. The speed must be
matched on the connecting serial device. Long or noisy lines require
lower speeds.
|
|
Data Bits
|
07/08/11
|
8
|
Select the data bits.
|
|
Parity
|
None/
Even/
Odd/
Mark/
Space
|
None
|
A parity bit can be sent with the data bits to detect some
transmission errors.
None: No parity bits are sent.
Even: Parity bit is 0 if the number of 1s in the data bits is
even.
Odd: Parity bit is 0 if the number of 1s in the data bits is odd.
Mark: Parity bit is always 1.
Space: Parity bit is always 0.
Mark and Space parity do not allow for error detection. They can
be used as an additional data bit.
|
|
Stop Bits
|
01/02/11
|
1
|
Stop bits indicate the end of a serial data packet. (A start bit
indicates the beginning of a serial data packet.) The standard
setting is 1 stop bit. Communication with slow devices may require
more than 1 stop bit.
|
|
Flow Control
|
None/
Hardware/
RTS/
CTS
|
None
|
Flow control can prevent data loss from buffer overflow. When
sending data, if the receiving buffers are full, a “stop” signal can
be sent to stop the data flow. Once the buffers are empty, a “start”
signal can be sent to restart the flow. Hardware flow control uses
two wires to send start and stop RTS (request to send) and CTS
(clear to send) signals.
|
|
TRUSTED COMPUTING
|
|
|
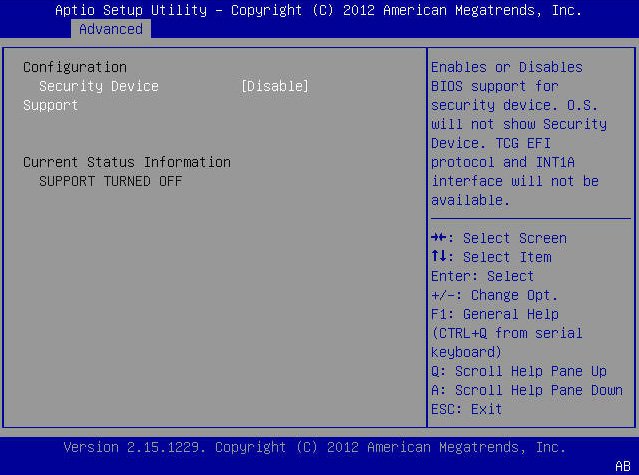
If you intend to use the Trusted Platform Module (TPM) feature
set, you must configure the server to support TPM. The TPM feature
is used by the OS for proof that BIOS code has not been tampered
with.
|
|
TPM Support
|
Disabled/ Enabled
|
Enabled
|
Enable or disable TPM support. Only UEFI BIOS implements this
setup option. If disabled, the OS will not show TPM. Reset of
|
|
TPM State
|
Disabled/ Enabled
|
Disabled
|
Displays whether TPM Support is enabled.
|
|
Current TPM Status Information (R/O)
|
|
|
If TPM Support is disabled, Current TPM Status displays “TPM
SUPPORT OFF.” If TPM Support is enabled, Current TPM Status
displays: TPM Enabled Status: TPM Active Status: TPM Owner Status:
|
|
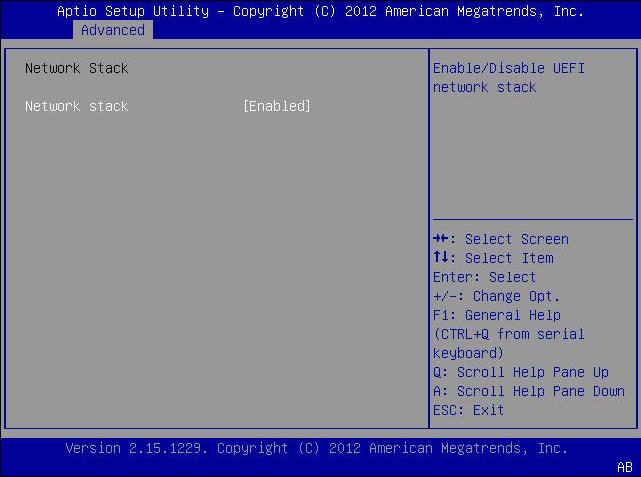
NETWORK STACK
|
|
|
Configure network stack settings.
|
|
Network Stack
|
Disabled/ Enabled
|
Enabled
|
Enable or disable the UEFI network stack.
|
|
BMC NETWORK
|
|
|
Configure Baseboard Management Controller (BMC) network
parameters.
|
|
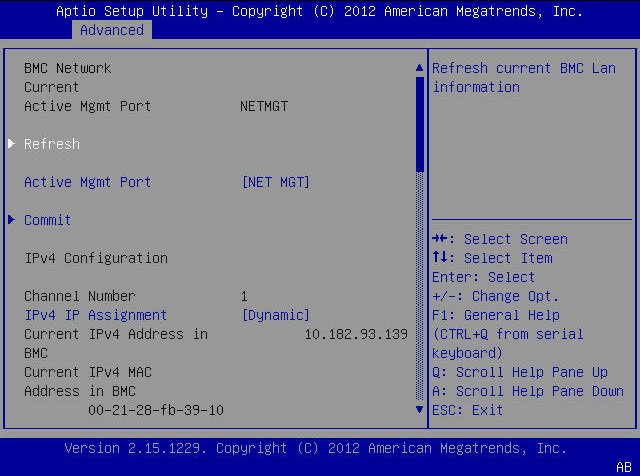
BMC Network: Current Active Management Port (R/O)
|
Disabled/ Enabled
|
Enabled
|
Active management port settings are displayed. Refresh
|
|
Refresh
|
|
|
Refresh current BMC network information with the latest
information from the service processor.
|
|
Active Management Port
|
NETMGT/
NET0/
NET1/
NET2/
NET3
|
|
Change the management port that is currently active.
|
|
Commit
|
|
|
Commit the current BMC network information.
|
|
IPv4 Configuration (R/O)
|
|
|
Current configuration of the IPv4 settings is displayed.
|
|
Channel Number (R/O)
|
|
|
Current channel number is displayed.
|
|
IPv4 Assignment (R/O)
|
Static/
Dynamic
|
Static
|
View whether the service processor is assigned a static IPv4
address or assigned a dynamic IPv4 address using Dynamic Host
Control Protocol (DHCP).
|
|
Current IPv4 Address in BMC (R/O)
|
|
|
Current IPv4 address of the service processor is displayed.
Example: 172.31.255.255
|
|
Current IPv4 MAC Address in BMC (R/O)
|
|
|
Current IPv4 MAC address for the service processor is displayed.
Example: 00:12:46:BE:0A:02
|
|
Current IPv4 Subnet Mask in BMC (R/O)
|
|
|
Current IPv4 subnet mask address for the service processor is
displayed. Example: 255.255.255.0
|
|
Refresh
|
|
|
Select Refresh to update to the current settings.
|
|
IPv4 Address
|
|
|
If IPv4 Assignment is set to Static, set the IPv4 address for the
service processor.
|
|
IPv4 Subnet Mask
|
|
|
If the IPv4 Assignment is set to Static, set the IPv4 subnet mask.
Example: 255.255.255.0
|
|
IPv4 Default Gateway
|
|
|
If the IPv4 Assignment is set to Static, set the IPv4 default
gateway. Example: 129.144.82.254
|
|
Commit
|
|
|
Commit the IPv4 configuration settings.
|
|
IPv6 Configuration (R/O)
|
Static/
Dynamic
|
Dynamic
|
urrent configuration of the IPv6 settings is displayed. IPv6
addresses are written with hexadecimal digits and colon separators.
For example: 2001:0db0:000:82a1:0000:0000:1234:abcd. IPv6 addresses
are composed of two parts: a 64-bit subnet prefix and a 64-bit host
interface ID. To shorten the IPv6 address, you can (1) omit all
leading zeros, and (2) replace one consecutive group of zeros with a
double colon (::). For example: 2001:db0:0:82a1::1234:abcd
|
|
Channel Number (R/O)
|
|
1
|
Current channel number is displayed.
|
|
Current IPv6 State (R/O)
|
|
|
Current IPv6 state is displayed.
|
|
Current IPv6 Auto Configuration (R/O)
|
|
|
Current IPv6 autoconfiguration parameters are displayed.
|
|
Link Local IPv6 Address (R/O)
|
|
|
Current link local IPv6 address is displayed. Example:
fe80::214:4fff:feca:5f7e/64
|
|
Static IPv6 Address (R/O)
|
|
|
Current static IPv6 address is displayed. Example:
2001:0db0:000:82a1:0000:0000:1234:abcd
|
|
IPv6 Gateway (R/O)
|
|
|
Current IPv6 gateway address is displayed. Example:
fe80::211:5dff:febe:5000/128
|
|
Dynamic IPv6 Address 1 – (R/O)
|
|
|
Current dynamic IPv6 address is displayed. Example:
fec0:a:8:b7:214:4fff:feca:5f7e/64
|
|
Refresh
|
|
|
Select Refresh to update to the current settings.
|
|
IPv6 State (R/O)
|
Disabled/ Enabled
|
|
View whether the IPv6 state is enabled or disabled.
|
|
Auto IPv6 Configuration
|
Disabled/
Stateless/
Dhcpv6_ stateless/
Dhcpv6_ stateful
|
Disabled
|
Autoconfiguration options are:
Disabled: When autoconfiguration is disabled, only the Link Local
address is set. None of the autoconfiguration options to configure
an IPv6 address are run.
Stateless: When enabled, the IPv6 Stateless autoconfiguration is
run to learn the IPv6 addresses for the device.
Dhcpv6_stateless: When enabled, the Dhcpv6_stateless
autoconfiguration is run to learn the DNS and domain information for
the device.
Dhcpv6_stateful: When enabled, the Dhcpv6_stateful
autoconfiguration is run to learn the IP addresses and DNS
information for the device.
|
|
Static IPv6 Address
|
|
|
Set the static IPv6 address. Example:
2001:0db0:000.82a1:0000:0000:1234:abcd
|
|
Commit
|
|
|
Commit the IPv6 configuration settings.
|


