| Skip Navigation Links | |
| Exit Print View | |

|
Sun Blade X4-2B HTML Documentation Collection |
About Oracle Solaris OS Installation
Oracle Solaris Installation Task Table
Supported Oracle Solaris Operating System Versions
Supported OS Versions and Latest Information
Latest Information in Product Notes
Single-Server Installation Methods
Oracle System Asssistant Overview
Oracle System Assistant OS Installation Task
Obtaining Oracle System Assistant
Obtaining Oracle Solaris Documentation
Selecting the Installation Method
Load BIOS Optimal Default Settings
Installing the Oracle Solaris OS
Installing the Oracle Solaris OS
Install the Solaris OS (Oracle System Assistant)
Install the Oracle Solaris OS (Manually)
Identify Logical and Physical Network Interface Names
Install Server System Tools (Optional)
Supported Linux OS Versions and Latest Information
Supported Linux Operating Systems
Oracle Unbreakable Enterprise Kernel for Linux
Single-Server Installation Methods
Oracle System Assistant OS Installation Task
Obtaining Oracle System Assistant
Downloading Installation Media Kits
Download Oracle Linux Media Kits
Selecting the Installation Method
Load BIOS Optimal Default Settings
Installing the Operating System
Identifying Logical and Physical Network Interface Names
Identify Logical and Physical Network Interface Names (Oracle Linux or RHEL)
Identify Logical and Physical Network Interface Names (SLES)
Install a Linux OS (Oracle System Assistant)
Installing a Linux OS Manually
Installing Server System Tools and Updating Drivers
Update or Install System Drivers
Updating a Linux OS to a New Version
Update the Oracle Linux Operating System Version
Update the SLES Operating System Version
Update the RHEL Operating System Version
About Oracle VM Software Installation
Oracle VM Installation Task Table
Oracle VM Installation Options
Single-Server Installation Methods
Multiple-Server Installation Options
Oracle System Asssistant Overview
Oracle System Assistant Install OS Task
Obtaining Oracle System Assistant
Preparing for Oracle VM Server Installation
Selecting the Installation Method
Creating a Virtual Disk and Setting the Boot Disk
Disable VT-d and SR-IOV in BIOS
Install Oracle VM Server (Oracle System Assistant)
Installing Oracle VM Server (Manually)
Install Oracle VM Server (Local or Remote Media)
Installing Oracle VM Server (PXE Server)
PXE Server Installation Requirements
Install Oracle VM Server (PXE Server)
Completing the Oracle VM Installation
Creating and Managing Oracle VM Resources
Supported OS Versions and Latest Information
Supported Windows Operating Systems
Single-Server Installation Methods
Windows Deployment Services OS Installation
Oracle System Assistant OS Installation Task
Obtaining Oracle System Assistant
Selecting the Installation Method
Load BIOS Optimal Default Settings
Install Windows (Oracle System Assistant)
Install Windows Server 2012 or 2012 R2 (Manually)
Installing Server System Tools and Updating Drivers
About VMware ESXi Installation
VMware ESXi 5 and Server Module Documentation
Supported VMware ESXi Software
Interactive Installation Methods
Preparing for ESXi 5 Installation
Creating a Virtual Disk and Setting the Boot Disk
Install VMware ESXi 5 (Local or Remote Interactive Installation)
This section describes how to install the OS without the use of Oracle System Assistant. The OS can be installed using either a local or remote method.
Caution - Data loss. The OS installation formats the boot disk, which erases any existing data on the disk, including any preinstalled OS. |
Before You Begin
Set up the server for the OS installation of choice (local or remote). See Set Up the Local Console or Set Up the Remote Console.
If necessary, prepare a volume on the server hard drives and set the boot device. Refer to the Sun Blade X4-2B Installation Guide .
Acquire the Windows OS install distribution media.
If you want to configure your boot drive for RAID 1 (mirroring) using the LSI Logic integrated RAID controller’s setup utility, press Ctrl+H (or Ctrl+C from the command line during server POST sequence).
For local installation: Insert the Microsoft Windows Server 2008 R2 installation media into the attached physical CD/DVD-ROM drive when prompted.
For remote installation: Insert the Windows Server installation media into the Oracle ILOM Remote Console system’s CD/DVD-ROM drive. Make sure you have selected CD-ROM in the Device menu.
If you are using a Windows image: Ensure that the Windows Server installation ISO image is accessible from the remote system. Make sure you have selected CD-ROM Image in the Device menu.
If you are using the Windows Remote or Windows Image method, you can power cycle the server through Oracle ILOM.
The BIOS POST process begins.
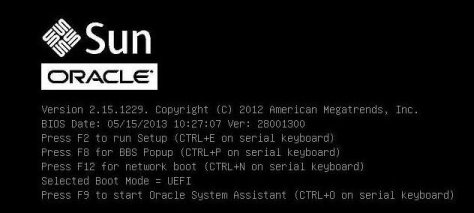
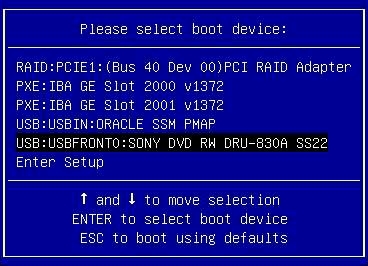
Once the BIOS POST process is complete, the BBS Popup menu appears. The BBS Popup menu allows you to select a boot device.
A sample BBS Popup menu screen:
When prompted with Press any key to boot from CD, quickly press any key.
The Windows installation wizard starts.
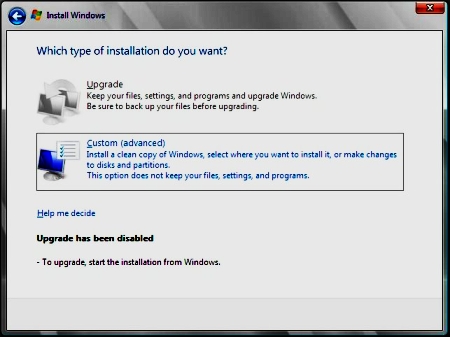
To add a mass storage driver for Windows Server 2008 SP2, click Load Driver, and browse to the location of the mass storage device driver (CD/DVD or USB flash drive). Select the driver information file (.inf).
To select the Windows default partition settings, click Next. Go to Step 9.
To override the Windows default partition settings, click Drive Options (advanced) and proceed to the next step.
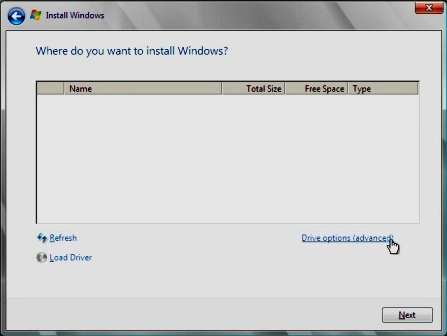
Caution - Data loss. Formatting or repartitioning a preexisting partition destroys all data on the partition. |
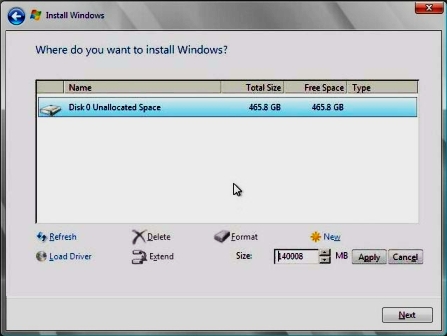
The Windows installation begins. During the installation process, the server reboots several times.
When the installation process is complete, Windows starts.
Once you have assigned a password to the Administrator account, the Windows Server 2008 R2 desktop appears.
Next Steps