 Part 1: Building a POJO Annotation-Driven Service

A Session Bean usually implements some type of business task or activity. It is generally instantiated or created for a specific client request and and usually exists only for the duration of a single session. They can be used for anything but are commonly used for one-off calculations, information lookup, etc, especially when data is not going to be persisted.
-
Create a new empty project. Right-click the Annotation project node and select New > From Gallery . In the New Gallery, select General > Projects in the Categories list and Custom Project in the Items list. Click OK

-
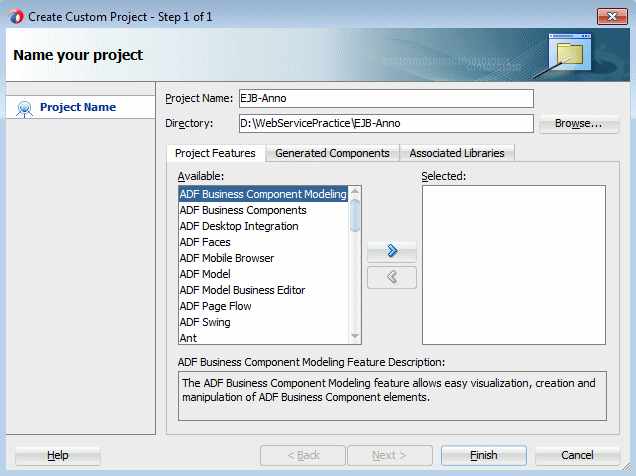
Name the new project EJB-Anno, leaving other values at their default. Click Finish.
-
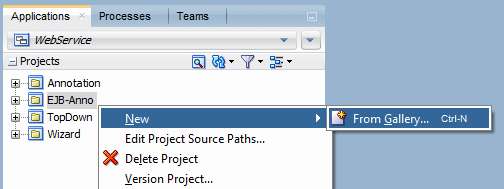
Right-click the EJB-Anno project and select New > From Gallery.
-
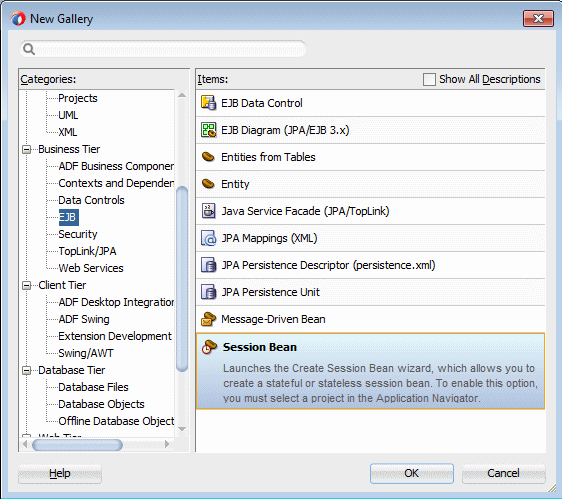
In the New Gallery, expand the Business Tier node and select EJB in the Categories list . In the Items column, select Session Bean and click OK.
-
In the new Session Bean Wizard, click Next up to Step 4. Accepting the defaults for the EJB Version (Enterprise JavaBeans 3.1 (Java EE 6.0), Name and Class Definition pages.
-
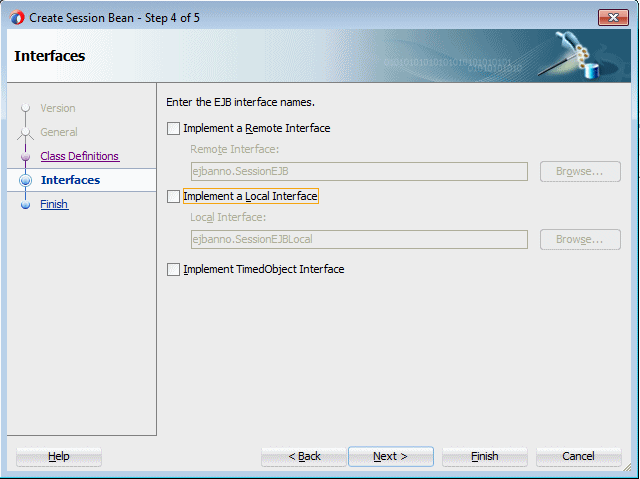
On the Interfaces page, deselect both check boxes so that no interfaces are implemented. Click Next, then Finish to create the bean.
-
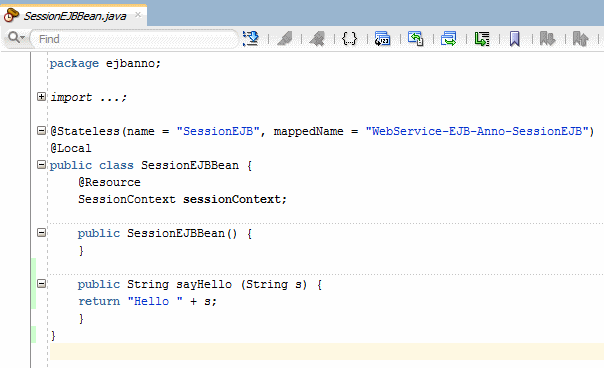
The SessionEJBBean.java file opens in the editor. Add the same sayHello() method as in previous scenarios:
public String sayHello (String s) {
return "Hello " + s;
}
The class should now look like:
-
Click Save All
 to save your work.
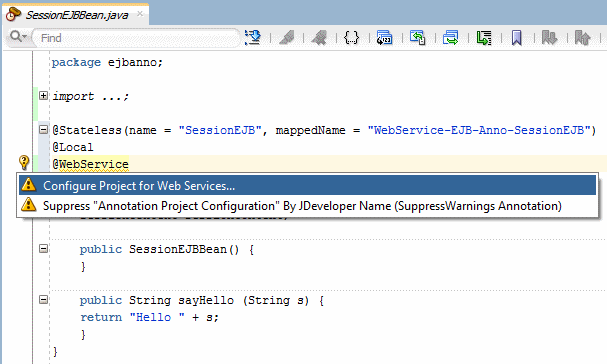
At this point you just have a class with simple business logic to return the word Hello, followed by the value entered for a parameter. Next you add the web service annotations as you did before. -
Above the class definition add the @WebService annotation. JDeveloper will automatically add the import for javax.jws.WebService. Click the @WebService line of code and then click the lightbulb in the left margin. Select Configure project for web services to configure the rest of the project for web services.
-
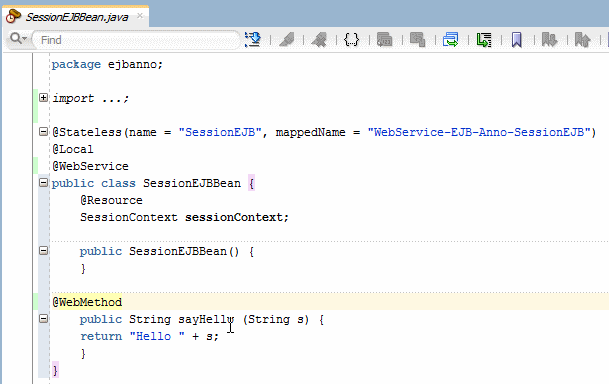
Above the sayHello method, add the @WebMethod annotation, just as you did with the POJO. If requested, press [Alt]+[Enter] to add the import statement (although this statement may be added automatically.)
-
Click Save All
to save your work.
In this section you compile, deploy and test the web service. Just as before, you use the HTTP Analyzer for testing the web service. When you test web services using the analyzer, the service is compiled and deployed to the integrated server. The analyzer is then invoked, enabling you to send and receive values from the web service.
-
In the Applications window, right-click the SessionEJBBean.java node and in the context menu, select Test Web Service
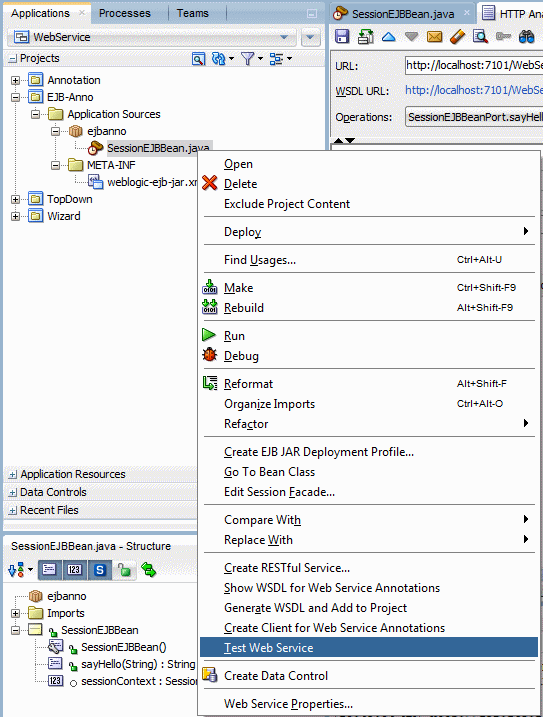
Like earlier, the top portion of the HTTP Analyzer editor displays the URL for the web service, WSDL URL, and exposed Operations.

-
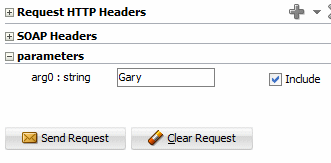
In the Request area, enter <your name> in the arg0 field and click Send Request.
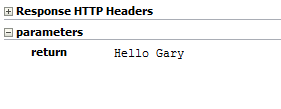
The analyzer then sends the request to the service, and after a bit the return parameter is displayed.
-
Close all the tabs and collapse the EJB-Anno project.