| Oracle® Application Integration Architecture Agile Product Lifecycle Management Integration Pack for Oracle E-Business Suite: Design to Release Implementation Guide Release 11.2 Part Number E36185-05 |
|
|
PDF · Mobi · ePub |
| Oracle® Application Integration Architecture Agile Product Lifecycle Management Integration Pack for Oracle E-Business Suite: Design to Release Implementation Guide Release 11.2 Part Number E36185-05 |
|
|
PDF · Mobi · ePub |
This appendix provides information on queue management.
The Queue Management feature in the process integration pack (PIP) helps you meet the following requirements:
An event exists to produce filtered payload from a file destination to a JMS destination.
The payload is defined by means of a standard XSD.
The files or JMS messages produced by events are sequenced in the order in which the objects are released.
Note:
These requirements are leveraged by means of the Agile PLM Content Service (ACS). ACS can produce payload to a file or JMS destination. The payload is based on filter configured for the ACS event defined by an Agile PLM-provided AXML schema definition. In addition, ACS transmits the messages in the order in which the ATOs are released.
A queue manages the order of messages
A queue monitors UI to enable reordering and resubmitting unprocessed messages
The queue manages the payloads based on the business process for which the message is produced by the event
The queue controlling mechanism:
Triggers the business flow based on the business process of message
Processes the messages sequentially based on the order specified in the message (the highest-order message is picked first for processing)
Does not pick a message for processing unless the processing of the previous message is complete
Can reorder the messages that have not been picked for processing
For more information about Queue Manager, see Agile PLM Integration Pack for Oracle E-Business Suite User Guide.
The integration of Change Order Release process between Agile PLM and Oracle Enterprise Business Services system is driven by Process Queue Controller. In order to maintain integrity of data in the ERP system, it is essential that Change Orders be transferred to that system in the order in which they were released by the source system. In the absence of such sequencing, BOM data can go out of sync between the two systems.
Since ERP systems, like Oracle, make it mandatory for successive item revisions to follow an ASCII progression of characters, it is essential for this sequence to be maintained.
For example, if for the same revised item, two successive Change Orders are released, and the second one is created first in the ERP system, the revision number of the first one (if smaller in ASCII value than that of the latter, which is mostly the case in Agile) will subsequently be prohibited from being created in the ERP system. Worse problems can occur if the two ECOs make successive changes to the same BOM line, or if the subsequent ECO is dependent on the first one.
When an aXML file containing Change Order information is received by the integration for processing through the Change Order Release process, the first step that needs to be carried out is to queue it for processing. aXML files are queued in the order in which they are received (FIFO). Agile application ensures that aXML files are pushed in the order that Change Orders are released.
The chronological order of receiving aXML files, (or, alternately, the ASCII sequence of aXML file names), is used to determine the sequence in which incoming XML will be processed by the integration. In some cases, aXML for multiple processes (such as NPR process, any other legacy process, etc.) may be published to the same location, in which case the integration performs an extra step of determining what the contents of the aXML are, in order to determine what flow does it trigger – only the aXML files belonging to the Change Order Release flow are to be queued.
By default, the aXML is queued at the back of the queue with an initial status of Pre-Processing. At this time, the initial pre-processing is carried out, as described in #1 above, after which the integration changes the status of that aXML to Pending Processing.
At a given time, only one Change Order, i.e., the first one in the queue, undergoes ERP processing. At this stage, the status of that aXML file changes to Processing. When a Change Order errors out during ERP processing, it remains ahead of the queue in an errored status. All further change orders are not processed until the errored change is manually moved out of the queue by the Integration Administrator. When a Change Order completes ERP processing successfully, it automatically moves out of the queue by the integration (for example, by changing the status to Post Processing), and the next Change Order in the queue begins ERP processing.
Note that the change that has completed ERP processing still needs to carry out postprocessing.
However, any errors encountered during post-processing cause the Change Order to complete with a Warning status, and not with an Error.
Manually moving the errored change out of the queue can be done in one of two ways:
The integration administrator can De-queue the Change Order. This operation moves the Change Order out of the queue and saves it in the repository of Unprocessed Change Orders. The next Change Order in queue is then picked up for processing through the Change Order process flow.
The integration administrator can Reprocess the Change Order. This operation immediately re-starts the integration process flow for that change order. Prior logs are wiped out, but the original aXML input provided by Agile is used. The pre-processing need not be repeated for such a change – the integration process resumes from the Processing stage.
The Change Order Release process flow can be broken down into two major stages:
Process ECO
ABM to EBM transformations
Invoke Provider
Receive Response
Send Response to the Queue
Table B-1 Flow of Change Order Process between ESB and BPEL
| Sequence | ESB | BPEL |
|---|---|---|
|
1 |
ACS AXML JMS Consumer polls on JMS Queue and invokes CreateQueueServiceABCS by sending the binary compressed aXML file. |
|
|
2 |
DB trigger is used for ECO Queue creation and giving them a sequence number |
ECO Queue Control |
|
3 |
Queue Processing Service polls on Queue Control table for pending rows and invokes QueueProcessorServiceImpl |
QueueProcessorServiceImpl
|
|
4 |
CreateQueueService
|
Post-Process ECO
Update transfer status in Agile
It must be noted that a conflict can occur only when data is actually being transferred to the ERP system, and not when parsing aXML or after the processing in ERP has finished.
If the pending ECOs are not being picked up for processing, there could be a possibility that some other user may have suspended the queue. To verify this, log in-out and then re-login. If the Suspend button is disabled, then you may resume the queue. By default, the queue remains in suspended state after PIP installation. You are required to initialize it for the first time by clicking Resume.
View the Automated Transfer Objects (ATO)
View the Process States. These states are:
Processing
Pending
Completed
Errored (failed)
View the Release Time and Processed Time of processed COs.
View the unprocessed COs.
View the deleted processes.
View the errored processes and their error details.
Suspend and resume the queuing operation.
Change the processing sequence in the queue, i.e., move the position of an object up and down the queue.
Remove the COs, selectively, from the processing queue.
Resubmit the removed COs for processing.
Filter the view on various criterion, such as, all COs that are pending.
Purge data from the list of change orders that have been processed successfully.
The following user interface components are available when working with queues:
Accessing the Process Queue Monitor
Fields and Attributes
Filters
Queue User Interface (UI) Application
The Process Queue Monitor UI is deployed at your Integration Server and can be accessed through web browser.
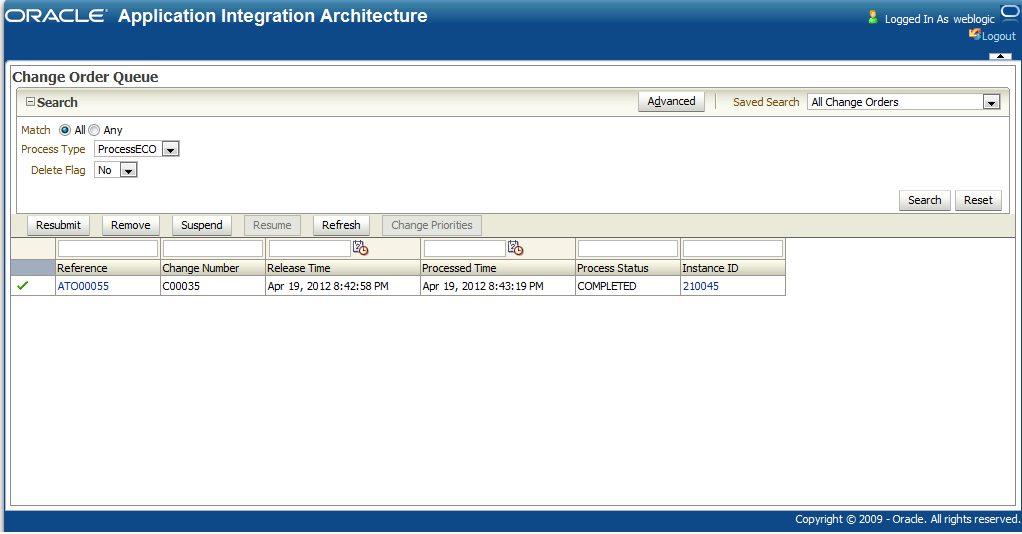
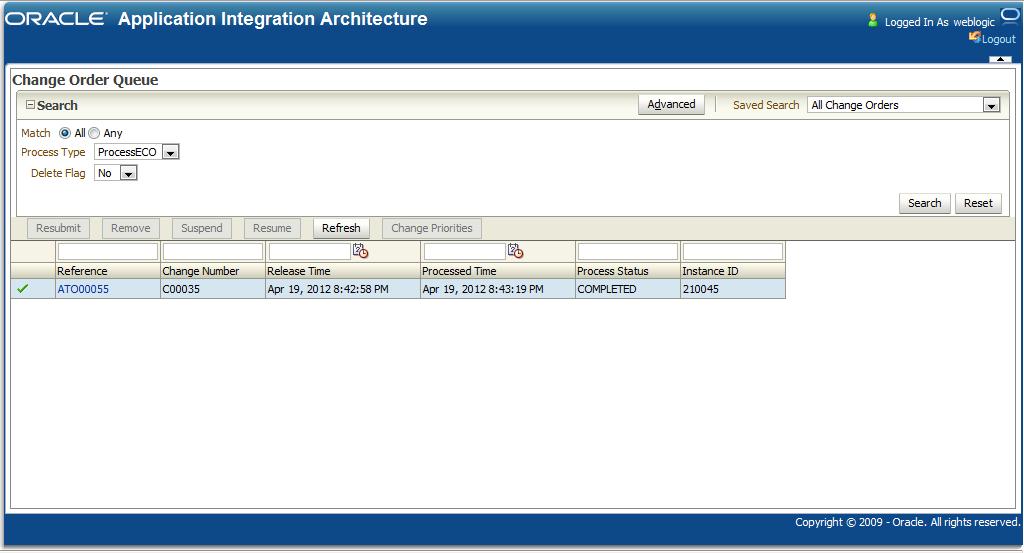
The Integration Administrator is provided with its URL, together with login ID and password. After you login, you can see a page similar to the one below:
When a Change Order is released, it is picked up by the Queue Controller, which assigns it an Automated Transfer Object (ATO) Number before passing it on for processing. The Queue Monitor displays this ATO number as Reference Number.
The Fields and Attributes component includes the Change Order Queue Monitor description.
The Changer Order Queue is a tabular display of the released orders lined up by Queue Manager for processing. Each row in this table is a Change Order. The first row denotes the 'first-in-sequence' Change Order, when it is in Pending state of processing.
| Columns | Descriptions |
|---|---|
|
Row Select |
To select rows, click on a row. To select multiple rows, click on a row and hold the Ctrl button and click on any additional rows. Selecting rows can be used when (a) re-ordering (only messages at a PENDING status that have not been removed), (b) removal, (c) resubmission. In such cases, this column gets visible and contains a checkbox. This column remains invisible for 'Completed' Process States. |
|
Reference |
The Automated Transfer Object Number (hence the prefix 'ATO') assigned to a Change Order by Agile Content Server (ACS). It is unique and corresponds to a unique Change Order. The Number of the corresponding Changer Order is displayed under the 'Change Number' column. |
|
Change Number |
This is a unique number assigned to a Changer Order in Agile system at the time of its creation. Its prefix denotes the type of Change, such as, ECO for Engineering Change Order. |
|
Release Time |
The Date and Time when an Order is released by ACS to the Process Queue Manager. Internally, its the Date and Time when the Process Queue Controller picks up an Order and puts it in the Queue. |
|
Processed Time |
The Date and Time when an Order attains a particular Process Status (last column). |
|
Process Status |
The State of a process - Processing, Pending, Completed, Errored. |
Figure B-2 shows the process denoters and their functions:
This section provides a list of queue operators and their operations.
Table B-3 Queue Operettas and Operations
| Buttons/Links | Operations |
|---|---|
|
Resubmit |
This button is used for resubmitting the Pending Processes that were removed from the Queue. Or for resubmitting the Errored Processes that you would like to resubmit. |
|
Remove |
This button is used for removing any processes from the Queue. The removed processes still exist in the database, and can be resubmitted for processing. (i.e. view records where the Delete Flag is equal to Yes). |
|
Suspend |
This button is used for suspending the Queue, temporarily, for removing, resubmitting or reordering the Pending Processes. It remains disabled when the Queue is inactive, i.e., when the Queue is in Suspended mode and has not been resumed. By default, the Queue remains in Suspended state after PIP installation. You are required to 'initialize' it for the first time by clicking Resume button. The queue suspends the ProcessECO and ValidateECO records independently of each other. If the Process Type is equal to ProcessECO when you click the Suspend button, only the ProcessECO records will be suspended, the ValidateECO record will not be suspended and will continue to be processed. |
|
Resume |
This button is used for resuming the suspended Queue. It remains disabled when the Queue is active, i.e., its not in suspended mode. The queue resumes the ProcessECO and ValidateECO records independently of each other. If the Process Type is equal to ProcessECO when you click the Resume button, only the ProcessECO records will be resumed, the ValidateECO record will not be resumed and will continue to be suspended. |
|
Refresh |
This button is used for refreshing the Queue to get a list of freshly added processes and to see the change in process status. The process status is not automatically refreshed. Also, the new processes do not automatically appear in the Queue. This search and refresh button will work identically. |
|
Search |
This button is used for searching the Queue to get a list of freshly added processes and to see the change in process status. The new processes do not automatically appear in the Queue. It's also used if you change the search criteria in the header. This search and refresh button will work identically. |
|
Reset |
This button is used to reset the search criteria back to the default Saved Search criteria that is selected in the search header. |
|
Change Priorities |
This button is used to reorder processes in the Queue. This button will only be enabled when records at a Pending state are selected. Select Pending records by selecting a row and using the Ctrl button to select additional Pending rows. Once you have selected Pending records, you can click on this button and the Reorder Queue screen will open. Changing priorities of records should always be done when the queue is in a Suspended state. |
|
Process Reordered Records |
This button is used after the move buttons have been used to reorder the queue. Once the pending records have been reordered, this button is used to process the reordered records. It will save the new priority of the records. |
|
Cancel |
This button is used to cancel any reordering you have done and will close the Reorder Queue form. The arrow buttons can be used to move a record up or down in the sequence. This should only be used when the queue is in 'suspended' mode. |
Figure B-3 shows the Change Priorities page
At any given time, a queue may have hundreds of COs under processing, depending on the size of the organization. Although, the Queue Monitor displays all of them, it gets difficult to find the specific ones that you may require to see quickly.
Queue filters facilitate display of the change orders on the basis of their processing state and further criterion. The tables below list the search criterion of the predefined Saved Search criteria. The bold text indicates the default value or operator.
This filter displays the complete list of all change orders in the queue.
Figure B-5 shows the search parameters to be selected to view all change orders.
This table shows how to set up a filter to view all change orders:
This filter displays the change orders with errors.
Figure B-6 shows the search parameters to find change order with errors.
This filter displays the pending change orders.
Figure B-7 shows the search parameters to view pending change orders.
This table shows how to set up a filter to view pending change orders:
This filter displays the completed change orders.
Figure B-8 shows the search parameters to view completed change orders.
This table shows how to set up a filter to view completed change orders:
This filter displays the changes errored within last week.
Figure B-9 shows changes which errored within last week.
This table shows how to set up a filter to view change orders that errored within last week:
Table B-8 Filter Settings to View Changes Errored within Last Week
| Criteria | Operator | Value |
|---|---|---|
|
Process Type |
Equals Starts With Ends With Does Not Equal Less Than Greater Than Less Than or Equal To Greater Than or Equal To Between Not Between Contains Does not contain Is Not Blank Is Blank *Not all operators may apply to your value. |
ProcessECO ValidateECO |
|
Delete Flag |
Equals Does not equal Less Than Greater Than Less Than or Equal To Greater Than or Equal To Between Not Between Is Blank Is Not Blank *Not all operators may apply to your value. |
No Yes |
|
Process Status |
Equals Starts With Ends With Does Not Equal Less Than Greater Than Less Than or Equal To Greater Than or Equal To Between Not Between Contains Does not contain Is Not Blank Is Blank *Not all operators may apply to your value. |
ERRORED PENDING COMPLETED PROCESSING |
|
Processed Time |
Between Equals Does Not Equal Not Between Before After On or before On or after Is blank Is not blank |
7 days from Today's Date and Today's Date |
This table shows how to set up a filter to view unprocessed change orders:
Table B-9 Filter Settings to View Unprocessed Change Orders
| Criteria | Operator | Value |
|---|---|---|
|
Process Type |
Equals Starts With Ends With Does Not Equal Less Than Greater Than Less Than or Equal To Greater Than or Equal To Between Not Between Contains Does not contain Is Not Blank Is Blank *Not all operators may apply to your value. |
Process ECO Validate ECO |
|
Process Status |
Does not Equal Starts With Ends With Does Not Equal Less Than Greater Than Less Than or Equal To Greater Than or Equal To Between Not Between Contains Does not contain Is Not Blank Is Blank *Not all operators may apply to your value. |
COMPLETED ERRORED PENDING PROCESSING |
This table shows how to set up a filter to view all delete flags:
Table B-10 Filter Settings to View Delete Flags
| Criteria | Operator | Value |
|---|---|---|
|
Process Type |
Equals Starts With Ends With Does Not Equal Less Than Greater Than Less Than or Equal To Greater Than or Equal To Between Not Between Contains Does not contain Is Not Blank Is Blank *Not all operators may apply to your value. |
Process ECO Validate ECO |
|
Delete Flag |
Equals Does not Equal Less Than Greater Than Less Than or Equal To Greater Than or Equal To Between Not Between Is Not Blank Is Blank *Not all operators may apply to your value. |
No |
|
Delete Flag |
Equals Does not Equal Less Than Greater Than Less Than or Equal To Greater Than or Equal To Between Not Between Is Not Blank Is Blank *Not all operators may apply to your value. |
Yes |
The Advance Query Abilities feature allows you search for queries using advanced search parameters. You can use the advanced query abilities by clicking the Advance Query Abilities button. This button can be used when advanced searching is required and if the pre-defined saved searches do not meet your needs. When this button is pressed, the Add Fields button is added next to the Reset button. Additional fields can be added to your current search criteria.
Example: If the All Change Orders default search criteria was being used, you could also select Change Number from the list below:
Then the Change Number will be added to your search criteria. The operator and value can then be entered and a search can be performed. The X button can then be used to delete that additional field. Or the reset button can use to reset your criteria back to the Saved Search criteria.
In addition to the header search criteria, each column in the table (Reference, Change Number, Release Time, Processed Time, Process Status) has a QBE Line that can also be used as a filter.
The Queue User Interface (UI) application provides the following features:
Easy access Enterprise Manager (EM) console link to SOA composite instances for Change Orders
User role-based access
Add new users into user roles
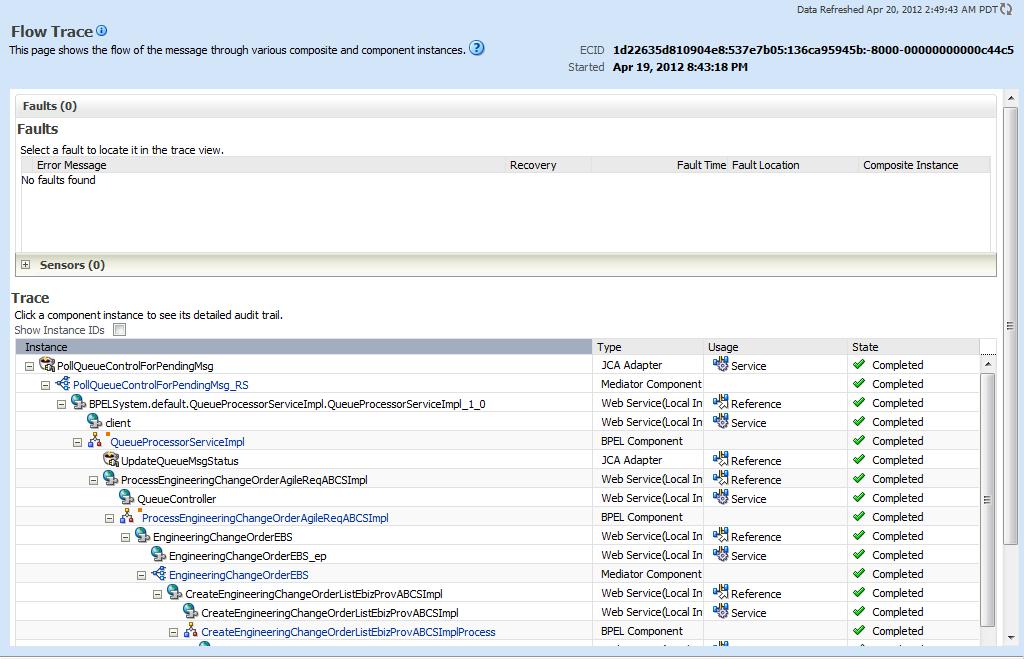
This feature enables you to easily access the flow trace of the SOA composite instances in EM console for a given change order. The new column Instance ID added in the Queue UI application shows the instance id value of the first SOA composite in the flow with a hyperlink to view the full flow trace.
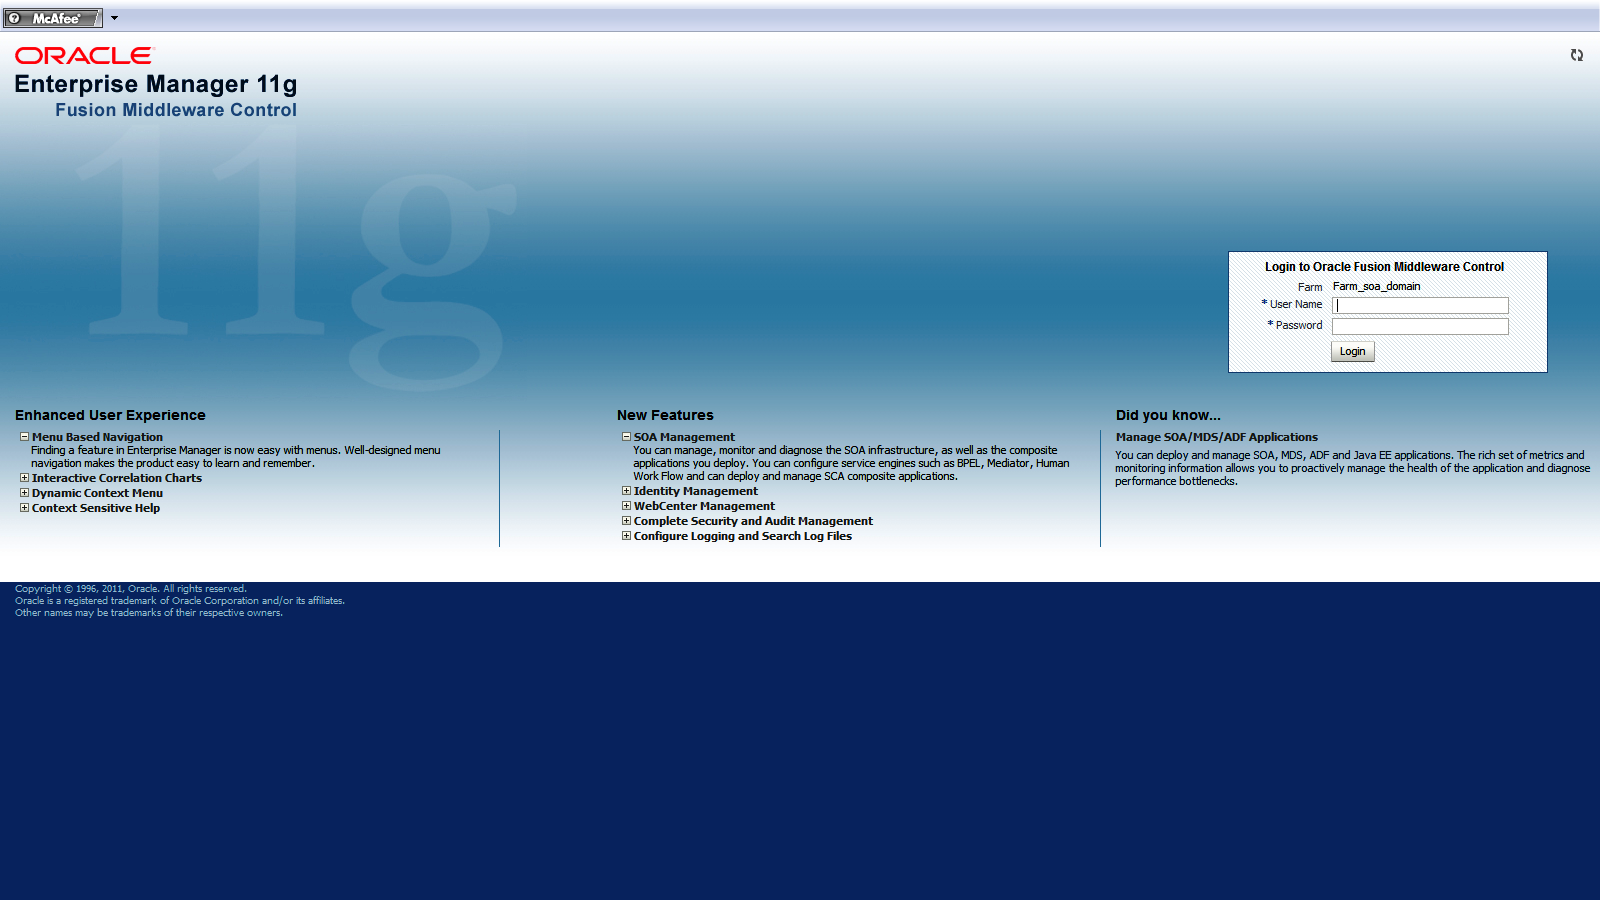
The hyperlinked Instance ID takes you to login screen of the EM console. After successful authentication, you can access the flow trace of execution for a given change order.
The following screenshots shows how to access the EM console for successful and errored instances of SOA composites through hyperlinked Instance ID field in the Queue UI application.
In AIA PIP release 11.2, the Queue UI application now ships with role-based controlled access to the application. Following are the two roles
| Role | Description |
|---|---|
|
For Change UI administrators: Role name: ChangeOrderUIAdminRole |
Have full access to the Queue UI application. Have exclusive access to:
|
|
For business users: Role name: ChangeOrderUIBusinessRole |
Have view only access to the Queue UI application. The user does not have the exclusive privileges mentioned for the administrators. |
Note:
As part of the Queue UI installation, the Queue UI application ships with the following two default users:
ChangeOrderUIAdmin: This role belong to ChangeOrderUIAdminRole
ChangeOrderUIBusiness: This role belongs to ChangeOrderUIBusinessRole
The default password for these users is same as that of the application server password provided at the time of the PIP installation. The Weblogic administrator is by default granted ChangeOrderUIAdmin role.
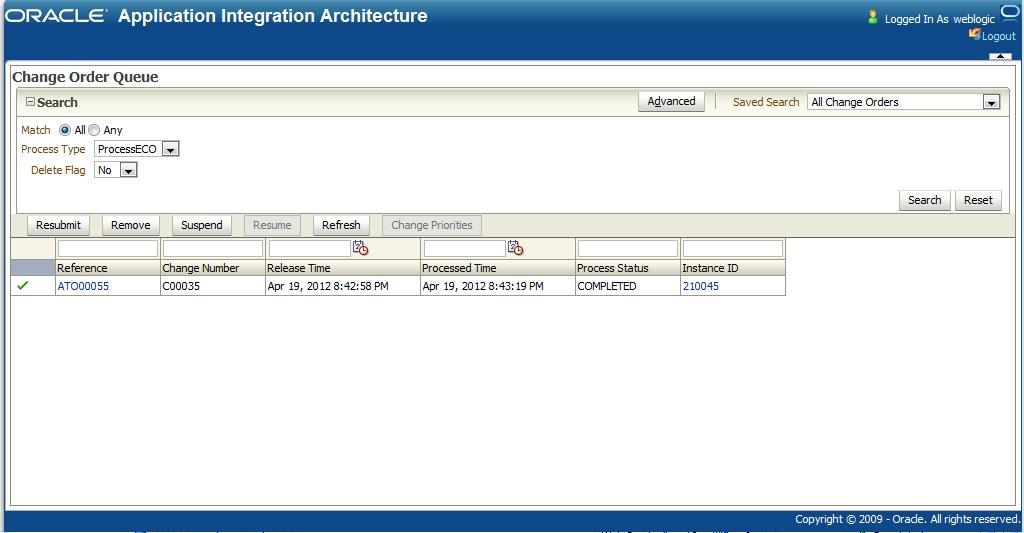
The following are the screenshots for different user role scenarios:
Administrator role view of the Queue UI application.
Business user role view of the Queue UI application.
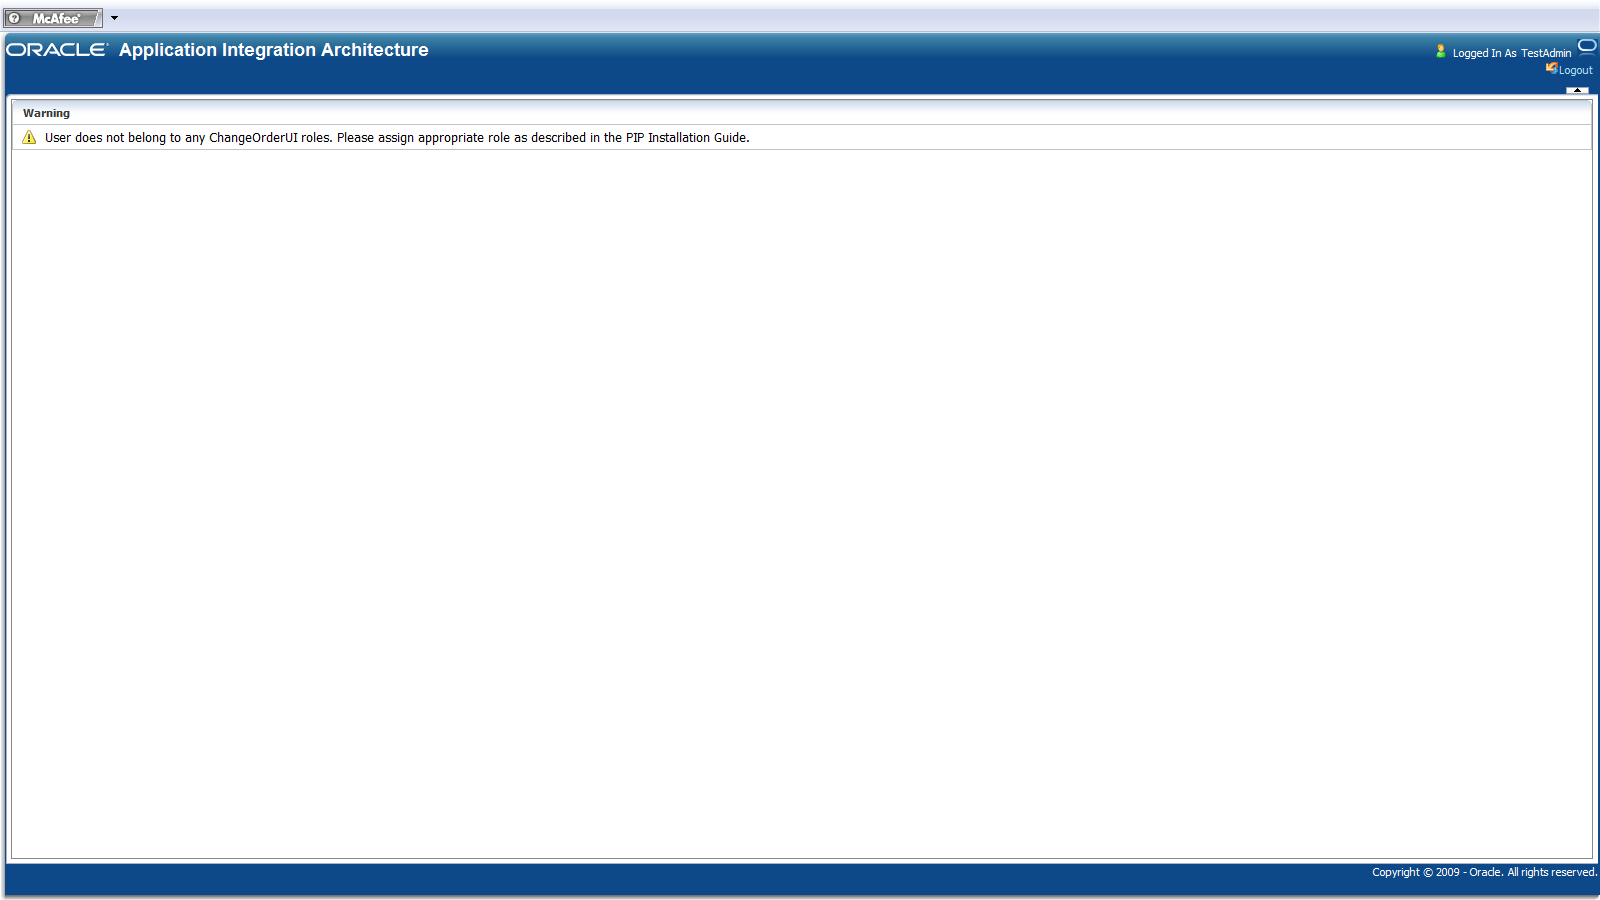
The view of the Queue UI application when a user is not assigned any of the Change Order UI roles.
To add new users to user roles in the Queue UI application, perform the following steps:
Log on to the Weblogic Server by using the appropriate port, http://<hostname>:<portnumber>/console.
Click Security Realms on the left pane of the Weblogic Administration Console.
Click myrealm (or the realm with true in the Default Realm column) in the Realms table.
Click Users and Groups tab.
Add a new user and provide all the details.
Click the newly added user and go to the Groups tab.
Select ChangeOrderUIAdminRole or ChangeOrderUIBusinessRole from the list of available groups and move them to the list of chosen groups for the user. Click Save to save the changes.
The Queue Monitor facilitates an administrator to perform the following on a Change Order:
Queue Management Solution
Queue Controller
Queue Monitor
The Queue Management Solution comprises of the following components:
Queue DB: The database that keeps the data related to the queue messages.
Queue Controller: Polls for new event payloads and adds them to the Queue DB. The highest priority message for each business process is picked and processed sequentially to trigger its business flow.
Queue Monitoring: UI that monitors the queue message status supports reordering of priorities of the queue messages.
In addition, it provides the capability to resubmit the unprocessed messages.
To support the Queue Management Solution, a polling strategy similar to PollingControlTableStrategy is used. The following two main tables are used to manage the sequential processing and reordering of the messages:
QUEUE_TABLE
It stores all the queue messages that are being provided by the Event trigger.
QUEUE_CONTROL_TABLE
It stores the relevant information of the messages from the QUEUE_TABLE that have not been processed yet.
The Queue Manager ensures that only one message is in the control table that is not yet processed. When the processing of a message is complete, a Pending message from the Queue table is inserted into this table. This facilitates the sequential processing of the message. In addition, because all the pending messages are stored in the Queue table, they can be reordered.
Queue DB Details
Table B-12 lists the Queue Schema tables:
| Table | Description |
|---|---|
|
ECO_QUEUE |
This table holds the data of both Process ECO and Validate ECO. The PROCESS_TYPE column is used as an identifier for Process ECO and Validate ECO. |
|
ECO_QUEUE_CONTROL |
This table stores the details about the rows that are currently in processing state. |
|
ECO_QUEUE_STATUS |
This table holds the data to control the simultaneous processing and suspending the Queue. Changing the values in the ECO_QUEUE_STATUS column can change the number of simultaneously processed ECOs. |
Table B-13 lists the structure of the ECO_QUEUE_STATUS service:
Table B-13 Structure of ECO_QUEUE STATUS service
| ECO_QUEUE_STATUS_ID | ECO_QUEUE_STATUS | ECO_QUEUE_STATUS_DESCRIPTION | Description |
|---|---|---|---|
|
1 |
1 or 0 |
ProcessECO Suspend Resume Status |
The status of the queue for ProcessECOs in suspended or resume mode. 0 means suspended. |
|
2 |
1 |
Maximum Number of Rows for Processing ProcessECO |
The count of rows that can be processed simultaneously for Process ECO A value of 1 means sequential processing. |
|
3 |
5 |
Maximum Number of Rows for Processing ValidateECO |
The count of rows that can be processed simultaneously for Validate ECO |
|
4 |
1 or 0 |
ValidateECO Suspend Resume Status |
The status of the Queue for ValidateECOs, in suspended or resume mode. 0 means suspended |
A polling strategy on the Queue DB is used for addressing the Queue Management business requirements. The Queue Controller provides an ECO system to ensure that this polling strategy works in tandem to ensure that:
All event-transmitted file and JMS messages are added to the queue for both change order release and change order processing flows as well as for the change order validation flow.
At any given time, only one pending message is in the control table for change order release and change order processing flows.
Once the processing of a message in the control table is complete, insert the highest-priority queue message for change order release and change order processing flows from the queue table to the control table.
In case of change order release and change order processing flows, if the Integration flow ends due to error, the queue manager will wait until the message is resubmitted or removed for Change Order Release flow.
Change order release processes are available on the Process ECO tab.
Validate release processes are available on the Validate ECO tab.
Validate change order processes are processed concurrently, dissimilar to the change order release and change order processing flows, which are processed sequentially.
If any of the validate change order processes end due to error, other processes can still proceed.
When a change order is released for release ECO or validate ECO processing by ACS, it is picked up by Queue Controller. The Queue Monitor displays a list of all the change orders that are waiting to be processed in both the tabs. It also helps you reorder their sequence of processing.
For more information about Queue Monitor, see Agile PLM to Oracle E-Business Suite Integration User Guide, "Managing the Process Queues."
These services are deployed as part of Queue Manager:
CreateQueueService
CreateQueueControlService
QueueProcessorService
QueueProcessorServiceImpl
The CreateQueueService is implemented as a routing mediator service. An adapter service (File/JMS Adapter) polls on the destinations for any event payloads. The payload is in the form of aXML files. This service receives message as a binary element (aXML file). For each payload received the service inserts a new row into the QUEUE table. An Adapter Service (DB Adapter) is used for the same. The Toplink solution generates the required schema from the table for this DB Adapter.
The service uses transformation services to populate any NOT NULL columns in the table.
OBJECT_REFERENCE is inserted with the file name of the aXML file using the mediator header transformation extension functions.
PROCESS_STATUS is pending for the newly inserted row.
PROCESS_PRIORITY is captured from the file name. (ACS can be configured to append a default order for the file name)
The CreateQueueControlService is implemented as a routing mediator service. A DB Adapter polls on the QUEUE_CONTROL_TABLE table. If no rows are in the Pending status, CreateQueueControlService invokes a DB Adapter service, which runs a custom SQL. This SQL identifies the highest-priority pending Queue message from QUEUE_TABLE table and inserts the same in the QUEUE_CONTROL_TABLE table.
This polling strategy ensures that at any time only one pending message is in the QUEUE_CONTROL_TABLE table. Once the Pending message is processed and status completed, a new Pending message is inserted from the QUEUE_TABLE table to the QUEUE_CONTROL_TABLE table. When the status for a message is completed in the QUEUE_CONTROL_TABLE, that row is deleted from the table.
The QueueProcessorService is implemented as a routing mediator service that acts like an Interface and provides a façade in front of the QueueProcessorServiceImpl service. A DB Adapter polls on the QUEUE_CONTROL table for any Pending messages. A pending message in the table is routed to the QueueProcessorServiceImpl service, which processes the message. Based on the result from the implementation service, the status of the message is updated in the control table.
The primary task of this service is to invoke the RequestorABCS. The response from RequestorABCS is processed and the queue is updated with the processing status.
Input: The QueueMessage generated by the Toplink solution in the QueueProcessorService is used as the input for this Service.
Output: QueueStatusMessage, which contains the status and result of the processed queue message.
Figure B-13 illustrates how QueueProcessorServiceImpl invokes the RequestorABCS:
Table B-14 lists the steps required to invoke the RequestorABCS:
Table B-14 Steps to invoke Requestor ABCS
| Step | Description |
|---|---|
|
QueueProcessorService invokes QueueProcessorServiceImpl process |
The QueueProcessorService invokes QueueProcessorServiceImpl with QueueMessage (generated by the Toplink solution for the QUEUE table) as input. |
|
Invoke UpdateQueueStatus DB Adapter service |
The input QueueMessage in this process is assigned with the following values to update the Queue message in the Queue DB PROCESS_STATUS: Processing PROCESS_ID: BPEL Process ID PROCESS_LOCK: 1 |
|
Transform AgileData (aXML) to ABM |
QueueMessage will have the AgileData payload, which is transformed to ABM. |
|
Invoke RequestorABCS |
QueueProcessorServiceImpl invokes RequestorABCS with ABM as input. |
|
Invoke Coarse Grained Web Service |
RequestorABCS optionally invokes the coarse-grained Web services to get the ABM populated with any missing information required for the integration flow. |
|
RequestorABCS Transforms ABM to EBM |
The response ABM from coarse-grained WS is transformed to EBM and an operation on EBS is invoked with EBM as the input. |
|
RequestorABCS orchestrates the business flow |
The RequestorABCS routes the EBM to EBS. |
|
EBS routes the response to RequestorABCS |
The response EBM from EBS is routed to the RequestorABCS, which is transformed to ABM and returned to QueueProcessorServiceImpl |
|
QueueProcessorServiceImpl invokes UpdateQueueResult DB Adapter service |
The result from the RequestorABCS is used to update the status of Queue in the Queue DB. Also, the Process lock is released. |
The aXML payload is transformed to the ABM, which is input for the RequestorABCS. Because the ABM schema is defined on the lines of aXML schema, this transformation will be easier to do in the Jdeveloper XSL Mapper.
The QueueProcessorServiceImpl is implemented as an Asynchronous BPEL process. For updating the queue status and invoking RequestorABCS, RequestorABCS and DB Adapters are called. These involve some logic (parsing the aXML payload) that cannot be achieved by means of mediator.
Note:
QueueID is used for the correlation set between QueueProcessorServiceImpl and RequestorABCS.