5 Personalizing Self Service
This chapter describes the personalization features of the Oracle Identity Self Service. It contains the following sections:
Note:
Personalization of the Self Service is allowed for all users, and is applicable on a per user basis. In other words, the personalization that is saved for a user, is not applicable when another user logs in to Identity Self Service.5.1 Personalizing the Home Page
The Home page provides you a snapshot of the various functions in Identity Self Service. All personalization in the Home page, such as rearranging the containers or hiding containers, are saved automatically. After personalizing the Home page, when you log out of Identity Self Service and log in again, all the changes that you did in the Home page are retained. When any other user logs in to Identity Self Service, the logged in user will see the default settings in the Home page.
You can personalize the Home page in the following ways:
5.1.1 Adding a Container
To add containers in the Home page:
-
Log in to Identity Self Service to navigate to the default landing Home page.
-
If the Home page is not displayed, click Home on the left navigation pane.
-
Click Personalize. The Home is displayed in customization mode with toolbars that consist of icons.
-
Click the Add Box Above icon on the toolbar. Figure 5-1 shows the Add Box Above icon on the toolbar.
Figure 5-1 The Add Box Above Icon on the Toolbar
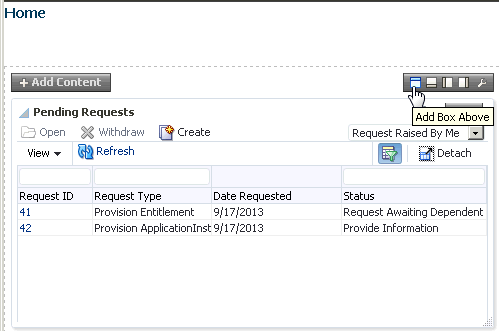
Description of "Figure 5-1 The Add Box Above Icon on the Toolbar"
You can click the respective icons to add a box below, right, or left of the container in which you are clicking the icon.
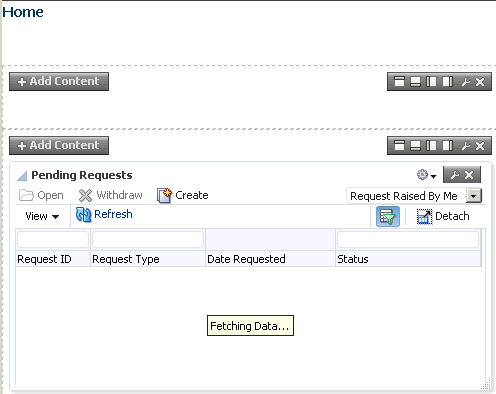
After clicking the icon, a container is added to the Home page, as shown in Figure 5-2:
-
Click Close on the navigation bar at the top to quit customization mode.
Note:
After you add a container, you must add UI components to use it. For information about adding UI components to a container, see "Customizing the Home Page" in the Oracle Fusion Middleware Developer's Guide for Oracle Identity Manager.
5.1.2 Editing a Container
To edit a container in the Home page:
-
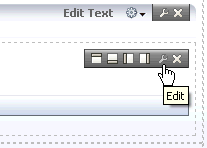
In the container that you want to edit, click the Edit icon on the toolbar, as shown in the following figure:
The Component Properties dialog box is displayed with the Child Components tab active, as shown in Figure 5-3:
Figure 5-3 The Component Properties Dialog Box
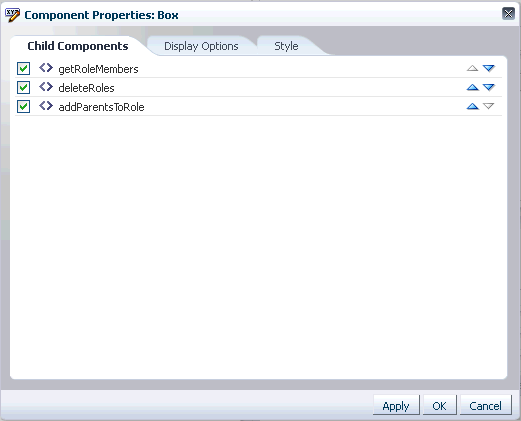
Description of "Figure 5-3 The Component Properties Dialog Box"
-
Use the up and down arrows to move the components up or down in the container.
-
Deselect a component to hide it. Only the selected components are displayed in the container.
-
Click the Style tab. In this tab, you can change the properties of the container, such as background color and image, font properties, and margin.
-
Click Apply, and then click OK.
5.1.3 Removing a Container
To remove a container from the Home page:
-
In the container that you want to remove, click the Delete icon, as shown in the following figure:

A message is displayed asking for confirmation.
-
Click Delete. The container is deleted from the Home page.
5.1.4 Moving Containers
To move the containers in the Home page:
-
To move the containers up or down in the Home page, click the down arrow icon on the top of the container, and select Move Up or Move Down.
You can move the containers up or down by using the down arrow icon in both customization and non-customization modes.
-
To move a container across the Home page, in the customization mode, drag the container and drop it in the location where you intend to place it, as shown in Figure 5-4:
Figure 5-4 Dragging and Dropping a Container
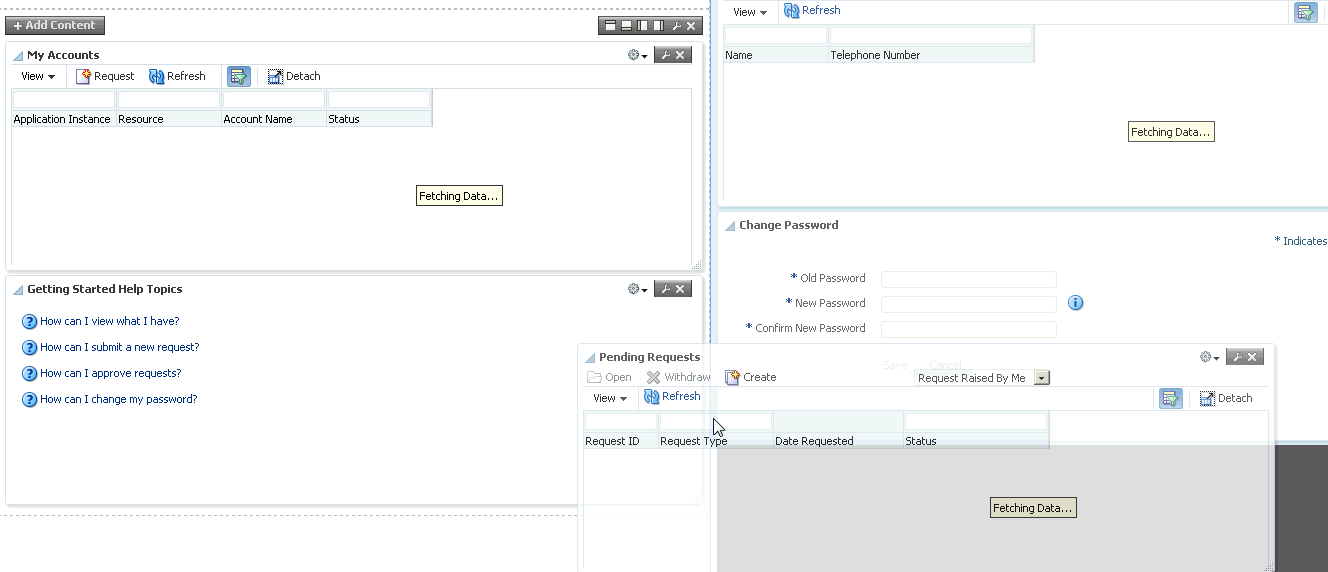
Description of "Figure 5-4 Dragging and Dropping a Container"
5.1.5 Changing the Layout of the Home Page
To change the layout of the Home page:
-
In the Home page, click the Change Layout icon on the top right of the containers, as shown in Figure 5-5:
If you are in customization mode, then you can click Change Layout.
The current layout is selected by default.
-
Change the layout by selecting a layout, such as one column or two columns below wide area.
If you are in customization mode, then click Save, and then click Close.
The Home page is displayed in the selected layout.
5.2 Adding and Removing Attributes in Search Criteria
Identity Self Service allows you to search for records in various pages, such as the Users page or the Roles page. Default attributes are available in the search pages based on which you can perform the search. In addition to the default search attributes, you can add search attributes based on which you can perform the search.
To add attributes in search criteria:
-
Navigate to a page in Identity Self Service with search option, such as the Users page or the Roles page. For example, to open the Roles page, under Administration, click Roles.
-
Click Add Fields. The list of attributes that you can add to the search criteria is displayed.
-
Select an attribute from the list, for example, Role Description. The selected attribute is added to the Search section.
Note that a cross icon is displayed with the attribute that you added in the Search section. To remove the attribute from the search criteria, click the cross icon.
5.3 Personalizing the Search Result
You can personalize the search result to display or hide search attributes that are displayed as columns in the search results table. You can also change the order in which the columns are displayed in the search results table.
To personalize the search result:
-
To show or hide columns in the search results table:
-
On the toolbar of the search results page, click View, and then select Columns. A list of column names for the search results table are displayed. The column names that are already displayed in the search results table have a check mark.
-
Select or deselect column names to show or hide respectively in the search results table.
Alternatively, select Manage Columns to display the Manage Columns dialog box. In this dialog box, you can move the column names in the Hidden Columns and Visible Columns lists to show or hide the columns respectively. When finished, click OK.
-
-
To change the order or the columns in the search results table:
-
On the toolbar of the search results page, click View, and then select Reorder Columns. The Reorder Columns dialog box is displayed.
Alternatively, click View and select the columns. Then, select Manage Columns to display the Manage Columns dialog box.
-
In the Visible Columns list, move the column names up or down by using the arrow keys to the right of the list. The columns will be displayed in the order that you specify here.
-
Click OK.
-
-
To detach the search result table from the page, from the View menu, select Detach. Alternatively, click Detach on the toolbar.
To close the detached search result, click the cross icon at the top right corner or click Detach on the toolbar.
5.4 Using Saved Search
To search for entities, such as users or roles, you specify a search criteria. The search criteria includes search attributes that you have added and other search conditions. Instead of specifying the search criteria every time you search for similar records, you can save a search and use the saved search to search for the records.
This section contains the following topics:
5.4.1 Creating a Saved Search
To save a search:
-
Perform a search by specifying search criteria.
-
Click Save. The Create Saved Search dialog box is displayed.
-
In the Name field, enter a name for the search.
-
Select one or more of the following options:
-
Set as Default: Selecting this option sets the saved search as the default search for the page whenever the search page is opened.
-
Run Automatically: Selecting this option runs the saved search when you open the page.
-
-
Click OK. The search is saved with the name you specified.
The saved search name is displayed in the Saved Search list on the top right of the Search section. You can select the saved search to perform the search.
5.4.2 Personalizing Saved Search
To personalize saved search:
-
From the Save Search list, select Personalize. The Personalize Saved Searches dialog box is displayed.
-
From the Personalize Saved Searches list, select the saved search that you want to personalize.
-
In the Name field, edit the name of the saved search.
-
Select any one or more of the following options:
-
Set as Default: Selecting this option sets the saved search as the default search for the page whenever the search page is opened.
-
Run Automatically: Selecting this option runs the saved search when you open the page.
-
Show in Search List: Selecting this option displays the saved search in the Saved Search list.
-
-
Click Apply, and then click OK.
Note:
The default saved searches are view-only and cannot be used for personalization (modification or deletion).
5.4.3 Deleting a Saved Search
To delete a saved search:
-
From the Save Search list, select Personalize. The Personalize Saved Searches dialog box is displayed.
-
From the Personalize Saved Searches list, select the saved search that you want to delete.
-
Click Delete. A warning message is displayed.
-
Click Yes to confirm deletion.
-
Click OK to close the Personalize Saved Searches dialog box.
5.4.4 Using Saved Search to Perform a Search Operation
If you select the Set as Default option when creating the saved search, then the saved search is displayed in the Saved Search list when you open the page. To search for records by using the default saved search, click Search.
If you select the Run Automatically option when creating the saved search, then the search operation based on the saved search is performed automatically when you open the page.
If you have not selected the Set as Default and Run Automatically options, then to perform the search by using the saved search, select the saved search from the Saved Search list.
5.5 Sorting Data in Search Results
You can sort the data in the search results table in ascending or descending order. When you place the mouse pointer on the column names in the search results table, up and down arrow keys are displayed. Clicking the up arrow key sorts the data in ascending order, and clicking he down arrow key sorts the data in descending order.
The sort is restored as a preference in the Self Service. As a result, when you logout, and login again and perform a search, sorted data is displayed in the search result. The sort preference works only for the logged in user. For other users, the search results table is displayed with default settings.
5.6 Using Query By Example
In many Self Service pages, data is displayed in a tabular format. Users can have hundreds of roles and resources, and thousands of entitlements provisioned to them. When you are looking at a large number of records, you need to scroll through multiple pages of results to find specific role, resources, and entitlements. By using the Query By Example feature, you can refine the search results by providing additional filters. Oracle Identity Manager allows you to turn this feature on and off based on your requirement.
When looking for a few records in a list of large number of records, you can use Query By Example to refine the search. To do so:
-
In the search results table, click View on the toolbar, and then select Query By Example. Text fields are displayed on top of each column of the search results table.
-
Enter a value in a text field for a column. For example, to refine the search for all users with Disabled status, enter Disabled on the text field above the Status column.
Instead of entering the complete value, you can enter a few letters that match the values you are searching, such as
Di.Users with Disabled status are displayed. If you enter D as the value, then all users with Disabled or Deleted are displayed (because both the Disabled and Deleted status begin with the letter "D"). -
Press Enter. All records that match the Query By Example value are displayed, as shown in Figure 5-6:
-
To disable Query By Example, click View, and then select Query By Example.
Alternatively, click Query By Example on the search result toolbar.
