Registering the Gateway With Oracle
During this portion of the installation process, you are guided through a series of menus to collect the necessary information to connect to Oracle and register the Gateway. In addition, you can also configure the network by:
-
Adding multiple network interfaces
-
Assigning IPv4 or IPv6 addresses
-
Adding VLAN tags to interfaces
-
Adding bonded interfaces.
You will need console access to complete the following steps.
-
Reboot the server as instructed in the previous section.
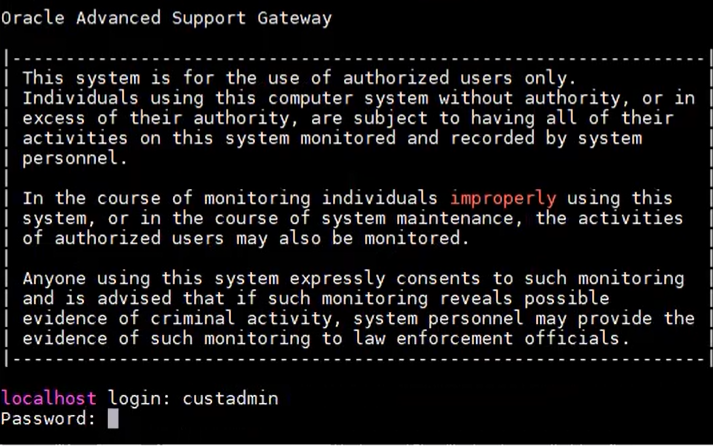
The login screen appears.
-
Log in using the default administrator account:
-
Login: custadmin
-
Password: install
Upon successful login, a screen displaying a message asking whether you wish to migrate an existing Gateway appears (OASG means Oracle Advanced Support Gateway).

-
-
Select one of the following options:
-
Enter y to use this Gateway to replace an existing Gateway and migrate its data. Refer to Replacing an Existing Gateway and Migrating Its Data .
-
Enter n to set up a new gateway. Continue with the next step.
Note - Enter ? for a complete list of options and symbols. -
-
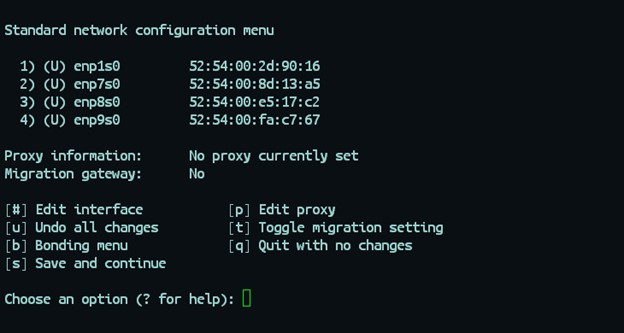
Select one of the following options:
-
Enter b to switch to the bonding configuration menu. Refer to Step 7 below.
-
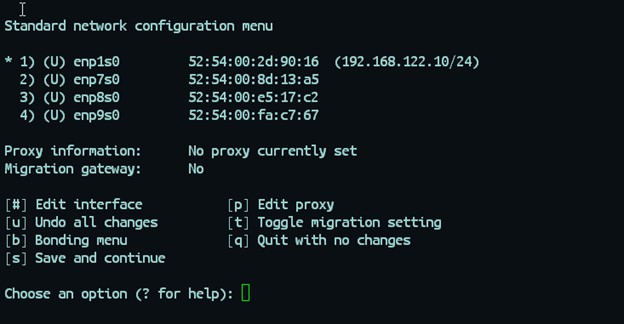
Enter the digit corresponding to the interface you wish to configure.
So, for example, in the screen shot below, the user enters 1 which corresponds to enp1s0.
-
-
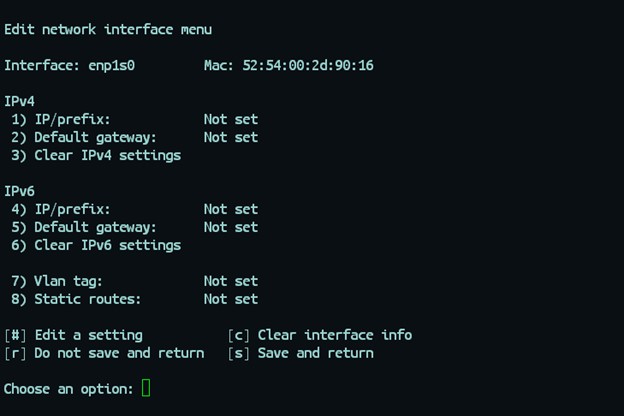
Enter the property number to edit the corresponding property, or enter
a to add all of the required configuration
information.
The configuration information might include:
-
The IP address and CIDR (IPv4 and IPv6 if enabled);
-
The default Gateway of the interface;
-
A VLAN tag;
-
Static routes.
There can be only one IPv4 and one IPv6 default Gateway defined per system. There must be at least one IPv4 default Gateway defined. The IPv4 and IPv6 default Gateways can be on two different interfaces.
-
-
Review the information and enter s to save the
configuration.
If you entered enough information to configure the interface you will notice a “+†next to the interface, as with enp1s0 in the screen shot below .
Note - A “!†indicates there is some information missing.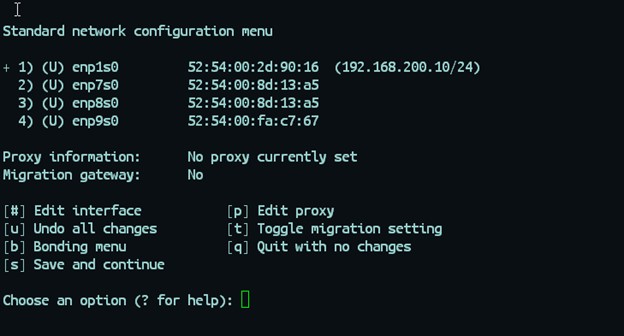
-
(Optional) To configure a bonding interface, enter b
from the standard network configuration menu to display the bonding
configuration menu.
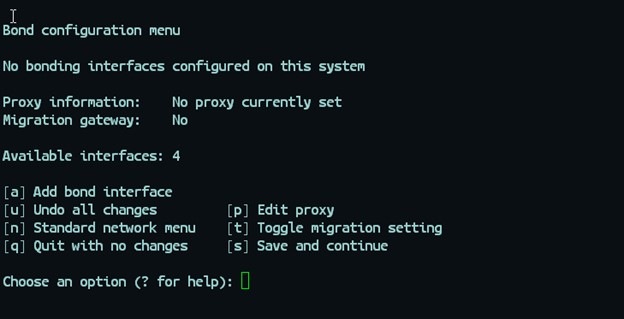
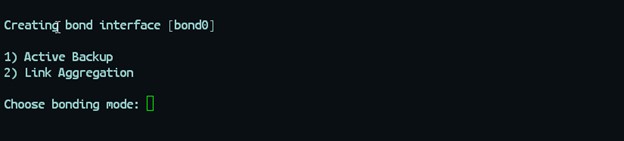
Enter a to add a new bonding interface. You will be prompted for:
The type of bond:
-
The type of bond:
-
Active Backup, or
-
Link Aggregation
-
-
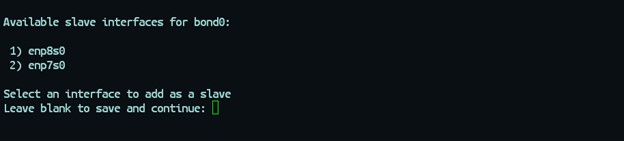
The slaves for the bond (enter the corresponding number of the interface to select or deselect.
After entering the information, the main bond configuration menu appears.
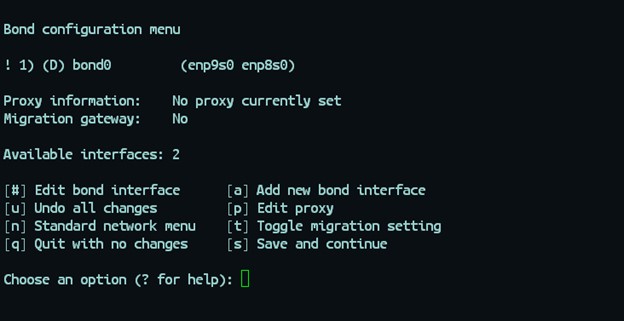
Note - In this case, a “!†is displayed because the bond is only partially configured at this point.Select the new bond number, 1, to edit it.
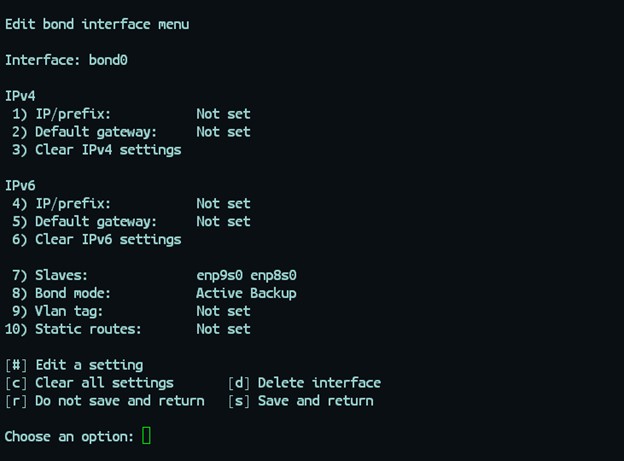
The configuration information includes:
-
The IP address and CIDR for the bonding interface (IPv4 and IPv6 if enabled);
-
The default gateway of the bonding interface;
-
Bonding mode (active backup or link aggregation);
-
Slave interfaces for the bonds;
-
A VLAN tag for the interface;
-
Static routes.
Review the information, edit as required, and enter s to save the configuration.
The main bond configuration menu containing your saved information is now displayed.
Note - The “+†next to the bond denotes that It is now correctly configured.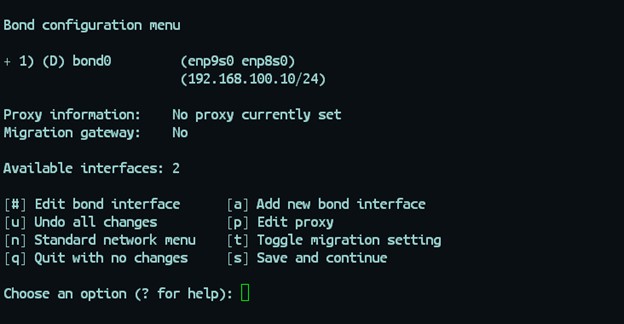
-
-
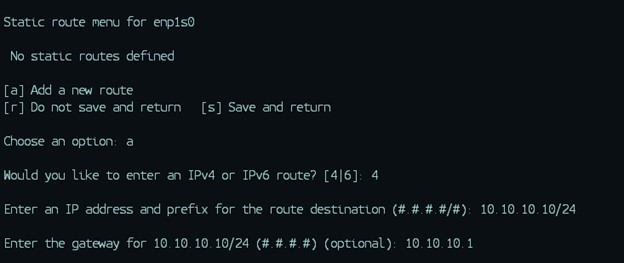
When configuring both standard and bonded network interfaces, you have the
option to add any number of static routes for each interface.
-
When configuring both standard and bonded network interfaces, you can assign
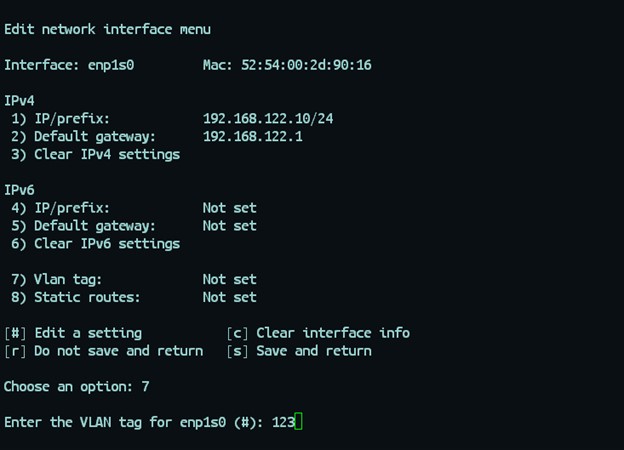
VLAN tags.
When you edit a non-tagged interface and add a new VLAN tag, the script transfers all the current information for that interface to a new interface with the same name and an extension represented by the VLAN tag you chose. For example, refer to the sample screen shots below:
(Optional) Enter 1 to edit enp1s0 and then add a VLAN tag.
When you save and return to the standard network menu, you can see that the information from enp1s0 is now associated to enp1s0.123.
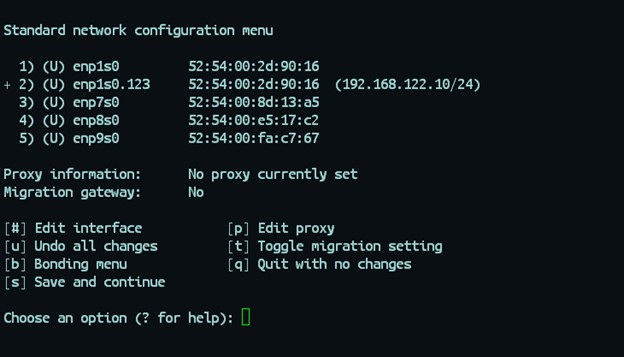
Note - You can assign multiple, different, VLAN tags to the same interface. Each tagged interface has different network address information. -
(Optional) After the network configuration has been completed, you can opt to
add proxy settings.
To add proxy settings, enter p from either the standard configuration menu or the bonding configuration menu to display the proxy configuration menu.
Enter the proxy IP address and port number if required. Enter the proxy username and password and then confirm the password. Refer to the following screen shot.

Note - NTLM authentication is not supported. -
Confirm the network information for all the interfaces you added.
Review the network information and select s to save the configuration details.
Any unconfigured interfaces are deleted. All configured interfaces are first deleted (to remove artifacts) and then recreated.
-
After all configuration has been completed, the Gateway performs a test
against the default network IP address.
Once this test is successful, the Gateway completes the initial configuration. This operation takes a number of minutes. The most recent packages and configuration parameters are downloaded automatically. Do not restart the Gateway during this step.
-
After the latest packages have been downloaded and applied, you are prompted
to select the Gateway type.
The Gateway types are outlined as follows:
-
BASIC: This Gateway replaces the Monitoring Gateway.
-
STANDARD: This is the standard Gateway.
The following screen shot shows sample answers. In this installation, the STANDARD Gateway is selected.

Installation of the updates required takes a number of minutes.
-