3 Oracle Key Vault Installation and Configuration
You should understand the system requirements, how to install Oracle Key Vault, and how to perform postinstallation tasks. You should also understand how to access the Oracle Key Vault management console after you complete the installation process.
Topics:
Oracle Key Vault Installation Requirements
Oracle Key Vault is a software appliance whose installation requirements cover system requirements, network ports, supported endpoint platforms, and endpoint database requirements.
Topics:
Oracle Key Vault: A Software Appliance
Oracle Key Vault is packaged as a software appliance and delivered as an ISO package, which must be installed onto its own dedicated server.
This software appliance consists of a preconfigured operating system, an Oracle database, and the Oracle Key Vault application.
System Requirements
Because it is a software appliance, remember that when you install Oracle Key Vault, the installation removes any existing software on a server.
Deployment on virtual machines is not recommended for production systems. However, you can use virtual machines for testing and proof of concept.
The hardware requirements for deploying the software appliance are:
-
CPU: Minimum: 2 x86 cores, Recommended: 2+ cores with cryptographic acceleration support (Intel Westmere or later)
-
Memory: Minimum 4 GB of RAM
-
Disk: Minimum 500 GB hard disk
-
Network interface: One network interface
-
Compatibility: Compatible with Oracle Linux, Release 5 Update 10.
To find supported hardware, see the following hardware certification list for Oracle Linux and Oracle VM, for the system supported by 5.10:
http://linux.oracle.com/pls/apex/f?p=117:1:470867609629060
Network Ports
Oracle Key Vault and endpoints use the a set of special ports for communication.
Network administrators must ensure that some or all these ports are not blocked by the firewalls.
Table 3-1 describes the ports that Oracle Key Vault requires.
Table 3-1 Ports Required for Oracle Key Vault
| Port Number | Protocol | Descriptions |
|---|---|---|
|
|
SSH/SCP Port |
Used by Oracle Key Vault administrators and support personnel to remotely administer Oracle Key Vault. See the description of the Network Services pane under "Settings for Configurations Page". |
|
|
HTTPS Port |
Used by web clients such as browsers to communicate with Oracle Key Vault. |
|
|
Database TCPS Listener Port |
Listener Port Used for communication between the Oracle Key Vault primary and standby appliances in high availability configurations. |
|
|
KMIP Port |
Used by Oracle Key Vault endpoints and third party KMIP clients to communicate with the Oracle Key Vault KMIP Server. |
Supported Endpoint Platforms
The supported platforms for endpoints in this release are for Oracle Linux and Oracle Solaris.
The supported releases are as follows:
-
Oracle Linux (5.x and 6.x)
-
Oracle Solaris (10.x and 11.x)
Oracle supports both 32-bit and 64-bit Linux endpoints. However, only 64-bit endpoints are supported for Oracle databases that use TDE direct connections.
Endpoint Database Requirements
Depending on the release of Oracle Database that you plan to use for endpoints, you may need to set the COMPATIBLE initialization parameter.
You can create endpoints from Oracle Database 10g and later and use the okvutil upload command to upload Oracle wallets from these releases. Direct connections between TDE and Oracle Key Vault are supported on Oracle Database 11g Release 2 and later.
If you plan to use Oracle Key Vault with Oracle Database 11.2, then set the COMPATIBLE initialization parameter for 11.2.0.0 or higher. For example:
SQL> ALTER SYSTEM SET COMPATIBLE = 11.2.0.0 SCOPE=SPFILE;
This is applicable if an Oracle database endpoint is connected with Oracle Key Vault using a TDE direct connection, but this compatibility mode setting is not required for Oracle wallet upload or download operations.
Also, be aware that after setting the COMPATIBLE parameter for 11.2.0.0, you cannot set it to a lower value, such as 10.2. Ensure that you restart the database after setting this parameter.
See Also:
Oracle Database Administrator's Guide for more information about setting theCOMPATIBLE parameterInstalling Oracle Key Vault
The Oracle Key Vault installation process entails first the installation of the Key Vault appliance, and second, postinstallation tasks.
Topics:
Task 1: Install the Oracle Key Vault Appliance
The installation process installs all required software components onto a dedicated server. The installation process may take from 30 minutes to an hour to complete, depending on the server resources where you are installing Oracle Key Vault.
Caution:
This installation takes over the server completely and removes any existing data on the server.-
Request a fixed IP address, network mask, and gateway address from your network administrator for the dedicated server. You will need this information for Step 9.
-
Ensure that this server meets the recommended requirements described in "Oracle Key Vault Installation Requirements".
-
Insert the installer disk for Oracle Key Vault in the disk drive and then restart the computer.
The system restarts from the disk, and the initial splash screen appears:
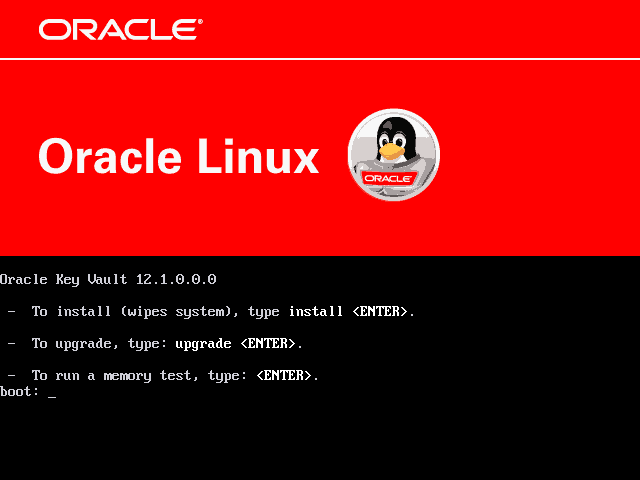
Description of the illustration ''okv_27.png''
-
Type
install, and then press the Enter key.The installation proceeds. This step can take several minutes to complete. The next screen prompts for the installation passphrase, which you must create.
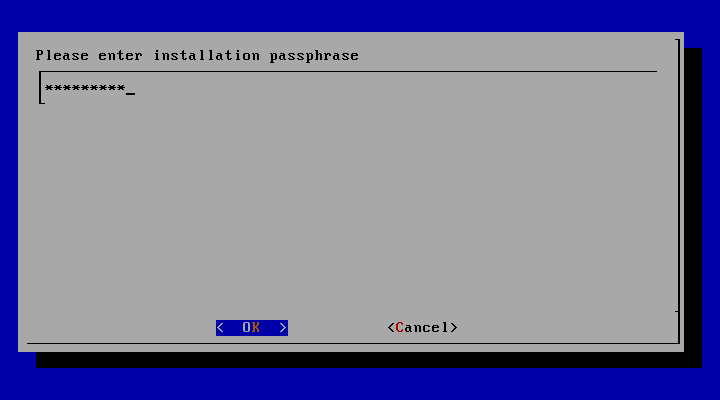
Description of the illustration ''okv_28.png''
-
Enter the installation passphrase.
Make a note of this passphrase because it is used for authentication during the first login to the Oracle Key Vault management console.
The installation passphrase must have 8 or more characters and contain at least one of each of the following: an uppercase letter, lowercase letter, number, and punctuation character. The allowed punctuation characters are period (
.), comma (,), underscore (_), plus sign (+), colon (:), and space.Confirm the installation passphrase in the Confirmation screen.
The Oracle Key Vault installation proceeds if the installation passphrase in the confirmation screen matches the one entered previously. Otherwise, the confirmation screen prompts again for confirmation.
-
Press Enter to select OK.
The Select Management Interface screen appears.
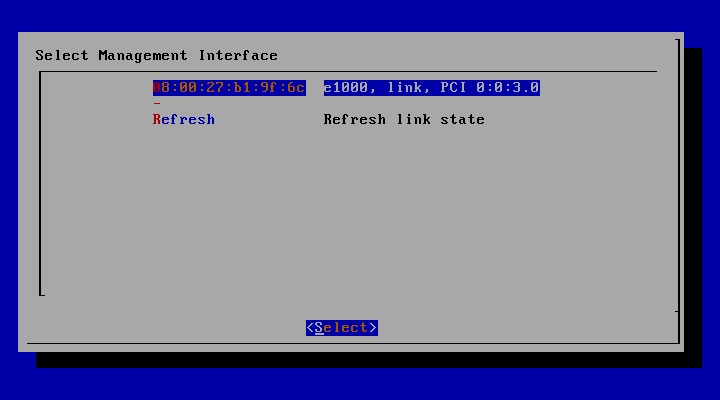
Description of the illustration ''okv_29.png''
-
Select the interface and select Select.
-
Press Enter to accept the defaults when the installer prompts for the MAC address of the management interface.
If more than one network interface is available, then select the interface that you want to serve as the management interface and to communicate with endpoints. Note that the management interface appears as the MAC address in the following screen.
Press Enter to select Select in the following screen.
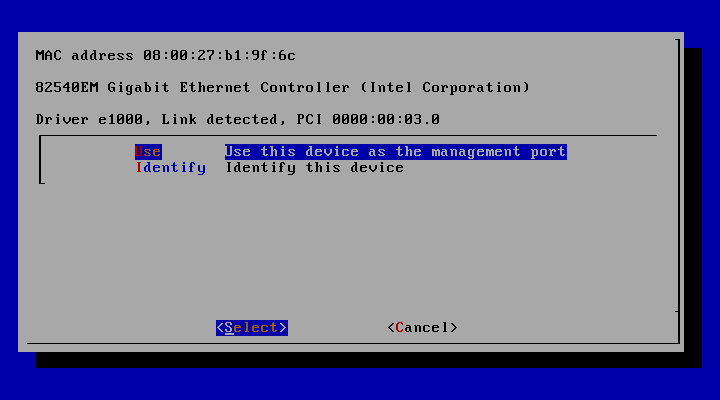
Description of the illustration ''okv_30.png''
The screen entitled ”Please enter management interface IP setting” appears next.
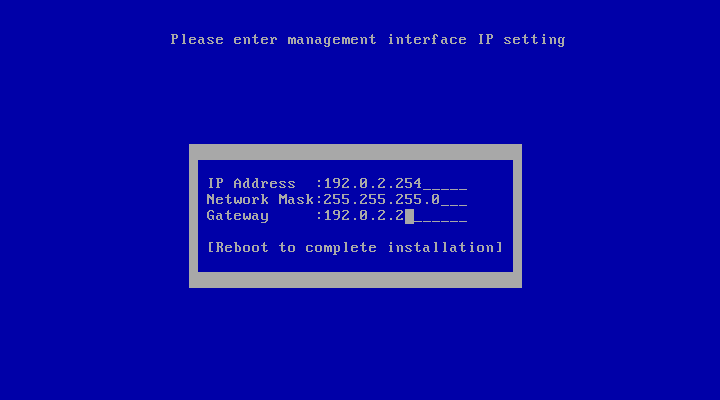
Description of the illustration ''okv_32.png''
-
Enter the configuration information for the appliance that includes a fixed IP address, the network mask, and the gateway address.
Press Enter to select Reboot to complete installation.
-
Wait while the installer installs and configures the operating system, database, and Oracle Key Vault on the server to make it a self-contained hardened appliance.
This process will take several minutes, during which time the screen may turn off due to the screen saver. To see whether the installation has completed, press the Shift key to turn the screen back on. If the installation has completed successfully, the following screen appears.
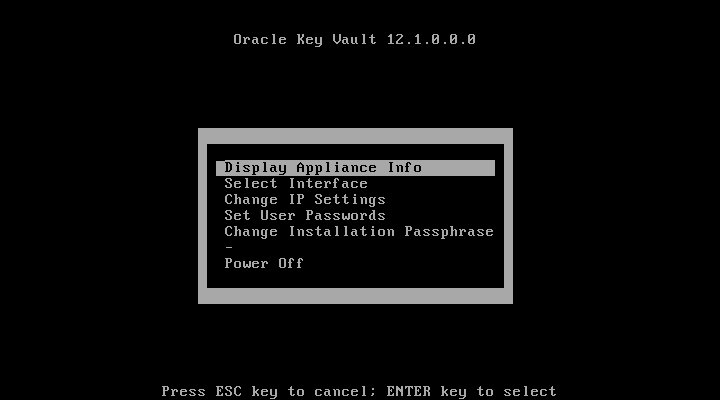
Description of the illustration ''okv31.png''
Task 2: Perform Postinstallation Tasks
After you have installed the Oracle Key Vault appliance, you are ready to perform the postinstallation tasks, which include creating administrative user accounts, creating a recovery passphrase, and optionally, setting the time and DNS configuration.
-
Open a web browser.
-
Connect to the Oracle Key Vault appliance, using an HTTPS connection and the IP address provided in Step 9 under "Task 1: Install the Oracle Key Vault Appliance."
For example, to log in to an Oracle Key Vault server whose IP address is 192.0.2.254, enter:
https://192.0.2.254Your browser may produce a warning saying that you are connecting to a website with an untrusted or self-signed security certificate. You can safely ignore this warning and proceed.
-
When the following screen appears, log in to the Oracle Key Vault appliance for the first time using the installation passphrase created in Step 5 under "Task 1: Install the Oracle Key Vault Appliance."
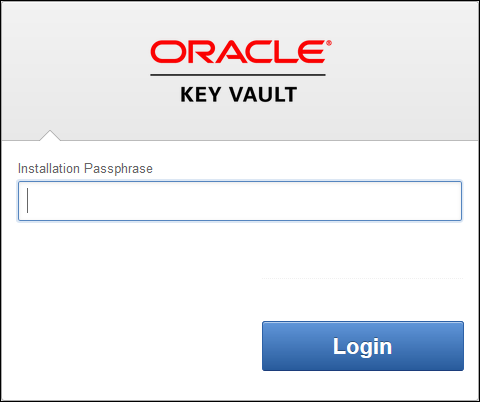
Description of the illustration ''initial_screen1.png''
This screen only appears after you have just installed the Oracle Key Vault appliance. The next time that you log in to the appliance, the standard Oracle Key Vault login screen will appear.
-
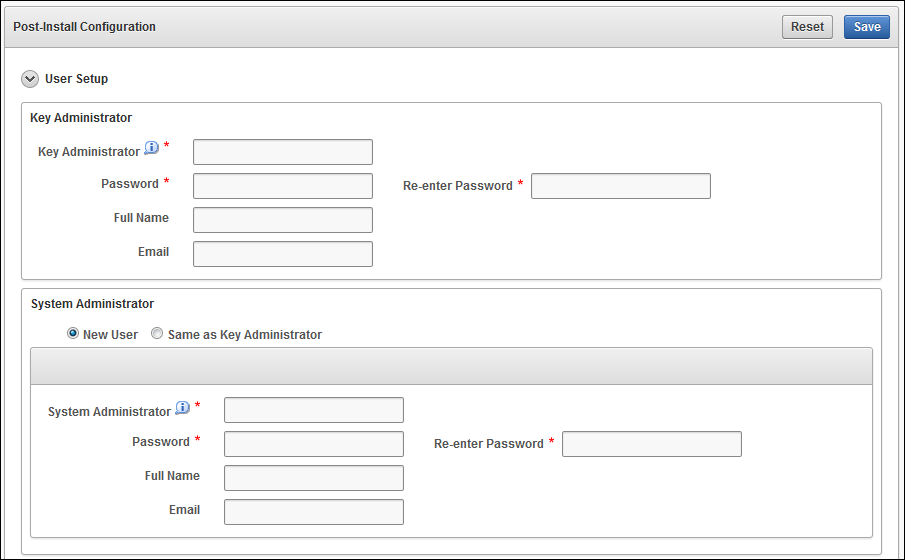
When the one-time Post-Install Configuration page for Oracle Key Vault appears, enter the following information:
-
Administrative role information (See "Overview of Administrative Roles").
Enter the user name, password, full name (optional), and email (optional) for the Key Administrator, System Administrator, and Audit Manager.
To fully support separation of duty requirements, you can create a different user account for each of these administrative roles. However, if one person performs multiple functions, you can assign two or more roles to the same user account.
Passwords must have 8 or more characters and contain at least one of each of the following: an uppercase letter, lowercase letter, number, and punctuation character. The allowed punctuation characters are period (
.), comma (,), underscore (_), plus sign (+), colon (:), and space. -
Recovery passphrase
The recovery passphrase has the same minimum requirements as the passwords that you create for the administrative users. However, it is a good idea to make this passphrase longer and more complex, because it provides access to backups containing all of the data on Oracle Key Vault. Because the recovery passphrase is extremely powerful and infrequently used, it is important to establish a process to store it securely and make it available only in emergency situations.
The recovery passphrase can be used for these situations:
-
When there are no administrators who are able to access the administrative roles (Key Administrator, System Administrator, Audit Manager). The recovery passphrase can be used to return to this screen to assign each administrative role to a new or existing user account.
-
When the Oracle Key Vault server must be restored from a previous backup file. The recovery passphrase is required to restore from a backup file and must match the recovery passphrase used when the backup was performed.
-
Description of the illustration ''okv_14.png''
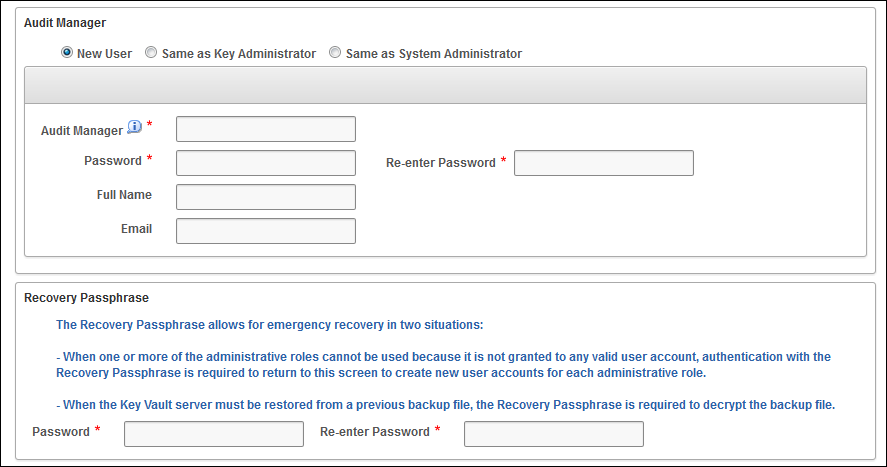
Description of the illustration ''okv_14a.png''
-
-
Complete the advanced section of the page by supplying the root password and the support user password. If you restore an existing backup to this appliance, then the root and support password you set here will remain the same, but all other data and user passwords will revert to the values when the backup was performed. This is also true if this system is added as the standby node of an high availability cluster.
Time Setup and DNS Setup settings are optional at this stage and can be set up later by a user with the System Administrator role using the Oracle Key Vault management console. (These are available by selecting the System tab, and then Settings.)
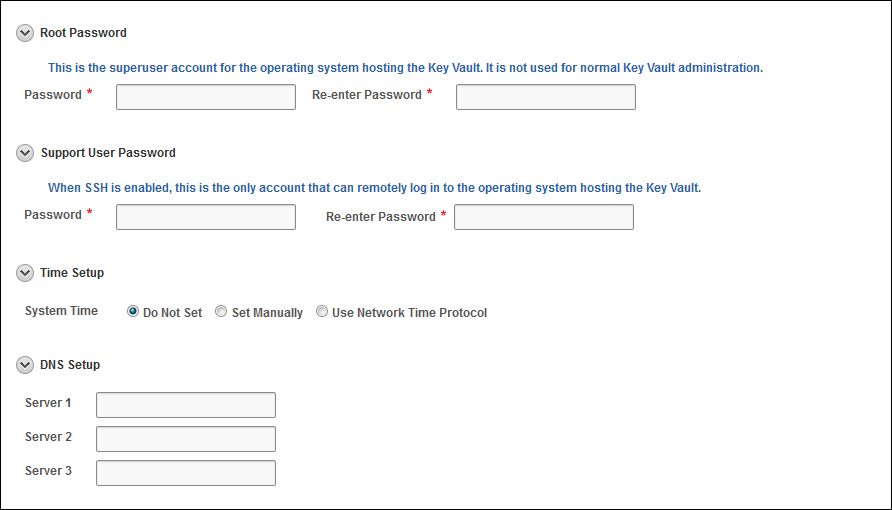
Description of the illustration ''okv_14b.png''
-
Click Save.
When the configuration is successful, the Oracle Key Vault post-install configuration is complete, and the login page appears.
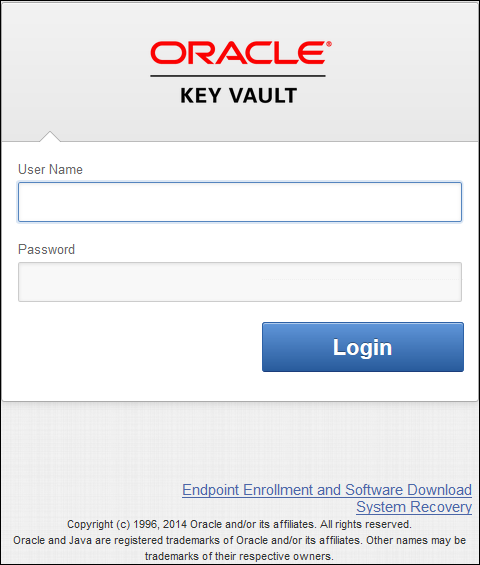
Description of the illustration ''okv16.png''
Overview of the Management Console
To perform most tasks in Oracle Key Vault, administrators and users use the Oracle Key Vault management console.
This wide range of tasks includes creating and managing endpoints, virtual wallets, security objects, users, and passwords, and setting up operations such as high availability and system backup.
The management console is a browser-based console that connects to the appliance using the https secure communication channel.
Logging In to the Oracle Key Vault Management Console
To use Oracle Key Vault, users can log in to the Oracle Key Vault management console.
-
Open a web browser.
-
Connect using an HTTPS connection and the IP address provided in Step 9 under "Task 1: Install the Oracle Key Vault Appliance."
For example, to log in to a server whose IP address is 192.0.2.254, enter:
https://192.0.2.254The login screen appears.
Description of the illustration ''okv16.png''
-
Enter your user name and password.
-
Click the Login.
Performing Actions and Searches
Many of the tab and menu pages contain an Actions menu or Search bars that allow you to search and perform actions on lists and the results of searches.
Topics:
Note:
Detailed help for the Actions menus and Search bars is provided in the Help selection of the Actions drop-down list.Actions Menus
The actions available from an Actions drop-down menu can vary but typically include a set of standard menu items.
These items are as follows:
-
Select Columns: Select which column should be displayed.
-
Filter: Filter by column or row and a user-defined expression.
-
Format: Choose formatting such as Sort, Control Break, Highlight, Compute, Aggregate, Chart, and Group By.
-
Save Report: Save reports.
-
Reset: Reset the report settings, removing any customizations.
-
Help: Get information about these actions.
-
Download: Download the result set in CSV or HTML.
Search Bars
Along with Actions menus, many tabs contain search bars.
This demonstration searches for endpoints, but the process is the same for other searches, except that the column headings are different.
Wildcard characters are not supported, but the search does match any letter or phrase that you enter. You can use the Filter menu item under Actions to further fine-tune the search.
To perform a search:
-
Enter a name or other identifier in the search field or (optionally) place your cursor on the magnifying icon in the Search bar to select one of the table headings (in this case, All Columns, Endpoint Name, Endpoint Type, Description, Platform, Status, Enrollment Token, and Alert) and then enter a search term.
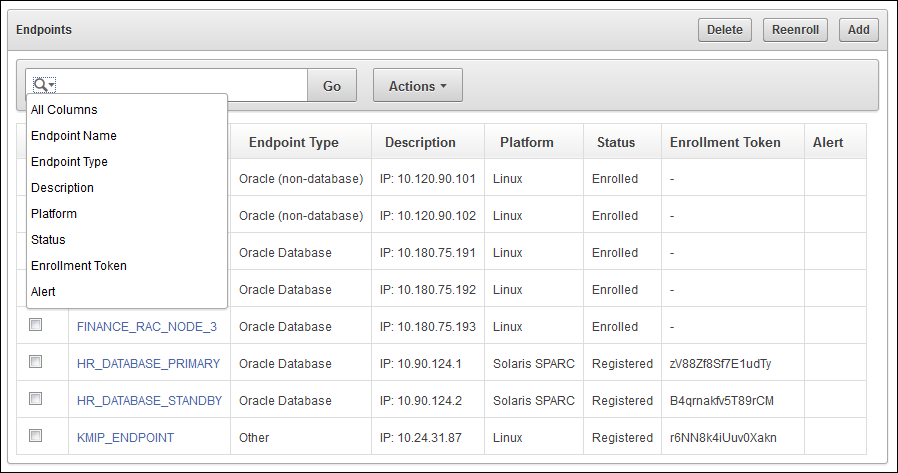
Description of the illustration ''okv_003.png''
-
Click Go.
A new endpoint list appears, displaying only those endpoints that meet the search criteria. A filter icon (looks like a funnel) indicates that a search has been performed and displays the search criteria.
-
You can select or deselect the filter icon to disable the search and enable the entire list to reappear.