Remove the Motherboard
 | Caution - Ensure that all power is removed from the server before removing or installing the motherboard assembly. You must disconnect the power cables from the server before performing these procedures. |
 | Caution - These procedures require that you handle components that are sensitive to ESD. This sensitivity can cause the component to fail. To avoid damage, ensure that you follow antistatic practices as described in ESD Measures. |
This is a cold-service procedure that must be performed by qualified service personnel. The server must be completely powered down before performing this procedure. See Component Service Categories for more information about this category of service procedures.
Note - When replacing the motherboard, remove the SPM and SC PROM from the old motherboard, and install these components on the new motherboard. The SPM contains the Oracle ILOM system configuration data, and the SC PROM contains the system host ID and MAC address. Transferring these components preserves the system-specific information stored on these modules. Whenever you replace the motherboard or the SPM, you must update the firmware so the portions of firmware in the SPM and on the motherboard are consistent.
- Prepare
for servicing.
- Attach an antistatic wrist strap.
- Power off the server and unplug power cords from the power supplies.
- Remove the server from the rack.
- Remove the top cover.
See Remove the Top Cover.
- Remove the airflow cover.
- Remove all PCIe cards.
See Remove a PCIe Card or Filler.
Always remove transceivers from a PCIe card before removing the card from the server.
Keep track of which slot each PCIe card was in so you can return them to their original positions.
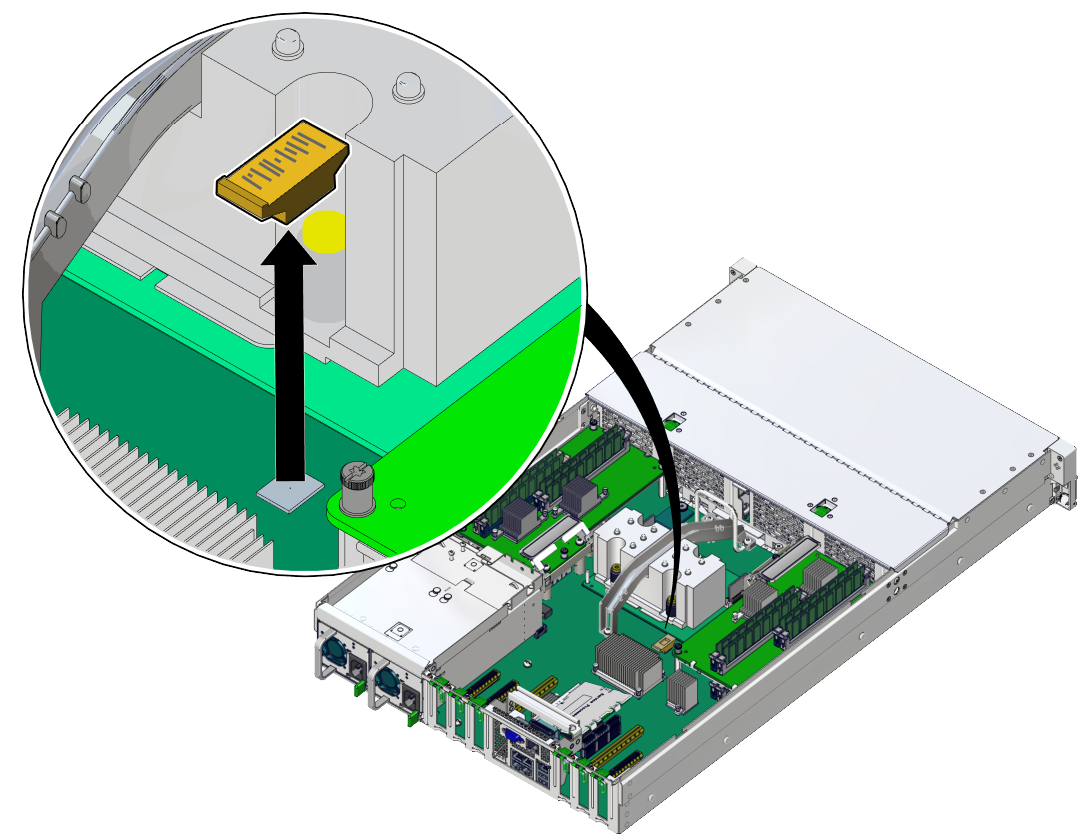
- Remove the SC PROM from the motherboard.
You will reinstall it on the new motherboard.

- Remove the SPM.
You will reinstall the SPM on the new motherboard. See Remove the SPM.
- Remove any memory risers.
You will reinstall the memory risers on the new motherboard. Keep track of which side each memory riser came from and return them to their original position.
-
Remove DIMMs from the motherboard.
See Remove a DIMM or DIMM Filler.
You will reinstall the DIMMs on the new motherboard. Keep track of which slot each DIMM came from and return them to their original position.
-
Remove the eUSB drive.
You will reinstall the eUSB drive on the new motherboard. See Remove the eUSB Drive.
- Open the fan cover and remove the fan modules.
-
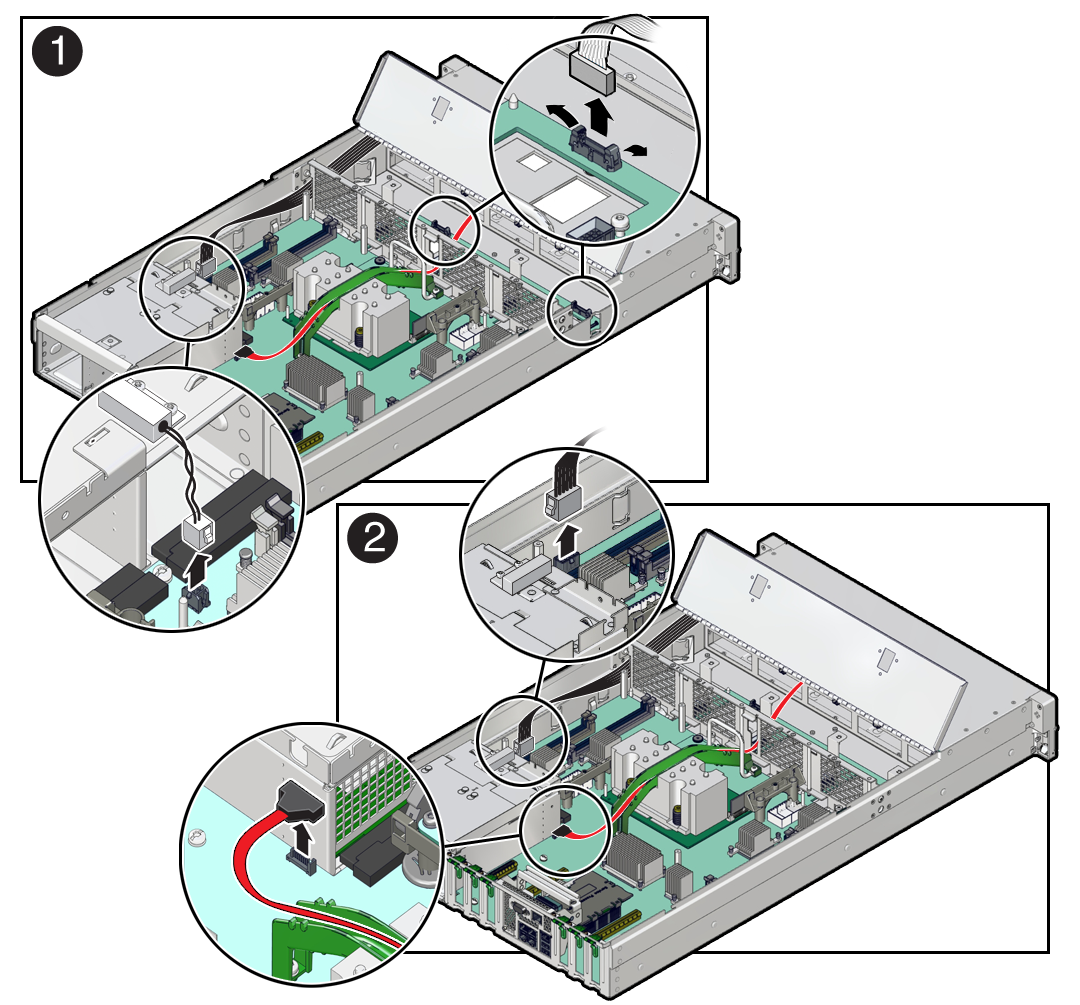
Disconnect the ribbon cables from the motherboard that go to
the left and right LED indicator modules (panel 1).
The right LED indicator module include the front USB 2.0 ports. The left and right LED indicator modules do not need to be removed to replace the motherboard.
- Disconnect the cable from the server intrusion switch (panel 1).
-
Disconnect the DVD drive cable from the motherboard (panel 2).
Carefully guide the DVD drive cable through the chassis mid-wall. Place the cable on top of the disk cage so that it is away from the motherboard. You do not need to disconnect the DVD drive cable from the DVD drive.

- Disconnect the signal cable and power cable from the motherboard to the drive backplane.
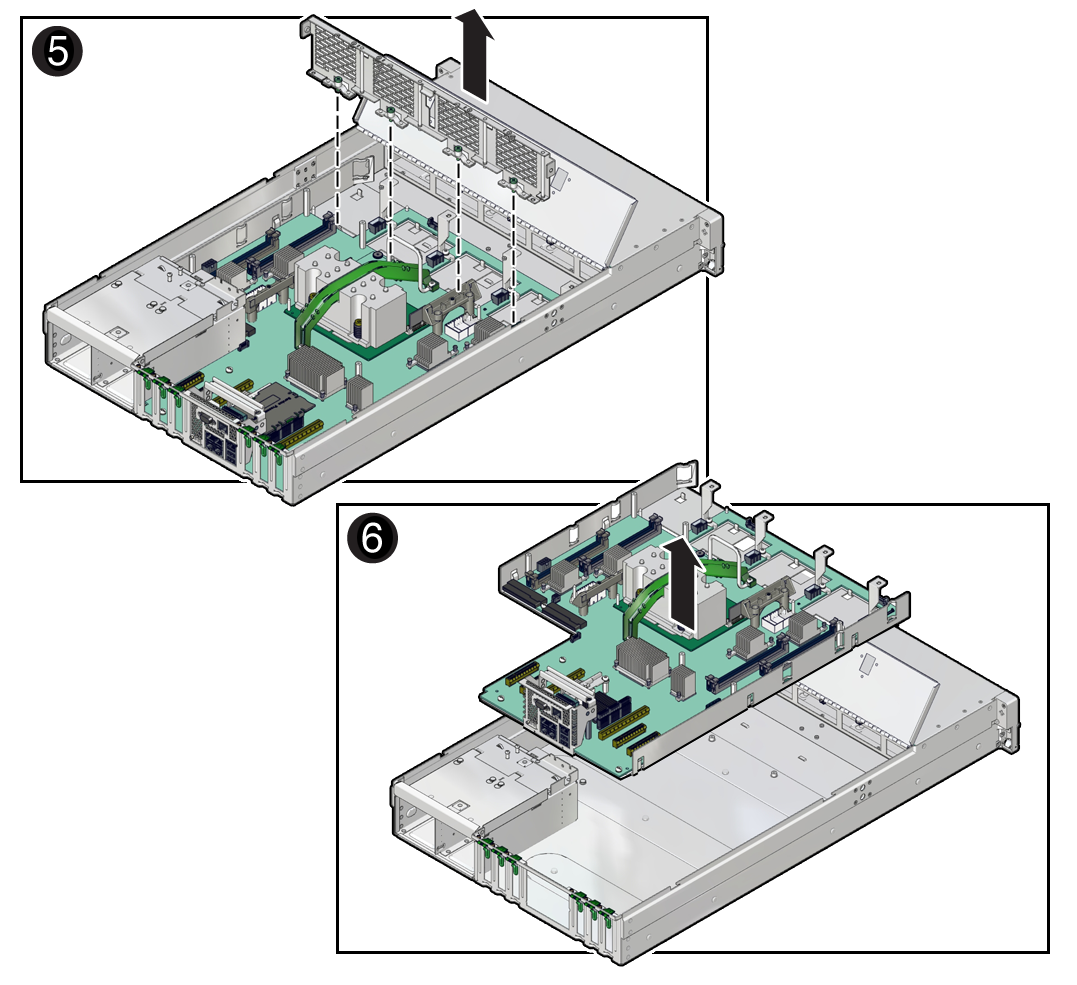
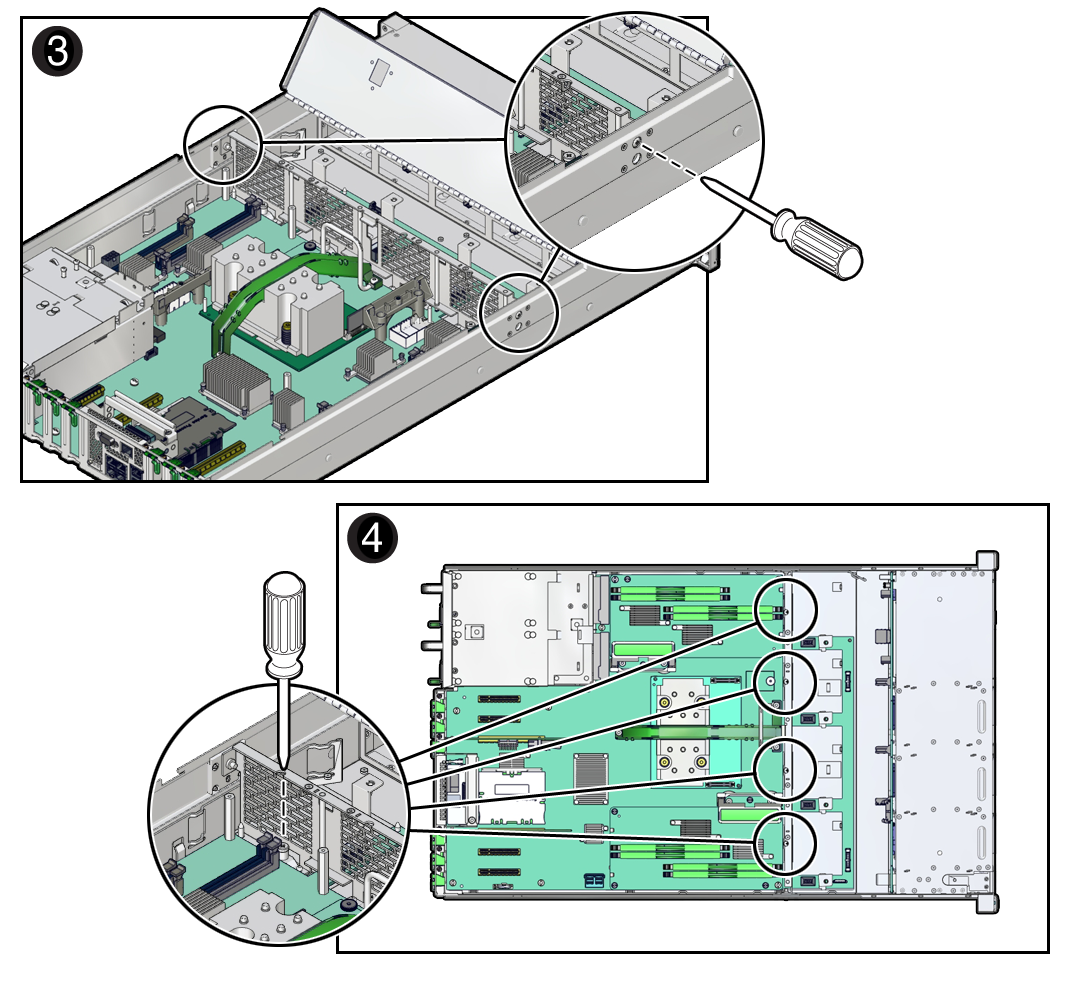
- Disconnect the mid-wall from the chassis.
-
Lift the mid-wall out of the chassis (panel 5)

-
Release the power supplies and pull them slightly out of the server.
The power supplies do not need to be removed from the chassis to lift out the motherboard.
-
Lift the motherboard out of the chassis.
You can use the bar by the rear I/O panel and the metal handle in front of the cable channel as handles to lift the motherboard.
- Place the motherboard on an antistatic mat.
- Install a new motherboard.
