Remove the Front I/O Assembly
The front I/O assembly is a cold-service component that can be replaced only by authorized service personnel. For the location of this component, see Main Module Components.
 | Caution - This procedure requires that you handle components that are sensitive to electrostatic discharge. This discharge can cause electronic components to fail. |
- Remove the main module from the server.
-
Take the necessary ESD precautions.
See Prevent ESD Damage.
- Locate the front I/O assembly on the main module.
-
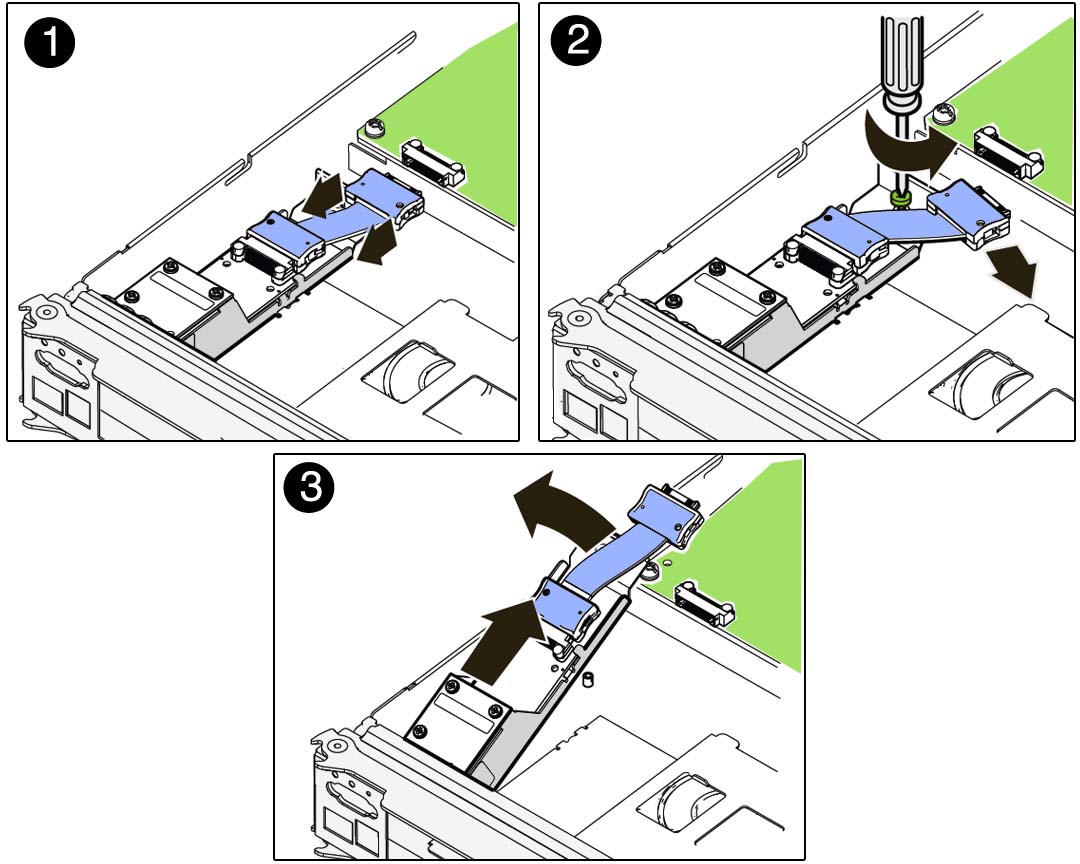
Disconnect the ribbon cable that connects the assembly to the motherboard and
remove the front I/O assembly.
- Pull the cable free of the connector on the motherboard (panel 1).
-
Push the cable connector aside to access the captive screw that
secures the assembly to the motherboard (panel 2).
Loosen the screw to release the lower end of the assembly.
- Gently pull the front I/O assembly toward the back of the main module until the ports at the front of the assembly clear the front of the main module, and then remove the front I/O assembly from the main module (panel 3).
