Printing the Course Catalog
This section discusses how to enter course catalog report parameters.
|
Page Name |
Definition Name |
Navigation |
Usage |
|---|---|---|---|
|
Print Course Catalog |
RUNCTL_SRYCATLG |
|
Use the Print Course Catalog page to print the course catalog (SR301 Report). |
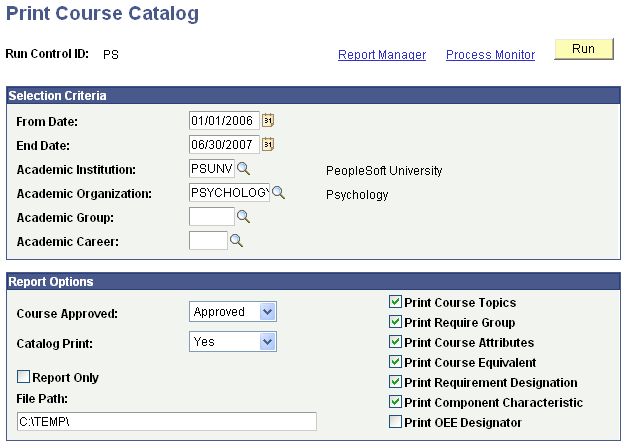
Access the Print Course Catalog page ().
Image: Print Course Catalog page
This example illustrates the fields and controls on the Print Course Catalog page. You can find definitions for the fields and controls later on this page.
|
Field or Control |
Definition |
|---|---|
| From Date and End Date |
Enter a from date and an end date. These dates are the effective dates of the course offerings. They are required fields. The system prints all active courses that are greater than or equal to the from date, and less than or equal to the end date. |
| Academic Institution |
The system populates this field with the value on the User Defaults 1 page. |
| Academic Organization |
Enter the academic organization. You are prompted by the Academic Organization Table page. |
| Academic Group and Academic Career |
Enter the academic group and academic career if you want to limit the scope of the report. Academic group values are defined on the Academic Group Table page. Academic Career values are defined on the Academic Career Table page. |
| Course Approved |
Select whether you want to display Approved, Denied, or Pending courses. To report courses of all three types, run three reports, each with a different Course Approved field value. |
| Catalog Print |
Select whether you want to view text designated as catalog print text. If you select Yes, all courses with the Catalog Print check box selected on the Course Catalog Offerings page appear in the report. If you select No, the courses that do not have the Catalog Print check box selected appear in the report. If you select All, all courses appear, regardless of the setting of the check box. |
| Report Only |
Clear this check box to specify that you want to create a Course Catalog report and send the Course Catalog report to your file path location in .csv format. Select this check box to create a Course Catalog report without creating a .csv file. If you select this check box, the File Path field becomes unavailable. |
| File Path |
If you clear the Report Only check box, this field is available. In addition to sending report output for this process to a file (through setting preferences in the PeopleSoft Process Monitor), you can also send any additional output files created by this process to a file directory. To send the extract output to a file directory, enter a valid directory path that maps to a folder with appropriate read/write permission. If you cannot locate such a folder, consult your system administrator. Select the print options to display the described detail on the report. If you clear them, the detail does not appear on the report. |
| Run |
Click to run the report using PeopleSoft Process Scheduler. You should set the type to Web and the format to PDF. |