10.8 Editing Classic Reports in Component View
This section describes how developers can edit classic reports in Component View. Using the Report Attributes page, developers can control report layout, pagination, column sorting, error messages, export links, and column break of Classic reports.
Tip:
With the addition of interactive reports in Oracle Application Express release 3.1, all previous report types are referred to as classic reports.See Also:
"Managing Pages in Component View," "Customizing Interactive Reports as an End User," and "APEX_IR" in Oracle Application Express API Reference-
Enabling Column Sorting in a Classic Report in Component View
-
Adding a Download Link to a Classic Report in Component View
-
Creating a Column Link in a Classic Report in Component View
-
Defining a Column as a List of Values in a Classic Report in Component View
-
Controlling When Classic Report Columns Display in Component View
-
Synchronizing Classic Report Column Order with Region Source
10.8.1 Editing Classic Report Attributes in Component View
This section describes how to customize a classic report by editing report attributes.
To access the Report Attributes page:
-
View the page containing the report in Component View. "Viewing a Page in Component View."
Component View appears.
-
To access the Report Attributes page, click the Report link next to the report region you want to edit.
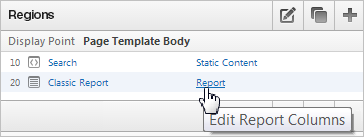
Description of the illustration ''rpt_edit.png''
The Report Attributes page appears and is divided into the following sections:
-
Column Attributes control the report layout. See "Altering Classic Report Layout in Component View".
-
Layout and Pagination attributes control report pagination. See "Controlling Classic Report Pagination in Component View".
-
Messages contain attributes that enable you to define messages that display if no data is found or more data is found than can be displayed.
-
Report Export attributes enable you to add download link to a report or export a report as either an XML file or CSV file. See "Adding a Download Link to a Classic Report in Component View" and "Adding Support for XML File or a CSV File Export".
-
Break Formatting attributes enable you to control if a specific column repeats and how column breaks appear when printed. See "Controlling Classic Report Column Breaks in Component View."
-
External Processing attributes enable you to specify a URL for post processing and a link label.
-
-
To learn more about an attribute, see field-level Help. See "Viewing Field-Level Help."
-
To save your changes, click Apply Changes.
10.8.2 Altering Classic Report Layout in Component View
You can use the Column Attributes section of the Report Attributes page to precisely control the report layout. For example, you can use these attributes to alter column heading text, change column positioning, hide a column, create a sum of a column, or select a sort sequence.
To access the Column Attributes:
-
Access the Classic Report Attributes page. See "Editing Classic Report Attributes in Component View."
The Report Attributes page appears with the Column Attributes section at the top of the page.
Use the Column Attributes section to control report column appearance and functionality.
Heading Type identifies how the heading is generated for the report. The Link column indicates if a column link is currently defined. The Edit column indicates whether a column is currently updatable.
Table 10-11 describes common report column edits.
Table 10-11 Common Report Column Edits for Classic Reports
Description Developer Action Alter column display sequence.
Click the up and down arrows to change the column display sequence.
Alter heading alignment.
Under Column Alignment, select a column alignment.
Change column heading text.
Under Heading, enter different heading text.
Control which columns display.
Click Show to indicate a column should display.
Enable a unique sort sequence.
Click Sort and select a sequence number from Sort Sequence.
Any number of columns can be sort enabled. However, at least one column must have a Sort Sequence defined.
Enable the sum of a column.
Click Sum to enable the sum of a column.
You can further refine the attributes of a specific column on the Column Attributes page.
-
To access the Column Attributes page, click the Edit icon next to the appropriate column Alias.
-
To learn more about an attribute, see field-level Help. See "Viewing Field-Level Help."
10.8.3 Controlling Classic Report Pagination in Component View
This section describes how to control pagination in a classic report.
10.8.3.1 About Controlling Pagination in a Classic Report
For a classic report, you control report pagination by:
-
Including a pagination substitution string in the report template
-
Making selections from the Layout and Pagination section on the Report Attributes page
You control how pagination displays by making selections from the Layout and Pagination attributes on the Report Attributes page.
10.8.3.2 Controlling Classic Report Pagination
To control classic report pagination:
-
Access the Classic Report Attributes page. See "Editing Classic Report Attributes in Component View."
The Report Attributes page appears.
-
Under Layout and Pagination, select the following:
-
Report Template - Select a report template (optional).
-
Pagination Scheme - Select a pagination scheme.
-
Display Position - Select a display position.
-
Number of Rows - Specify how many rows display on each page.
-
Click Apply Changes.
-
-
In the Property Editor, locate and edit the following attributes described in Table 10-12.
To learn more about an attribute, see field-level Help. See "Viewing Field-Level Help."
Table 10-12 Layout and Pagination Attributes
Attribute Description Report Template
Specifies a template to be applied to this report. Report templates provide control over the results of a row from your SQL query. You can choose from many default templates, or pick a custom build template.
Report Attributes
Enter a value to replace the
#REPORT_ATTRIBUTES#substitution string. The#REPORT_ATTRIBUTES#substitution string is only replaced in the before rows attribute of the report template.Show Null Values as
Enter the text you want to display for null columns. The default value is
(null).Pagination Scheme
Specifies the type of pagination for this report.
Pagination provides the user with information about the number of rows and the current position within the result set. Pagination also defines the style of links or buttons used to navigate to the next or previous page.
Enable Partial Page Refresh
If enabled, this attribute refreshed the report region when paginating forward and backward in your result set.
Display Position
Defines where pagination occurs.
If you choose to display pagination above a report, the selected report template must support that type of display.
Number of Rows
Defines the maximum number of rows to display on each page.
Number of Rows (Item)
Defines the number of rows displayed by default per page for SQL queries (obtained dynamically from an item). Identify the item in this attribute.
Maximum Row Count
Defines the maximum number of rows to query, for example, rows 1 - 10 of 456.
If you set this attribute to 200, the result would appear as follows:
rows 1 - 10 of more than 200 rowsThis attribute impacts performance. Counting fewer rows can improve performance and counting thousands of rows can degrade performance.
Strip HTML
Specify whether to remove HTML tags from the original column values for HTML expressions, column links and report data exported as CSV files.
If you select values from the database that contain HTML tags, then those tags can cause conflicts with the HTML generated for your columns links or HTML expressions. When this option is enabled, only the actual data portion of your column value is used.
Sort Nulls
For reports with column heading sorting, specify if you want null valued columns to sort first or last.
See Also: "Enabling Column Sorting in a Classic Report in Component View"
10.8.3.3 Including Pagination After the Rows in a Classic Report
To include pagination after the rows in a report:
-
Create a report. See "Creating a Report Using the Create Page Wizard."
-
Access the Classic Report Attributes page. See "Editing Classic Report Attributes in Component View."
The Report Attributes page appears.
-
Under Layout and Pagination, specify the following:
-
Report Template - Select a report template (optional).
-
Pagination Scheme - Select a pagination scheme.
-
Display Position - Select a display position.
-
Number of Rows - Specify how many rows display on each page.
-
Click Apply Changes.
-
-
Edit the report template:
-
Navigate to the page. See "Viewing a Page in Component View."
-
Under Templates, select the report template name.
-
Include the
#PAGINATION#substitution string in the After Rows attribute. -
Click Apply Changes.
-
-
Run the page.
10.8.3.4 Including Pagination Before the Rows in a Classic Report
To include pagination before the rows in a report:
-
Create a report. See "Creating a Report Using the Create Page Wizard".
-
Access the Classic Report Attributes page. See "Editing Classic Report Attributes in Component View."
The Report Attributes page appears.
-
Under Layout and Pagination:
-
Report Template - Select a report template (optional).
-
Pagination Scheme - Select a pagination scheme.
-
Display Position - Select a position that contains the word top.
-
Number of Rows - Specify how many rows display on each page.
-
Click Apply Changes.
-
-
Edit the report template.
-
Navigate to the page. See "Viewing a Page in Component View".
-
Under Templates, select the report template name.
-
Include the
#TOP_PAGINATION#substitution string in the Before Rows attribute. -
Click Apply Changes.
-
-
Run the page.
10.8.4 Enabling Column Sorting in a Classic Report in Component View
You enable column sorting on the Report Attributes page.
To enable column sorting:
-
Access the Classic Report Attributes page. See "Editing Classic Report Attributes in Component View."
The Report Attributes page appears.
-
Under Column Attributes, select the Sort check box next to the columns to be sorted.
-
From Sort Sequence, select a sequence number.
Sort Sequence is optional. However, if there are one or more sort enabled columns, then at least one column needs a defined Sort Sequence.
-
Click Apply Changes.
Tip:
Column sorting must be enabled if you want columns with null values to display at the top or end of the report.10.8.5 Adding a Download Link to a Classic Report in Component View
You can create a link within a report that enables users to export the report as a comma-delimited file (.csv) file. To add a CSV link to a report you must enable the CSV output option. When using the CSV output option, the report template is not important. You can include a CSV link with any report template that has the CSV export substitution string defined.
See Also:
"Automatic CSV Encoding"10.8.6 Enabling Classic Report CSV Output in Component View
To use the enable the CSV output option:
-
Access the Classic Report Attributes page. See "Editing Classic Report Attributes in Component View."
The Report Attributes page appears.
-
Scroll down to Report Export.
-
From Enable CSV output, select Yes.
-
(Optional) In the Separator and Enclosed By fields, define the separator and delimiter.
The default Enclosed By by characters are a double quotation marks (" "). The default delimiter is either a comma or a semicolon depending upon your current NLS settings.
-
In Link Label, enter link text. This text displays in your report and enables users to invoke a download.
-
(Optional) To specify a default export file name, enter a name in the Filename field.
By default, the Application Express engine creates an export file name by taking the region name and adding the appropriate file name extension (
.csvor.xml). -
Click Apply Changes.
10.8.7 Adding Support for XML File or a CSV File Export
You can add support for exporting a report as an XML or CSV by selecting a report template.
To export a report as a file:
-
Access the Classic Report Attributes page. See "Editing Classic Report Attributes in Component View."
The Report Attributes page appears.
-
Scroll down to Layout and Pagination.
-
From the Report Template list, select export: XML or export: CSV.
Selecting export: XML prevents the Application Express engine from rendering the page and dumps the content to an XML file.
-
Click Apply Changes.
10.8.8 Creating a Column Link in a Classic Report in Component View
This section describes how to create a column link to another page in your application or to a URL.
10.8.8.1 Creating a Column Link to Another Page
To create a column link to another page:
-
Access the Classic Report Attributes page. See "Editing Classic Report Attributes in Component View."
The Report Attributes page appears.
-
Under Column Attributes, locate the column to contain the link.
-
Click the Edit icon next to the column name.
The Column Attributes page appears.
-
Scroll down to Column Link.
-
To create a column link to another page:
-
From Target, select Page in this Application.
-
(Optional) In Link Attributes, specify additional column link attributes to be included in the
<a href= >tag (for example, a link target, classes, or styles). -
In Link Text, enter the text to be displayed as a link, specify an image tag, or pick from the list of default images.
-
In Page, specify the target page number. To reset the pagination for this page, select Reset Pagination.
-
In Request, specify the request to be used.
-
In Clear Cache, specify the pages (that is, the page numbers) on which to clear cache. You can specify multiple pages by listing the page numbers in a comma-delimited list. See "Linking to Interactive Reports."
-
Use the Name and Value fields to specify session state for a specific item.
-
-
Click Apply Changes.
10.8.8.2 Creating a Column Link to a URL
To create a column link to a URL:
-
Access the Classic Report Attributes page. See "Editing Classic Report Attributes in Component View."
The Report Attributes page appears.
-
Access the Column Attributes page by clicking the Edit icon next to the appropriate column.
The Column Attributes page appears.
-
Scroll down to Column Link.
-
Under Column Link, specify the following:
-
From Target, select URL.
-
In Link Text, enter the text to be displayed as a link and select a substitution string.
-
(Optional) In Link Attributes, specify additional column link attributes to be included in the
<a href= >tag (for example, a link target, classes, or styles). -
In URL, enter the appropriate address.
-
-
Click Apply Changes.
10.8.9 Defining an Updatable Column in Component View
You can make a column updatable by editing Tabular Form Element attributes on the Column Attributes page. Note that the Application Express engine can only perform updates if:
-
A multirow update is defined
-
A PL/SQL process is implemented to process updated data
-
When using the built-in tabular form elements and display types, then the report has to be defined using the type SQL Query (updatable report)
To define updatable column attributes:
-
Access the Classic Report Attributes page. See "Editing Classic Report Attributes in Component View."
The Report Attributes page appears.
-
Access the Column Attributes page by clicking the Edit icon next to the appropriate column.
The Column Attributes page appears.
-
Under Column Attributes, specify the following:
-
Display As - Select a type of updatable column.
Use this option to make a column updatable. Updates can only be performed if a multirow update is defined, or a PL/SQL process is implemented to process updated data.
-
Number/Date Format - Make a selection if you selected the Display As type of Date Picker.
-
Element Width - Specify the width of the form item.
-
Number of Rows - Specify the height of a form item (applicable to text areas).
-
Element Attributes - Define a style or standard form element attribute.
-
Element Option Attributes - Specify form element attributes for items in a radio group or check box.
-
-
Tabular Form Attributes, specify the following:
-
Default Type - Identify the default type.
-
Default - Identify the default source.
-
Reference Table Owner - Identify the owner of the referenced table. This attribute compares references to columns across applications against User Interface Defaults. This reference is manually maintained after being initialized by a wizard, whenever possible.
-
Reference Table Name - Specify the table or view that this column references. This attribute compares references to columns across applications against User Interface Defaults. This reference is manually maintained after being initialized by a wizard, whenever possible.
-
Reference Column Name - Specify the column name that this report column references. This attribute compares references to columns across applications against User Interface Defaults. This reference is manually maintained after being initialized by a wizard, whenever possible.
-
-
Click Apply Changes.
10.8.10 Defining a Column as a List of Values in a Classic Report in Component View
A column can be rendered as Radio Group or a static, named, or query-based LOV. For example, a column can be rendered using a select list or a popup list of values. Or, a column can be rendered as read-only text based on a list of values.
This last approach is an effective strategy when creating display lookup values and is particularly useful in regular, nonupdatable reports. This approach enables you to display the value of a column without having to write a SQL JOIN statement.
To render a report column as a list of values:
-
Access the Classic Report Attributes page. See "Editing Classic Report Attributes in Component View."
The Report Attributes page appears.
-
Access the Column Attributes page by clicking the Edit icon next to the appropriate column.
The Column Attributes page appears. Next, specify how the column is rendered (radio group, LOV, select list, and so on).
-
Under Column Attributes, make a selection from the Display As list.
-
Scroll down to List of Values.
-
From Named LOV, make a selection from the List of Values repository.
-
To include a null value in a list of values:
-
In Display Null - Select Yes.
-
Null display value - Enter the display value for the
NULLoption here. -
Null return value - Enter the
NULLvalue to be used for this item's list of values. If you do not specify a value, the default is%null%.
A column can also have a value that does not display in its list of values.
-
-
To define a value that does not display in the list of values:
-
From Display Extra Value, select Yes.
The extra value is used if the actual column value is not part of the LOV. In that situation, the actual value is shown. If you do not display extra values, you may end up with the wrong value and unintentionally update your data incorrectly.
-
In Null Value, specify the value that displays.
-
If you have not selected a Named LOV, enter the query used to display a select list in the LOV Query field.
-
-
If you have not selected a Named LOV, enter the query used to display a select list in List of values definition.
-
Click Apply Changes.
10.8.11 Controlling When Classic Report Columns Display in Component View
You can use the Authorization and Condition attributes to control when a column displays.
Authorization enables you to control access to resources (such as a report column) based on predefined user privileges. For example, you could create an authorization scheme in which only managers can view a specific report column. Before you can select an authorization scheme, you must first create it.
A condition is a small unit of logic that enables you to control the display of a column based on a predefined condition type. The condition evaluates to true or false based on the values you enter in the Expressions fields.
To specify Authorization and Condition attributes:
-
Access the Classic Report Attributes page. See "Editing Classic Report Attributes in Component View."
The Report Attributes page appears.
-
Access the Column Attributes page by clicking the Edit icon next to the appropriate column.
The Column Attributes page appears.
-
If controlling a column with an authorization scheme, make a selection from the Authorization Scheme list.
-
If controlling the column with a condition, define a condition, make a selection from the Condition Type list. Depending upon your selection, enter an expression or value in the appropriate Expression fields.
If the authorization is successful and the condition type display evaluates to true, the column displays.
10.8.12 Controlling Classic Report Column Breaks in Component View
You can control if a specific column repeats and how column breaks appear when printed using Break Formatting attributes. For example, suppose your report displays employee information by department number. If multiple employees are members of the same department, you can increase the readability by specifying the department number only appears once.
To create this type of column break:
-
Access the Classic Report Attributes page. See "Editing Classic Report Attributes in Component View."
The Report Attributes page appears.
-
Scroll down to Break Formatting.
-
Make a selection from the Breaks list.
10.8.13 Synchronizing Classic Report Column Order with Region Source
To synchronize a classic report's column order with the column order defined in the region source query:
-
Access the Classic Report Attributes page. See "Editing Classic Report Attributes in Component View."
The Report Attributes page appears.
-
From Tasks, select Synchronize Column Order with Region Source.
-
Click Synchronize.