Importing Customized ETL tasks
Use these instructions to import the customized ETL tasks.
- Launch the ODI Studio client and connect to the ODI Repository for BI Applications 11.1.1.10.1.
- Navigate to Designer > Projects > BI Apps Project > Mappings
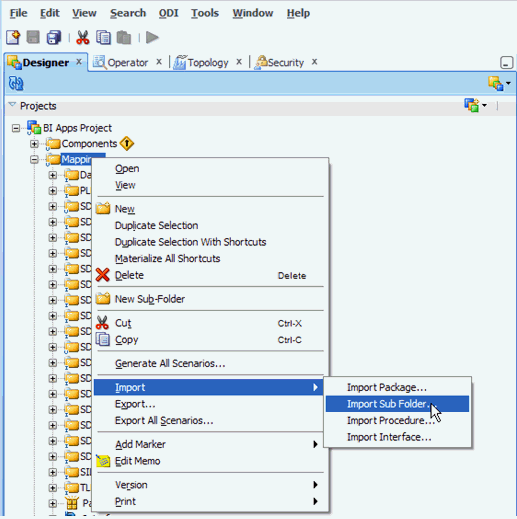
- Right click Mappings and select Import… and then Import Sub Folder….
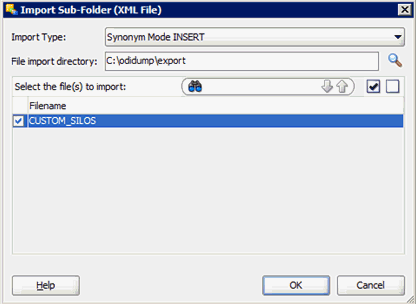
- In the Import Sub-Folder window, ensure Import Type is Synonym Mode INSERT.
- Navigate to the directory where you previously exported the custom folders.
- Select the check boxes for each folder to be imported and click OK.
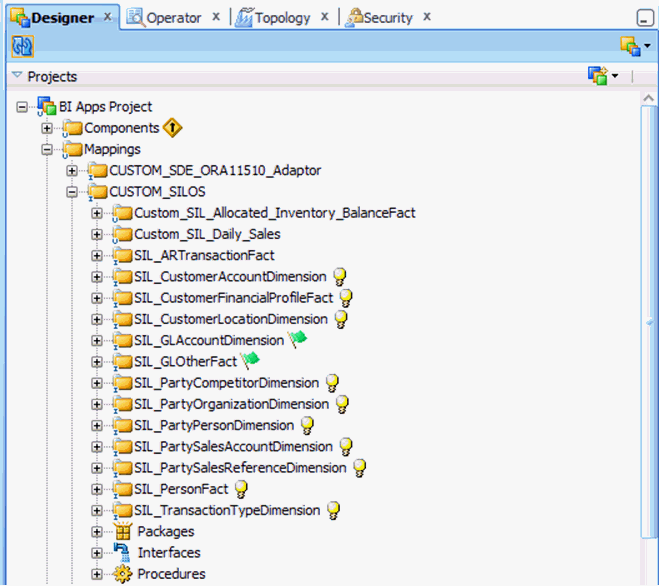
When the import completes, you can see your custom folder and its corresponding customized objects.
At this point, it is necessary to merge any customizations with any changes that may have been introduced in the upgrade repository. For example, a column may have been added to a table that was customized (as in the
W_GL_OTHER_Fexample earlier) or bug fixes applied or content otherwise changed by Oracle.There is no automatic merge mechanism available. The customized and out-of-the-box ETL tasks must be inspected for changes and the changes manually incorporated into the other. The recommended approach is to re-copy the out-of-the-box ETL task and re-apply the customizations to this new copy. Since you are far more familiar with the changes you have made it should be easier to incorporate these into the new copy rather than figure out the changes Oracle made and incorporate these into your original copy.
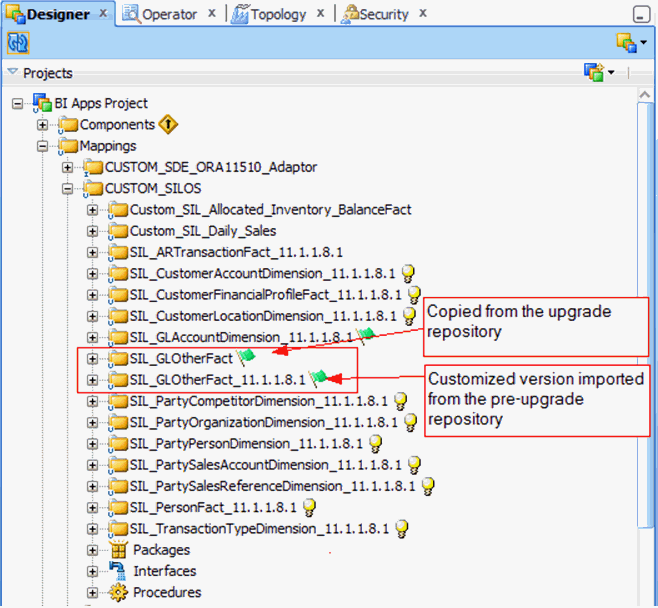
- Rename the customized ETL task to reflect the pre-upgrade version it was based on.
- Duplicate the out-of-the-box ETL task per the customization methodology and move to the Custom folder.
- Inspect the customized ETL task. The custom columns are populated but any new columns introduced by Oracle are not.
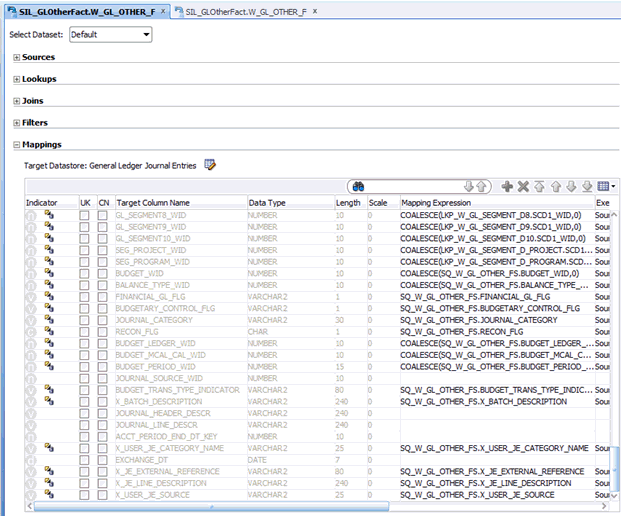
Below is an example of a customized interface. Make a note of the customizations made.
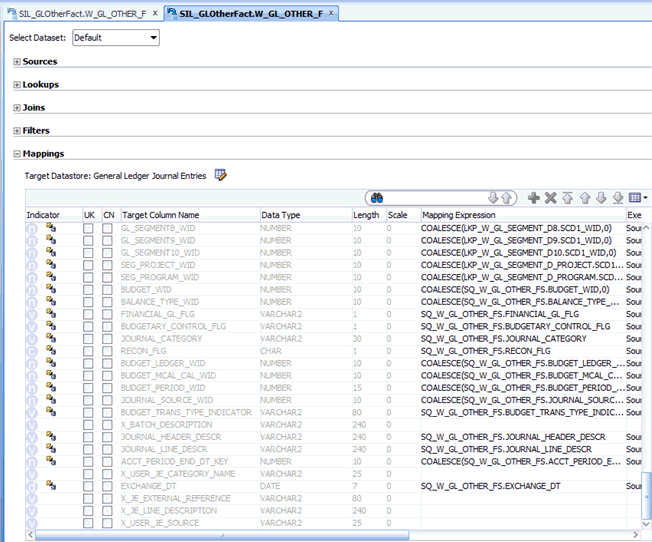
Below is the copied interface where the new columns introduced by Oracle are populated but the custom columns are not.
- Apply the customizations noted previously in this interface.
- Generate a Scenario for the newly customized ETL task.
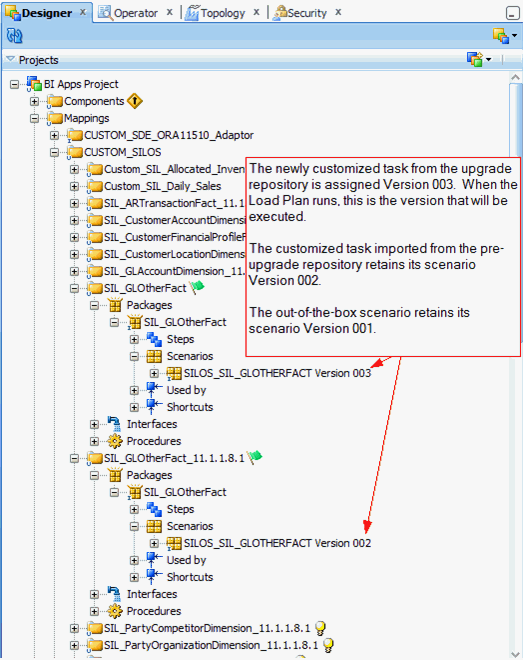
Ensure the Scenario Name matches the out-of-the-box Scenario Name but use a Version Number that is larger than any previously used Version Number. The BI Apps Load Plans are configured to run the scenario with the largest number. By retaining the same scenario name and assigning the largest scenario version number, you do not have to make any changes to the load plan.
- Apply customizations to the generated load plans as per the Customization methodology.
