3. Defining Attributes of an Islamic Fixed Asset Product
In this chapter, we shall discuss the manner in which you can define attributes specific to the Islamic Fixed Assets product.
This chapter contains the following sections:
3.1 Islamic Asset Product
This section contains the following topics:
- Section 3.1.1, "Invoking Islamic Asset Product Maintenance"
- Section 3.1.2, "Accounting Roles Button"
- Section 3.1.3, "Events Button"
- Section 3.1.4, "Branch Currency Button"
- Section 3.1.5, "MIS Details Button"
- Section 3.1.6, "Preferences Button"
- Section 3.1.7, "Category Restrictions Button"
- Section 3.1.8, "Instrument Restrictions"
- Section 3.1.9, "Charges Button"
- Section 3.1.10, "Fields Button"
- Section 3.1.11, "Viewing Summary for Islamic Fixed Asset Products"
3.1.1 Invoking Islamic Asset Product Maintenance
You can access the ‘Islamic Asset Product Maintenance’ screen, from the Application Browser. In this screen, you can enter basic information relating to a product such as the Product Code, Product type, the Description, etc.
You can invoke this screen by typing ‘FIDPRMNT’ in the field at the top right corner of the Application tool bar and clicking the adjoining arrow button.

For any product you create in Oracle FLEXCUBE, you can define generic attributes, such as branch, location, and category, etc., by clicking on the appropriate icon in the horizontal array of icons in this screen.
You can define the attributes specific to the product in the ‘Islamic Fixed Asset Product Definition’ screen and the ‘Islamic Fixed Asset Product Preferences’ screen. In these screens, you can specify the product type and set the product preferences respectively.
For further information on the generic attributes that you can define for a product, please refer the following Oracle FLEXCUBE User Manuals:
- Products
- Charges
- User Defined Fields
Product Code
The code you assign to a product will identify the product throughout the module. The code should contain four characters. You can follow your own convention for devising the code, however, at least one of the characters should be a letter of the English alphabet.
Since the code that you define is used to identify the product, it should be unique across the modules of Oracle FLEXCUBE. For instance, if you have assigned the code ‘LC01’ to a particular product in this module, you cannot use it as a code in any other module.
Product Description
You can enter a brief description of the product, which will be associated with the product for information retrieval purposes.
Product Type
An important detail in defining a Islamic product is to specify the type of product you are creating. The product type identifies the basic nature of a product. In this module, you can create Portfolio funds only.
The accounting entries that are passed, the messages that are generated, and the processing of funds involving this product are determined by the type of product that you create.
Description
You can enter a brief description
Slogan
You can specify a marketing punch-line to be associated with the product. This slogan will be printed on all the advices that are sent to the customer, for an LC involving this product.
Product Group
Each product is classified under a specific group. The different groups are defined in the Product Group Definition table.
Product Group description
A brief description of the product group is displayed in the Product Group description field.
Start Date and End Date
A product can be set up for use over a specific period, by defining a start and an end date. The Issue Date of an LC involving a product should be:
- The same as or later than the Start Date.
- The same as or earlier than the End Date.
The start and end dates of a product come in handy when you are defining a product for a scheme, which is open for a specific period.
Remarks
You can enter information about the product, intended for the internal reference of your bank. The remarks are displayed when the details of the LC are displayed or printed. However, this information will not be printed on any correspondence with the customer.
Exchange Rate Variance (in %)
For a special customer, or in special cases, you may want to use an exchange rate (a special rate) that is greater than the exchange rate maintained for a currency pair. The variance is referred to as the Exchange Rate Variance.
When creating a product, you can express an Exchange Rate Variance Limit in terms of a percentage. This variance limit would apply to all funds associated with the product.
Override Limit
If the variance between the default rate and the rate input varies by a percentage that is between the Override Limit and the Rate Stop Limit, you can save the transaction (involving the fund) by providing an override.
Stop Limit
If the variance between the default rate and the rate input varies by a percentage greater than or equal to the Rate Stop Limit, you cannot save the transaction involving the fund.
Rate Code
For every Currency Pair and Rate Type combination you are required to maintain Buy, Sell, and Mid Rates.
You need to specify whether the Mid Rate should be used for all Cross Currency transactions or whether the Buy/Sell Rate should be used depending upon the nature of the transaction by selecting the appropriate rate from the option list available.
Rate Type Preffered
You have to specify the Rate Type that should be used for Cross Currency transactions. Click on the option list for a display of all the Rate Types maintained through the Rate Type Definition screen.
3.1.2 Accounting Roles Button
Click the ‘Accounting Roles’ button to invoke the ‘Accounting Roles’ screen. Through this screen you can define accounting rules for the product you are creating.

For more information on specifying Accounting Roles, refer ‘Products’ User Manual under ‘Modularity’.
3.1.3 Events Button
Click the ‘Events’ button to invoke the ‘Events’ screen. Through this screen you can define events for the product you are creating.

For more information on specifying Event Details, refer ‘Product Definition’ User Manual under ‘Modularity’.
3.1.4 Branch Currency Button
Click the ‘Branch Currency’ button to invoke the ‘Branch/Currency Restriction’ screen. Through this screen you can maintain branch currency for the product you are creating.

For more information on specifying Branch Details, refer ‘Products’ User Manual under ‘Modularity’.
3.1.5 MIS Details Button
Click the ‘MIS’ button to invoke the ‘MIS Details’ screen. Through this screen you can manage MIS details you are creating.
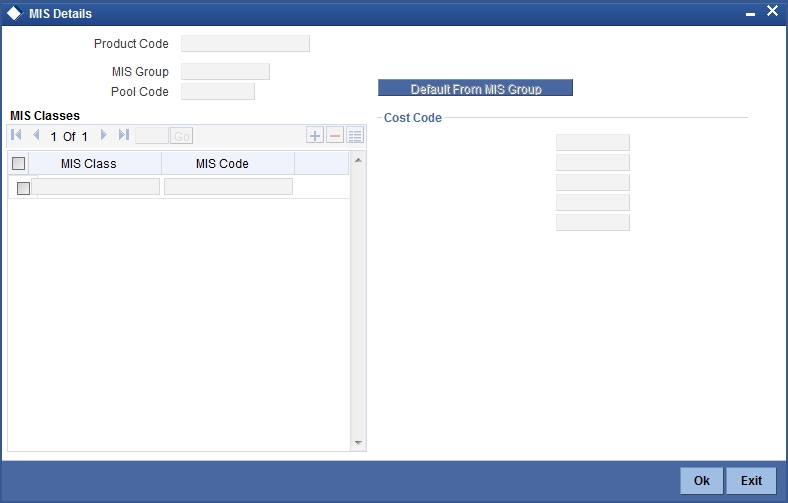
For more information on specifying MIS Details, refer ‘Products’ User Manual under ‘Modularity’.
3.1.6 Preferences Button
The attributes specific to an asset are defined in the Preferences screen.
You can invoke ‘Fixed Assets Product Preferences’ screen from the ‘Islamic Assets Product Maintenance’ screen by clicking on the ’Preferences’ button.

Displaying the Product Code
This is the code for the product that you are defining here. The code is defaulted from the product definition screen.
Displaying the Product Description
This is the description of the product that is being defined. This is defaulted from the product definition screen.
Specifying if Purchase Order (PO) is Required
You have to indicate whether a purchase order is required or not for procuring a new asset. Choose your preference by clicking on ‘Yes’ or ‘No’ accordingly.
Note
If your preference for PO is ‘Yes’ then you will have to link the asset to an XP (Expense Processing) contract using ‘XP Linkage’ screen invoked from the ‘Islamic Asset Capture Online screen’.
Specifying if Depreciation Processing is Required for the Asset
You have to mention if you want the depreciation process to be carried out for the asset. Choose your preference by clicking on ‘Yes’ or ‘No’ accordingly.
If you choose ‘No’, then the depreciation will not be charged for the assets which come under this product.
This data is maintained for both books of account as well as tax purposes.
Note
- Accounting entries will be passed only for book type of depreciation
- In order to achieve the inventory tracking you need to select depreciation as ‘No’ and only BOOK and SALE events can be maintained
Specifying if Rekey is Required for the Asset
Indicate if you require any parameters to be keyed in, at the time of authorization, for the asset.
Specifying the Rekey Parameters
All operations on a Islamic fixed asset contract have to be authorized by a user other than the one who carried out the operation. Authorization is a cross checking mechanism to ensure that the entries made by a user are correct. All operations on a contract except placing it on hold, should be authorized before the beginning the End of Day operations.
You have the option of specifying whether certain important details of the contract need to be rekeyed, at the time of authorization. If you enable this option you should also specify the field that will have to be rekeyed at the time of contract authorization. You can specify any one of the following rekey fields:
- Asset Cost
- Capitalization Date
- Depreciation Effective Date
When you invoke a contract for authorization, the complete details of the contract will be displayed only after the values to the rekey fields are entered. Suppose you choose not to define any rekey fields the details of the contract will be displayed immediately once the authorizer calls the contract for authorization. The re-key option also serves as a means of ensuring the accuracy of inputs.
Financing By Loan
Check this box to indicate that the financing for the asset is done through a loan. This is maintained as ‘Yes’ for the ijarah asset products.
3.1.7 Category Restrictions Button
You can define few specific restrictions for an asset at the product level. They are:
- Asset category restrictions
- Locations restrictions
You have already categorized assets that share similar attributes in the ‘Asset Category Maintenance’ screen. The categorization of assets is useful for charging a common depreciation rate, generating MIS reports etc. You can also define the useful life for different categories of assets.
While creating an Islamic Fixed Asset product, you may want to establish certain controls by restricting the usage of the product to select asset categories only. You can achieve this control by maintaining restriction lists when creating a product.
Click ‘Category Restrictions’ button to display the ‘Fixed Asset Product Category Details’ screen.

You can choose to specify Asset Category Restrictions either by:
- Associating the product with a Asset Category Restriction class
- By defining these restrictions specifically for the product
If you would like to associate a restrictions class to a product that you are defining, choose the ‘Default From Class’ button in the ‘Islamic Fixed Asset Category Restriction’ screen. A list of the restrictions classes that you have defined specifically for the Islamic Fixed Assets will be displayed. Choose a suitable Restrictions class.
Alternatively, you can choose to define asset category restrictions specifically for the product. In this case, you would choose not to associate restriction classes with the product. You would define restrictions for the product by:
- Specifying the List type – wherein you restrict the usage of an asset category (or asset categories as the case may be) to the product by maintaining an Allowed or Disallowed list.
- Move a Category to the Allowed/Disallowed column depending on the list type that you choose to maintain.
3.1.8 Instrument Restrictions
Through the Location Code maintenance you have assigned unique location codes to identify different locations where the asset physically exists. Using the ‘Fixed Assets Location Restrictions’ screen you can restrict the usage of a product to specific locations. Click ‘Instrument Restrictions’ button to invoke the ‘Fixed Assets Product Location Details’ screen.

The details of all the locations that you have maintained will be displayed here. You can choose to specify the Location Restrictions either by associating the product with a Location Restriction class or by defining these restrictions specifically for the product.
3.1.9 Charges Button
Click the ‘Charges’ button to invoke the ‘Charge Details’ screen. Through this screen you can manage charge details you are creating.
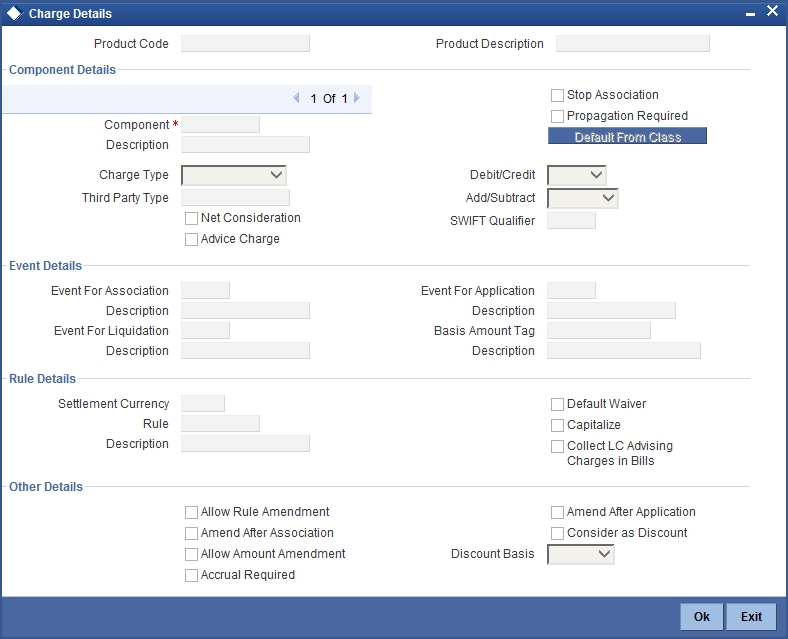
The steps involved in processing charges for a contract, i.e. defining charge rules, defining charge classes, associating charge classes with a product, and amending charge details to suit a contract are explained in the Building Charge Components User Manual.
3.1.10 Fields Button
Click the ‘Fields’ button to invoke the ‘Product User Defined Fields’ screen. Through this screen you can manage user defined field details you are creating.

From the list of all the fields that you created, you can choose specific fields and make them applicable to the product. Besides, you can also specify the values that should be defaulted for the field.
The list of fields and the default values that you select for a product will be apply to all transactions associated with the product.
Refer to the User Manual ‘User Defined Fields’ under ‘Modularity for more details.
3.1.11 Viewing Summary for Islamic Fixed Asset Products
You can view the summary of the Islamic fixed assets products using ‘Islamic Fixed Asset Product Summary’ screen. You can invoke this screen by typing ‘FISPRMNT’ in the field at the top right corner of the Application tool bar and clicking the adjoining arrow button. A screen giving all the details of the products is displayed.

You can query on records based on all or any of the following criteria:
- Authorization Status
- Record Status
- Product Code
- Product Description
- End Date
- Product Group
- Start Date
- Product Type
Click ‘Search’ button. The system identifies all records satisfying the specified criteria and displays the following details for each one of them:
- Authorization Status
- Record Status
- Product Code
- End Date
- Product Group
- Start Date
- Product Description