4. Maintenance Required for Processing FTs
4.1 Introduction
This chapter enumerates the maintenance of the following reference information used by the Funds Transfer module in Oracle FLEXCUBE:
- Value Date Spreads
- National Clearing Codes
This chapter contains the following sections:
- Section 4.2, "Value Date Spreads"
- Section 4.3, "National Clearing Codes"
- Section 4.4, "Blacklisted BIC Codes"
- Section 4.5, "RTGS Directory"
- Section 4.6, "Branch Parameters for Funds Transfer"
4.2 Value Date Spreads
This section contains the following topics:
- Section 4.2.1, "Maintaining Value Date Spreads"
- Section 4.2.2, "Maintaining Clearing Network Details"
4.2.1 Maintaining Value Date Spreads
The debit or credit value date spread refers to the number of days that should be added to the value date of an transfer.
Debit and credit value date spreads are applicable to all transfers like; internal customer transfers, incoming transfers, and outgoing transfers.
Internal customer transfers can be of three types:
- A customer transfers funds from one account to another (the CIF is the same but the accounts are different).
- The ordering and the beneficiary customer belong to the same customer category.
- The ordering customer and the beneficiary customers are different but customers of your bank.
In cases 1 and 2, the value date for both the debit and credit legs will be defaulted to today’s date.
In case 3, the defaulted Debit and Credit Value Dates will need to be modified based on the spread that is maintained. Incoming transfers are received as MT 103 SWIFT messages, which are uploaded into Oracle FLEXCUBE and processed as incoming payment transactions in the Payments and Collections module.
You can invoke the ‘Value Date Spread details’ screen by typing ‘FTDVDSPR’ in the field at the top right corner of the Application tool bar and clicking the adjoining arrow button.
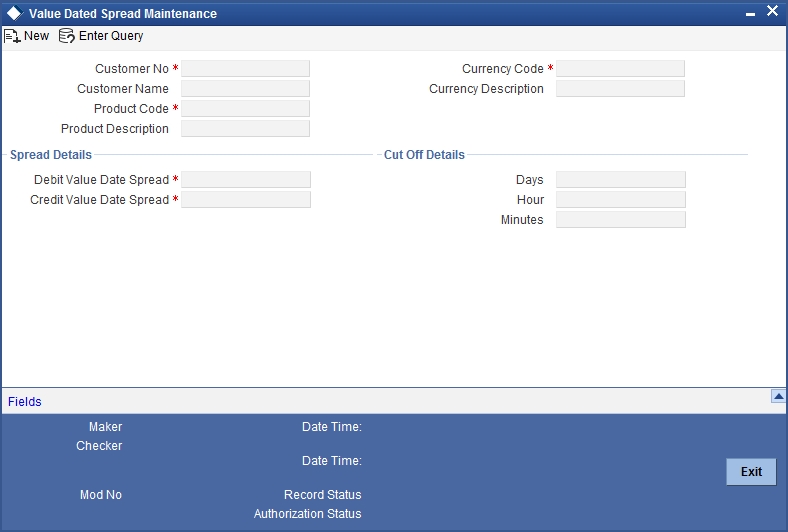
Specifying the Value Date Spread
The debit and credit value date spread can be maintained for a customer + product + currency combination. You can select the identification codes of the customer, product, and currency from the option lists available at the respective fields.
Indicating the Spread Details
Indicate the debit and the credit value date spread that is applicable for the combination that you specified. The spread can be positive or negative. It is important to note that the spread that you indicate is always taken to be in calendar days.
In addition to maintaining spreads for individual customers, you can specify debit and credit value date spreads for all customers for a given product and currency combination. Click option list and select ‘ALL’ from the all valid values available at the field Customer.
While processing FT transfer, where the initiator and beneficiary, are different customers of your Bank, Oracle FLEXCUBE applies the spread you maintained for the customer + product +currency combination in the following manner:
| Account Leg | Description | ||
|---|---|---|---|
| Dr account leg | Modified Value Date = Today + Debit Value Date Spread for Customer 1 | ||
| Cr. account leg | Modified Value Date = Today + Credit Value Date Spread for Customer 2 |
Specifying Cut-off Details for a currency, product and customer combination
Specify time within which (or before which) you want to receive FT transactions for processing, for the specified customer, product, and currency.
You can specify the following:
- Number of days before which a transaction involving the combination must be received.
- Cut-off time, in hours and minutes, before which transactions must be received.
These parameters are known as currency cut-off parameters.
In this screen, you can maintain the cut-off time, cut-off days and the value spreads to be applicable for:
- Each customer, for a product and currency combination
- All customers, for each product and currency combination
These currency cut-off parameters are validated in respect of a funds transfer transaction only if currency cut-off checks are specified as applicable in the product preferences, for the product involving the transaction.
4.2.2 Maintaining Clearing Network Details
In the Clearing Networks screen, you can maintain the networks (such as SORBNET and ELIXIR) through which you communicate with other banks and financial institutions for funds transfers.
You can invoke this screen by typing ‘PCDCLRNT’ in the field at the top right corner of the Application tool bar and clicking the adjoining arrow button. The screen is as below:

In this screen, you should specify the following details:
4.2.2.1 Specifying the Networks
- The Name of the Clearing Network. This will uniquely identify the network in Oracle FLEXCUBE.
- A brief description of the network
- Clearing currency of the network
- Clearing system ID code
- Clearing Network BIC
4.2.2.2 Specifying the Handoff Directory
- The Incoming and Outgoing Handoff directories. Incoming and Outgoing transactions will be handed off to the respective directories that you indicate in this screen.
- IBAN validation for the Counterparty Account Number is required for outgoing payments and incoming collections using the clearing network.
- Indicate whether the processing bank is an indirect participant of the clearing network. If yes, then the counterparty account will be replaced with the currency correspondent account.
4.2.2.3 Specifying the RTGS
The following RTGS network details should be specified:
Network Type
Select the network type. This can be RTGS or Non-RTGS. By default, system selects Non–RTGS.
New COV Format Required
Check this box to indicate that the cover message needs to be sent in the new format. If you select this option, CUST_RTGS_COV message will be sent which will follow the same format as 202COV.
For more details on new cover message formats, refer the settlements user manual.
Network Qualifier
If the network type is RTGS, indicate whether the network is TARGET 2 system. To enable the system to perform TARGET -2 specific validations during contract input and message generation, select TARGET-2 from the network qualifier drop down list.
You can either choose ‘TARGET 2’ or ‘Others’ as the network qualifier. The default value is ‘Others’.
Note
This field is enabled only if the network type is chosen as ‘RTGS’.
TARGET-2 is a RTGS clearing system for high value Euro payments. All the participants in the current National RTGS system automatically become members of TARGET-2.
Following are the units of TARGET-2:
- Direct TARGET-2 participant
- Indirect TARGET-2 participant
If payment is done from direct TARGET-2 participant to another direct TARGET-2, the account of the sender will be debited and that of receiver is credited.
If payments are sent from a direct TARGET-2 participant to a direct TARGET-1 participant, an interlinking account is used.
Swift Type
Select the swift type from the drop down list. The drop down list contains the options ‘FIN’ and ‘FIN Y- Copy’.
Network Service Identifier
The service identifier that is specified here will be displayed in Field 113 of Block 3 header in the RTGS message.
Note
This will be enabled if network type chosen is ‘RTGS’.
4.2.2.4 Specifying the Incoming Transactions
Branch Code
Specify the code for the branch that is participating in the incoming account process.
Incoming Currency Code
If you select the currency code, all the accounts associated with the chosen currency code will be displayed in the option list provided in the adjacent field.
Incoming Account
In case of incoming transactions received over the network, the account that you indicate here will be debited by default.
Description
In case of TARGET 2 clearing network, the default incoming account will be the primary nostro account with the central bank that should be debited while processing an incoming TARGET 2 payment.
4.2.2.5 Specifying the Outgoing Transactions
Branch Code
For all outgoing transactions sent over the network you are maintaining, you can specify the default account that should be credited.
Outgoing Currency code
If you select the currency code, all the accounts associated with the chosen currency code will be displayed in the option list provided in the adjacent field.
Outgoing Account
In case of outgoing transactions received over the network, the account that you indicate here will be credited by default.
Description
In case of TARGET 2 clearing network, the default incoming account will be the primary nostro account with the central bank that should be credited while processing an outgoing TARGET 2 payment.
Note
You are not allowed to maintain the same default incoming or outgoing accounts for different networks.
4.2.2.6 Specifying Dispatch Accounting Parameters
To consolidate the accounting entries such that the Clearing Nostro GL is netted to post single debit and credit entries for each file that is dispatched, you will need to identify the Clearing Nostro account through the Dispatch Accounting Parameters section in the ‘Clearing Network’ screen.
Branch
Select the appropriate branch code and the currency code from the corresponding option lists available.
Nostro Account
You can maintain different clearing Nostro accounts for the above combination of branch and currency.
Outgoing and Incoming Transaction Code
After you identify the nostro account to which the consolidated entry will be passed for all Dispatch entries you have to select separate transactions codes against which all the incoming and outgoing transactions are to be tracked. The BIC codes for the clearing network will be derived using the Nostro Account so maintained.
4.2.2.7 Specifying the UDF Details
Click ‘Fields’ button to provide values for the UDFs associated with the screen.
4.3 National Clearing Codes
This section contains the following topics:
- Section 4.3.1, "Maintaining National Clearing Codes"
- Section 4.3.2, "Maintaining Network Details"
- Section 4.3.3, "Maintaining Clearing Codes for Individual Banks"
- Section 4.3.4, "Uploading Clearing Codes"
- Section 4.3.5, "Maintaining Clearing Code Exclusion List "
4.3.1 Maintaining National Clearing Codes
As part of maintaining reference information for the different banks with which your bank transacts in various countries, you can maintain the National Clearing Codes for each of them. These codes are identifiers for local banks in the clearing network, similar to, but distinct from, the Bank Identifier Codes (BIC).
When you enter or upload a funds transfer transaction, you can specify the National Clearing Codes for banks that form part of the settlement route, which correspond to fields 56, 57 and 58 in a SWIFT message – the Intermediary Institution, Account with Institution and the Beneficiary Institution.
You maintain National Clearing Codes as follows:
- Maintaining network details for each clearing network, of which the local banks form a part
- Maintaining the National Clearing Codes for the individual banks (or branches) in a network
4.3.2 Maintaining Network Details
You can maintain details of clearing networks, of which local banks and their branches form a part.
For each network, you maintain the following details:
- A unique identifier for the network
- The prefix to be used for the network code
- A first party field
- A description for the network
- The unique mask or format that will be used for the clearing codes of banks that form part of the network
- The local currency for the network
You can invoke the ‘Clearing Network Maintenance’ screen by typing ‘ISDNTMNT’ in the field at the top right corner of the Application tool bar and clicking the adjoining arrow button.

The network code uniquely identifies the network. The Clearing Code information for each of the banks that form part of the clearing network will contain the network code.
Specify a prefix for the network code. For instance, //CH.
Clearing Code Mask
A unique Clearing Code identifies each individual bank that forms part of the network. Each network has a unique mask or format to which the clearing codes of individual banks must conform. You can specify a mask comprising a maximum of 35 alphanumeric characters. Here, you have to define the minimum number of digits in lower case ‘n’ and the variable digits in upper case ‘N’.
In Oracle FLEXCUBE, you can maintain variable length clearing code. However, this is supported only for numeric clearing codes.
For each network, specify the applicable local currency.
First Party Field
If you check this flag, the network code can appear only once in the MT103, MT103+, MT102, MT102+ MT202 messages of the payment instruction.
4.3.3 Maintaining Clearing Codes for Individual Banks
You can maintain the Clearing Code details for individual banks (or branches) in a network, in the ‘Clearing Code Maintenance’ screen.
You can invoke the ‘Clearing Code Maintenance’ screen by typing ‘ISDCTMNT’ in the field at the top right corner of the Application tool bar and clicking the adjoining arrow button.
![]()
The Clearing Code details comprise the following:
- The clearing network of which the bank forms a part
- The nationality of the bank, i.e., the country in which the bank operates
- The name, description and address of the bank
- The bank’s own clearing code, if any
- The customer number for the clearing code
- The BIC for the bank
Network Code
The individual bank is part of a clearing network, for which you have maintained details in Oracle FLEXCUBE. Specify the code of the clearing network, of which the bank (or branch) forms a part.
Country
Specify the country in which the bank operates.
Clearing code
The National Clearing Code that has been assigned to the bank, in the clearing network you have specified, must be indicated.
Customer Number
This is a number used to identify the customer. The swift upload process in Oracle FLEXCUBE will check if the customer number is a clearing code. In case the customer number is a clearing code, Oracle FLEXCUBE will check if this is a bank’s customer and based on that, will fetch the customer’s account number.
Bank Name, Description, Address
Specify the name, description and address of the bank.
Own clearing code
Each individual bank in a clearing network could have two different, distinct clearing codes:
- The National Clearing Code
- The bank’s own clearing code
The National Clearing Code is the identifier for the bank as a clearing agent in a settlement route for any transaction, in the network. However, when the bank is the beneficiary institution as well as the receiver of funds in the settlement route for a transaction, within the network, the National Clearing Code is not used, but the bank’s own clearing code is used.
For example,
For Global Services Bank (GSB), Paris, the National Clearing Code used when the bank just acts only as a clearing agent in the settlement route, is (20-00-00). However, when GSB is the beneficiary of the funds, the local clearing code used is (20-32-53). This is the bank’s ‘own clearing code’. In both cases, the SWIFT BIC used for the bank would be the same.
Bank Identification Code
As part of the clearing codes details for a bank, you must also specify the SWIFT BIC code that corresponds to the bank. The system uses this association between the BIC Code and the Clearing Code to convert BIC Codes to local clearing codes.
Clearing Code Indicator
Here, you need to specify whether the network code is in clearing or not. Select ‘Yes’ or ‘No’ from the drop-down list as required.
Clearing Code Type
Specify the type of clearing code being maintained.
In case the details are maintained through a bank directory plus upload, this field will contain the value of national ID type.
4.3.4 Uploading Clearing Codes
You can upload clearing codes from the BIC Plus directory to Oracle FLEXCUBE through the ‘BIC Upload’ screen.
You can invoke the ‘BIC Upload’ screen by typing ‘ISDBICPU’ in the field at the top right corner of the Application tool bar and clicking the adjoining arrow button.

In the BIC Upload screen, specify the source code from which you want to upload details. Select an appropriate source code from the adjoining drop-down list by clicking the alongside arrow. Specify the file name as well as the file path in the respective fields and click ‘Submit Params’ button. The options available are:
- BIC - Select this to upload the BIC file
- CCH - Select this to upload the country-wise holiday file
- BICPLUSIBAN - Select this to upload BIC plus IBAN file.
- BankDirectoryPlus - Select this to upload Bank Directory Plus file.
- IBANPlus - Select this to upload IBAN Plus file.
- IBANStructure - Select this to upload IBAN structure file.
- BICPLUSIBANIS - Select this to upload BIC plus IBAN structure file.
- IBANExclusionList - Select this to upload IBAN exclusion list
Note
- For a record with the modification option U, if there is no existing record in the Oracle FLEXCUBE clearing code table, then the same is inserted. If the record exists, the data is updated with the one in BIC upload.
- For a record with the modification option M, if there is no existing record in the Oracle FLEXCUBE clearing code table, then the same is inserted. If the record exists, the data is updated with the one in BIC upload.
- For a record with the modification options A and W, if there is an existing record in the Oracle FLEXCUBE clearing code table, then an error is logged and the upload continues.
- For a record with the modification option D, if there is no existing record in the Oracle FLEXCUBE clearing code table, then an error is logged and the upload continues.
- On upload the national ID for all bank codes and the default network code for those countries are populated in the clearing upload tables.
The sequence of upload is based on the modification option and follows the order given below:
- Deletion
- Modification
- Addition
4.3.5 Maintaining Clearing Code Exclusion List
Oracle FLEXCUBE allows you to maintain a list of clearing codes that should not be uploaded during the clearing code upload. You can specify this list in the ‘BIC Upload Maintenance’ screen.
You can invoke the ‘BIC Upload Maintenance’ screen by typing ‘ISDBICUM’ in the field at the top right corner of the Application tool bar and clicking the adjoining arrow button.

Here you can capture the following details:
BIC upload Source file
You can select the BIC upload source file as BICPLUS or BIC from the adjoining drop-down list, through the BIC upload Maintenance screen.
Network Code exclusion List
You can specify a list of Network codes for which the clearing codes need not be uploaded during clearing code upload operation. This BICPLUS upload file will be invoked during clearing code upload into the directory.
4.4 Blacklisted BIC Codes
Your bank may wish to avoid dealing with blacklisted entities, in a funds transfer settlement. Entities are identified by their SWIFT BIC Codes.
If the entity for which you are specifying the BIC code is a blacklisted entity, you can indicate the same in the BIC Code Details screen, by selecting the ‘Blacklisted’ checkbox.
If the BIC code of a blacklisted entity is specified as part of the party information in a funds transfer settlement, Oracle FLEXCUBE prompts you for an override before you can save the transaction.
For details about how funds transfer transactions with blacklisted BIC codes are processed, refer the chapter ‘Processing a Funds Transfer’, in this user manual.
4.5 RTGS Directory
This section contains the following topics:
4.5.1 Maintaining RTGS Directory
You can maintain the details of the Real Time Gross Settlement (RTGS) directory in the ‘RTGS Directory Structure’ screen.
You can invoke the ‘RTGS Directory Maintenance’ screen by typing ‘ISDERTGD’ in the field at the top right corner of the Application tool bar and clicking the adjoining arrow button.
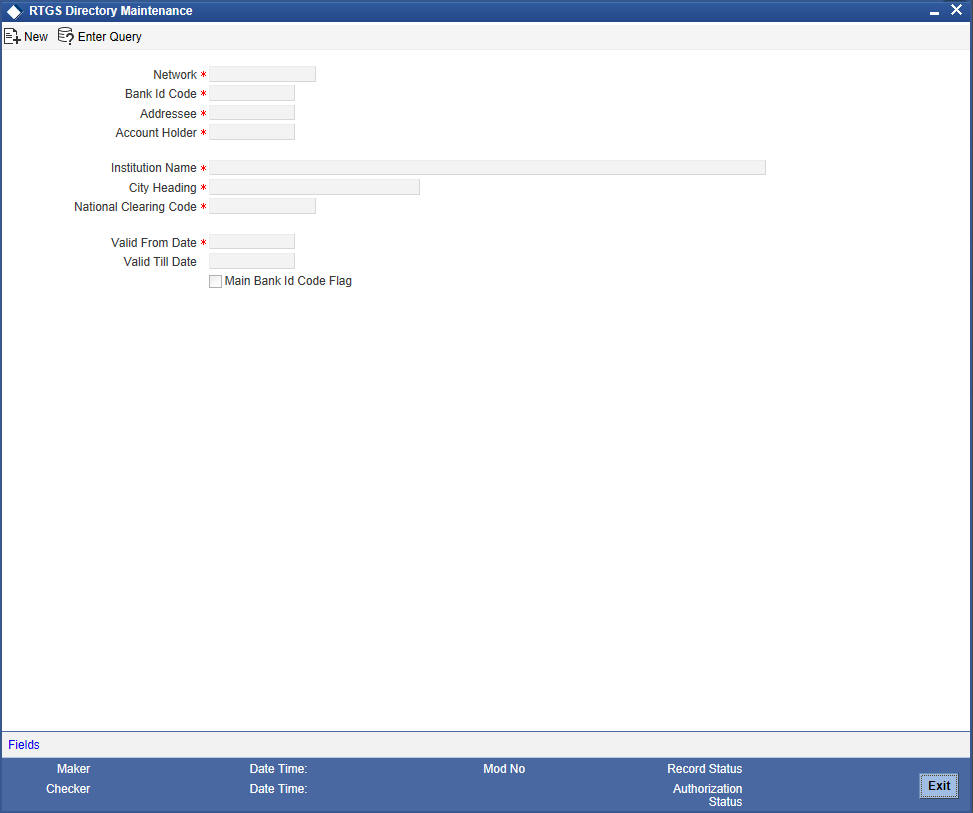
Network
Select the relevant Network ID from the available option list. The option list defaults only those networks which are maintained as RTGS type Network type in the clearing networks Maintenance.
Sender Bank Identification Code
Specify the BIC assigned to the participant from the option list. A participant can be a ‘Direct Participant’ or an ‘Indirect Participant’.
For more details on Direct and Indirect participant refer ‘Maintaining Information specific to the Payments and Collections Module’ chapter in the Payments and Collections user manual.
Addressee
Specify the BIC of the addressee, i.e., the receiver of the payment message.
Account Holder
Specify the BIC of the settlement bank.
Institution Name
Specify the institution where the participant’s account is to be credited with the amount of the funds transfer.
City Heading
Specify the city where the institution is sited.
National Clearing Code
Enter the national clearing code to be used in case the system is not able to resolve the TARGET-2 participant based on the bank code.
TARGET–2 is a high value Euro Payment clearing system.
For more information on TARGET-2, refer to the Maintaining Information specific to the Payments and Collections Module chapter in the Payments and Collections user manual.
Valid From Date
Specify the date from which the clearing code is valid. The application date is defaulted here. You can change this, if required.
Valid Till Date
Specify the date up to which the clearing code is valid. If you do not specify the valid till date, then it will be set to 31-12-9999.
Main Bank Identification Code Flag
Main BIC Flag is used to resolve 8 characters BIC. Check this option to indicate that the main BIC must be used if the bank code is incomplete.
4.5.2 RTGS Directory Upload
Upload the updated TARGET directory into Oracle FLEXCUBE. The files are fixed length ASCII format files. You can trigger the upload by using the RTGS Directory Upload screen.
You can invoke the ‘RTGS Upload’ screen by typing ‘ISDRTGSU’ in the field at the top right corner of the Application tool bar and clicking the adjoining arrow button.
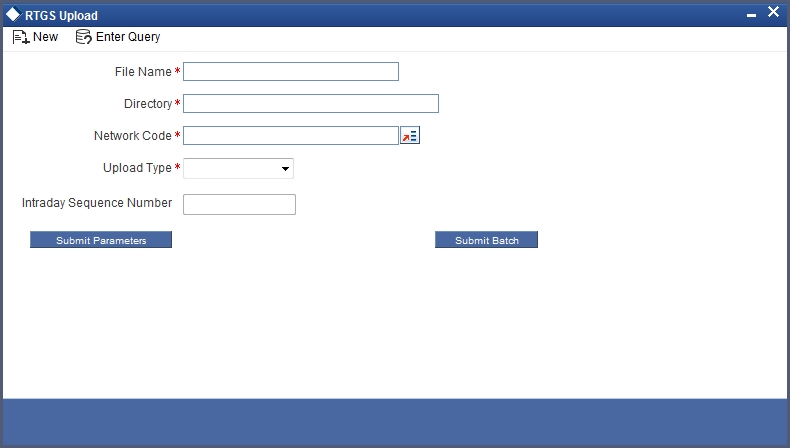
You can specify the following details in this screen.
File name
Specify the name of the upload filename.
Directory
Specify the directory i.e., the file path or area in your system where the ASCII files are to be stored.
Network Code
Specify the network from which the upload is being triggered from the option list. The list contains all the RTGS networks defined in the ‘PC Clearing Network’ screen whose network qualifiers are TARGET2.
Intraday Sequence Number
Specify the sequence number for the upload. In case you have multiple uploads on the same day, this number may be used as the identifier of each upload.
Upload Type
Select the type of the upload required from the adjoining drop-down list. This list displays the following values:
- Full Refresh
- Current
The format of the file is as below:
| Sl. No. | Field Name | Data type | Values | Remarks | |||||||
|---|---|---|---|---|---|---|---|---|---|---|---|
| 1 | BIC | Varchar2(11) | Participant’s BIC | ||||||||
| 2 | Addressee | Varchar2(11) | BIC to be used in header | ||||||||
| 3 | Account Holder | VARCHAR2(11) | BIC identifying the settlement bank | ||||||||
| 4 | Institution Name | VARCHAR2(105) | Participant’s company name | ||||||||
| 5 | City Heading | VARCHAR2(35) | |||||||||
| 6 | National Sorting Code | VARCHAR2(15) | |||||||||
| 7 | Main BIC Flag | VARCHAR2(1) | ‘Y’ OR ‘N’ | ||||||||
| VARCHAR2(1) | A:added, M:modified, D:deleted,U:unchanged | ||||||||||
| 9 | Valid From | Date | ‘YYYYMMDD’ | ||||||||
| 10 | Valid Till | Date | ‘YYYYMMDD’ | ||||||||
| 11 | Reserve | VARCHAR2 (25) | |||||||||
The following actions will be performed based on the type of change:
Added
A new record will be created. If the record already exists then the latest details will be updated in this.
Modified
A new record will be created. If the record already exists then the latest details will be updated in this.
Unchanged
A new record will be created. If the record already exists then the latest details will be updated in this.
Deleted
An existing record will be marked as closed. If the record doesn’t exist then it will be ignored.
If the BICs present in RTGS directory is not present in the RTGS upload file they will be closed once the upload is over. This will happen when upload type chosen is ‘Full Refresh’.
4.6 Branch Parameters for Funds Transfer
This section contains the following topics:
- Section 4.6.1, "Maintaining Branch Parameters for Funds Transfer"
- Section 4.6.2, "Maintaining Currency and Transaction Amount Agreements for MT102 and MT102+"
4.6.1 Maintaining Branch Parameters for Funds Transfer
You can use the ‘Funds Transfer - Branch Parameters’ screen for maintaining parameters related to Funds transfer. These parameters can be maintained for each branch of your bank.
You can invoke the ‘Funds Transfer Branch Parameters’ screen by also entering ‘FTDBRMNT’ in the field at the top right corner of the Application toolbar and clicking the adjoining arrow button.

The following fields can be specified in the above screen.
Branch Code
Specify the Branch Code for which the Funds Transfer parameters are being maintained.
Multi Customer Transfer
Check this box to indicate that multiple customer transfer messages - MT102 – can be processed for the transactions entered in the branch. By default this check box will be un-selected, in which case MT102 message will not be processed.
Multi Bank Transfer
Check this box to indicate that multiple Bank/Financial institution transfer messages - MT203 - can be processed for the transactions entered in the branch. The valid values allowed are ‘Y’ and ‘N’. By default this check box will be un-selected, in which case MT203 message will not be processed.
Generate MT102+
Check this box to indicate that MT102+ messages can be processed for the transactions entered in the branch. By default this check box will be un-selected, in which case MT102+ message will not be processed.
To process an MT 102+ message, select both Generate MT102+ and Multi Customer Transfer check boxes.
Incoming General Ledger
Specify the Bridge GL for the incoming MT102 and 102+.
Outgoing General Ledger:
Specify the Bridge GL for outgoing MT102 and 102+.
For SDMC, the system picks the credit leg for consolidated internal contract as outgoing general ledger.
Note
You must specify both incoming and outgoing GLs if ‘Multi Customer Transfer or ‘Multi Bank Transfer’ is selected.
Customer Consolidation Debit Product
Specify the customer consolidation debit product. The option list displays all valid internal type FT products. Select the appropriate one.
This product will be used for creating consolidated FT contract for Single Debit Multiple Credit (SDMC).
4.6.2 Maintaining Currency and Transaction Amount Agreements for MT102 and MT102+
You can capture the accepted currencies and transaction amounts as agreed bilaterally between the Sender and receiver in `Agreements with Sender / Receiver BIC’.
You can invoke the screen by typing ‘ISDCCYRS’ in the field at the top right corner of the Application toolbar and clicking the adjoining arrow button.I

The following fields can be specified in the above screen:
BIC Code
Specify the BIC code from the option list. The value entered here must be a valid BIC code in the system with the options Generate MT102, Generate MT102+ and Generate MT101 selected.
Message Type
Select the message type from the option list:
- MT101,
- MT102
- MT102+
Direction
Indicate whether the BIC-currencies amount maintenance is for incoming or outgoing or both type of messages. You have the following options here
- Incoming
- Outgoing
- Both
Product for Consol Debt
Specify the product for consolidated debit entry to ordering customer. This can be specified for incoming MT101.
No. of Transactions per Message
Specify the total number of transactions for each message (MT101).
Cutoff Incoming
Specify the cutoff time in hours and minutes for the incoming messages.
Cutoff Outgoing
Specify the cutoff time in hours and minutes for the outgoing messages.
4.6.2.1 Transaction Currency Limit Details
The details displayed here depend on the direction specified. They are used for MT101, MT102 and MT102+.
- If the direction is Incoming, these fields indicate the transaction limit for individual transactions in the incoming message.
- If the direction is Outgoing, these fields indicate the transaction limit for individual transactions in the outgoing message.
- If the direction is Both, these fields indicate the transaction limit for individual transactions in the outgoing and incoming message.
Incoming MT101
If the message is an incoming MT101, on receiving the message the following checks will be made before uploading the transactions.
- If the Sender has an agreement for Incoming MT101.
- If the Cut-off time for Incoming MT101 for the receiver has not passed.
- Check for the Transaction currency & Transaction amount limit.
Check for the debit authority of the Instructing party, in case the instructing party is different than the ordering customer.