- Locate the appropriate
rack unit (RU) height.The DE2-24C Drive Enclosure requires four standard rack units (4U) of vertical space.
- Remove the rails from the Drive Enclosure packaging.
- If you are installing rails in a square-hole rack, snap one cage nut into the eighth rack hole on both sides of the rack.
To locate the eighth rack hole, count eight holes upward from the bottom rail location peg.
The following figure shows a cage nut installed in a square-hole rack.Figure 1: Cage nut installed in a square-hole rack
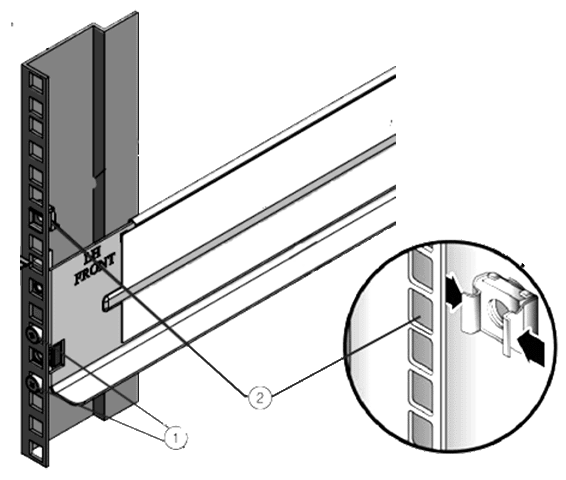
- Legend
1 Rail-location pegs 2 Cage nut
- Prepare the screws in each rail end.
- Square-hole racks
- No preparation is required.
- Round-hole racks
- Remove the two rail-location pegs from each rail end and replace them with the special screws from the rail kit. The special screws are part number 0093340-02.
- Threaded-hole rack
- Remove the two rail-location pegs from each rail end and replace them in the opposite direction from inside of the rail flange. Remove and discard the clip nut from the front rail.
Figure 2: Rail-location pegs from inside of the rail flange and the clip nut
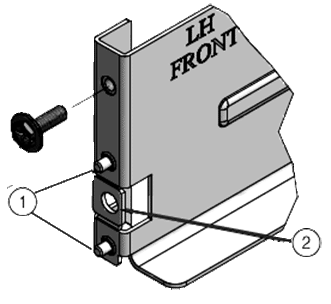
- Legend
1 Rail location pegs from inside of the rail flange 2 Clip nut
- Position the front of the rails inside of the rack.
Make sure the rail flange aligns with the inside of the rack flange and the rail label faces the inside of the rack.
- Square-hole racks
- The rail-location pegs fit inside of the rack holes.
- Round-hole rack
- The special screws fit inside of the rack holes.
- Threaded-hole rack
- The rail-location pegs fit inside of the rack holes.
The following figure shows an example of the rail-location pegs inserted into a square-hole rack.Figure 3: Rail-location pegs and a square-hole rack
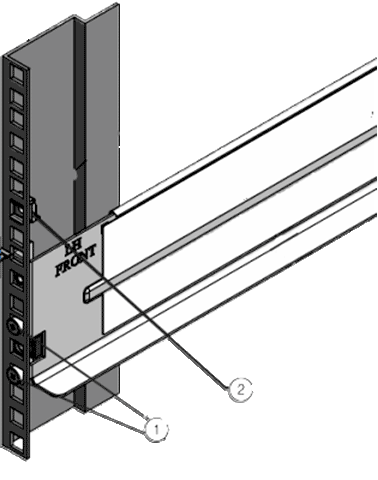
- Legend
1 Rail-location pegs 2 Cage nut
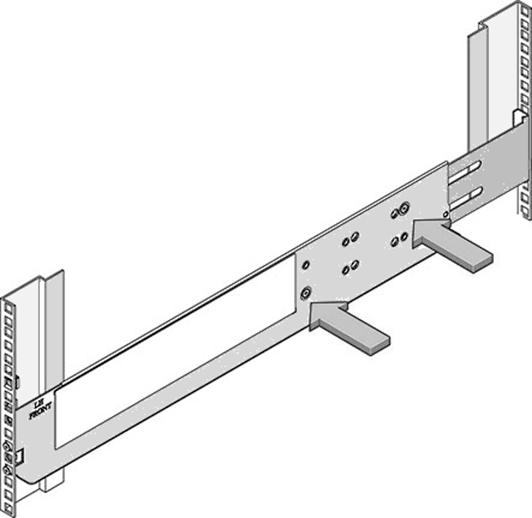
- Extend the rail length towards the back of the rack and into the rail holes at the back of the rack.
Figure 4: Rail extended to holes in the back of the rack
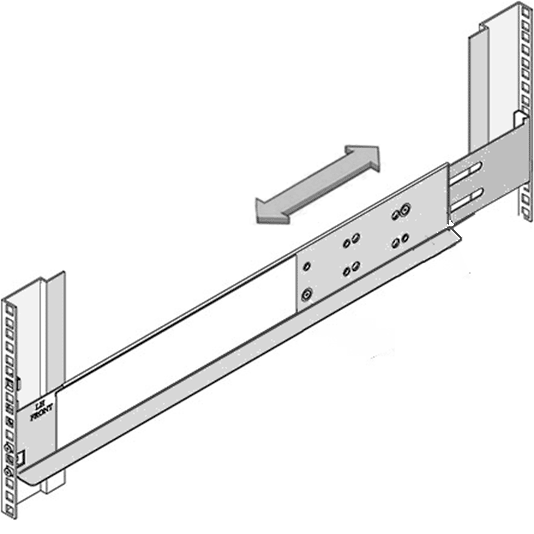
- Insert and fully tighten one Phillips 13mm head hex flange screw through the back of the rack and into the rail.
- Tighten the two locking screws in the side of the rail.
Figure 5: The locking screws and side of the rail
- Repeat steps 1 - 8 to install the right-hand rail assembly.