Install the cable management arm (CMA) so that you can route the Pilot cables into the rack.
The CMA clips into the ends of the left and right Pilot slide rail assemblies. No screws are necessary for mounting the CMA. The right sides of the two CMA arms have hinged extensions.
Note: The CMA shown in the graphics might vary slightly from the CMA shipped with your product.
- Unpack the CMA parts.
- Take the CMA to the back of the rack, and ensure that you have adequate room to work around the back of the Pilot.
- Remove the tape to separate the parts of the CMA.
- Insert the CMA’s mounting bracket connector into the back of the right slide rail until the connector locks into place with an audible click.
- Insert the right CMA slide rail connector into the back of the right slide rail assembly until the connector locks into place with an audible click.
Figure 1: CMA slide rail connector inserted into the back of the right slide rail
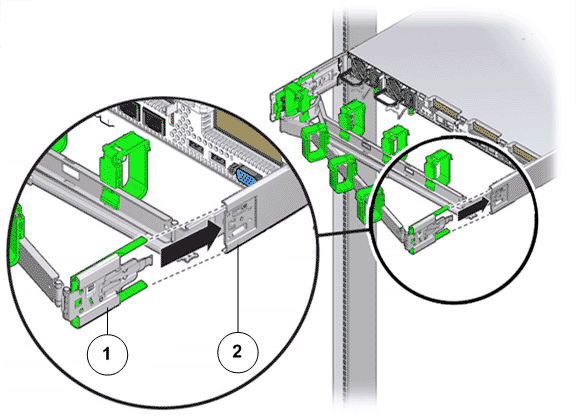
- Legend
1 CMA slide rail connector 2 Right slide rail
Note: The CMA in the graphic is for representation only. The CMA shipped with your Pilot might be slightly different. - Insert the left CMA slide-rail connector into the back of the left slide rail assembly until the connector locks into place with an audible click.
Figure 2: CMA slide rail connector inserted into the back of the left slide rail
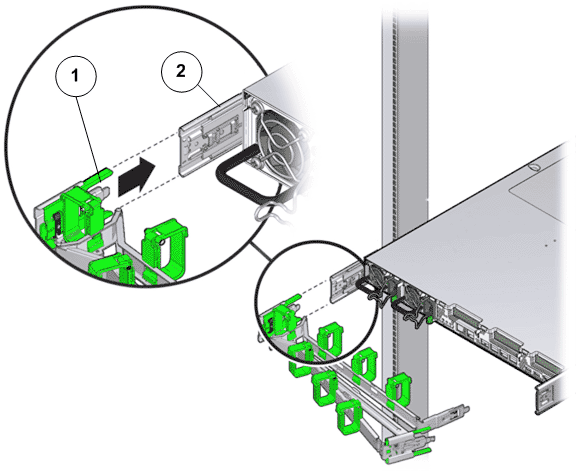
- Legend
1 CMA slide rail connector 2 Left slide rail
Note: The CMA in the graphic is for representation only. The CMA shipped with your Pilot might be slightly different. - Install and route cables to the Pilot, as required.