Prior to adding Controllers, install rails into the rack for each Controller that you plan to add.
- Prerequisites:
Ensure that you have adequate room to work around the rack while installing the rails and the Controller.
Attach an electrostatic discharge (ESD) wrist strap to your wrist, and stand on an ESD mat while replacing components.
Ensure that you have a Phillips Number 2 screwdriver with at least a 4-inch shaft.
If you are installing the rails in a rack with threaded holes, make sure you have a Torx Number 20 screwdriver.
- Mark the rack mount hole where you plan to mount the Controller.The Controller requires two standard rack units (2U) of vertical space.
- Remove the rails from the packaging.
- Position the front of the left rail behind the left front rack rail.
Figure 1: Controller rack mount location
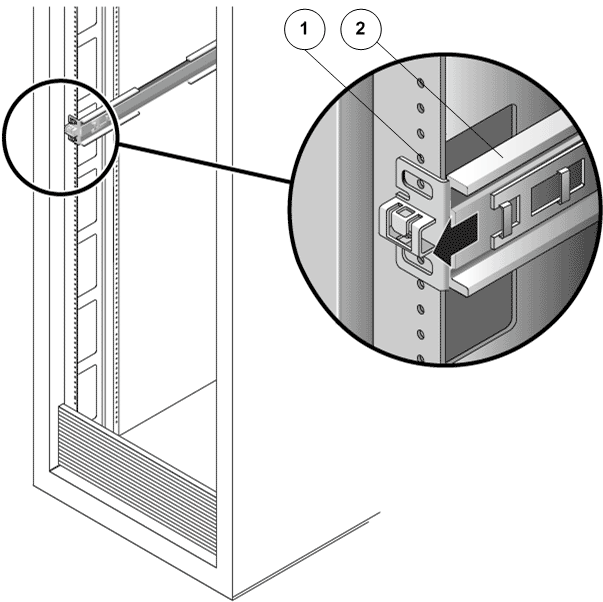
- Legend
1 Rack mount holes 2 Left rail
- Use a Phillips Number 2 screwdriver to insert and tighten two 8-32 panhead screws to secure the left rail to the front of the rack.Note: Each Controller requires two standard mounting units (2U) of vertical space in the rack. Each standard mounting unit (U) has three mounting holes in the left and right rack rails.Note: Insert the screws into the lowest holes in the top two mounting units of the 2U slot in which the chassis is to be mounted. These screws pass through the rack rail holes and screw into threaded holes in the left rail.
Figure 2: Left rail secured to the front of the rack
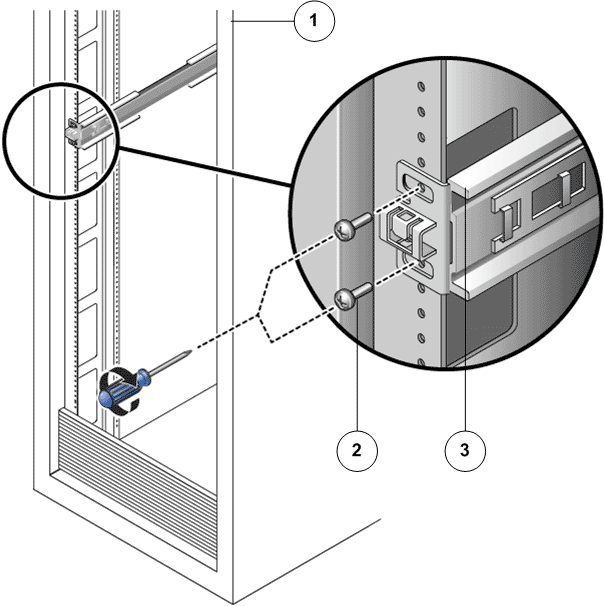
- Legend
1 Rack 2 8–32 screws to secure left rail to rack 3 Left rail
- Repeat the above two steps for the right rail.
- At the back of the rack, adjust the length of the left rail as needed to fit the rack, and position the rail flange over the face of the rack rail.
Figure 3: Left rail adjusted at the back of the rack
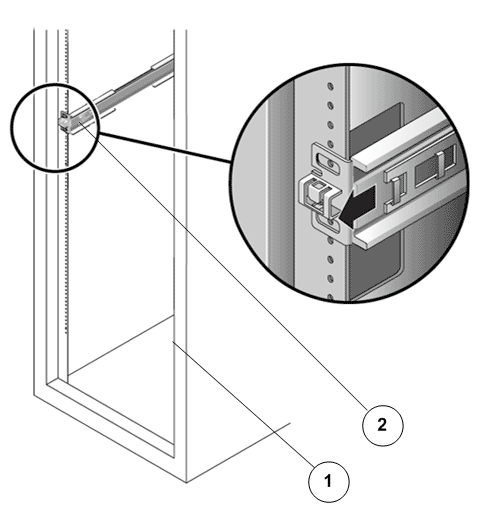
- Legend
1 Back of the rack 2 Left rail
- Align the rail flange so that the mounting holes correspond to those at the front of the rack.
- Use a Phillips screwdriver to insert and tighten four metric M6 screws (two on each side) at the back of the rail.
- Repeat the above three steps for the right rail.
- Using a Phillips Number 2 screwdriver, tighten the eight 10-32 panhead adjustment screws (four on each side) toward the back of each rail.