- Extend the mounting brackets completely out of their respective slide rails.Tip: To extend the mounting brackets out of the slide rails, simultaneously press and hold the upper and lower lock buttons of the slide rail lock. Then, pull the mounting bracket out until it locks in the extended position.
Figure 1: Slide rail assembly unlocked
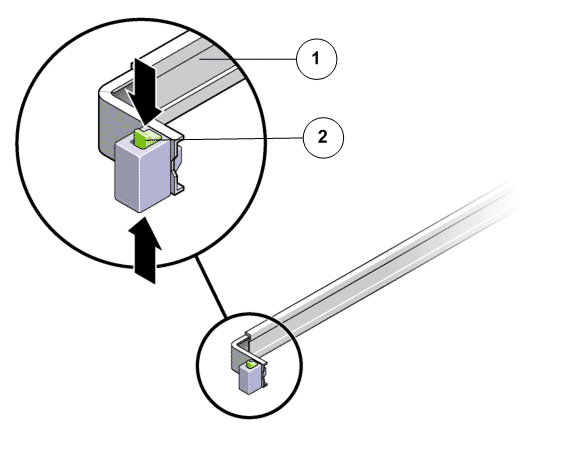
- Legend
1 Slide rail assembly 2 Slide rail lock button
- Slide the mounting bracket release button, and then slide the mounting bracket out of the slide rail.
Figure 2: Mounting bracket release button
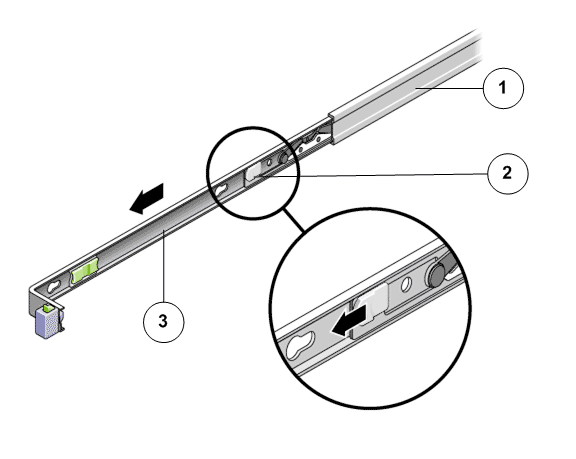
- Legend
1 Slide rail 2 Mounting bracket release button 3 Mounting bracket
Figure 3: Slide rail middle section unlocked
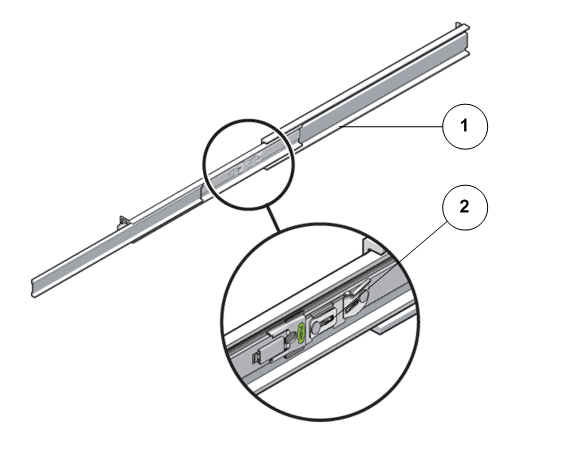
- Legend
1 Slide rail 2 Metal lever
Tip: Press the metal lever on the middle section of the slide rail to unlock the slide rail, and then push the middle section back into the rack. - Attach a mounting bracket to the right side of the Controller chassis.
Figure 4: Mounting bracket attached to the chassis
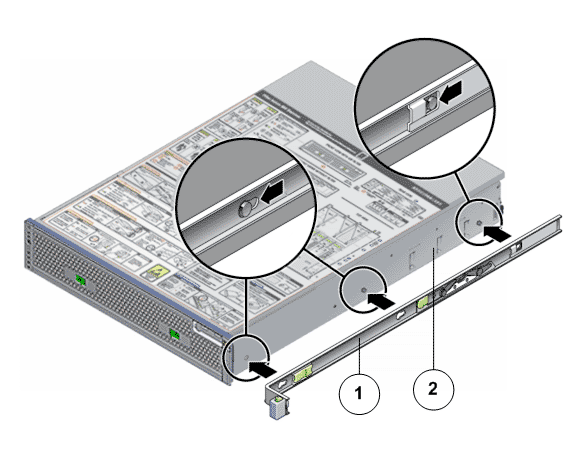
- Legend
1 Mounting bracket 2 Controller chassis
Tip: Position the mounting bracket against the Controller chassis so that the mounting bracket are aligned with screw holes and then install the screws. - Attach the second mounting bracket to the left side of the Controller chassis.
- Determine which rack hole numbers to use when attaching the slide rails to the rack posts. Note: The Controller is two rack units tall (2U). The slide rails will occupy the lower half of the 2U space.
- Determine which screws you will use to mount the slide rails. Tip: If your rack has threaded mounting holes in the rack posts, determine whether the threads are metric or standard. Select the appropriate screws from the package included in the mounting kit. If your rack does not have threaded mounting holes, the mounting screws are secured with a caged nut.
- Attach a slide rail to the right front rack post.
Figure 5: Slide rail mounted on the rack post
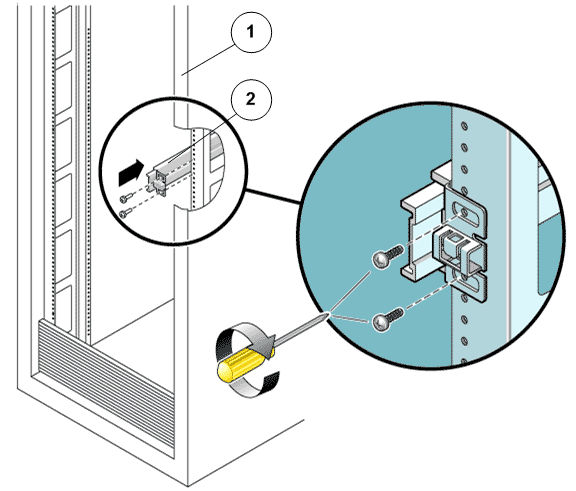
- Legend
1 Rack post 2 Slide rail
Tip: Loosely attach the front of a slide rail to the right front rack post using two screws but do not tighten the screws yet. Adjust the length of the slide rail by sliding the back mounting flange to reach the outside edge of the back rack post. Loosely attach the back of the slide rail to the back rack post with two screws. - Attach the second slide rail to the left rack posts in a similar manner. Tip: Do not tighten the screws.
- Use the slide rail spacing tool to adjust the distance between the slide rails.
Figure 6: Slide rail spacing tool
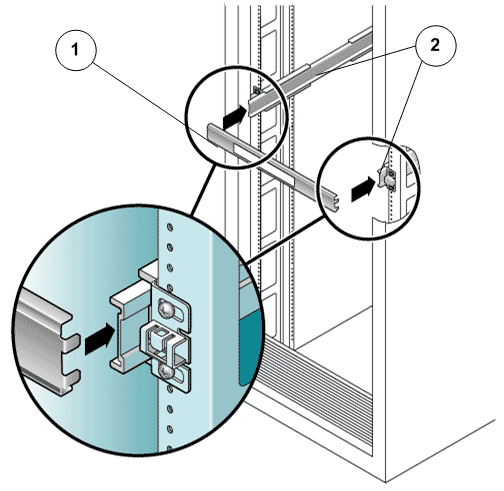
- Legend
1 Spacing tool 2 Slide rails
Tip: At the front of the rack, plug the left side of the tool into slots at the end of the left rail. Insert the right side of the tool into the front end of the right rail, while sliding the end of the rail to the right or left as needed to allow the ends of the tool to enter the ends of both rails. The distance between the rails is now equal to the width of the Controller with mounting brackets. - Tighten the screws to lock the front ends of the rails in place.
- Repeat the steps for the back ends of the rails.
- Deploy the anti-tilt mechanism on the rack, if any. CautionThe weight of the Controller on extended slide rails can be enough to overturn a rack.
- Insert the ends of the mounting brackets into the sliding rails.
Figure 7: Controller chassis mounted on the slide rails
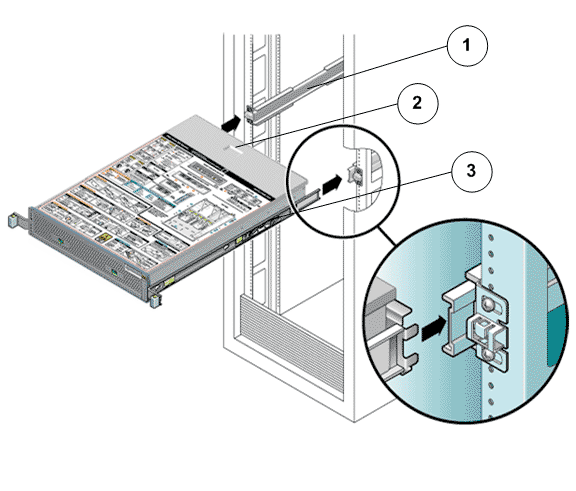
- Legend
1 Slide rails 2 Controller chassis 3 Mounting brackets
CautionWork with a partner or use a mechanical lift for assistance. The Controller weighs approximately 70 lbs (31.75 kg). Two people are required to carry the chassis. - Simultaneously release the rail locks on each side of the sliding rails, and guide the Controller chassis into the rack. CautionVerify that the Controller is securely mounted in the rack, and that the slide rails are locked to the mounting brackets, before continuing.