2 Object Oriented Functionality
The following sections describe the functionality available through DIVAdirector 5.3 in detail.
Queries
Queries are collections of pre-defined search criteria used to locate specific objects (video clips and so on) within DIVArchive. Queries are based on a series of conditions where query columns and operators are compared to an object's attributes, and only objects that meet the search criteria are displayed. When the search results are displayed, they are sorted by object name (by default). The default sort order can be changed on the Admin screen of the navigation menu under the System, Defaults navigation tree node (by the System Administrator).
Queries Navigation Tree
Queries are displayed in the Queries section of the navigation tree, which is organized in the following hierarchical structure:
-
Organization
-
Organization-wide Public Queries
-
Group
-
Group-wide Public Queries
-
User
- Private Queries
- Recent Queries
-
-
Queries have 3 access levels as follows:
- Private
-
You create private queries that can only be viewed and manipulated by you, or they can be viewed by other users depending on relevant visibility access. The System Administrator controls the visibility on the Admin, Groups screen under the Visibility tab.
- Public
-
You can make queries public by dragging a private query to the Public Queries folder. Public queries can be viewed and used by all users who have access to the public folder. Public folders can be organization-wide or group-wide; however, the visibility permissions control access to these folders.
- Recent
-
These queries are the most recent and only the last ten days are shown.
Queries in the Private Queries folder can be grouped into their own query folders and appear in the private queries at the same level as the queries themselves. They can also be nested within other query folders. Organizations and groups will only be shown the query results if relevant visibility permission has been given to the organization. The visibility access right that determines if the logged-in user can see other users is different from being able to view another user's queries.
Items in the Queries navigation tree may be suffixed with a number in parenthesis, indicating the number of Child Nodes; for example, a private node that is suffixed with (4) indicates that the total number of child nodes is four. The child nodes count may be comprised of both queries and query folders.
Query Types
DIVAdirector can execute two types of queries:
- Ad-hoc
-
Ad-hoc queries are only run once, and executed real-time by clicking Search with search criteria entered in the Search field. Each executed query is added to the list of recent queries that is shown in the Queries navigation tree on the left side of the screen.
- Saved
-
These are pre-defined queries that are saved in the system, allowing users to easily access previous results or to run the query again without having to reenter the search criteria. Any query, whether public, private or recent can be saved.
Basic Search
Basic search utilizes the Postgres full text search engine. Full text search has some fundamental functional differences compared to string-matched text searching. Query string terms are reduced to a Lexeme and searched against a preformatted indexed table.
A lexeme is defined as a meaningful linguistic unit of a language, consisting of one word or several words and applied to a family of words related by form or meaning.
The lexemes are language-specific. You can change the language used to calculate your searches on the Admin, System, Defaults page. Recalculating the language in your metadata is an exhaustive database procedure likely requiring eight or more hours (on average) to complete.
When a search is executed, the lexemes are stemmed to a range of similar lexemes to simulate normal text matching. Also conjunctions, pronouns, and effectors (considered 'stop words') are not turned into lexemes and are ignored by the searcher. If you require a specific phrase to be searched, the recommended method is to use an advanced search query with the Contains clause.For example, in a normalized lexeme the phrase an elephant's swimming trunks interprets as three lexemes; eleph, swim and trunk. Both the search parameters and all textual metadata are normalized, which more broadly matches similar criteria. For example, because populous and populated have the same lexeme conversion, they both match for either term.Full text searching is considerably faster than string-matching on larger data sets resulting in a faster, more flexible search engine. Advanced search queries against the metadata make literal matching simple.
Use the following procedure to create a basic query:
-
Enter the text to search for in the Search field (limited to 64 characters) on the top right side of the screen.
-
Click the Search icon (a magnifying glass to the right of the Search field) or press Enter to begin the search.
-
A search will be performed on objects where the metadata text fields contain the entered search text, or the lexemes of the entered search text.
Queries based on basic searches are added to the Recent Queries list and are designated by the search icon next to the query name in the Queries navigation tree.
Basic Search Boolean Support
Basic Search supports using the AND, OR and NOT Boolean operators to denote clauses between terms. A space represents the default AND operator.
The AND operator specifies that all terms must exist for the object to match. Since this is the default behavior, using AND is optional.
For example:
-
The search phrase
virtual camerais the same asvirtual AND camera. -
The search phrase
virtual NOT camerais the same asvirtual AND NOT camera.
The OR operator specifies that one of the terms must exist for the object to match. For example, the search phrase virtual OR camera will search for metadata that contains the word virtual, or the word camera, or both words.
Clauses can be clustered together using quotation marks. For example, the search phrase "Space the final frontier" OR "Star Trek" will match either collection of terms but do not share lexemes.
The NOT operator specifies that the term following NOT does not exist in the file's metadata. For example, the search phrase NOT virtual will search for metadata that does not contain the word virtual.
Multiple boolean search terms can be used in a single search phrase.
Advanced Search
You can search on specific metadata fields, except external metadata and binary attachments. Up to five separate metadata fields (in addition to search criteria on all metadata fields) can be searched on either by using the AND logical operator on each field or using the OR logical operator on each field.
Use the following procedure to create an advanced query:
-
Click Advanced on the top right side of the screen. Advanced criteria will be displayed for you to select from.
On the top of the Advanced screen is an area with fields where you enter search terms to execute a basic search. The remainder of the screen is used for advanced searching.
-
Enter the desired search text in the Search field to specify searching for the text on all metadata fields.
This is equivalent to performing a basic search if this is the only criteria specified.
-
Click the Search icon or press Enter to perform the query.
Use the following procedure to define advanced search criteria on specific metadata fields:
-
Immediately below the Search label is the Match drop-down list that enables identifying which terms to match in the query. Choose ALL to match on each condition (logical
AND) or choose ANY to match on any one of the conditions (logicalOR). -
To the right of the Match drop-down list are multiple Metadata Field drop-down lists. You can select from any metadata fields available to your group or organization. Enter the value for the metadata field to be compared to (up to a maximum of 64 characters).
-
The Not check box is in the middle of the screen. Selecting the Not check box next to each query list will reverse the query and display only objects that do not meet the specified condition.
-
To the right of the Not check box are the Operator drop-down lists. Select the boolean operator from the Operator drop-down list.
The options include items such as Less Than, Equals, and Greater Than. The operators available for the column depend on the metadata field chosen.
-
Next to the Operator lists is the Search Criteria area. Enter the terms to search for in the fields.
-
Just under the Search Criteria area is the QC Status drop-down list. Select the QC Report Status for your search.
-
Click the Search icon or press Enter to perform the query.
Queries based on advanced searches are added to the Recent Queries list and are denoted by the search icon next to the query name in the Queries navigation tree. The main content screen's Advanced link on the top right side of the screen will now be displayed with an exclamation point after it.
Configurable Search Results
The number of proxies displayed on each page of search results is configurable and allows most search results to display on a single page rather than multiple pages (depending on the per page value).
The default value is zero (fits the results to screen) and the maximum allowed value is one thousand. If a value larger than one thousand is entered, the value will automatically return to one thousand. Your System Administrator configures the search results limit value on the Admin, System, Defaults screen. If the number of results per page are either inadequate or too high, consult with your administrator about raising or lowering the results display number.
Creating a New Query Folder
You can create query folders to help organize saved queries. Use the following procedure to create a query folder:
-
Right-click the Private node in the Queries navigation tree where the new folder will be created.
-
Select the New Folder menu item from the resulting context menu.
-
Enter a new folder name in the Folder Name field. You should ensure that the name you provide is descriptive enough for users to easily identify the purpose of the query from the folder name.
-
When complete, the new query folder will be displayed.
Deleting a Query Folder
You can delete a query folder using the following procedure:
-
Right-click the folder to be deleted in the navigation tree.
-
Click Delete on the resulting context menu.
-
Click OK in the confirmation dialog box to continue with the deletion, or click Cancel to cancel the operation and keep the folder.
Note:
When a private folder is deleted, its public copy is also deleted.
Creating a New Query
Use the following procedure to create a query:
-
Right-click the Private node in the Queries navigation tree.
-
Click New Query on the resulting context menu.
-
Enter the name of the new query and press Enter.
Activating a Query
An active query is specifically assigned to be easily accessed at any time. Use the following procedure to activate a query:
-
Click the Active button at the top of the Queries navigation tree (on the right side of the Queries title bar).
-
Right-click the desired query and click Set Active from the resulting context menu.
Making a Query Private
Recent queries can be made private. Since the Recent Queries folder only holds the last ten most recent queries, any queries to be retained should be moved to the Private folder using the following procedure:
-
Open the Queries section of the navigation tree on the left side of the screen.
-
Click the Plus icon to expand the Admin navigation tree.
-
Click the Plus icon to expand the Recent Queries navigation tree.
-
Locate and select the desired query, then drag and drop it into the Private folder.
Making a Query Public
Public queries allow other users in the system to view and execute your query. There are two types of public queries:
-
Organization-wide
-
Group-wide
It is not possible to make an entire query group public, only individual queries.
Note:
Only private queries can be made public.The following procedure creates a link to the query in the Public folder in the Queries area. This results in the selected query becoming public for the group.
-
Open the Queries section of the navigation tree on the left side of the screen.
-
Click the Plus icon to expand the Admin navigation tree.
-
Click the Plus icon to expand the Private Folder navigation tree.
-
Drag and drop the desired query from the Private folder to the Public folder under the Group.
-
Once dropped in the Public folder, the new query is displayed in the Public list.
-
To make a query public within the organization (rather than just the group) follow the above steps, but instead of dragging and dropping the query to the Public folder under Group, drop it in the Public folder under Organization.
Note:
Only a user with administrator permissions can make a public query private again. This is done through the Admin, Public Resources screen.
Executing a Query
You can execute any of the saved queries at any time by clicking on the query in the Queries navigation tree.
If the created and saved query contains a metadata field that was later hidden by the administrator, an exclamation point is displayed in the main content window next to the Advanced link (on the top right side of the screen) the next time the query is executed. Hovering over the exclamation point will show a tooltip warning that the search uses hidden fields.
Note:
The search will exclude the hidden metadata fields during execution.Renaming Queries and Query Folders
Use the following procedure to rename a query or query folder:
-
Open the Queries section of the navigation tree on the left side of the screen.
-
Right-click the query or query folder to rename.
-
Select Rename from the resulting context menu.
-
Enter the new name.
-
Press Enter to complete the process.
Deleting a Saved Query
You can permanently delete saved private queries. When a query is made public, a copy of it is added under the public navigation tree folder that mimics the query in the your private folder structure. Public queries cannot be deleted directly from the public folder; however, deleting a query from the private tree structure that has a copy in the public folder will cause the copy of that query in the public folder to also be deleted.
Use the following procedure to delete a saved query:
-
Select a private query to delete from the Queries navigation tree list.
-
Right-click the query and select Delete from the resulting context menu.
-
Click OK in the confirmation dialog box to continue with the deletion, or click Cancel to cancel the operation and keep the query.
Note:
Deleting a query does not delete the objects that were part of it from DIVAdirector.
Viewing Query Results
Query results are displayed in the DIVAdirector main content area in either List View or Grid View. To select the desired display, click List/Grid on the bottom right side of the screen to switch between the views.
The Grid View displays the search results in the form of a grid of thumbnails. The List View shows the search results in the form of a list. In either case, only columns that are allowed in the search results will be displayed.
In both grid and list views, hovering the mouse over the thumbnails will reveal a set of standard media player style mini icons that act as buttons. The buttons function as follows:
- Play the Proxy for this Asset
-
This icon is the standard play icon seen on media players. Clicking the button plays the selected clip in the player. Only clips with proxies have this option available and are the only clips that you can play. This button is grayed out for clips that do not have proxies associated with them.
- Edit Metadata
-
This icon resembles a document with a folded top right corner and displays the metadata in the Asset Metadata area.
- Add this Asset to the Recent Work Bins
-
This icon is a plus sign and adds the selected clip to a Work Bin in the Administrator Recent Work Bins folder.
- Create a Shot List for this Asset
-
This icon is two arrowheads pointing at each other and creates a Shot List for the selected clip by adding it to a Shot List in the Recent Shot Lists folder.
- DIVArchive Restore
-
This icon is a curved arrow (similar to a refresh icon) and enables restoring the high resolution version of the video clip from the DIVArchive system. This icon will be inaccessible (grayed out) for virtual objects.
- DIVArchive Delete
-
This icon is the standard X (representing a delete function) and removes the file from DIVArchive. The clip's proxy and metadata are not immediately deleted from DIVAdirector until the next synchronization cycle between DIVAdirector and DIVArchive. Deleting a Virtual Asset simply deletes the proxy from the system.
- Tooltip
-
This dialog box appears when you hover the mouse over a clip and displays a tooltip. The information in the tooltip is configurable by the administrator on the Admin, Metadata screen.
The previously listed actions can be performed on more than one clip at a time by selecting multiple clips. Individual clips can be added to the current selection by holding down the CTRL key and clicking the left mouse button on each additional clip. A group of clips can be selected by holding down SHIFT, clicking on the first clip in the group, and clicking on the last clip in the group - all clips in between the first and last selected clips will be included.
Right-clicking on a thumbnail, or a selection of thumbnails, displays a context menu that offers all the functionality of the mini icons (previously listed) in addition to the following:
- Play in New Window
-
Plays the selected proxies in a new window.
Caution:
This option may have a serious impact on the client computer's memory and performance, particularly when large numbers of proxies are being played all at once in their own separate windows. - Add to Work Bin
-
Adds the selected clips to a new Work Bin or an active Work Bin.
- Add to Shot List
-
Adds the selected clips to a new Shot List or an active Shot List.
- Export Metadata
-
Allows metadata to be exported as a CSV or XML formatted file.
Viewing the Contents of a Query
You can view the contents of a query by hovering over the query in the Queries navigation tree on the left side of the screen to reveal a tooltip. Alternatively, clicking on the query itself enables viewing the individual conditions that were used to perform the query.
-
A magnifying glass icon indicates the query is a basic query.
-
A magnifying glass icon with the letter A on it indicates the query is an advanced query.
Playing a Proxy for a Video Clip
Video playback is available only when a proxy is registered in DIVAdirector. The version of the clip that is displayed in the player area is a lower-resolution version of the clip that is archived in DIVArchive. The displayed clip contains the same content, frame rate, duration and time code as the object in DIVArchive - only the resolution is different.
For playback to work, the following must be installed on the client PC:
-
Microsoft Silverlight 5 for playback of Windows media and MP4 files.
-
Apple QuickTime Player for QuickTime MOV files.
Note:
Playback of WMV and MOV clips are no longer supported in Google Chrome due to the End of Life (EOL) for NPAPI in their browser.The following controls are located across the bottom of the player area:
- Mute
-
The Mute button is on the bottom right side of the player and looks like a speaker - it mutes the audio when clicked.
- Volume Control
-
The Volume control is on the bottom right side of the player and enables adjusting the audio volume of the proxy being played.
- Rewind
-
The Rewind button is on the bottom left side of the player and is a double arrowhead pointing to the left. When clicked, the clip will be played backward at 4x speed unless Rewind is pressed again; which will change the playback rate to 8x speed.
- Previous Frame
-
The Previous Frame button is on the bottom left side of the player and is an arrowhead pointing to the left with a vertical bar to the right of the arrowhead. Clicking the button skips to the proxy's previous frame, allowing you to view the proxy frame by frame.
- Stop
-
The Stop button is on the bottom left side of the player and is a square - it stops the playback of the proxy.
- Pause
-
The Pause button is on the bottom left side of the player and is a double vertical line - it pauses the current play operation. This is a toggle button which switches between Play and Pause. When a clip is paused, this button will show the Play icon.
- Play
-
The Play button is on the bottom left side of the player and is a single arrowhead pointing to the right - it plays the proxy when clicked. This is a toggle button that switches between Play and Pause. When a clip is playing, this button will show the Pause icon.
- Next Frame
-
The Next Frame button is on the bottom left side of the player and is an arrowhead pointing to the right with a vertical bar on the left. Clicking the button skips to the proxy's next frame, allowing you to view the proxy frame by frame.
- Fast Forward
-
The Fast Forward button is on the bottom left side of the player and is a double arrowhead pointing to the right - it fast forwards the proxy. The proxy will be played at 4x speed unless Fast Forward is pressed again; which will change the playback rate to 8x speed.
- No Looping Play Mode
-
The No Looping play mode button is a horizontal line with an arrowhead pointing to the right - it plays the clip from beginning to end without looping. This is a three-way toggle button that switches between No Looping, Loop Between Markers and Loop through all Segments.
- Loop Between Markers Play Mode
-
The Loop Between Markers play mode button is two vertical lines with a circular arrow in between the lines - it plays the clip between it's designated markers and loops continuously until stopped.
- Loop Through all Segments Play Mode
-
The Loop Through all Segments play mode button is two vertical lines at the top (representing segments) with a circular arrow going through the lines - it plays each selected segment continuously in the order in which they appear in the segments list. This button is only available in the Shot List Editor.
Editing Metadata for an Object
You can edit a clip's metadata and keyframe thumbnails if the System Administrator has granted access to this functionality. Each field type is assigned by the System Administrator in the Admin, Metadata screen and each group's roles are set in the Admin, Groups screen under the Permissions (Metadata) tab.
Drop Folders
Drop Folders are used for managing large amounts of data imports or transactions that would be otherwise impractical to execute manually. In the initial DIVAdirector 5.3 release only Metadata Drop Folders are available through the user interface. Other Drop Folders retain their usability and configuration from previous software releases. Drop Folders are shared group-wide and only available to modify and execute metadata or tasks based on the group's configured permissions.
Note:
Proxy Drop Folders are still operational in this release of DIVAdirector. Oracle recommends using the new Transcode Service for proxy generation rather than Proxy Drop Folders.There are two primary Drop Folder components - the Folder Monitor and the User Interface. The Folder Monitor watches a configured directory on the DIVAdirector Server and automatically processes files with a specified extension. The user interface provides a means of uploading one or more files for processing from the local system to the server's Drop Folder.
Note:
A newly created Drop Folder can be used immediately through the user interface for each member of the group, but an administrator will need to restart the DIVAdirector Drop Folder and Annotation Service before the folder monitor will begin actively monitoring the new folder.Drop Folder Navigation
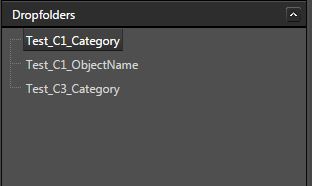
The Dropfolders navigation tree contains a node for each drop folder you have been granted access to. Access is granted based on a user's group rather than on an individual basis. Each drop folder in the tree links to the upload page for that respective drop folder.
Drop Folder Explorer
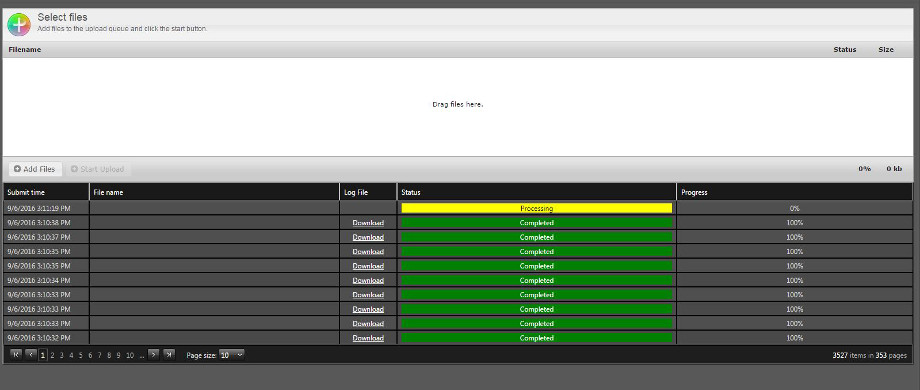
Clicking the desired Drop Folder in the Dropfolders navigation tree opens the Drop Folder Explorer. The Drop Folder Explorer provides a means of uploading to, and monitoring the processing of, a particular Drop Folder. Each file processed produces a log entry which reflects the overall status of the import and provides a human-readable log file available for download. The explorer has drag-and-drop capabilities and a file selector accessible through the Add Files button on the left side, near the middle of the screen. Once all files are selected, click Start Upload (next to the Add Files button) to initiate processing for each file.
Work Bins
Work Bins are working areas used to organize objects in a single location. The Work Bins navigation tree on the left side of the screen is organized similar to the Queries navigation tree. Everything described in the "Queries Navigation Tree" section of this book also applies to Work Bins.
Viewing Existing Work Bins
Use the following procedure to view clips available in a particular Work Bin; including the Public and Recent Work Bins areas:
-
Open the Work Bins navigation tree.
-
Click the desired Work Bin name to view its included clips. The main window will refresh and display the clips that belong to the selected Work Bin.
Creating a New Work Bin Folder
You can organize your work area by grouping your Work Bins together. The folders can be nested within other folders to create a hierarchical structure. Use the following procedure to create a Work Bin folder:
-
Right-click the existing folder (where the new folder will be created) in the Work Bins navigation tree and select New Folder from the displayed context menu.
Note:
You are unable to create a group in the Public folder in the Work Bin hierarchy. -
Enter a folder name for the new folder and press Enter.
-
The new Work Bin folder will appear under the originally selected folder.
Deleting a Work Bin Folder
You can delete a Work Bin folder using the following procedure:
-
Right-click the folder to be deleted in the Work Bins navigation tree and select Delete from the displayed context menu.
-
Click OK in the confirmation dialog box to continue with the deletion or click Cancel to cancel the action and keep the folder.
Note:
When you delete a private folder its public copy is also deleted.
Creating a New Work Bin
You can create new Work Bins, allowing you to more efficiently organize and manipulate objects. Use the following procedure to create a Work Bin:
-
Right-click the desired folder (where the new Work Bin will be created) in the Work Bins navigation tree and select New Work Bin from the displayed context menu.
-
Enter the new Work Bin name and press Enter.
-
The new Work Bin will appear in the Work Bins screen under the selected group where the Work Bin was created.
Making a Work Bin Public
You can make Work Bins public and allow other users to view them. There are two kinds of public Work Bins:
-
Organization-wide
-
Group-wide
Only individual Work Bins can be made public, not an entire Work Bin group.
Note:
Only private Work Bins may be made public.This operation creates a link to the Work Bin under the Public Group on the Work Bins screen. Use the following procedure to make a private Work Bin public:
-
Drag and drop the Work Bin from the Private navigation tree list to the Public folder underneath the appropriate group.
-
Once dropped in the Public folder the new Work Bin is displayed in the Public list.
-
Follow the previous steps to make a Work Bin public within the organization. The difference is that you drag and drop the Work Bin to the Public folder under Organization rather than under Group.
Note:
Only a System Administrator can make a public Work Bin private again. This is done through the Admin, Public Resources screen.
Deleting a Work Bin
You can permanently delete Work Bins. Only private Work Bins may be directly deleted. When a Work Bin is made public, a copy of it is added under the Public navigation tree folder and mimics the Work Bin in your private folder structure. Public Work Bins cannot be deleted directly from the Public folder; however, deleting a Work Bin from the Private navigation tree structure that has a copy in a Public folder will result in the copy of that Work Bin in the Public folder also being deleted. Use the following procedure to permanently delete a Work Bin:
-
Select a private Work Bin to delete from the Work Bin navigation tree.
-
Right-click the Work Bin and select Delete from the displayed context menu.
-
Click OK in the confirmation dialog box to continue with the deletion, or click Cancel to cancel the operation and keep the Work Bin.
Note:
Deleting a Work Bin does not delete the clips that were part of it from DIVAdirector.
Working with Video Clips within a Work Bin
You can view Work Bin contents in either List View or Grid View. To select the desired viewing display use the List/Grid link on the bottom right side of the screen to switch between the views. In List View, the presence of metadata columns in the main content area is always the same as in the query results and configured on a per-group basis on the Admin, Groups screen.
The Grid View displays the search results in the form of a grid of thumbnails. The List View shows the search results in the form of a list. In either case, only columns that are allowed in the search results will be displayed.
In both Grid and List views, hovering the mouse over the thumbnails will reveal a set of mini icons that act as buttons. The buttons function as follows:
- Play the Proxy for this Asset
-
This icon is the standard play button icon (an arrowhead pointing to the right) and plays the selected object in the player screen. Only clips with proxies have this option available and are the only ones that you can play. This icon is grayed out for clips that do not have proxies associated with them.
- Edit Metadata
-
This icon resembles a document with a folded top right corner and displays the clip metadata in the Object Metadata area. The metadata can be edited.
- Remove from Work Bin
-
This icon is a horizontal, rectangular bar and deletes the selected clip from the current Work Bin. This operation only removes the clip from the Work Bin, it does not delete the clip itself.
- Create a Shot List for this Asset
-
This icon is two arrowheads pointing at each other and creates a Shot List for the selected clip by adding it to a Shot List in the Recent Shot Lists folder.
- DIVArchive Restore
-
This icon is a curved arrow (similar to a refresh icon) and allows the user to restore the high resolution version of the clip from the DIVArchive system. This icon will be inaccessible (grayed out) for a Virtual Asset.
- DIVArchive Delete
-
This icon is the standard X icon (representing a delete function) and removes the clip from DIVArchive. The clip's proxy and metadata is not immediately deleted from DIVAdirector until the next synchronization cycle between DIVAdirector and DIVArchive. Virtual objects simply delete the proxy from the DIVAdirector system.
- Tooltip
-
Tooltips appear when you hover the mouse over a video clip. The information in the tooltip is configurable by the System Administrator on the Admin, Metadata screen.
These actions can be performed on more than one clip at a time by selecting multiple clips. Individual clips can be added to the current selection by holding down the CTRL key and clicking the left mouse button on each additional clip. A group of clips can be selected by holding down the SHIFT key, clicking on the first clip in the group, and then clicking on the last clip in the group - all clips in between the first and last selected clips will be included.
Right-clicking on a thumbnail, or a selection of thumbnails, displays a context menu that provides all the functionality of the mini icons (previously listed) in addition to the following:
- Play in New Window
-
Allows the selected proxies to be played in a new window.
Caution:
This may have a serious impact on the client computer's memory and performance, particularly with large numbers of proxies being played all at once in their own separate window. - Add to Work Bin
-
Enables adding the selected clips to a new Work Bin or an active Work Bin.
- Add to Shot List
-
Enables adding the selected clips to a new Shot List or an active Shot List.
- Export Metadata
-
Enables exporting metadata as a CSV or XML formatted file.
Shot Lists
You use Shot Lists for managing and manipulating segments of video clips so that they can be partially restored by DIVArchive. It also provides an exported EDL File for use with Avid and Apple Final Cut Pro.
Shot List Navigation Tree
Shot lists are displayed in the Shot Lists navigation tree. The Shot Lists navigation tree is organized in the following hierarchical structure:
-
Organization
-
Organization-wide Public Shot Lists
-
Group
-
Group-wide Public Shot Lists
-
User
- Private Shot Lists
Proxies and Segments
- Recent Shot Lists
Proxies and Segments
-
-
Shot List Editor
The layout of the Shot List Editor is similar to the general Proxy Player. The viewing area is in the center of the screen and has additional controls (not included on the player screen) for Mark In and Mark Out of timecodes. The right side of the screen incorporates both a Segments List Control and the Metadata Editor for the clip being edited.
Creating a Shot List
You create a Shot List by adding a collection of clips from the Queries Results or Work Bin Results screens using either the Add to Shot List link or the context menu (when right-clicking the clip). You can drag the newly created Shot List from the Recent List to your Private List. You manually create a Shot List using the following procedure:
-
In the Shot List navigation tree, right-click the appropriate folder and click New Shot List from the displayed context menu.
-
Enter the Shot List name in the Name field and press Enter.
-
Drag and drop the desired video clips from either the Queries Results or Work Bin Results into the Shot List (multiple clips can be dragged and dropped).
Deleting an Existing Shot List
Use the following procedure to delete an existing Shot List:
-
Select the Shot List to be deleted in the Shot List navigation tree.
-
Right-click the Shot List and then click Delete from the displayed context menu.
Adding a Video Clip Segment to a Shot List
You can create video clip segments and add them to a Shot List. Thumbnails of the first and last frames of the segment represent each segment in the Shot List.
You mark the beginning and end frames of a clip in a Shot List before adding it to the Segment List to create video segments during playback.
The segmentation controls are on the bottom left side of the screen just below the player buttons.
Use the following procedure to create a video clip segment:
-
Mark the first frame of the segment by clicking the Mark In icon located on the left side of the segmentation controls.
-
Enter the Mark In Timecode manually, or by dragging the left orange marker on the timeline just under the shot display to the desired segment start time.
-
Mark the last frame of the segment by clicking the Mark Out icon located on the right side of the segmentation controls.
-
Enter the Mark Out Timecode manually, or by dragging the right light blue marker on the timeline just under the shot display to the desired segment end time.
-
Enter a description for the segment in the Description field and then click the Plus icon (or press Enter) after adding the description to add the specified segment to the Segment List.
Deleting Shot List Segments
Use the following procedure to delete a video clip segment from the selected Shot List:
-
To delete a single segment, click the Minus icon next to the desired segment in the Shot List Control area of the Shot List screen.
-
To delete more than one segment, use the Select All Segments check box on the top left side of the screen to select all segments, or select individual check boxes in the list.
-
Click Delete just above the table on the right side of the screen. The selected clip segments will be removed from the Segment List.
Changing the Shot List Entry Order
The order in which segments appear within the Shot List dictates the order in which the segments will be played for visual inspection. To reorder the segments, drag the segment to the desired position and drop it there. During dragging, the current position is indicated by white dotted lines in the list control.
Playing the Shot List
Use the following procedure to play the video segments currently added to the Shot List:
-
On the Shot List screen click the Select All Segments check box on the top left side of the screen, or select individual checkboxes.
-
Click Play - all segments are played in the order in which they appear in the Shot List.
-
Alternatively, click the Play icon in a segment's row (on the left side of the thumbnail) to play only that specific segment.
When playing segments, clicking the Loopback icon (within the player controls) loops playback of the segment. Refer to "Playing a Proxy for a Video Clip" for more information about playing video clip proxies.
Making a Shot List Public
You make Shot Lists public to allow other users in the system to view them. There are two kinds of Public Shot Lists:
-
Organization-wide
-
Group-wide
Note:
Only private Shot Lists can be made public.When a Shot List is made public, a link for the Shot List is created under the Public Group on the Shot List screen. Use the following procedure to make a Shot List public:
-
Drag and drop the desired Shot List from the Private folder to the Public folder underneath the appropriate group.
-
Once dropped in the Public folder the new Shot List is displayed in the Public list.
-
Follow the previous steps to make a Shot List public within the Organization. The difference is that you drag the Shot List to the Public folder under Organization rather than under Group.
Note:
Only System Administrators can make a public Shot List private again. You perform this function on the Admin, Public Resources screen.Exporting a Shot List
Use the following procedure to export the current Shot List:
-
On the Shot List screen, select the segments to export and click Export.
-
In the Export Options area in the center of the screen, review and deselect any segments that should not be included in the export.
-
Select the Export Format from the list on the right side of the screen, enter a file name in the Filename field just below the Export Format, and click Export on the top right side of the screen. The file will be downloaded to the browser's default download location using its default file download procedure.
You can export the current Shot List in one of two formats:
- Avid ALE
-
The format of the text file that can be imported into the Avid Editing System, allowing users to manipulate the digital files using the Avid System.
- Apple Final Cut Pro Interchange v4
-
The format of the XML document that can be imported into the Apple Final Cut Pro application.
Caution:
The XML document must be imported into the Final Cut Pro application with special attention: the imported sequence rate must correspond to application's Sequence Settings (in the aspect of default frame rate only). Otherwise, the resulting FCP Sequence Timeline Duration will appear miscalculated.Note:
The installation of DIVAdirector includes thefcp-v4.0.dtdfile described as an Oracle DIVAdirector Export Format and is compatible with the Apple Final Cut Pro application. You can obtain the file from your System Administrator.
Metadata Operations
Metadata is used for capturing a video clip's attributes. This section discusses the concept of metadata and the options available to DIVAdirector users. For a detailed explanation of the metadata fields refer to the Oracle DIVAdirector Administrator's Guide.
Metadata Concepts
DIVAdirector supports two types of metadata:
- System
-
System metadata fields are the baseline and predefined metadata fields. They are read-only in DIVAdirector and cannot be edited by DIVAdirector users. The system metadata consists of fields imported from DIVArchive and from DIVAdirector Server. The proxy metadata is generated from the Transcoding Service rather than the DIVAdirector Server.
- Custom
-
Custom metadata fields are DIVAdirector custom-defined fields used to describe additional clip attributes, allowing further system customization for an organization's specifications and requirements. The System Administrator must configure the fields appropriately for your system before use.
Understanding System Metadata Fields
You cannot modify system metadata fields. These fields include the following:
- ID
-
DIVAdirector-defined unique identifier for the object.
- Name
-
System-defined object name that is used as a unique identifier with the category.
- Category
-
System-defined object category. This forms a unique identifier for the object when used with the name.
- Date
-
The date when the object was archived to DIVArchive.
- Comments
-
The comments field that contains comments added during the creation of the object.
- Source
-
The original source of the file from which the object was created.
- Active
-
The current status that determines whether the object exists.
- Virtual
-
The flag defining whether the object is virtual (YES or NO).
- SOM (P)
-
The start timecode of the object's proxy.
- Duration (P)
-
The duration of the object's proxy.
- EOM (P)
-
The end timecode of the object's proxy.
Metadata Data Types
DIVAdirector supports a variety of data types for metadata field definition and associated presentation controls (discussed in the following section) including:
- CHAR
-
Any character string; restricted from 1 to 100000 characters in length. The CHAR data type can be represented using an EditBox, TextBox, or SelectBox control.
- INTEGER
-
Any whole numeric value. The INTEGER data type can be represented using an EditBox, SelectBox, or CheckBox control.
- FLOAT
-
Any numeric value including decimals. The FLOAT data type can be represented using an EditBox or SelectBox control.
- DATE
-
The DATE data type that can be represented using an EditBox, SelectBox, or Calendar control.
- TIME
-
The TIME data type that can be represented using an EditBox or SelectBox control.
- BINARY
-
Fixed representation of a file of an arbitrary internal format which is represented using a FileSelect control.
- SAMMA GRAPH
-
A graphical representation of metadata that originated from Oracle SAMMAsolo. The graph can represent the entire object or a portion of the object.
- SAMMA THUMBNAIL
-
A representation of thumbnails of frames that matches the portion of the object represented by the SAMMA GRAPH.
- QC REPORT
-
A representation of Quality Control (QC) report data for the object. Provides QC action buttons to change an object's QC Status.
Metadata Type Presentation Controls
Some metadata field data types have various ways of displaying the data and some are restricted to using particular controls, as discussed in the previous section.
The presentation controls available within the DIVAdirector system are as follows:
- EditBox
-
A single-line text entry control that enables editing its value.
- TextBox
-
A general multi-line text editing control.
- SelectBox
-
Enables selecting a value from the supplied list of unique values.
- CheckBox
-
Enables selecting an option by selecting the appropriate check box.
- Calendar
-
A calendar control that enables easy browsing through the calendar and selecting an appropriate date; this format is only used for the DATE data type.
- FileSelect
-
Special composite control comprised of an Upload button and a link to an existing binary file; this format is only used for the BINARY data type.
- SAMMA Graph
-
This is only used for the SAMMA GRAPH data type to show a graphical representation of SAMMAsolo-generated data.
- SAMMA Thumbnail
-
This is only used for the SAMMA Thumbnail data type to provide thumbnail representations of frames that match a portion of the data represented by a SAMMA Graph control.
- QC Report
-
This is only used for the QC Report data type to represent QC Report data for the object.
Editing Metadata
Use the following procedure to edit an object's metadata:
-
Click the Edit Metadata icon (it looks like a document with one corner folded over), or select it from the context menu of any selected object from a query, Work Bin or Shot List.
Multiple selections are allowed for grouped editing of common metadata fields. Selecting more than one object for metadata editing results in changes to the field contents being applied to each of the selected objects when you click Save All. The same metadata screen appears in the Proxy Player and the Shot List Editor.
Note:
Asset image and binary metadata cannot be updated through multiple selections and must be added individually for each asset.All editable metadata fields are displayed using one of the editable controls. Fields that are read-only are displayed in uneditable controls and cannot be modified. Modified items are highlighted, indicating that they have been changed.
-
Click Save to save the changes to the metadata.
Examples of field types include:
- Binary Data
-
Attachment of a file up to a file size of 2 GB. After uploading, the file can be retrieved by clicking on the file link. You can also deleted the file. The file mask is set by the System Administrator.
- Text Fields
-
EditBox and TextBox controls with limited length.
- Date Fields
-
Calendar or EditBox controls.
- List Field
-
List Selection Box pre-defined by the System Administrator.
- Time Field
-
EditBox and list selection of time in the format set by the System Administrator.
Keyframe Metadata
Keyframe Metadata is a list of one or more frames extracted from a dropped proxy file. The keyframe field is present within the Asset Metadata screen as a list (ribbon) of frames with horizontal scrolling capability. The Administrator configures the number of frames that are extracted with equal intervals from the proxy. Each frame includes a tooltip with its timecode and number in the list.
The first frame in the keyframe field is not always the first frame of the proxy. The Administrator configures the count of frames from the beginning of the proxy that must be skipped at the beginning of the keyframe extraction. The keyframe selected and saved as the default is displayed as a thumbnail in the Query Results and the Work Bin screens. Initially, the first frame in the keyframe field is set as the default; however this can be changed using the following procedure:
-
Click once to highlight the keyframe required.
-
Click Save to save the new first frame.
After saving, the new keyframe will be used as the thumbnail to represent that object when viewing query results, Work Bin contents or Shot List contents.
If the object does not have a proxy, the thumbnail in the Edit Metadata screen will be represented by a company logo. The same logo will also be displayed as the default frame in the Query Results and Work Bins.
When you double-click a frame in the keyframe field on the Proxy Player or Shot List Editor, the player will jump to the keyframe's position and pause there.
Image Metadata
Image metadata is a list of one or more static image files that can be associated with the object. New images are uploaded by clicking Upload. Existing images can be downloaded or deleted by actions that become available when hovering over the specified image.
Similar to the keyframe functionality, an object image can be selected and saved since the default is displayed as a thumbnail in the Query Results and the Work Bin screens.
-
Click once to highlight the keyframe required.
-
Click Save to save the new image.
After saving, the new object image will be used as the thumbnail to represent that object when viewing query results, Work Bin contents or Shot List contents.
Quality Control (QC) Reports
Report data from Venera Rapid, Venera Pulsar, Tektronix Cerify, or Interra Baton will be shown in a general display presentation. You use the action buttons placed at the bottom of the screen to change the QC Status for the object, and triggers execution of the corresponding batch files that were configured by the Administrator.
Annotations
Annotations give you the ability to attach time-specific metadata to a segment of an audio or video file.
Viewing Annotations
With the Annotations feature installed, two types of metadata can be viewed for an object:
- Main
-
The single record of metadata for the object (consistent with previous DIVAdirector releases).
- Annotations
-
Contains timecode or locator, and metadata for an object. Multiple annotation records can exist for each object.
The Metadata View is available through either the View/Edit Metadata screen or the Player screen and contains separate tabs for the two metadata types. The Annotations tab displays a grid of locator-based metadata records. If the full text of a record's comments is not visible, it can be expanded by double-clicking on the row.
Each annotation record contains the following fields:
- In
-
The Mark-In time in the format HH:MM:SS:FF.
- Out
-
The Mark-Out time in the format HH:MM:SS:FF.
- Comments
-
The metadata for the specific shot. This is a text field with a maximum of two thousand characters.
Player Screen
There are two additional view features that are only on the player screen:
-
When an annotation row is double-clicked, the player will move to the video segment associated with the annotation.
-
As the video plays, annotation rows are highlighted when their mark-in time is passed. Highlighting the annotation row stops playback when the mark-out time is passed.
Administering Annotations
The ability to modify (add, edit, and delete) annotations is controlled through the Group Administration area under the Permissions tab. The option to Modify Annotations is located on the bottom of the first row of options (the General column). Selecting the check box enables the option.
Adding Annotations
Annotations are added through the player screen, or in the View/Edit Metadata screen for users in groups that are configured to allow annotation modification. The player screen provides the most features for adding metadata.
Player Screen
The player has Mark-in and Mark-out capabilities just like in the Shot List view. To add new locator metadata, specify the Mark-in and Mark-out, and then click the right-facing arrow on the bottom right side of the screen. This will open a new record in the Annotation tab. To insert a new record, enter your desired comments, then click Insert on the bottom left side of the screen.
View/Edit Metadata Screen
The View/Edit Metadata screen is accessed through the View/Edit Metadata icon (the icon resembles a document with one corner folded over), or through the object's context menu. Annotations are available in the Annotations tab. Use the following procedure to add a new annotation:
-
Click Add New Record to add a new record.
-
You must manually enter Mark-in and Mark-out times.
-
Click Save to save the new annotation.
Virtual Objects
Virtual objects exist only in the DIVAdirector system and do not physically exist in the DIVArchive system. They provide a way to add metadata and searchability to objects that do not yet exist in DIVArchive, but will be synchronized later when the object is present. Therefore, a DIVArchive restore does not apply for virtual objects. Each object has a Virtual Flag in DIVAdirector as follows:
- YES
-
The object is virtual and does not physically exist in DIVArchive.
- NO
-
The object is not virtual and does physically exist in DIVArchive.
You can perform searches on objects using the object's virtual flag. For visual differentiation, the thumbnail text of the virtual object is slightly lighter (grayed out) in the Query Results and Work Bin screens. The grayed text on the virtual objects distinguishes them from the non-virtual objects.
Creating Virtual Objects
Along with using the DIVAdirector Server's Proxy Drop Folders, you can use the Assets, Create Virtual Asset menu option to create a virtual object. The options required in the resulting page are object name, object category (a single selection is chosen from a pre-defined list) and any comments. The Administrator defines the pre-defined list for the object category on the Admin, User, Groups screen under the Virtual Asset Settings tab.
Virtual Object Operations
Similar to the existing objects in DIVArchive, the virtual objects in DIVAdirector can have a proxy, additional metadata, and can be added to a Shot List. Virtual objects and physical objects can be deleted from DIVAdirector. The request to delete a virtual object will not be sent to DIVArchive (because a virtual object does not actually exist in the DIVArchive system) and the status of the operation will not be displayed on the Status screen.
Restore and Oracle Partial File Restore operations are not available for virtual objects. The Restore icon (it resembles a typical refresh icon) is not available for virtual objects in the Query Results and Work Bin screens. If you select only virtual objects, only the DIVArchive delete operations will be available for the objects.
Proxy Download
DIVAdirector enables downloading proxy videos to your local computer. The System Administrator controls access to this feature through the setting under the Permissions tab on the Group screen.
With this feature enabled, a Download Clip menu item is available on the context menu in the Search Results screen and in the Work Bins screen.
To download clips located in Work Bins, the Work Bin folder must be selected on the left side of the screen; not an individual object.
Once you select the desired clip and click the Download Clip menu item, DIVAdirector will initiate the download of the clip to the your local computer. Select Save File and click OK in the download dialog box that appears. The file will be saved in the browser's default download folder on the local computer.