44.3 Generating Database Usage Tracking Report

Generating Database Usage Tracking Report consists of the following two steps:

  1. Configuring Business Intelligence Publisher (BI Publisher) - setup the delivery destination of the output files (FTP server and folder)
  2. Running Usage Tracking Report - produce the CSV files after the data is collected
44.3.1 Configuring Business Intelligence Publisher (BI Publisher)

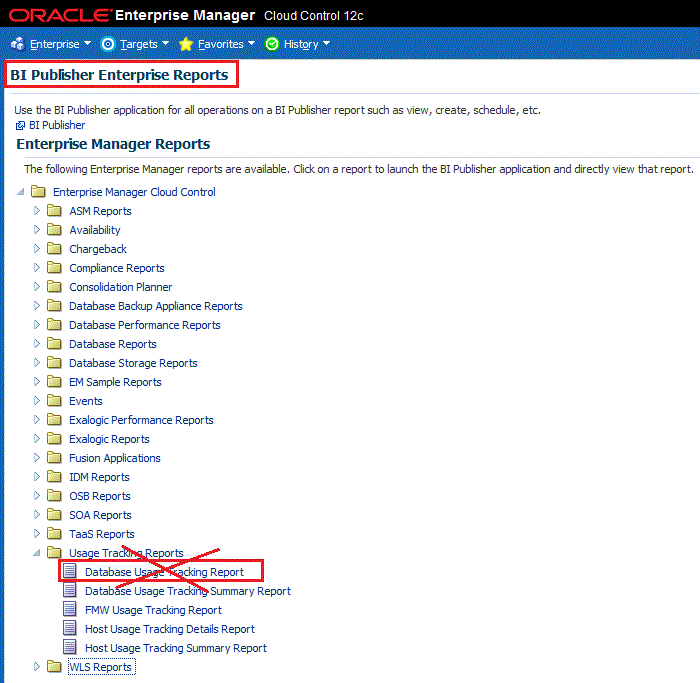
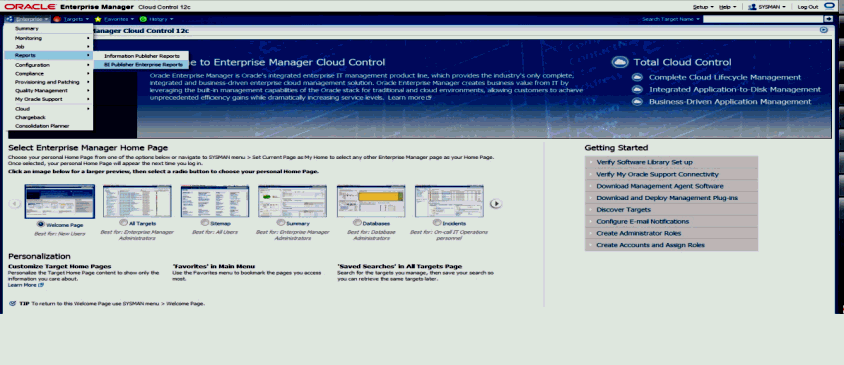
  1. From the Enterprise menu, select Reports and then BI Publisher Enterprise Reports.
    select BI Publisher
  2. Click on BI Publisher Enterprise Reports Web Application to navigate to the Oracle BI Publisher URL. Log in to BI Publisher using the same credentials used to Log in to Enterprise Manager.

    Note:

    Do NOT click on the Database Usage Tracking Report shown at the bottom of the page. The online execution of this Usage Tracking Report has been disabled.

    BI publisher login
  3. Set up the delivery destination.

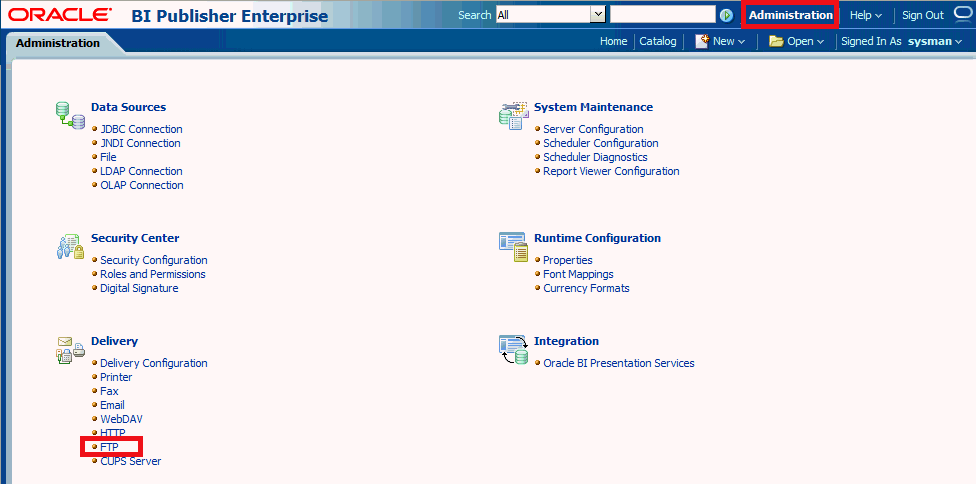
    Click on the Administration tab on the top right corner of the page. Then select FTP under Delivery as shown below:

    select FTP delivery method
  4. Add an FTP Server:

    Click Add Server.

    click Add Server

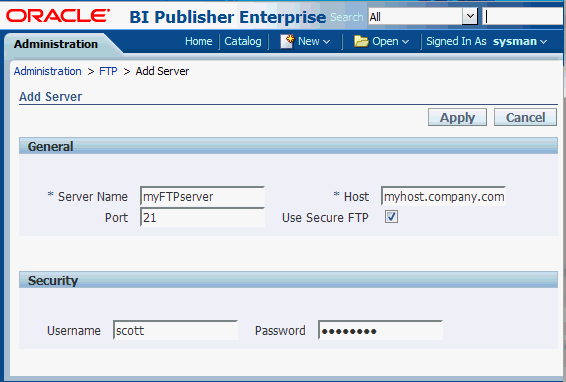
    Enter the following fields for the FTP server:

    Server Name - Example : myFTPserver (any name of your choice)

    Host - Example : myhost.company.com

    Port - Example : 22

    Select "Use Secure FTP" check box to enable secure FTP (SFTP)

    Enter a username and password to connect to the host

    Enter user name and password
  5. Configure the data model with the FTP server configured above in step 4.

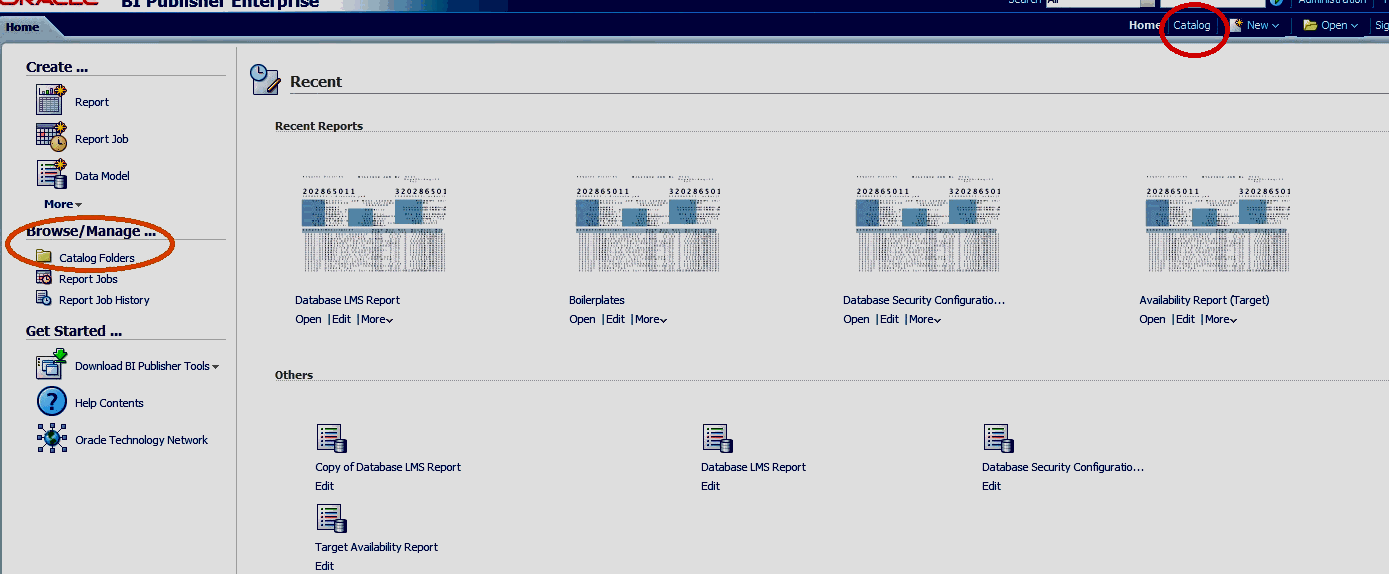
    Click on Catalog Folders or alternatively the Catalog menu as shown in the following graphic.

    select Catalog folder

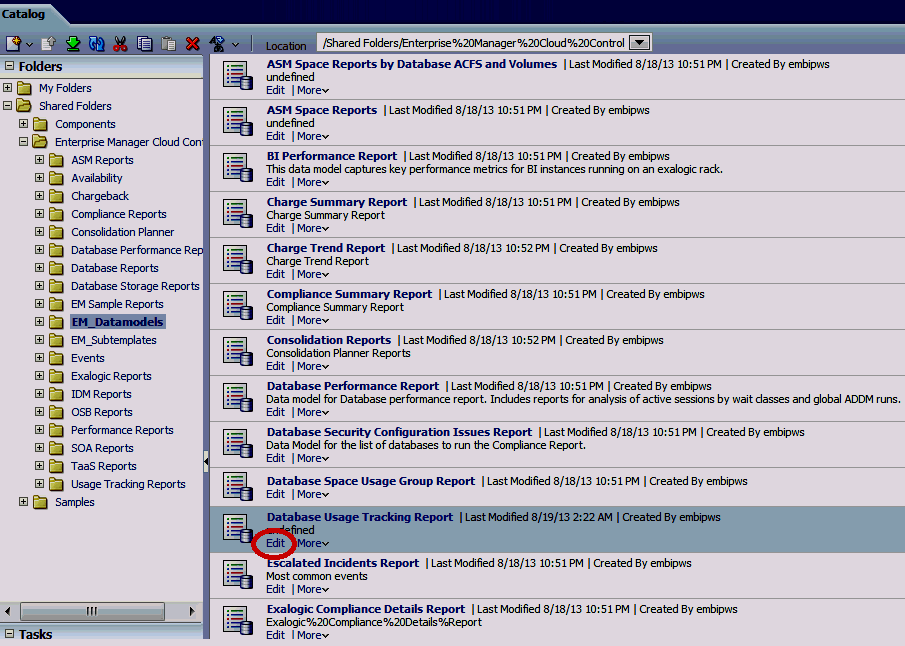
    Select Shared Folders, then select Enterprise Manager Cloud Control and then EM_Datamodels

    Scroll to Database Usage Tracking Report and click Edit.

    Edit DB usage tracking report

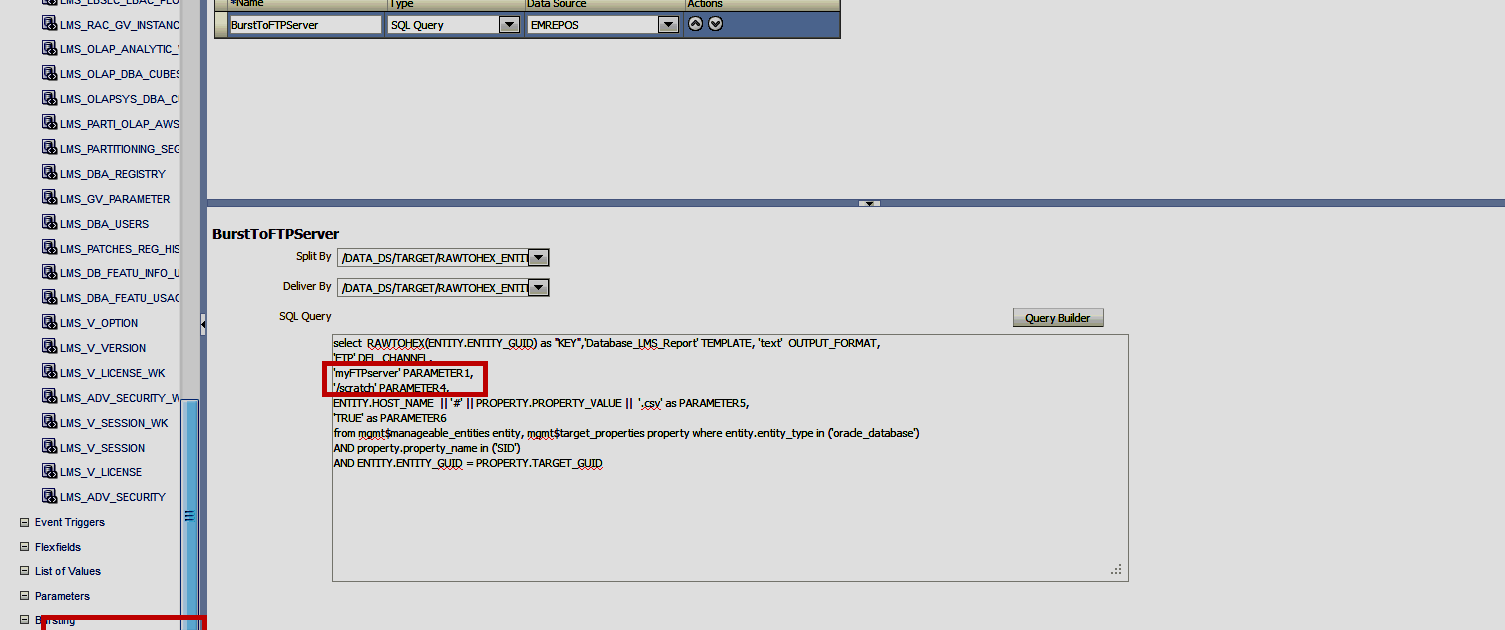
    On the bottom of the left list, select Bursting, and then BurstToFTPserver.

    In the SQL Query area, update the query as show below:

    • "myFTPserver" (configured in step 4) as the value for the PARAMETER1 column.

    • The output directory (absolute path of the directory on the disk) as the value for the PARAMETER4 column.

    updating query

44.3.2 Running Usage Tracking Reports:

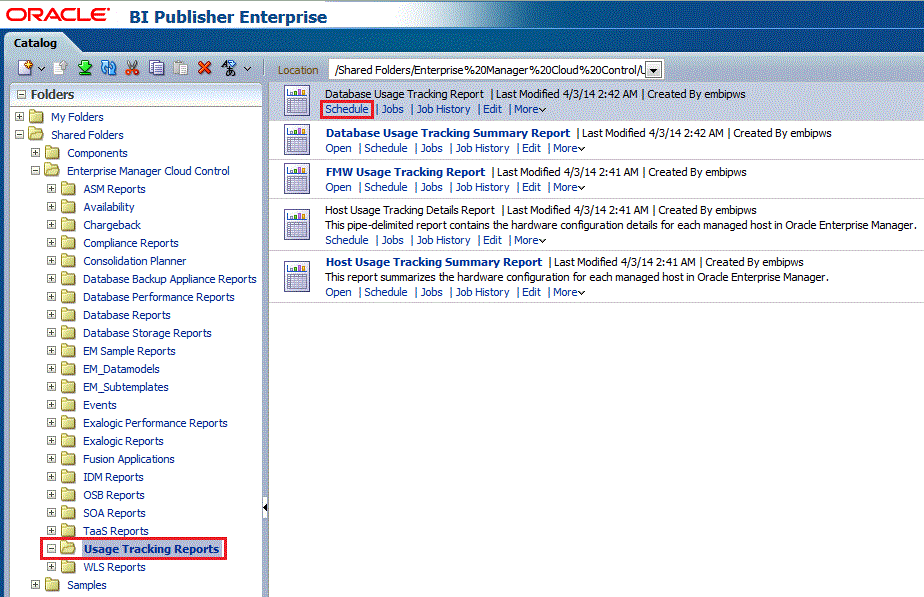
  1. From the Catalog menu, select Shared Folders, then select Enterprise Manager Cloud Control, then Usage Tracking Reports, then Database Usage Tracking Report, and finally Schedule.
    scheduling usage tracking report
  2. Make sure that, in the Schedule tab, the frequency is set to Once and Run Now is selected. Click Submit.
    submit schedule
  3. In the popup window, enter a job name to uniquely identify the job later.

    The status of the submitted job can be monitored in "Report Job History" page as shown below.

    report job history

    Errors (if any) in the metric collection are displayed at the bottom of each report that gets generated for an instance.

    Use the refresh button highlighted in the screen shot (job_running.png) to refresh the status of the job

    usage report job running

    Wait until the status of the job changes from Running to Success.

    job completed