2. Istisna Corporate Islamic Financing
Oracle FLEXCUBE facilitates Corporate Islamic Financing through a process flow. Istisna' is a sale transaction where a commodity is transacted before it comes into existence. The price in Istisna' does not necessarily need to be paid in full in advance. It is not even necessary to pay the full price at delivery. It can be deferred to any time according to the agreement of the parties. The payment may also be made in instalments.
This chapter contains the following topics:
- Section 2.1, "Process Flow Diagram"
- Section 2.2, "Process Matrix"
- Section 2.3, "Stages in Corporate Islamic Financing Process Flow"
- Section 2.4, "Corporate Islamic Financing Application Details"
- Section 2.5, "Manual Liquidation"
2.1 Process Flow Diagram
The process flow diagram given below illustrates the activities carried out during various stages of Corporate Islamic Financing.
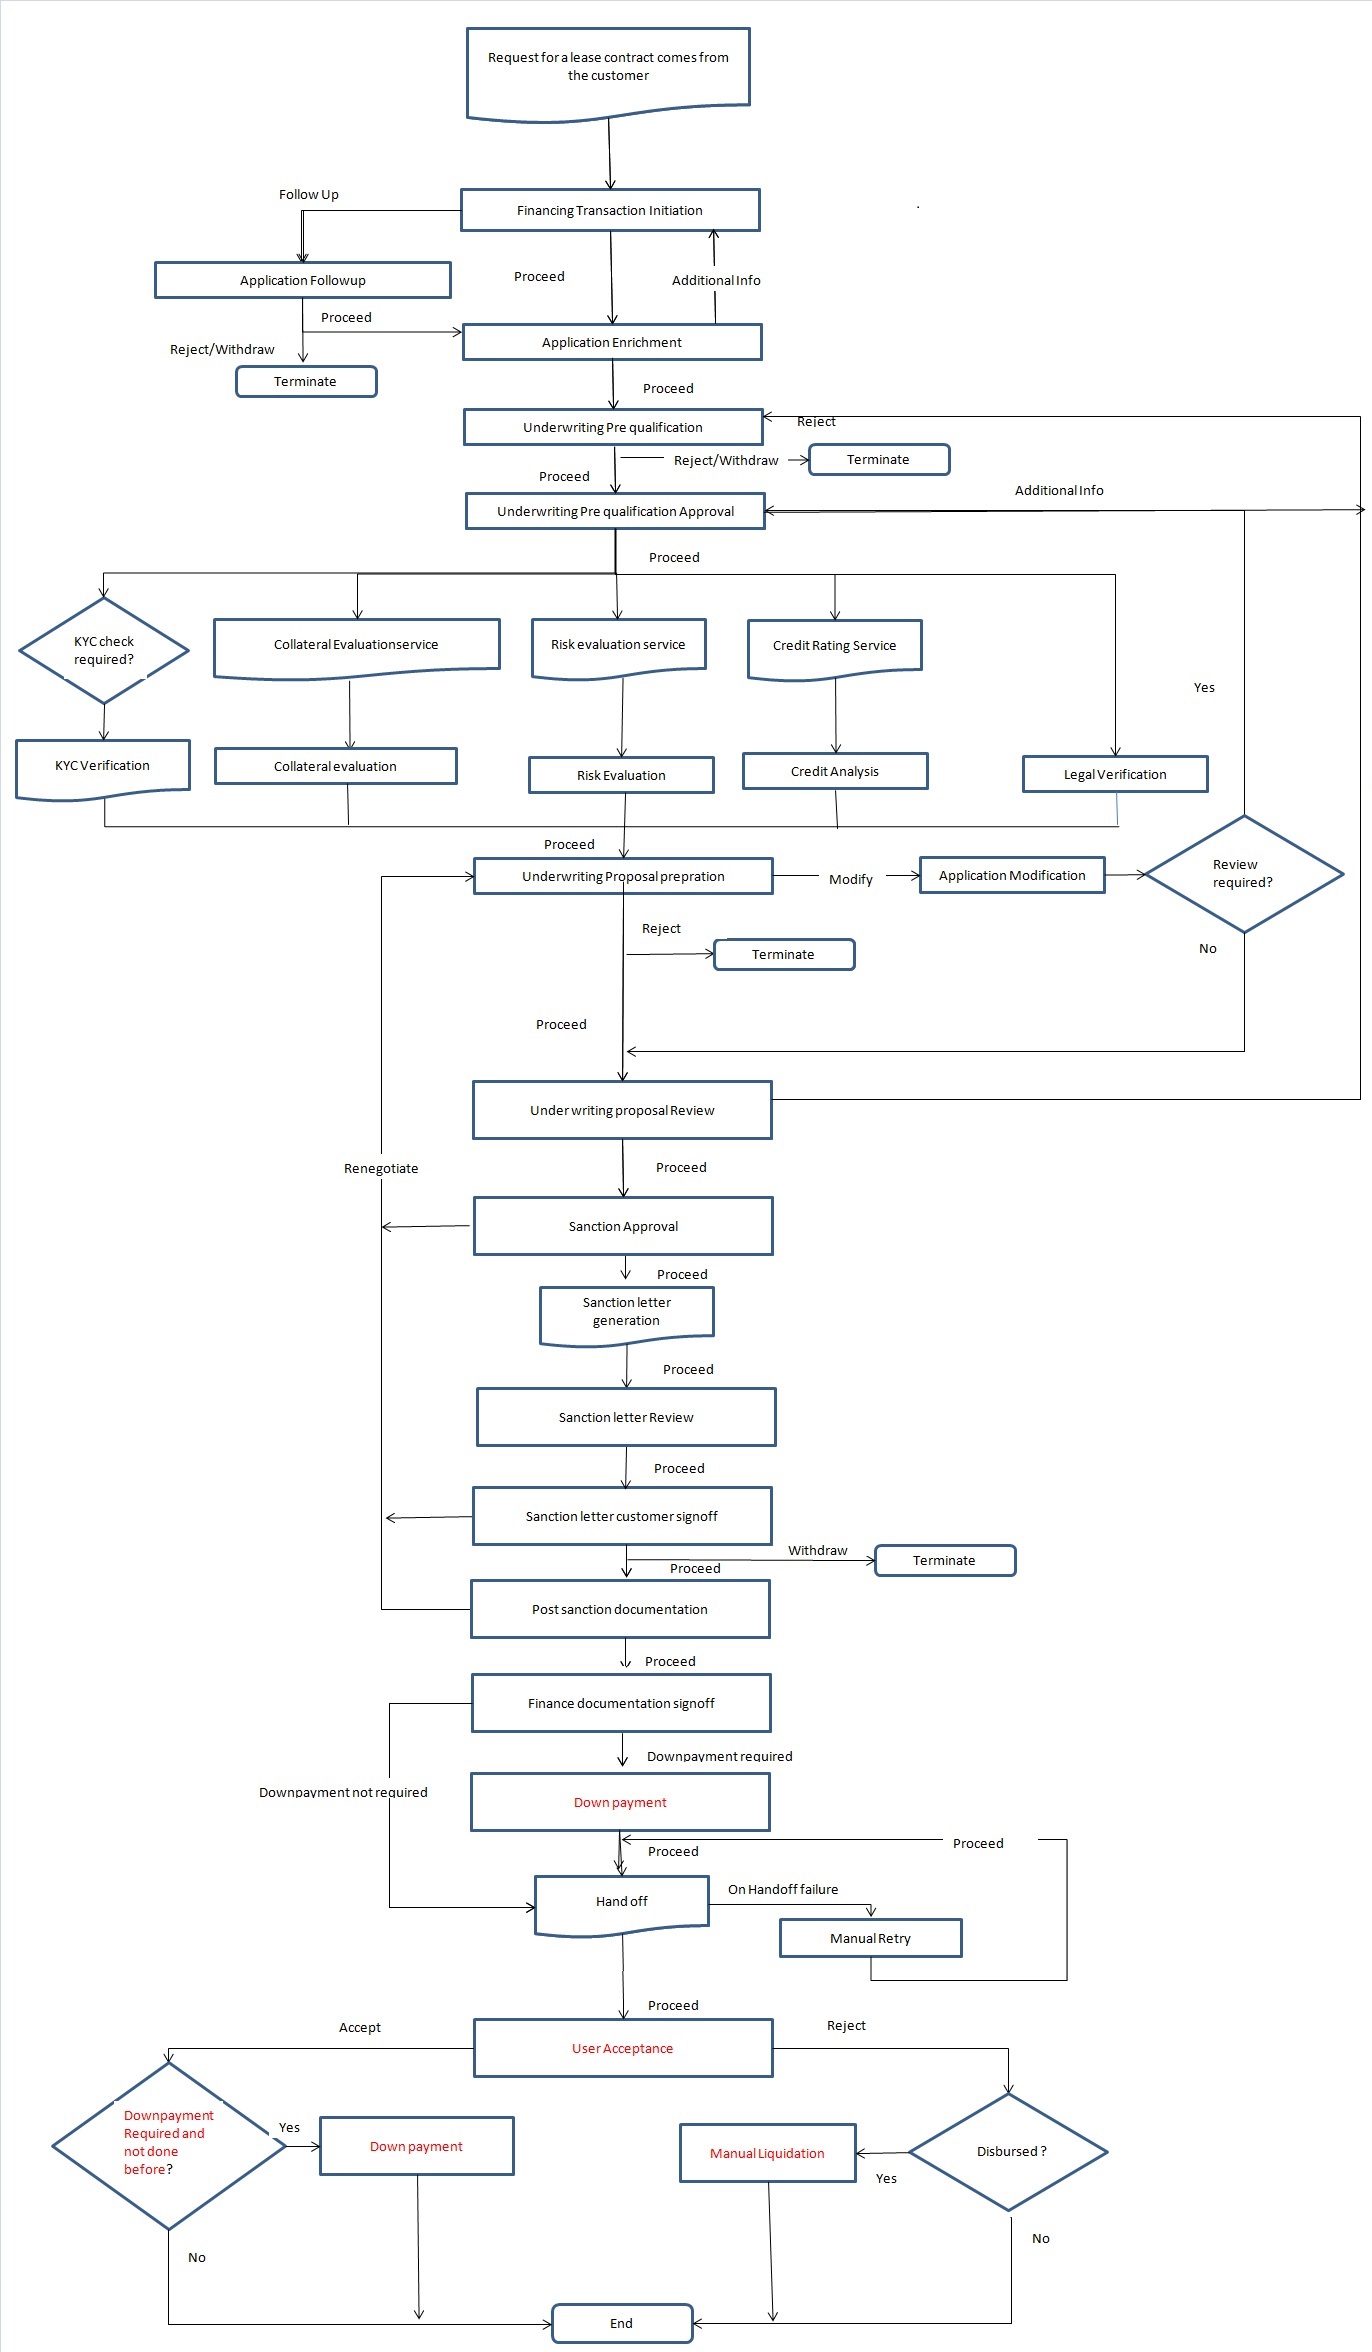
2.2 Process Matrix
The process matrix given below lists out the different stages, condition to move to next stage, target stage and remarks for each condition.
Sl. No |
Source stage |
Rules / Conditions for the flow Movement |
Target stage |
Remarks |
1 |
Financing transaction initiation |
outcome = "PROCEED" |
Application Enrichment |
Instance is moved to ‘Application Enrichment’ stage, when the user selects the outcome "PROCEED" and saves the task. |
outcome = "FOLLOW UP" |
Application Follow up |
Instance is moved to ‘Application Follow up’ stage, when the user selects the outcome “FOLLOW UP" and saves the task. |
||
2 |
Application Follow up
|
outcome = "PROCEED" |
Application Enrichment |
Instance is moved to ‘Application Enrichment’ stage, when the user selects the outcome "PROCEED" and saves the task. |
outcome = "REJECT" |
Terminate |
Instance will be terminated when the user selects the outcome "REJECT" and saves the task. |
||
3 |
Application Enrichment
|
outcome = "PROCEED" |
Underwriting Pre-qualification |
Instance is moved to ‘Underwriting Pre-qualification’ stage, when the user selects the outcome "PROCEED" and saves the task. |
outcome = "RETURN" |
Financing transaction initiation |
Instance is moved to ‘Financing transaction initiation’ stage, when the user selects the outcome "RETURN" and saves the task. |
||
4 |
Underwriting Pre-qualification
|
outcome = "PROCEED" |
Underwriting Pre-qualification Approval |
Instance is moved to ‘Underwriting Pre-qualification Approval’ stage, when the user selects the outcome "PROCEED" and saves the task. |
outcome = "REJECT" |
Terminate |
Instance will be terminated when the user selects the outcome "REJECT" and saves the task. |
||
5 |
Underwriting Pre-qualification Approval |
outcome = "PROCEED" and if Risk evaluation is required |
Risk evaluation |
Instance is moved to ‘Risk evaluation’ stage, when the user selects the outcome "PROCEED" and saves the task. |
outcome = "PROCEED" and if Legal Verification is required |
Legal Verification |
Instance is moved to ‘Legal Verification’ stage, when the user selects the outcome "PROCEED" and saves the task. |
||
outcome = "PROCEED" and if KYC verification is required |
Invoke KYC Verification service call |
KYC verification service call will be invoked when the user selects the outcome "PROCEED" and saves the task. |
||
outcome = "PROCEED" and if Collateral evaluation is required |
Invoke Collateral evaluation service call |
Invoke the Collateral evaluation service call and move to collateral evaluation stage, when the user selects the outcome "PROCEED" and saves the task. |
||
outcome = "PROCEED" and if Risk evaluation, collateral evaluation, KYC verification and Legal Verification are not required |
Underwriting Proposal preparation |
Instance is moved to ‘Underwriting Proposal preparation’ stage, when the user selects the outcome "PROCEED" and saves the task. |
||
outcome = "RETURN" |
Underwriting Pre-qualification |
Instance is moved to ‘Underwriting Pre-qualification’ stage, when the user selects the outcome "RETURN" and saves the task. |
||
6 |
Risk Evaluation |
outcome = “PROCEED" |
Underwriting proposal preparation |
Instance is moved to ‘Underwriting proposal preparation’ stage, when the user selects the outcome "PROCEED" and saves the task. |
7 |
Legal Verification |
outcome = "PROCEED" |
Underwriting proposal preparation |
Instance is moved to ‘Underwriting proposal preparation’ stage, when the user selects the outcome "PROCEED" and saves the task. |
8 |
Credit analysis |
outcome = "PROCEED" |
Underwriting proposal preparation |
Instance is moved to ‘Underwriting proposal preparation’ stage, when the user selects the outcome "PROCEED" and saves the task. |
9 |
Collateral Evaluation |
outcome = "PROCEED" |
Underwriting proposal preparation |
Instance is moved to ‘Underwriting proposal preparation’ stage, when the user selects the outcome "PROCEED" and saves the task. |
10 |
Underwriting proposal preparation |
outcome = "PROCEED" |
Underwriting proposal Review |
Instance is moved to ‘Underwriting proposal Review’ stage, when the user selects the outcome "PROCEED" and saves the task. |
outcome = “ADDITIONAL INFO” |
Application Modification |
Instance is moved to ‘Application Modification’ stage, when the user selects the outcome "ADDITIONAL INFO" and saves the task. |
||
outcome = “REJECT” |
Terminate |
Instance will be terminated when the user selects the outcome "REJECT" and saves the task. |
||
11 |
Application Modification |
outcome = "PROCEED" |
Underwriting Proposal Review |
Instance is moved to ‘Underwriting proposal Review’ stage, when the user selects the outcome "PROCEED" and saves the task. |
outcome = "REVIEW" |
Underwriting Pre-qualification approval |
Instance is moved to ‘Underwriting Pre-qualification approval’ stage, when the user selects the outcome "PROCEED" and saves the task. |
||
12 |
Underwriting proposal Review |
outcome = "PROCEED" |
Sanction Approval |
Instance is moved to ‘Sanction Approval’ stage, when the user selects the outcome "PROCEED" and saves the task. |
outcome = "RETURN" |
Underwriting proposal Preparation |
Instance is moved to ‘Underwriting Proposal preparation’ stage, when the user selects the outcome "RETURN" and saves the task. |
||
13 |
Sanction Approval |
outcome = "PROCEED" |
Sanction Letter Review |
Instance is moved to ‘Sanction Letter Review’ stage, when the user selects the outcome "PROCEED" and saves the task. |
outcome = "RETURN" |
Underwriting Proposal Preparation |
Instance is moved to ‘Underwriting proposal Preparation’ stage, when the user selects the outcome "RETURN" and saves the task. |
||
14 |
Sanction letter Review |
outcome = "PROCEED" |
Sanction Letter Customer signoff |
Instance is moved to ‘Sanction Letter Customer signoff’ stage, when the user selects the outcome "PROCEED" and saves the task. |
15 |
Sanction Letter Customer Signoff
|
outcome = "PROCEED" |
Documentations and TC verification |
Instance is moved to ‘Documentations and TC verification’ stage, when the user selects the outcome "PROCEED" and saves the task. |
outcome = "WITHDRAW" |
Terminate |
Instance will be terminated when the user selects the outcome "WITHDRAW" and saves the task. |
||
outcome = "RENEGOTIATE" |
Underwriting Proposal Preparation |
Instance is moved to ‘Underwriting Proposal Preparation’ stage, when the user selects the outcome "RENEGOTIATE" and saves the task. |
||
16 |
Documentations and TC verification
|
outcome = "PROCEED" and Downpayment required = ‘Y’
|
Down payment |
Instance is moved to ‘Down payment’ stage, when the user selects the outcome "PROCEED" and saves the task. |
outcome = "PROCEED" and Downpayment required = ‘N’
|
Hand-off |
Instance is moved to ‘CI Core’ stage, when the user selects the outcome "PROCEED" and saves the task. |
||
outcome = "FOLLOW UP" |
Documentation Follow Up |
Instance is moved to ‘Documentation Follow Up’ stage, when the user selects the outcome "FOLLOW UP" and saves the task. |
||
outcome = "ADDITIONAL_INFO" |
Underwriting Proposal preparation |
Instance is moved to ‘Underwriting Proposal Preparation’ stage, when the user selects the outcome "ADDITIONAL_INFO" and saves the task. |
||
17 |
Documentation follow up |
outcome = "PROCEED" |
Documentation & TC verification |
Instance is moved to ‘Documentations and TC verification’ stage, when the user selects the outcome "PROCEED" and saves the task. |
18 |
Down payment |
outcome = "PROCEED" |
Hand-off |
Details will be hand off to CI core when the user selects the outcome "PROCEED" and saves the task. |
19 |
Hand-off |
Successful Hand off to Core & ‘Post Approval documentation’ is ‘YES’ |
Final Documentation |
Instance is moved to ‘Final Documentation’ stage, if ‘Post Approval documentation’ is ‘YES’ and outcome is “PROCEED”. |
Successful Hand off to Core & ‘Post Approval documentation’ is ‘NO’ |
User Acceptance |
Instance is moved to ‘User Acceptance’ stage, when the user selects the outcome "PROCEED" and saves the task. |
||
For any system exceptions |
Manual Retry |
For any system exception, task will be moved to Manual retry stage |
||
20 |
Manual Retry |
outcome = "PROCEED" |
Hand-off |
Details will be hand off to CI core when the user selects the outcome "PROCEED" and saves the task. |
21 |
Final Documentation |
outcome = "PROCEED" |
User Acceptance |
Instance is moved to ‘User Acceptance’ stage, when the user selects the outcome "PROCEED" and saves the task. |
22 |
User Acceptance |
outcome = "ACCEPT" and Down payment Required and not done before is ‘YES’ |
Down Payment |
Instance is moved to ‘Down Payment’ stage, when the user selects the outcome "ACCEPT" and saves the task. |
outcome = "REJECT" and Disbursed is ‘YES’ |
Manual Liquidation |
Instance is moved to ‘Manual Liquidation’ stage, when the user selects the outcome "REJECT" and saves the task. |
||
outcome = "ACCEPT" and Down payment Required and not done before is ‘NO’ |
END |
Task will be changed to completed status and it will not be available for further movement |
||
outcome = "REJECT" and Disbursed is ‘NO’ |
END |
Task will be changed to completed status and it will not be available for further movement |
||
23 |
Down Payment |
outcome = "PROCEED" |
END |
Task will be changed to completed status and it will not be available for further movement |
24 |
Manual Liquidation |
outcome = "PROCEED" |
END |
Task will be changed to completed status and it will not be available for further movement |
Acquiring a Stage
To acquire a stage, you need to go to the ‘Task’ menu and select ‘Assigned’ under ‘Standard’ option.
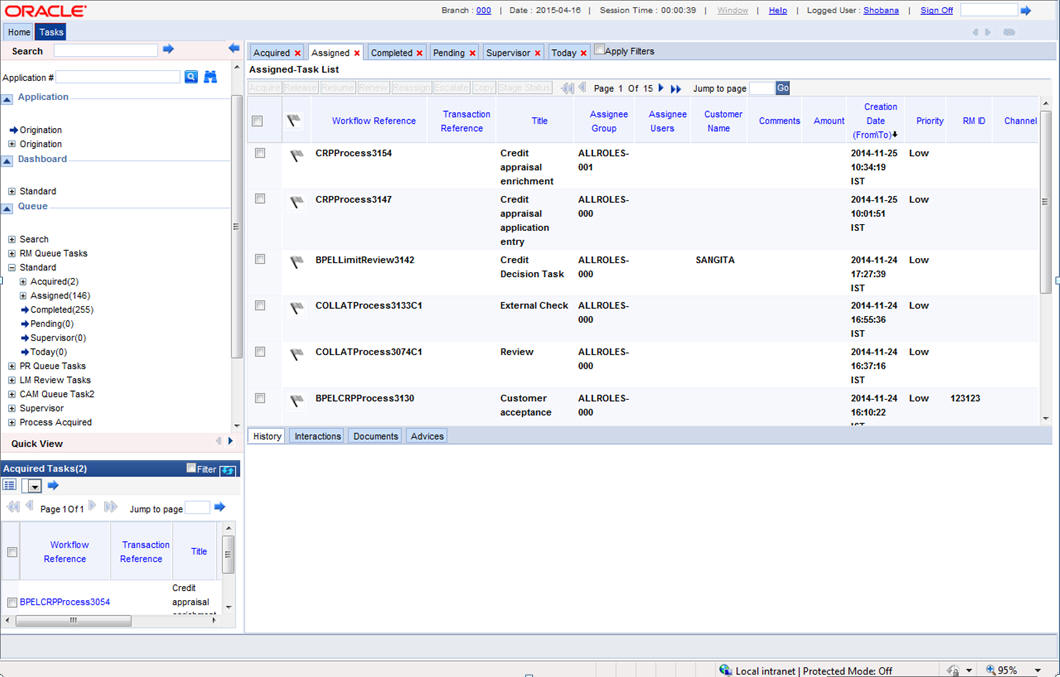
You can acquire a task by performing the following tasks:
- Search for the application from the Quick search / Standard search options (or) look for the application in the assigned Queue.
- Select the task and click on Acquire button.
All tasks that have been successfully completed are listed in the right side of the screen. Select the check box against your ‘Workflow Ref No’ and click ‘Acquire’ button at the top ofthe screen to acquire the next stage of the task.
The system displays the message as ‘Acquire Successful’ on successful acquisition of the task.
Click ‘Ok’ to proceed to the next stage. To select the acquired task for the next stage, select ‘Acquired’ under ‘Standard’ option in the ‘Task’ menu. All the tasks that have been successfully acquired are displayed in the right side of the screen. Search for your workflow reference number and click the ‘Workflow Ref No’ to open the required screen.
2.3 Stages in Corporate Islamic Financing Process Flow
Istisna process flow uses Oracle BPEL framework with multiple human tasks for workflow stages. The capture and enrichment of information in multiple steps can be dynamically assigned to different user roles, so that multiple users can take part in the transaction. Oracle Business rules are used for dynamic creation of multiple approval stages.
Following are the stages involved in Istisna Corporate Islamic Financing:
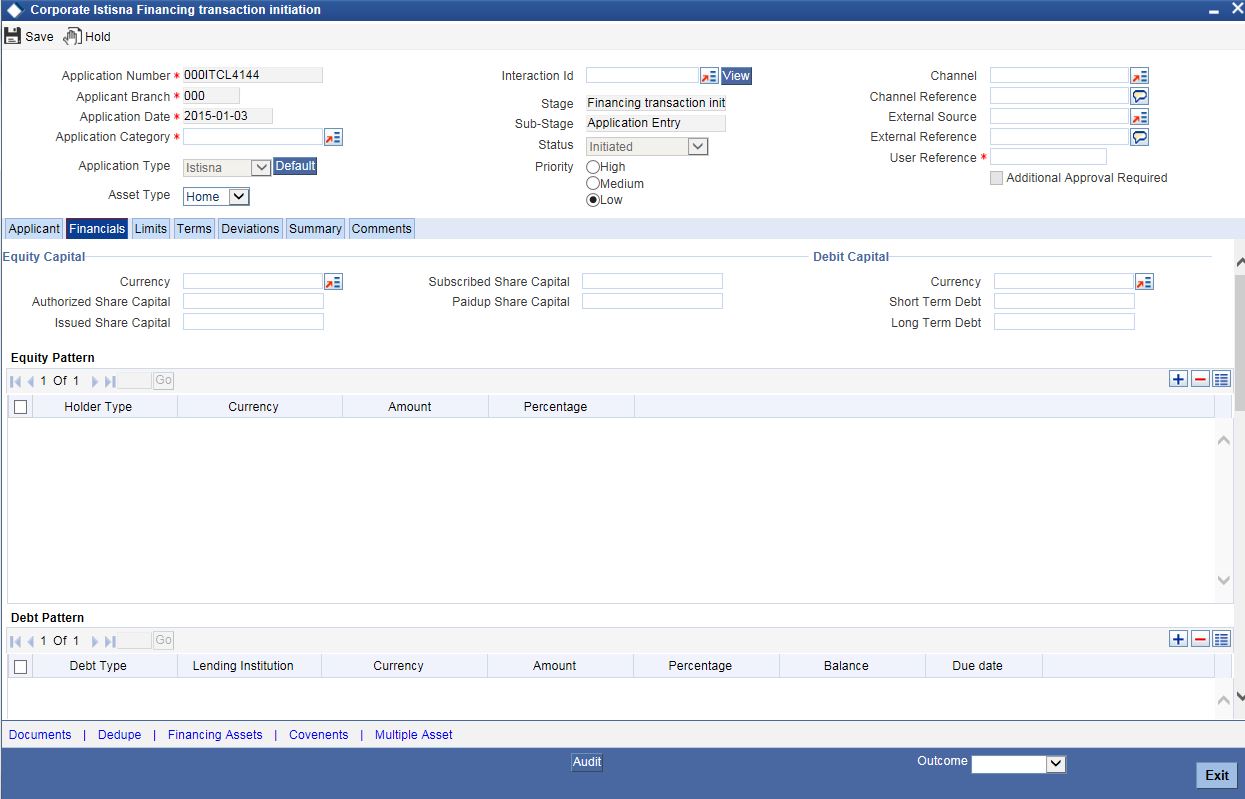
Step 1. Financing Transaction Initiation
In the application entry stage, you can initiate the Istisna contract and capture the requested details. The system populates the applicants details maintained. You can capture the purchase details of the asset in the Purchase Details tab. The system defaults the Asset type from the product. Click ‘Multiple Asset’ button to enter the details about the asset. You can pull Lead data and simulate application details. You can attach interactions to the application and upload the documents maintained for this stage.
![]()
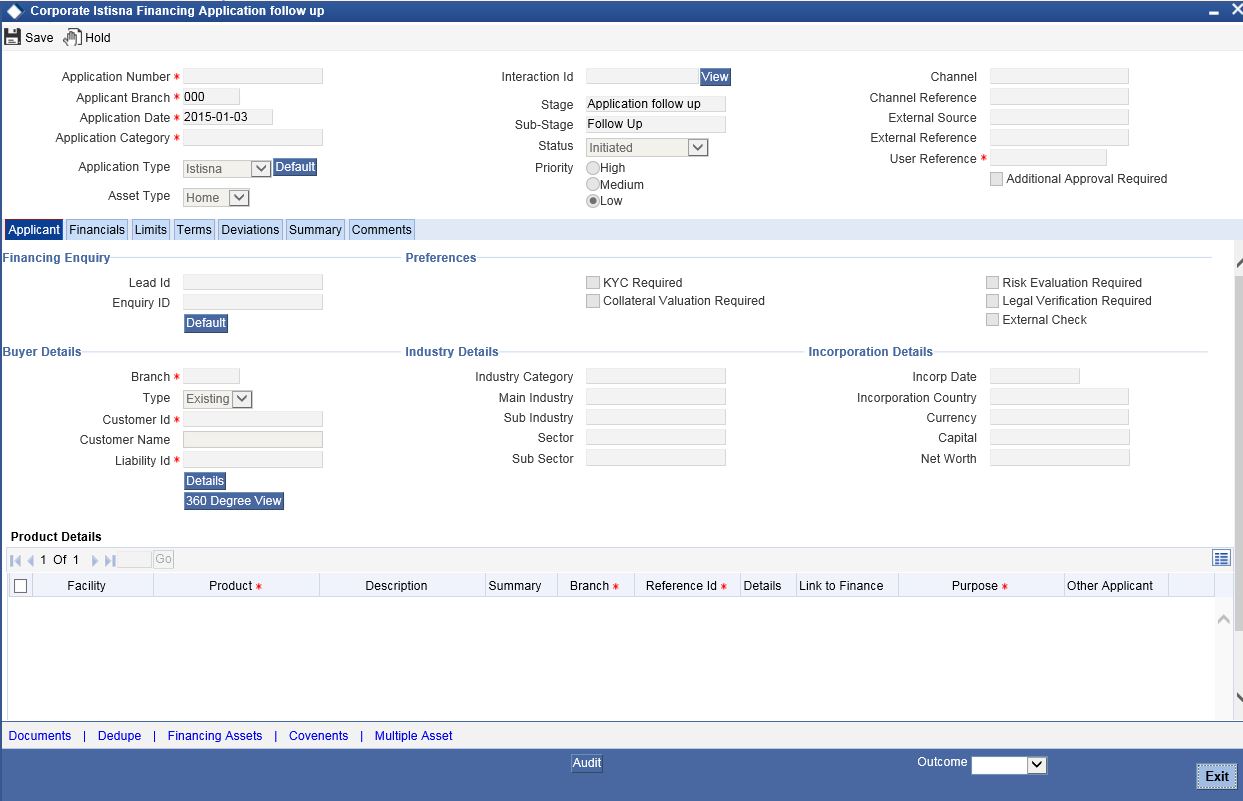
Step 2. Application Follow-up
At this stage, you can upload the documents collected from the applicant and follow up if necessary documents are not submitted by the applicant. The Document Support team verifies and uploads the documents which are provided by the customer. The system does not allow modification of any other data in this stage. The collected documents are scanned and uploaded along with application.
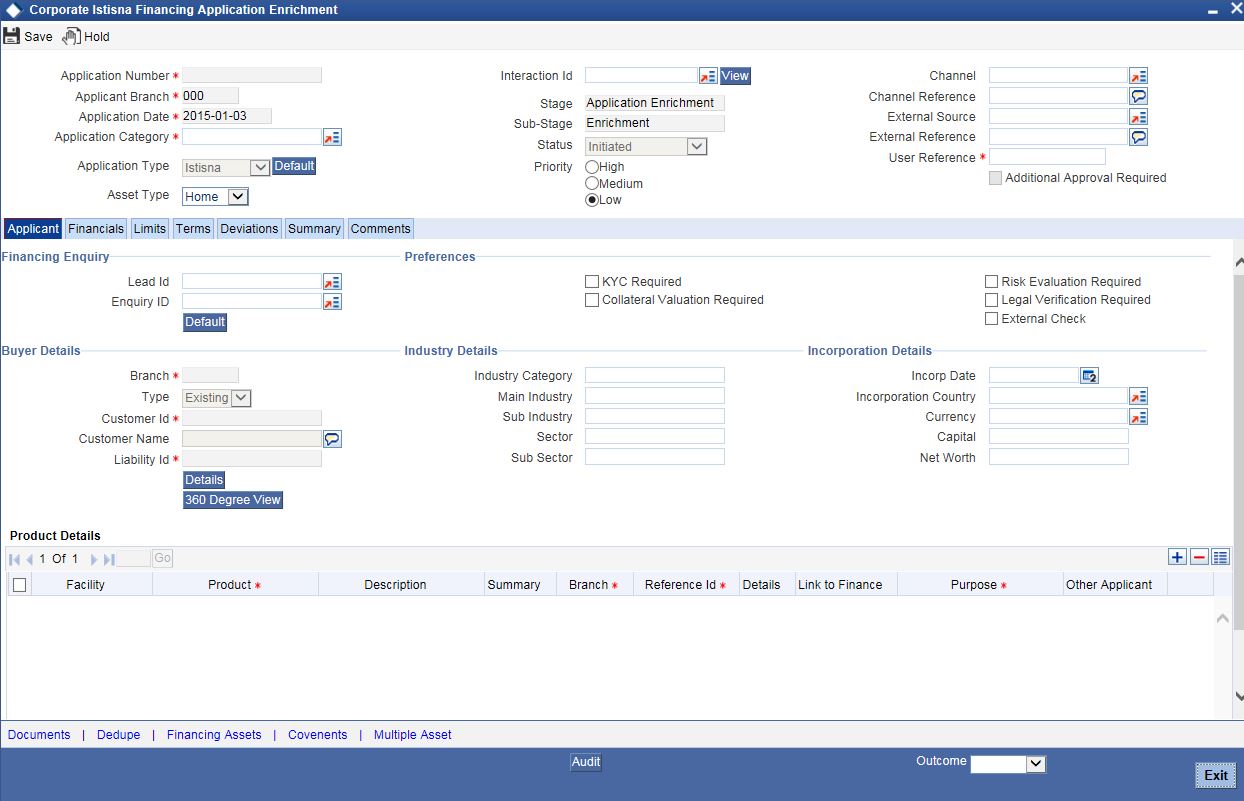
Step 3. Application Enrichment
At this stage, the application is enriched with the details like Director Details, Financial Details, Linkages, and so on. The user can modify the customer details, if required. In this stage, the user can enter the asset details and multiple asset details. Along with other details, the user can provide Hamish Jiddayah details and asset details in this stage. The system validates duplication of applications and applicants for CIF, CASA, Collaterals, Facilities, Cheque Book validation during SAVE operation.
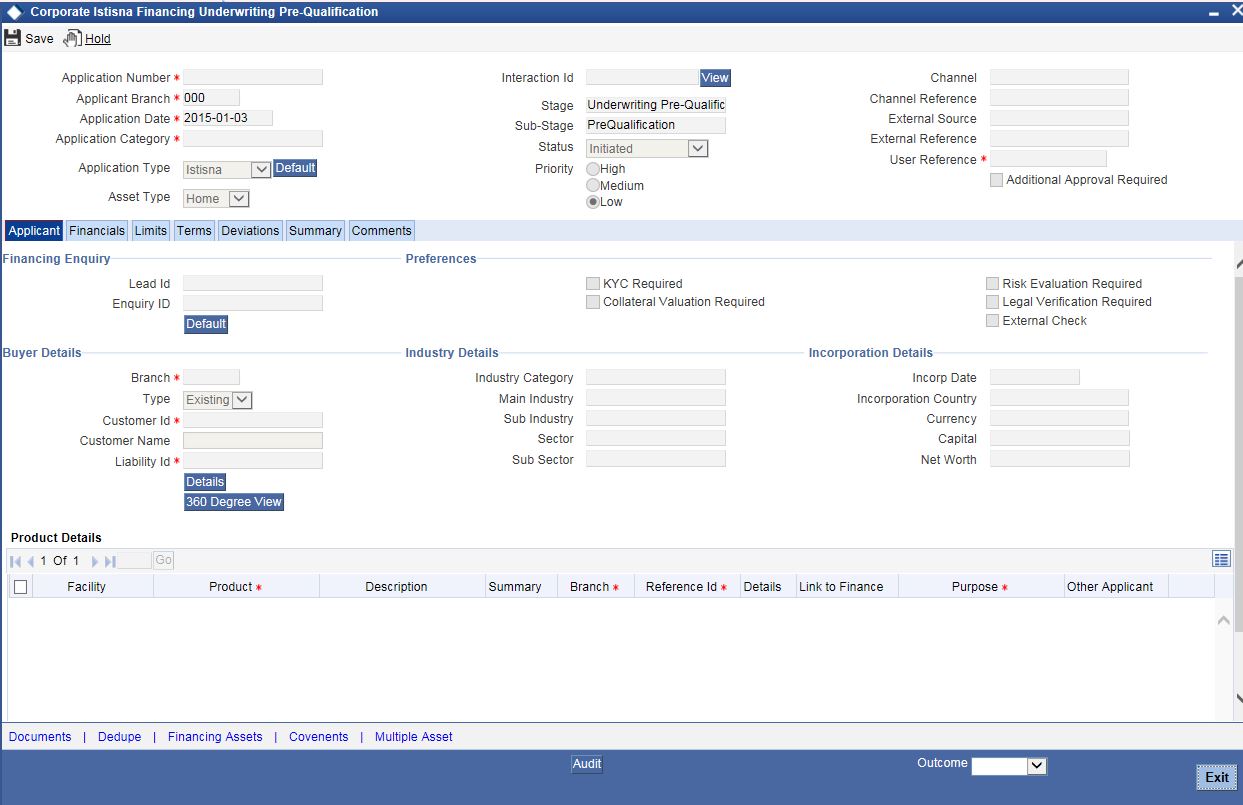
Step 4. Underwriting Pre-Qualification
In this stage, the Credit Admin retrieves the documents and reviews it. Financial statements are put in a standard template and basic analysis is done including bank policy Islamic financing norms compliance checks. Details such as Terms and Conditions, Deviations, Summary, Comments, Documents can be captured in this stage.
You can view the details of the property such as, ‘Property Handover’, ‘Property Handover Date’, ‘Original construction Date’ and ‘End Of Construction Date’. You can also view the nominal disbursal details in ‘Nominal Disbursal’ screen.
Step 5. Underwriting Pre-Qualification Approval
At this stage, underwriter reviews the basic analysis done by the credit along with the application and supporting documents.Underwriter will decide whether to proceed with the deal or not based on the given information. The system allows modification of initial credit analysis done.
The underwriter evaluates the financial documents and project details provided by the customer and prepares the initial credit write up in this stage that includes standard set of terms and conditions. This credit write up is submitted to the credit admin for review and support. The system does not allow modification of customer data and other data provided in the previous stages.

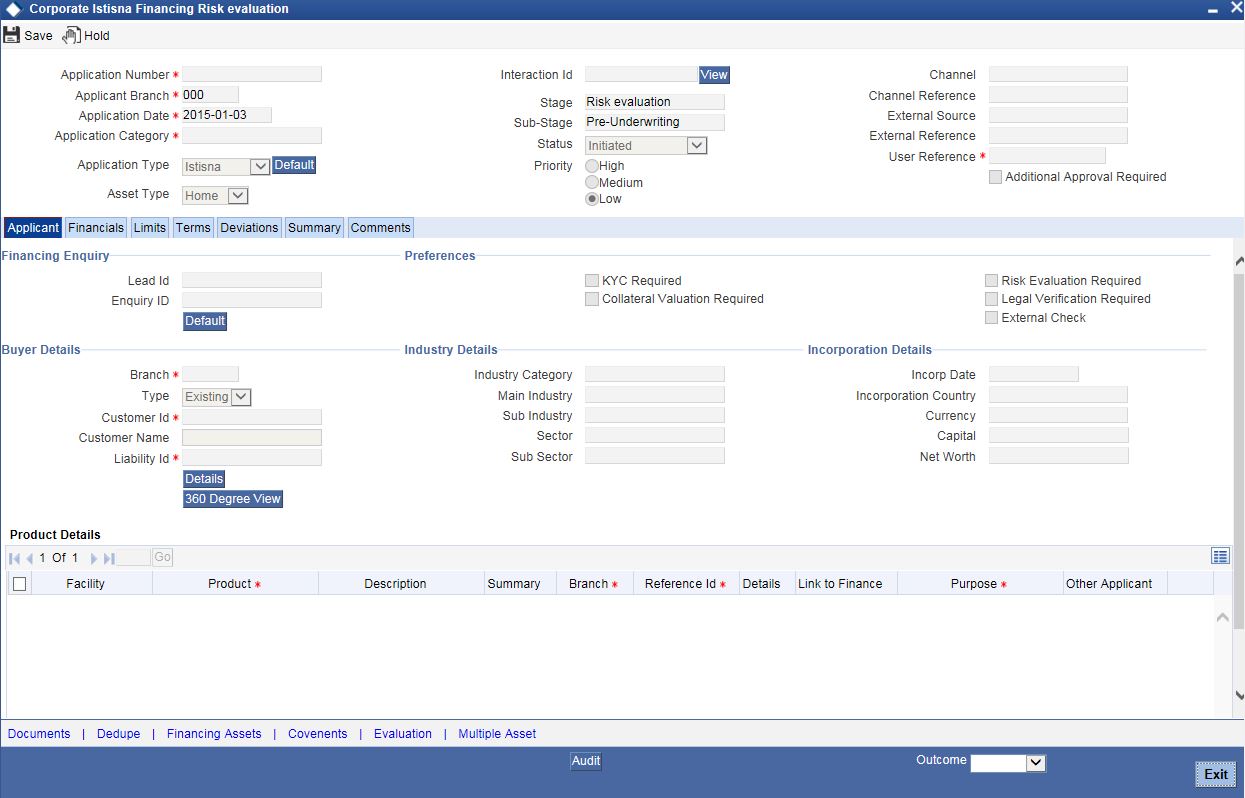
Step 6. Risk Evaluation
At this stage, the user can evaluate the risk associated with the applicant and the application. The user can capture the risk based on credit scores and credit ratios . The user can perform horizontal and vertical analysis. The system does not allow modification of customer data and other data provided in the previous stages.
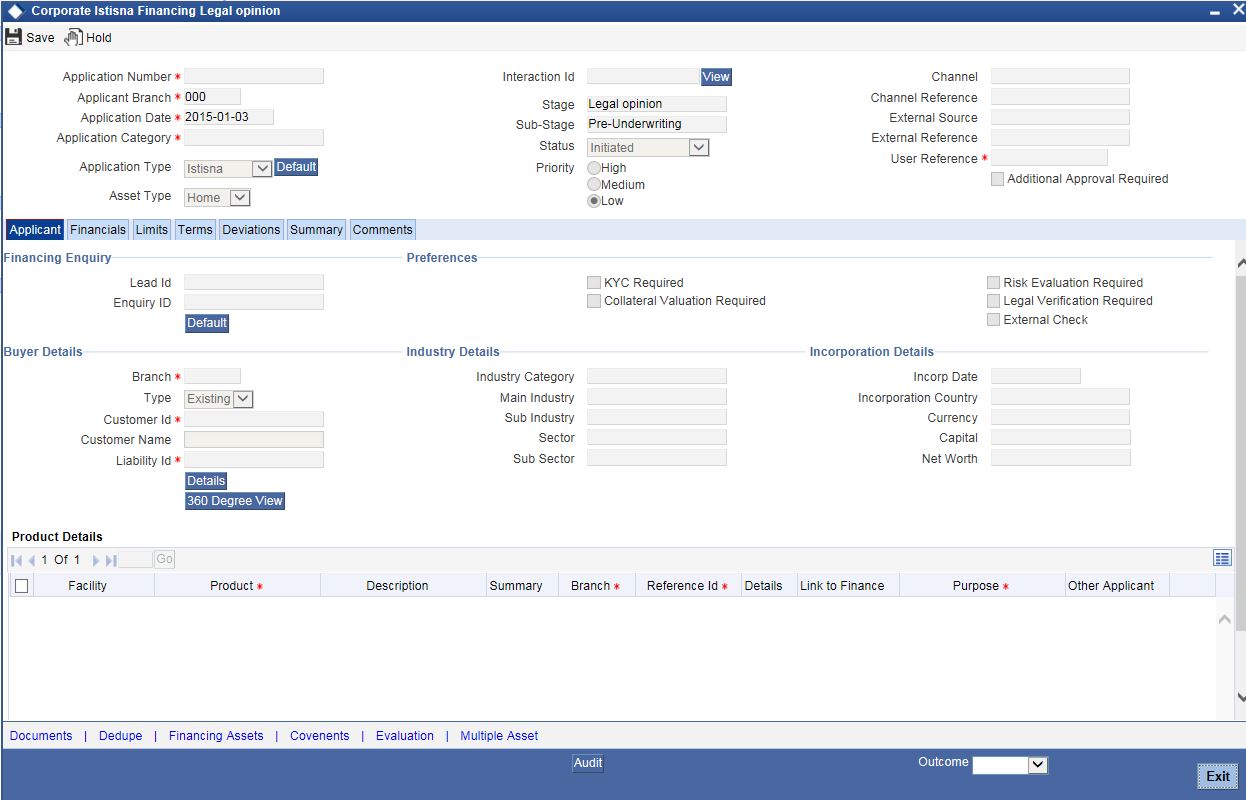
Step 7. Legal Verification
At this stage, any legal constraints associated with the applicant and the finance application are evaluated. The system does not allow modification of customer data and other data provided in the previous stages.
Step 8. Credit Analysis
In this stage, the Underwriter evaluates the financial documents and project details provided by the customer. The underwriter prepares the initial credit write up in this stage that includes standard set of terms and conditions. This credit write up is submitted to the credit admin for review and support. The system does not allow modification of customer data and other data provided in the previous stages.

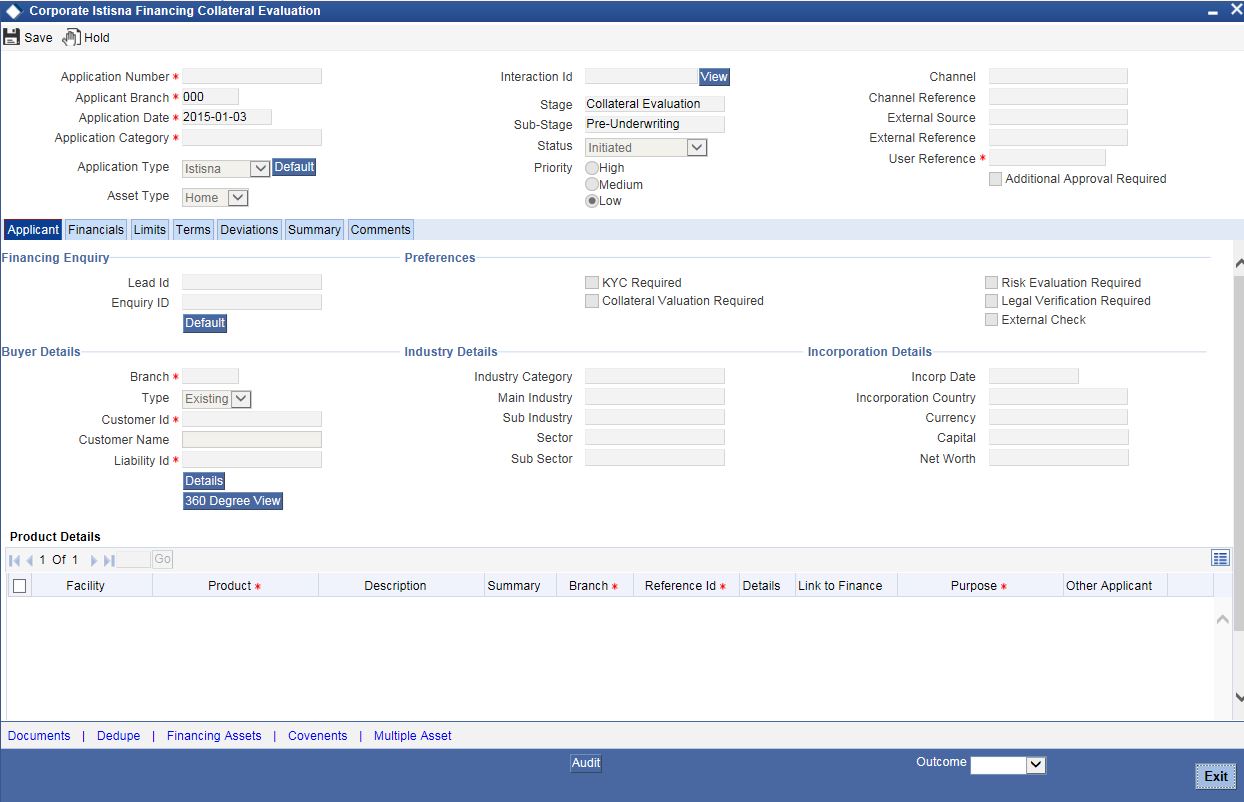
Step 9. Collateral Evaluation
At this stage, the collaterals submitted for the finance application are evaluated. After evaluation the details are passed on to the underwriter. In case, if the collateral is new, then Collateral Creation process flow is initiated. The system does not allow modification of customer data and requested details in this stage.
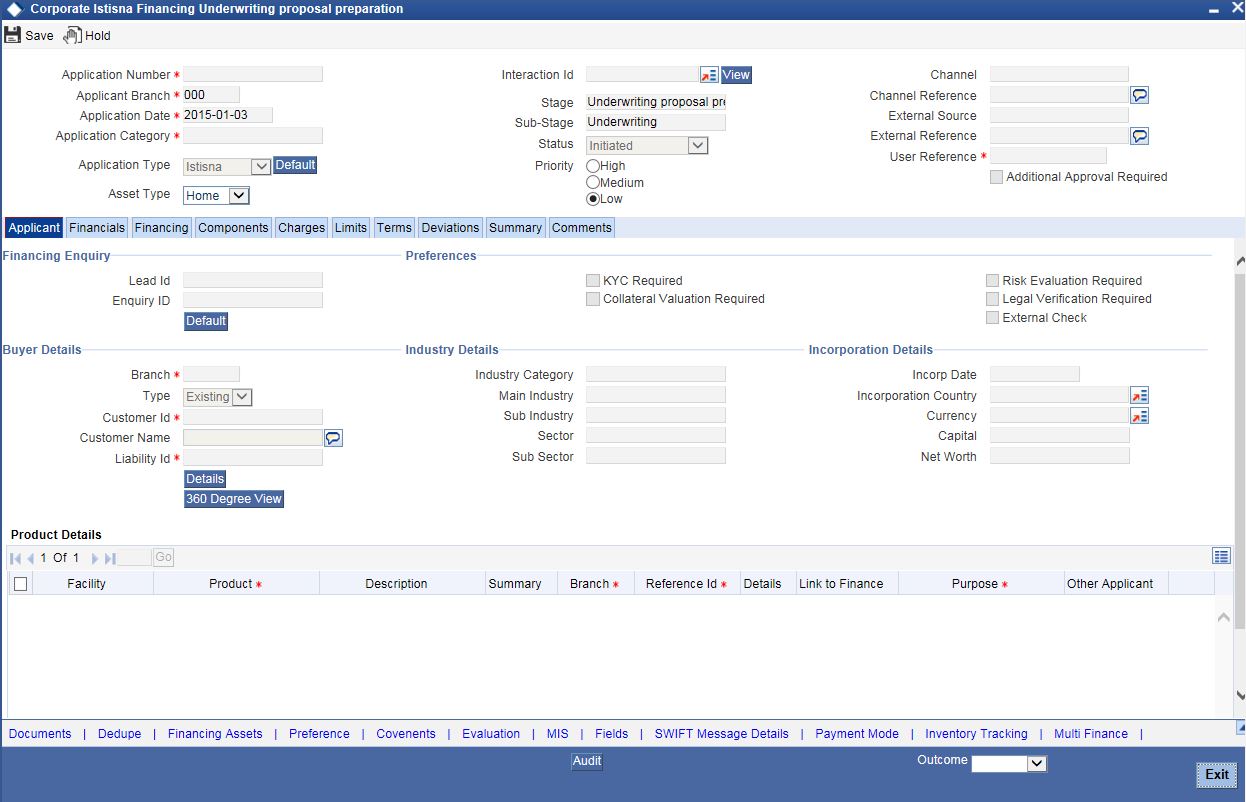
Step 10. Underwriting Proposal Preparation
At this stage, the credit admin evaluates the application based on the inputs from the previous stages. The credit admin will review the initial credit write up and decides to support or reject the application. The credit admin will also have the option to send the application to underwriter for revision. The underwriter arrives at the interest rate, tenor and the charges, based on the evaluation of the application with details and analysis performed so far. The Underwriter prepares the final credit recommendation summary that will include all aspects of the deal like borrower details, finance details, underwriting details, pricing, justification for recommendation and final term sheet.
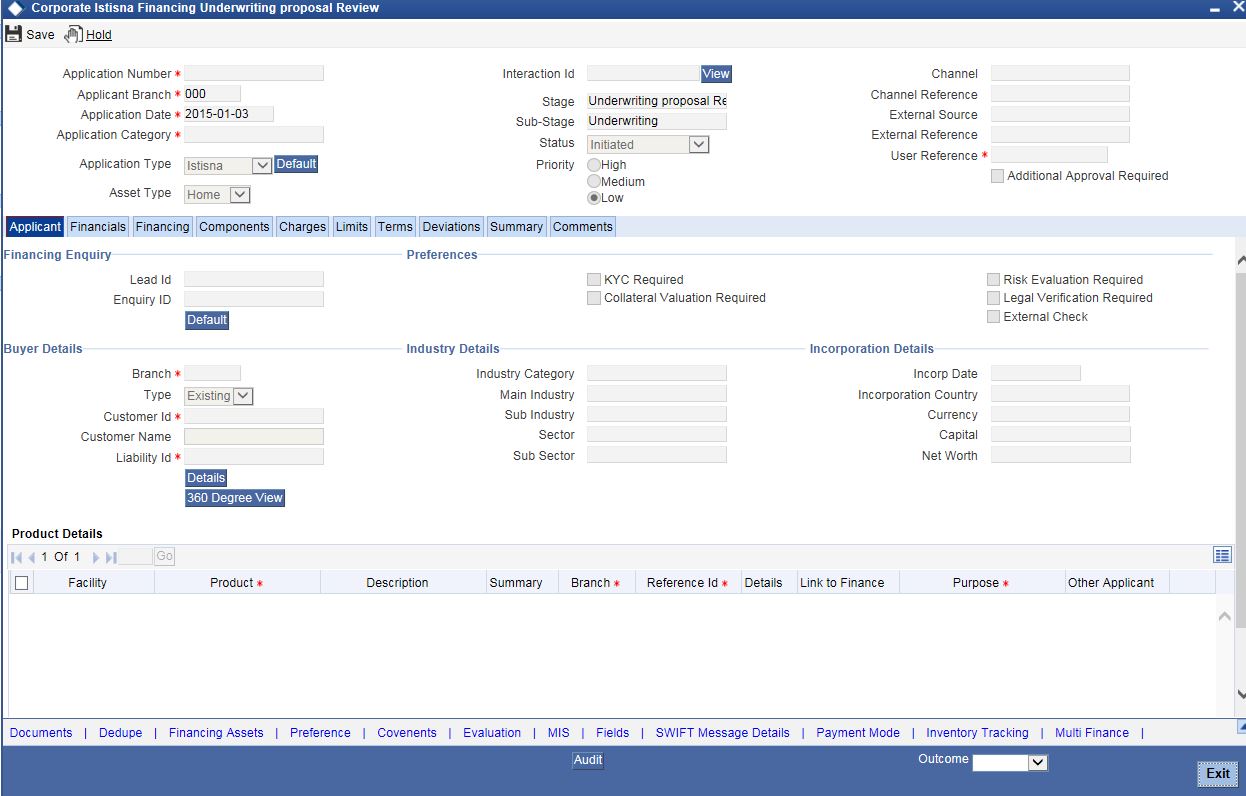
Step 11. Underwriting Proposal Review
At this stage, the Credit Admin reviews the credit recommendation summary. If there is any error, then the credit admin routes the application back to underwriter for rectification. The system does not allow any modification of details in this stage by the credit admin.
Step 12. Application Modification
At this stage, the user modifies the application details as per the underwriter review comments. The user interacts the customer, in case of additional documents which are required for further processing as mentioned by the reviewer. In case of any additional approval, the modified application is sent back to underwriter for pre-qualification approval. .

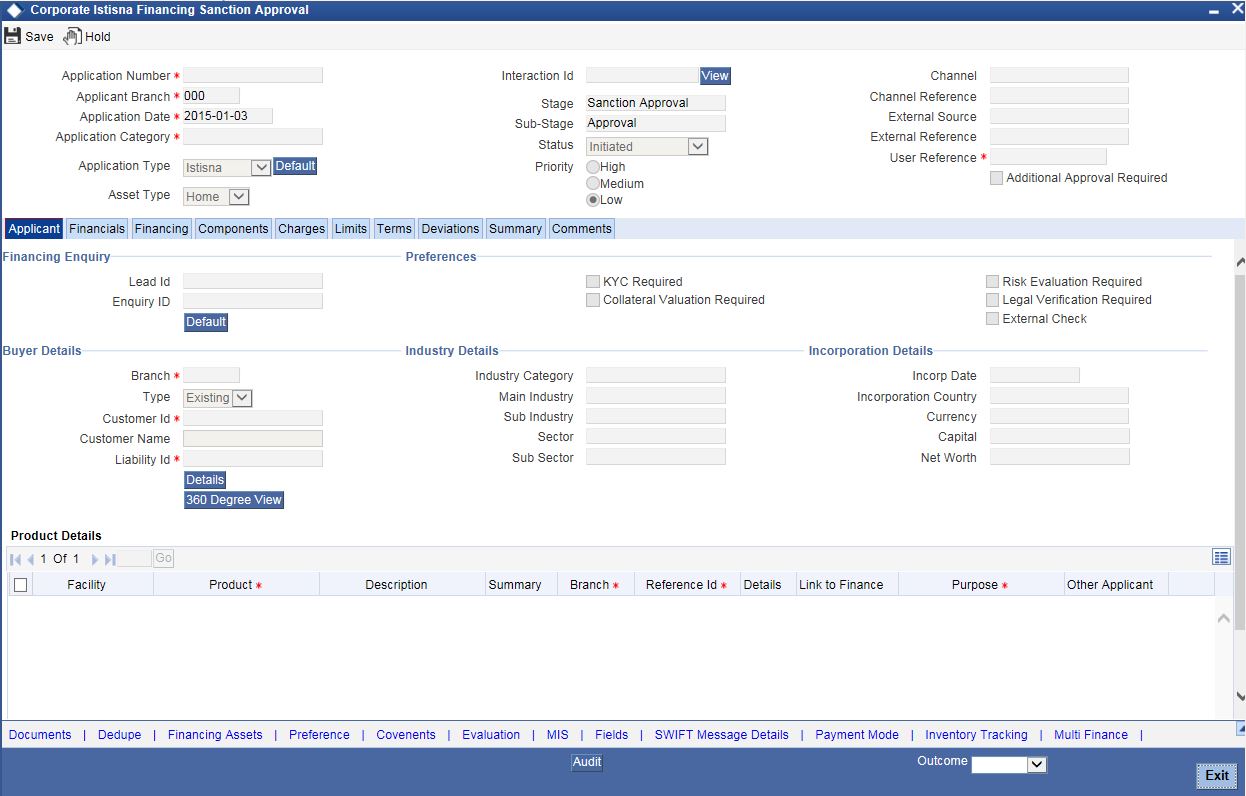
Step 13. Sanction Approval
At this stage, the Credit Admin approves or rejects the application based on the credit recommendation summary. The Credit Admin can add comments justifying the sanction. The system does not allow modification of data provided in earlier stages. The system generates the sanction letter for approval or regret letter for rejection as the case may be and send it to the account manager.
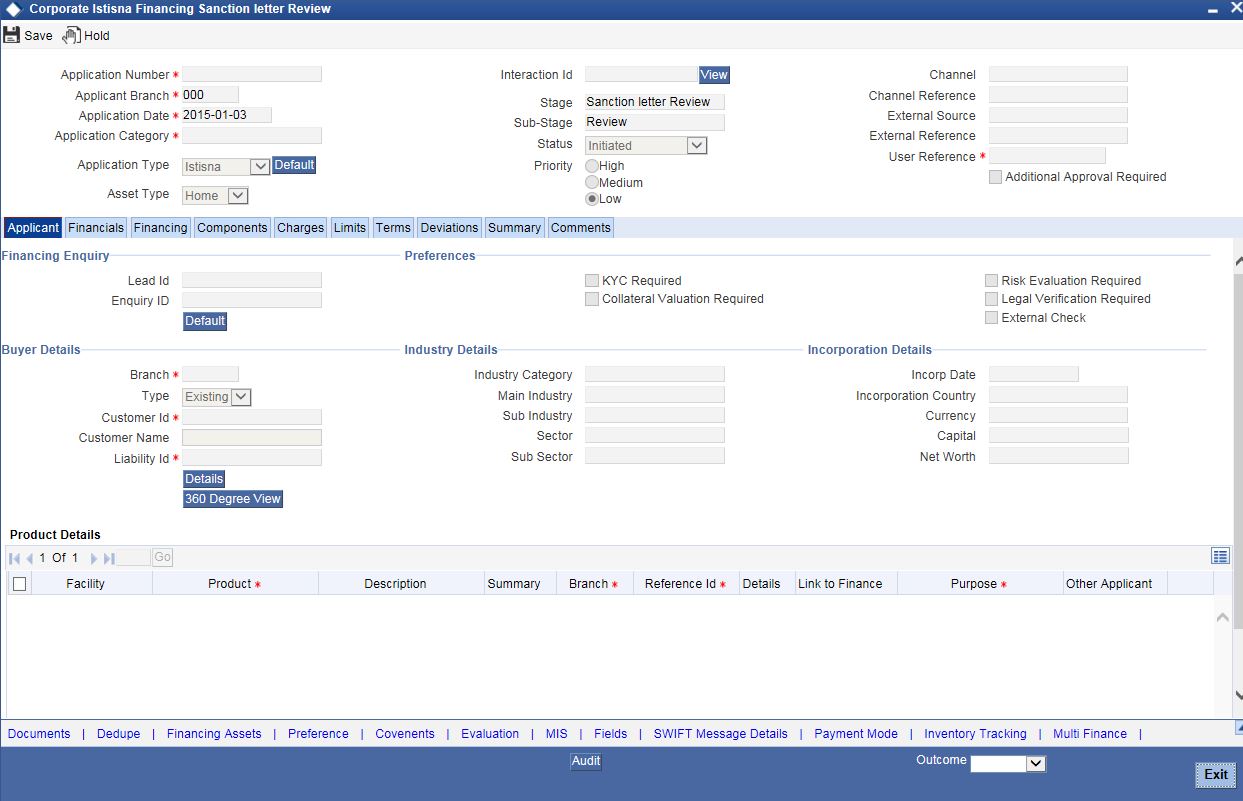
Step 14. Sanction Letter Review
At this stage, the account manager reviews the sanction letter or regret letter and sends it to the borrower.
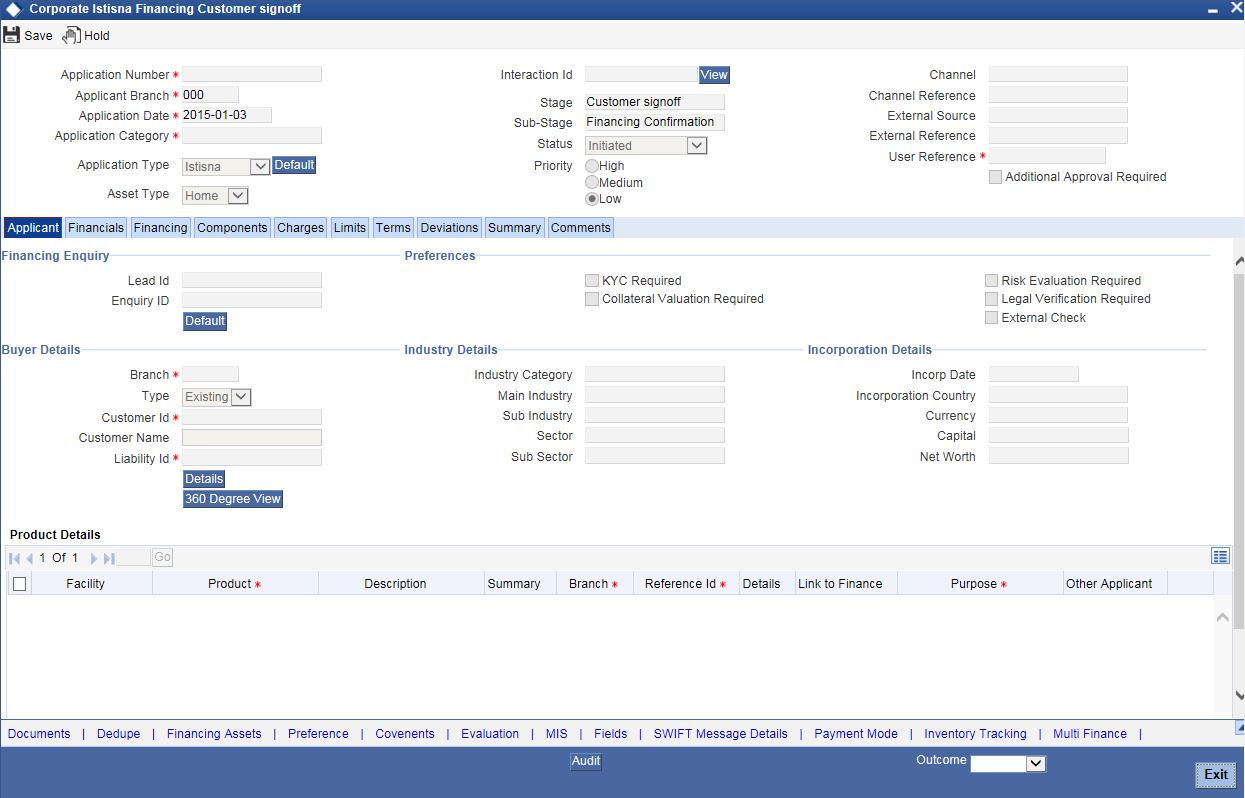
Step 15. Customer Sign-off
At this stage, the customer signs off the sanction letter acknowledging the terms mentioned therein. The document support team receives the signed copy of the sanction letter and uploads the same on to the system. If the borrower rejects the sanction, the application is terminated in this stage. The system does not allow modification of data provided in earlier stages.
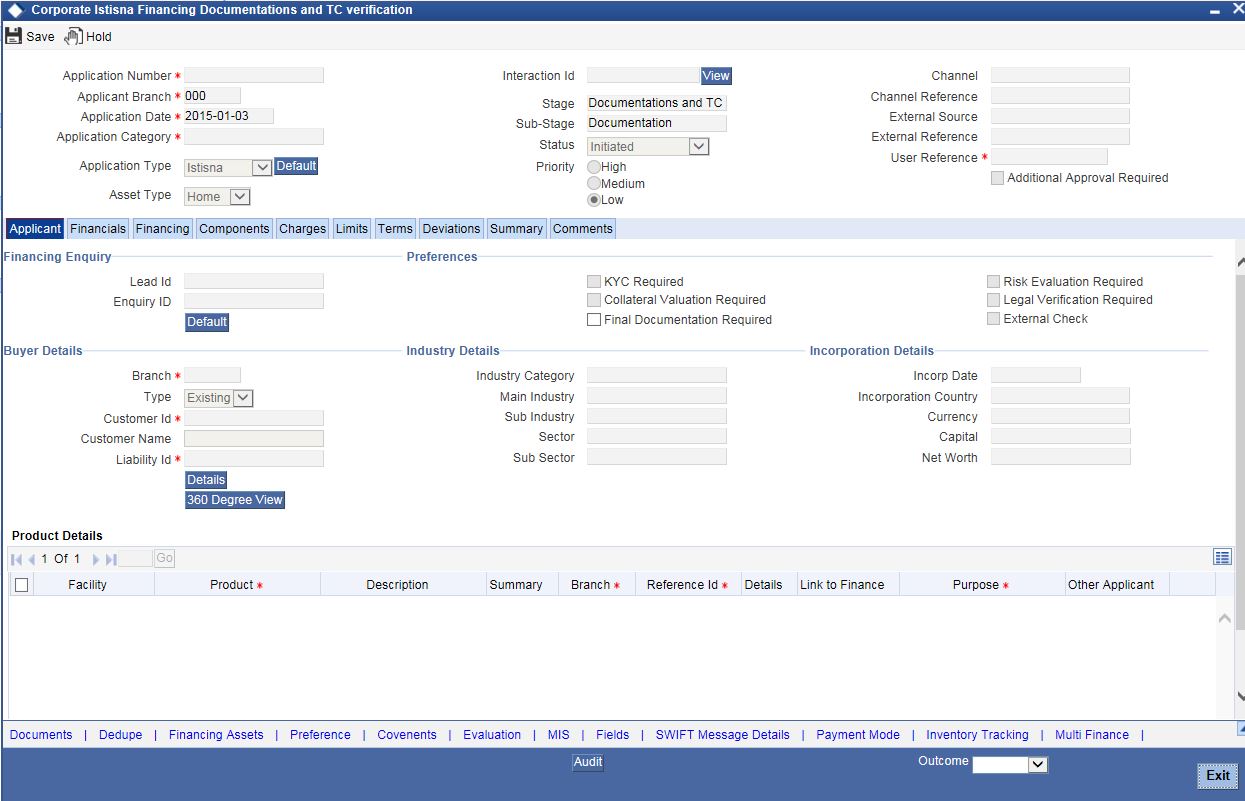
Step 16. Documentation and TC Verification
At this stage, the finance documentation team prepares the finance documents for execution by the borrower. Once the documents are ready, it is sent to the borrower for sign off. The details entered in earlier stages cannot be modified.
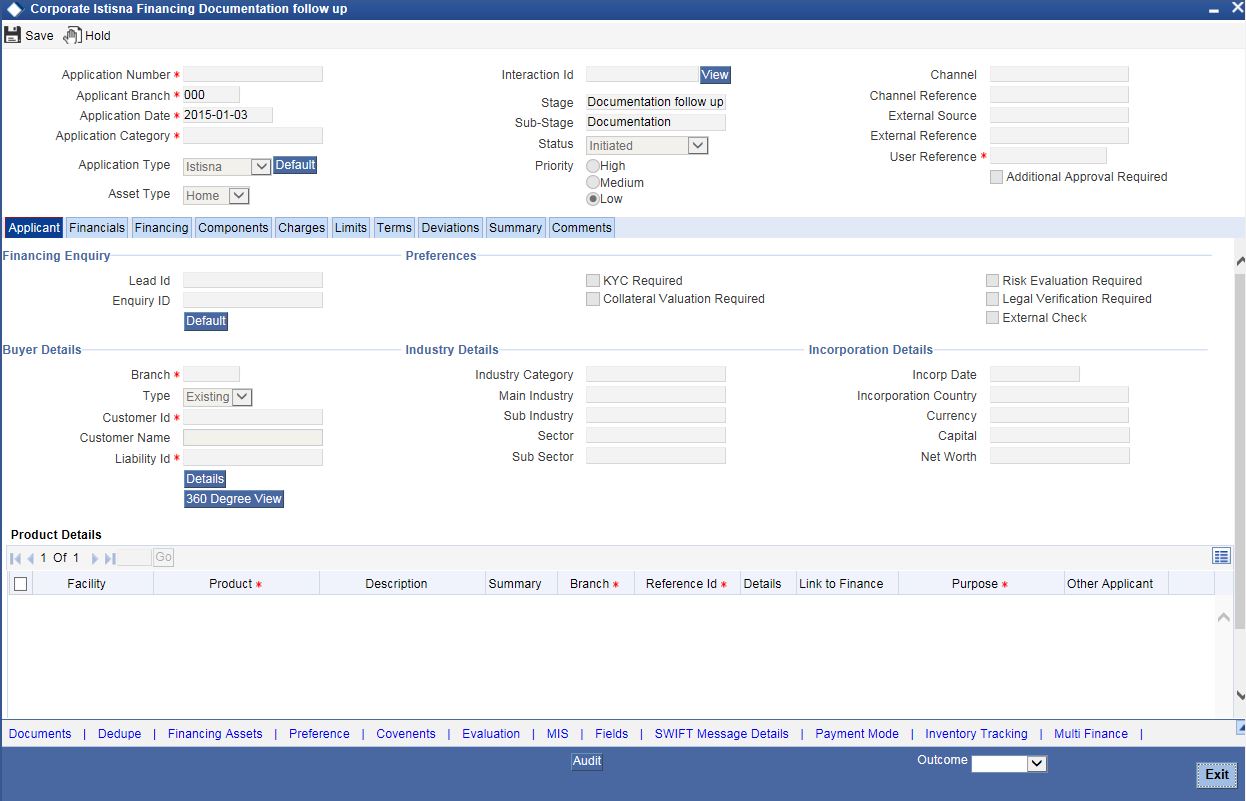
Step 17. Documentation Follow Up
At this stage, a follow up is done on the mandatory documents, which are yet to be collected from the customer or the borrower. Once the documents are received, it is sent to the borrower for sign off. The details entered in earlier stages cannot be modified.
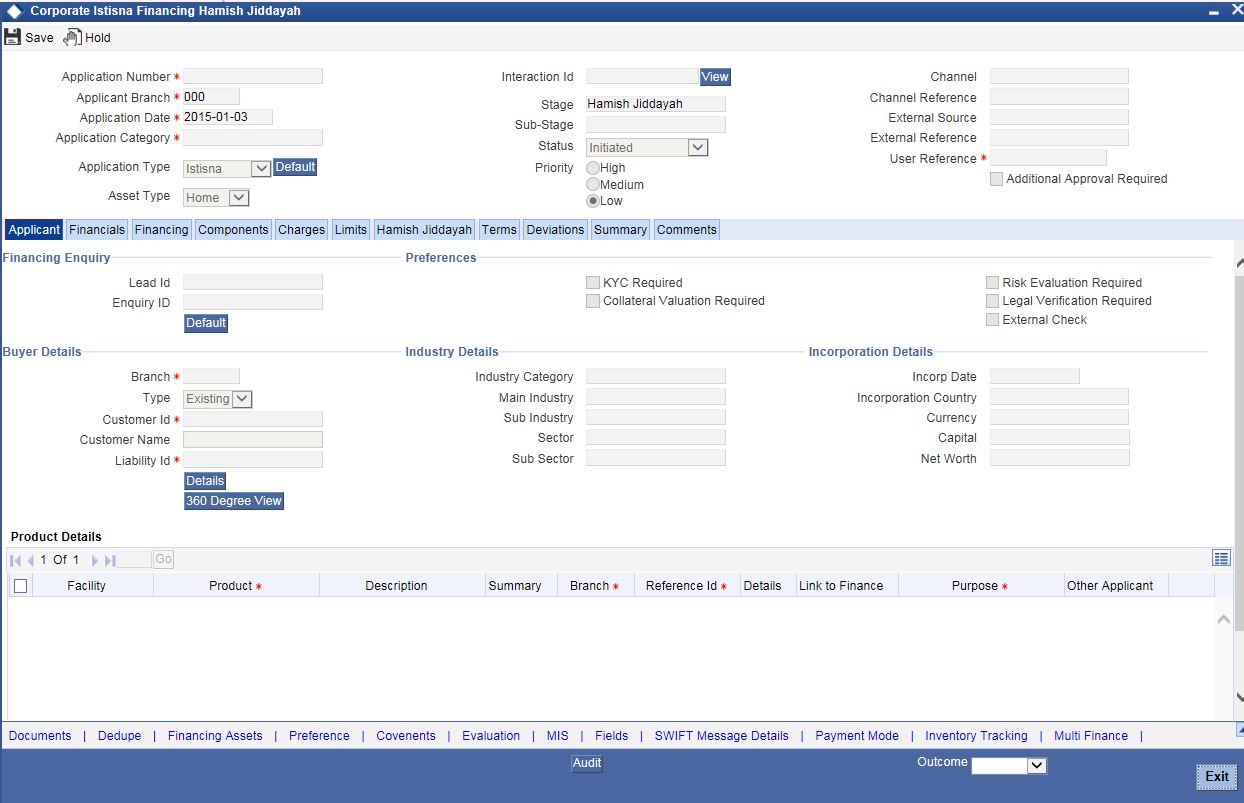
Step 18. Hamish Jiddayah (Down Payment)
At this stage, the user can do Hamish Jiddayah (Down payment) for the contract. This is an optional stage. The task will come to this stage only when Hamish Jiddayah amount is given. Hamish Jiddayah can be done before or after finance account creation. The user can give the details about the payment amount and settlement account and proceed.
If the user has not given the payment details and preceded, then down payment will not happen for the account and will move to the next stage, but system will throw an override.
If the down payment is done before account creation, then once the account is created system will automatically link the down payment reference number to the finance account on creation.
If the down payment amount is not null and if down payment is not done, then account will be created in ‘Uninitiated’ status. Once the user does down payment for the entire down payment amount, the account status will be changed to ‘Initiated’.
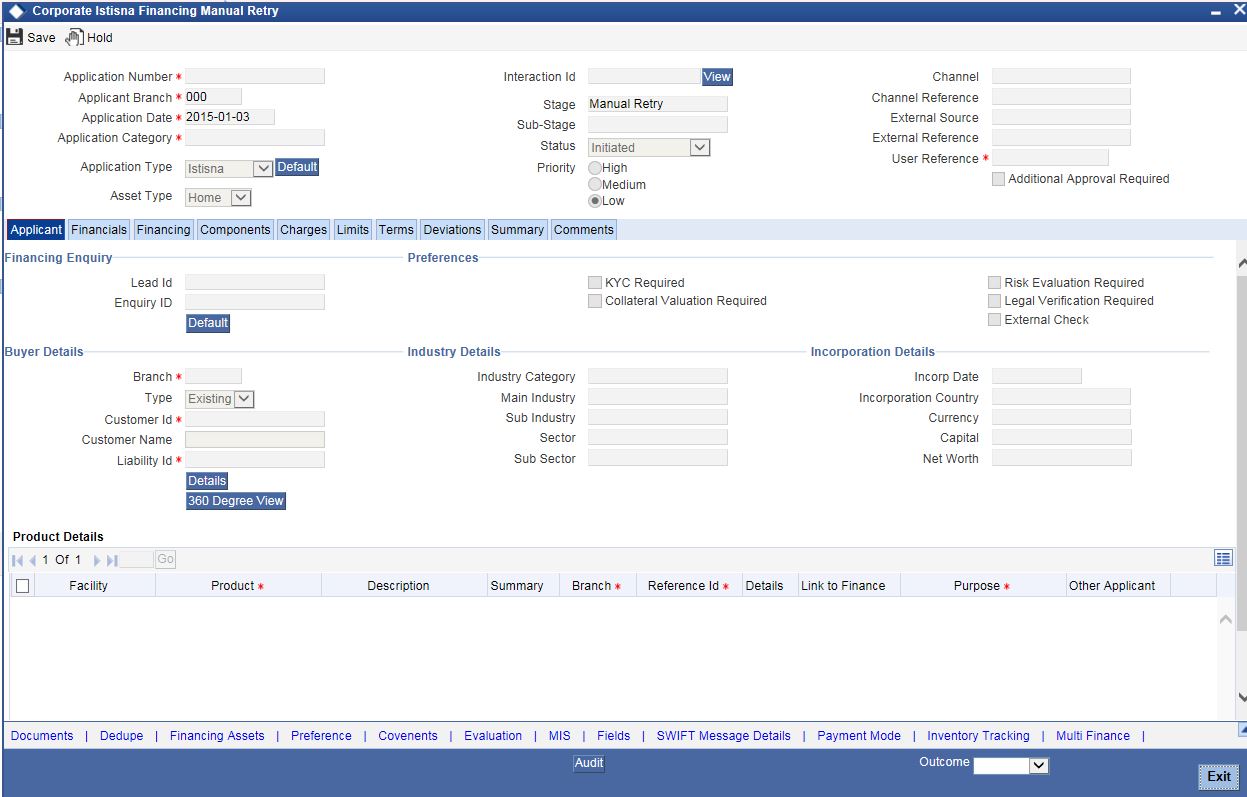
Step 19. Manual Retry
For any exception during the hand off/ unavailability of CI service, the instance is moved to Manual retry stage where the user is allowed to manually re-initiate the core hand off after core validation.
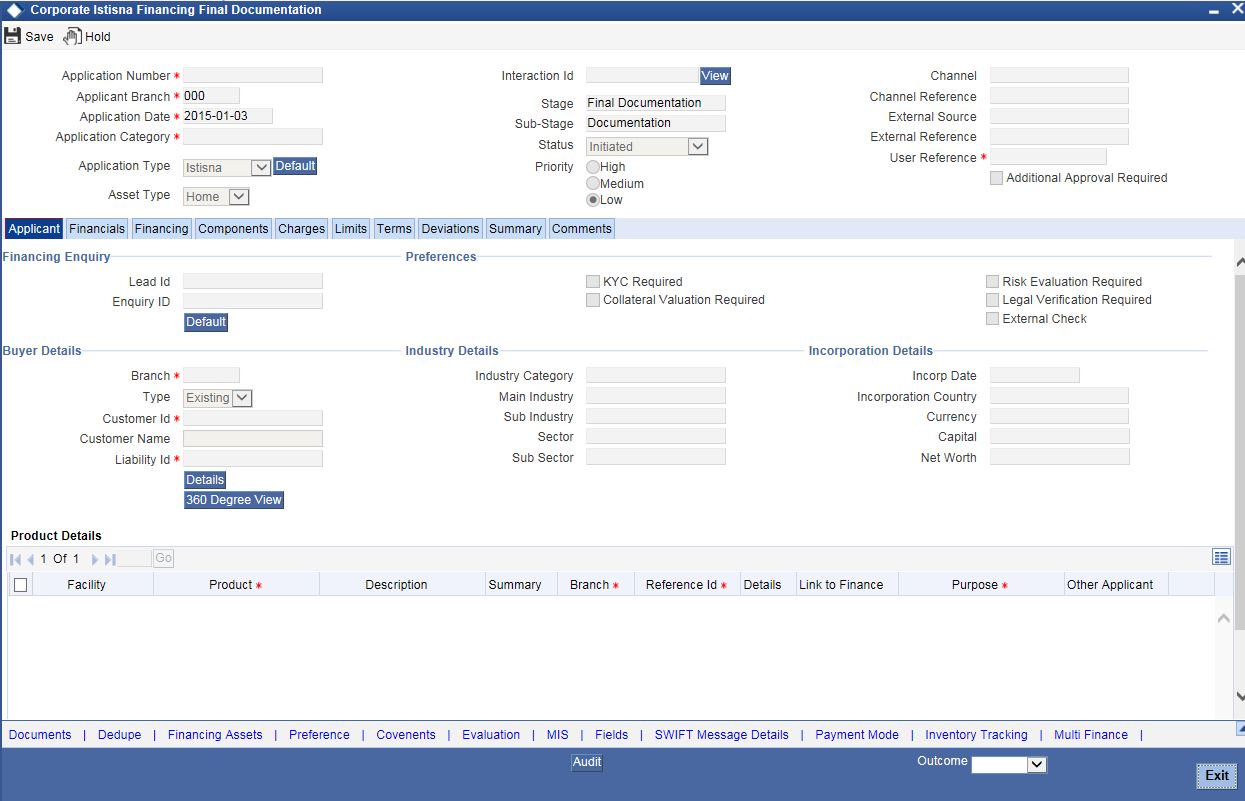
Step 20. Final Documentation
This stage is visited only if the 'Final Documentation Required' flag is checked in the 'Documents & TC Verification' stage. At this stage, documentation team will prepare the finance documents for execution.
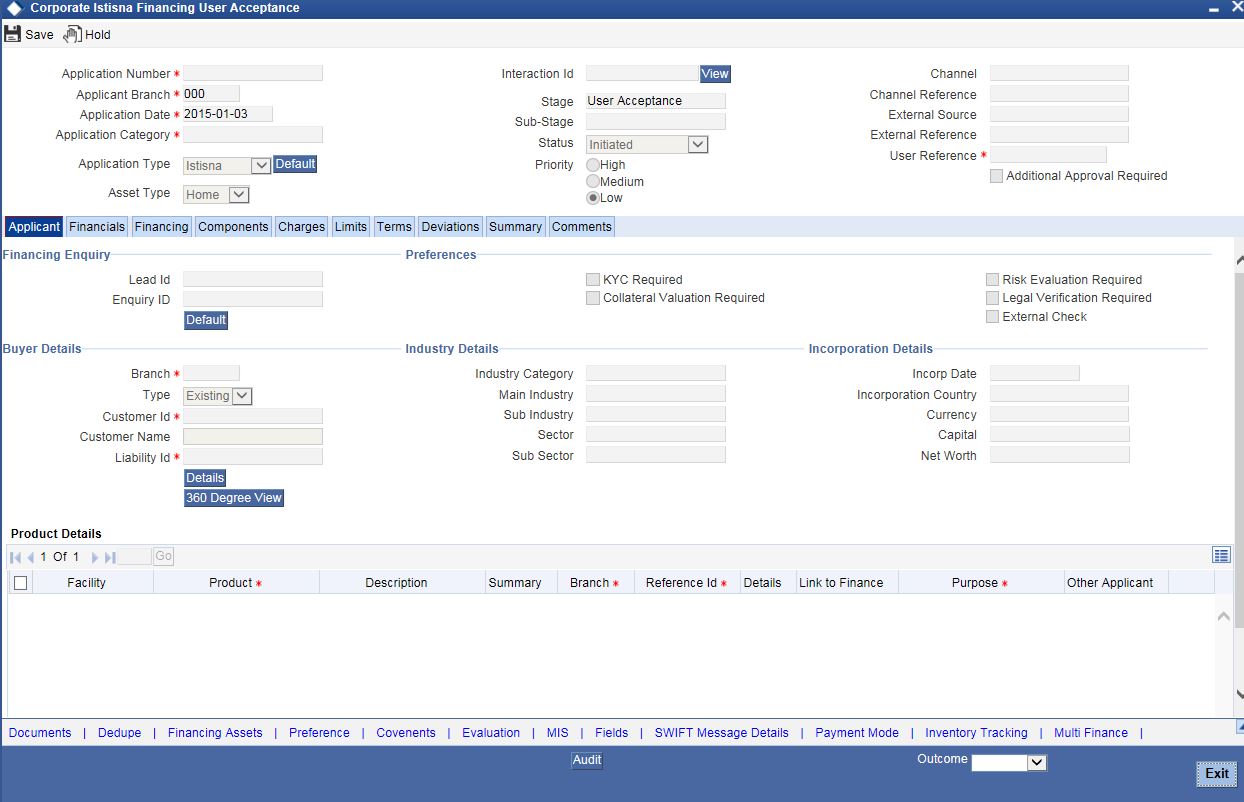
Step 21. User Acceptance
At this stage, withdrawal from the lease contract due to some reasons after finance account creation is possible.
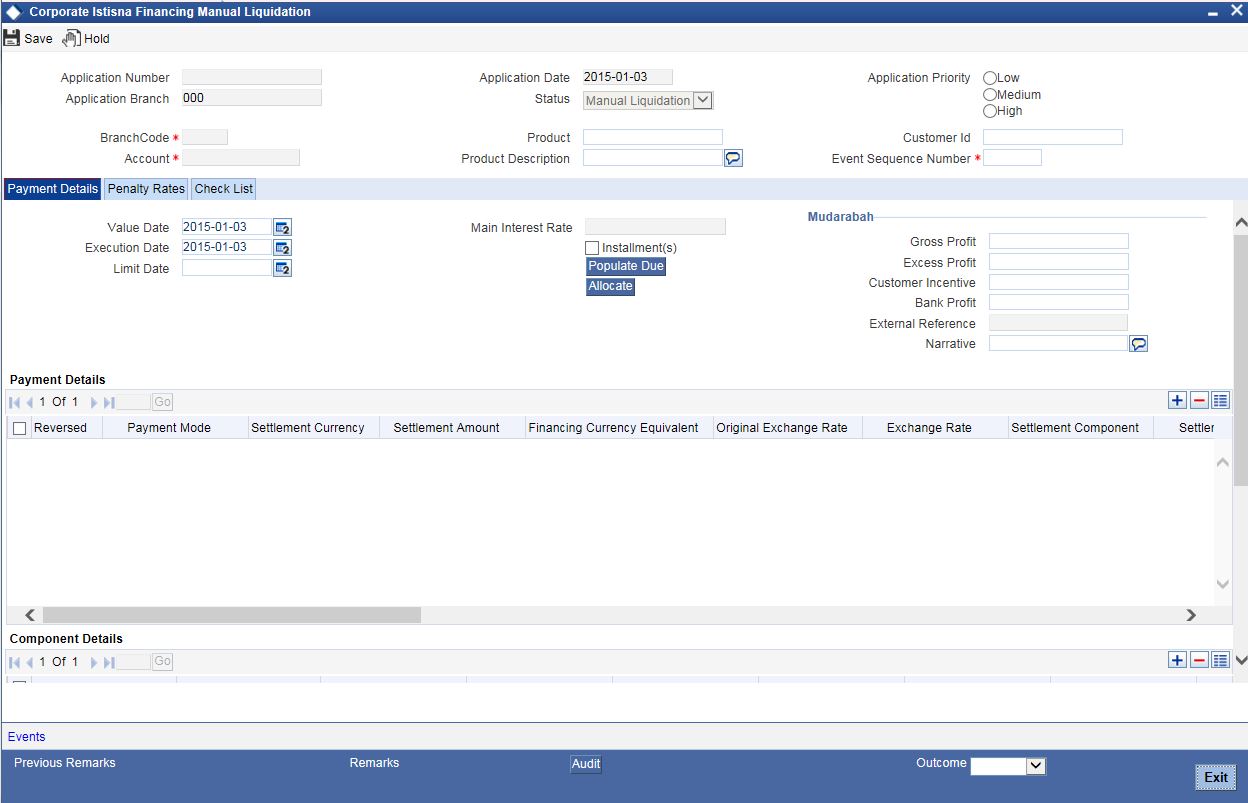
Step 22. Manual Liquidation
At this stage, if the disbursement has happened and user has rejected the offer, then there will be a provision to liquidate the contract. For liquidation, full disbursed amount should be selected.
2.4 Corporate Islamic Financing Application Details
This section contains the following topics:
- Section 2.4.1, "Processing Corporate Istisna Financing Transaction Initiation"
- Section 2.4.2, "Applicant Tab"
- Section 2.4.3, "Financials Tab"
- Section 2.4.4, "Financing Tab"
- Section 2.4.5, "Components Tab"
- Section 2.4.6, "Credit Settlement Mode"
- Section 2.4.7, "Charges Tab"
- Section 2.4.8, "Credit Settlement Mode"
- Section 2.4.9, "Limits Tab"
- Section 2.4.10, "Asset Details Tab"
- Section 2.4.11, "Hamish Jiddayah Tab"
- Section 2.4.12, "Terms Tab"
- Section 2.4.13, "Deviations Tab"
- Section 2.4.14, "Summary Tab"
- Section 2.4.15, "Comments Tab"
- Section 2.4.16, "Documents Button"
- Section 2.4.17, "Advices Tab"
- Section 2.4.18, "Checklist Tab"
- Section 2.4.19, "Dedupe Button"
- Section 2.4.20, "Financing Asset Button"
- Section 2.4.21, "Insurance Tab"
- Section 2.4.22, "Preference Button"
- Section 2.4.23, "Covenant Button"
- Section 2.4.24, "Evaluation Button"
- Section 2.4.25, "Risk Tab"
- Section 2.4.26, "Quantitative Analysis Tab"
- Section 2.4.27, "Qualitative Analysis Tab"
- Section 2.4.28, "Credit Agency Tab"
- Section 2.4.29, "Legal Details Tab"
- Section 2.4.30, "MIS Button"
- Section 2.4.31, "Fields Button"
- Section 2.4.32, "SWIFT Message Button"
- Section 2.4.33, "Payment Mode Button"
- Section 2.4.34, "Inventory Tracking Button"
- Section 2.4.35, "Multi Finance Button"
- Section 2.4.36, "Hamish Jiddayah Details Button"
- Section 2.4.37, "Multiple Asset Button"
2.4.1 Processing Corporate Istisna Financing Transaction Initiation
You can initiate the Istisna contract and capture the requested details in the ‘Corporate Islamic Financing’ screen, if you have the required access rights. You can invoke this screen by typing ‘ORDCITIN’ in the field at the top right corner of the Application tool bar and clicking the adjoining arrow button..
![]()
Specify the following in this screen:
Application Number
The system displays the application reference number on initiating a process. This number is unique throughout the process.
Application Branch
The system displays the branch where application is captured.
Application Date
The system defaults the application initiation date.
Application Category
Specify the application category. Alternatively, you can select the application category from the option list. The category is used for populating the documents, advices and checklist mapped in Document sub screen.
Application Type
The system displays the application type.
Interaction ID
The system displays the interaction ID.
Stage
The system displays the stage of the application.
Sub-stage
The system displays the sub-stage of the application.
Status
The system defaults the application status based on the current stage of the process.
Priority
Select application priority from the adjoining drop-down list.The options available are:
- High
- Low
- Medium
Channel
Specify the channel through which the application is initiated. Alternatively, you can select the channel from the option list. The list displays all valid channels.
Channel Reference
Specify the channel reference number.
External Source
Specify the external source.
External Reference
Specify the external reference number.
User Reference
Specify the user reference number.
Additional Approval Required
Check this box if additional approval is required for the finance application.
2.4.2 Applicant Tab
![]()
Financial Enquiry
Lead ID
Specify the lead ID. Alternatively, you can select the lead ID from the option list. The list displays the lead IDs maintained in the system.
Enquiry ID
Specify the enquiry ID. Alternatively, you can select the enquiry ID from the option list. The list displays the enquiry IDs maintained in the system.
Preferences
KYC Required
Check this box if KYC review is required for the applicant.
Collateral Valuation Required
Check this box if collateral valuation is required for the collaterals linked to the finance application.
Risk Evaluation Required
Check this box to evaluate the risk in granting the finance.
Legal Verification Required
Check this box to evaluate the legal constraints associated with the finance application.
External Check
Check this box if external check is required.
Buyer Details
Branch
Specify the branch of the customer. Alternatively, you can select the branch from the option list. The list displays all valid branch details.
Type
The system displays the type of applicant.
Customer ID
Specify the customer ID of the applicant. Alternatively, you can select the customer ID from the option list. The list displays all valid customer IDs.
Customer Name
Specify the name of the customer.
Liability ID
Specify the liability ID. Alternatively, you can select the liability ID from the option list. The list displays all valid liability IDs.
360 Degree View
Click this button for 360 degree applicant view.
Industry Details
Industry Category
The system displays the industry category.
Main Industry
The system displays the main industry.
Sub Industry
The system displays the sub industry.
Sector
The system displays the sector details.
Sub Sector
The system displays the sub sector details.
Incorporation Details
Incorp Date
The system displays the date of incorporation.
Incorporation Country
The system displays the country of incorporation.
Currency
The system displays the currency details.
Capital
The system displays the capital details.
Net Worth
The system displays the net worth.
Product Details
Facility
Select the required facility from the drop-down list. The list displays the following values:
- CASA
- Finance
- Cheque Book
- Credit Card
- Debit Card
Product
The system displays the product based on the facility selected.
Description
Give a brief description on the product.
Summary
Click this button to view summary details based on the facility selected.
Branch
Specify the branch of the customer. Alternatively, you can select the branch from the option list. The list displays all valid branch details.
Reference ID
The system displays the reference ID.
Details
The system displays the details of the customer.
Linked to Finance
Check this box to link the facility to the finance.
Purpose
The system displays the finance purpose.
Other Applicant
The system displays the other applicant details.
2.4.3 Financials Tab
Click ‘Financials’ tab to maintain financial details.
Specify the following details:
Equity Capital
Currency
Specify the equity currency. Alternatively, you can select the equity currency from the option list. The list displays all the currencies maintained in the system.
Authorized Share capital
The system displays the authorized share capital.
Issued Share Capital
The system displays the issued share capital.
Subscribed Share Capital
The system displays the subscribed share capital.
Paid up Share Capital
The system displays the paid up share capital.
Debit Capital
Currency
The system displays the debit currency .
Short Term Debt
The system displays the short term debt.\
Long Term Debt
The system displays the long term debt.
Equity Pattern
Currency
Specify the currency code. Alternatively, you can select the currency code from the option list. The list displays all the currencies maintained in the system.
Holder Type
The system displays the holder type.
Amount
The system displays the amount.
Percentage
The system displays the equity percentage.
Debt Pattern
Debt Type
The system displays the debt type
Lending Institution
The system displays the lending institution.
Currency
Specify the currency code. Alternatively, you can select the currency code from the option list. The list displays all the currencies maintained in the system.
Amount
The system displays the debt amount.
Percentage
The system displays the debt percentage.
Balance
The system displays the balance.
Due Date
The system displays the due date.
Corporate Performance
Financial Year
The system displays the financial year.
Currency
Specify the currency code. Alternatively, you can select the currency code from the option list. The list displays all the currencies maintained in the system.
Net Sales
The system displays the net sales.
Net Profit
The system displays the net profit.
Net Worth
The system displays the worth.
Promoters
Promoter Name
The system displays the name of the promoter.
Acquisition Date
The system the acquisition date.
Currency
Specify the currency code. Alternatively, you can select the currency code from the option list. The list displays all the currencies maintained in the system.
Share Count
The system displays the share count.
Face Value
The system displays the face value.
Paid-up Capital %
The system displays the paid-up capital percentage.
Associate Groups
Entity
The system displays the entity.
Business Type
The system displays the business type.
Banking With
The system displays the banking width.
Association Nature
The system displays the nature of association.
Interest Extent
The system displays the interest extent.
Group Performance
Financial Year
The system displays the financial year.
Currency
Specify the currency code. Alternatively, you can select the currency code from the option list. The list displays all the currencies maintained in the system.
Net Sales
The system displays the net sales.
Net Profit
The system displays the net profit.
Net Worth
The system displays the net worth.
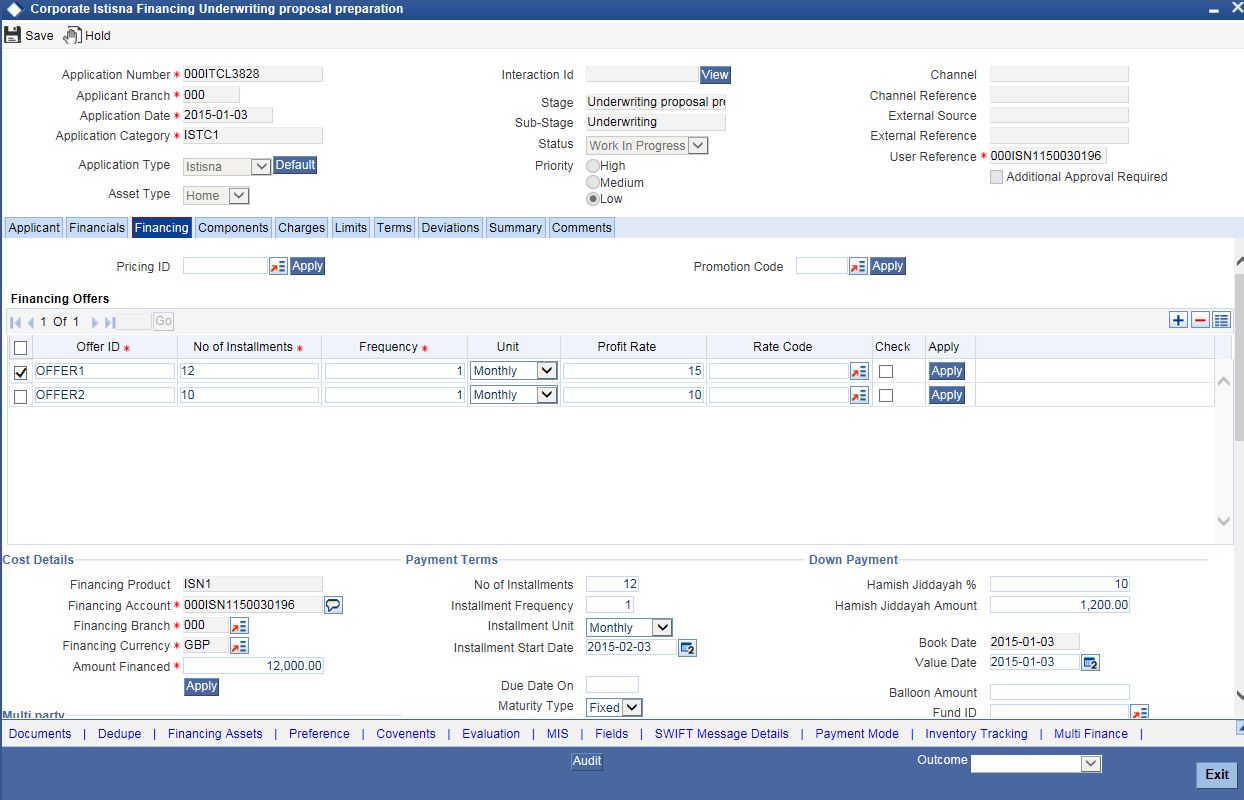
2.4.4 Financing Tab
Click ‘Financing’ tab to maintain finance details.
Specify the following details:
Pricing ID
Specify the pricing ID. Alternatively, you can select the pricing ID from the option list. The list displays all valid pricing IDs.
Promotion Code
Specify the promotion code. Alternatively, you can select the promotion code from the option list. The list displays all valid promotion codes.
Financing Offers
Offer ID
Specify the finance offer ID.
No. of Instalments
Specify the number of installments applicable for the selected finance offer.
Frequency
Specify the frequency of the finance offer.
Unit
Select the unit from the drop-down list.
Profit Rate
Specify the profit rate of the finance offer.
Rate Code
Specify the rate code. Alternatively, you can select the rate code from the option list. The list displays all valid rate codes.
Check
Check this box to apply an offer. You can only check one offer at a time.
Cost Details
Financing Product
The system displays the financing product.
Financing Account
Specify the financing account number.
Financing Branch
Specify the financing branch. Alternatively, you can select the financing branch from the option list. The list displays all valid branch codes.
Financing Currency
Specify the financing currency. Alternatively, you can select the currency from the option list. The list displays all valid currency codes.
Amount Financed
Specify the financed amount.
Wakala Reference
Specify the Wakala reference number. Alternatively, you can select wakala reference number from the option list. The list displays all valid Wakala reference number maintained in the system.
Payment Terms
No of Installments
Specify the number of installments required to pay the financed amount.
Installment Frequency
Specify the installment frequency.
Installment Unit
Select the unit of installment from the drop-down list. The list displays the following values:
- Bullet - Select this option for single repayment on maturity date.
- Daily
- Monthly
- Weekly
- Half Yearly
- Quarterly
- Yearly
Installment Start Date
Select the installment start date from the adjoining calendar.
Due Date On
Select the due date from the adjoining calendar.
Maturity Type
Select the maturity type from the drop-down list. The list displays the following values:
- Fixed - this type of a finance has a fixed maturity date
- Call - If the maturity date is not fixed the finance can be liquidated any time
Maturity Date
Select the maturity date from the adjoining calendar.
Tenor (in Days)
Specify the finance tenor in days.
URBOUN
Hamish Jiddayah %
The system displays the Hamish Jiddayah percentage.
Hamish Jiddayah Amount
The system displays the Hamish Jiddayah amount.
Book Date
The system displays the book date.
Value Date
The system displays the value date.
Balloon Amount
Specify the amount that is being paid as balloon payment. This value cannot exceed the principal amount of the finance. You will be allowed to specify this value only if the following conditions are met:
- Contract is linked to a Istisna product
- The box ‘Balloon Required’ is checked in the ‘Product Maintenance’ screen for the linked product.
- The box ‘Recompute schedule on IRR’ is checked in the ‘Product Maintenance’ screen for the linked product.
Fund ID
Select the fund id from the adjoining option list. The system defaults the value of ‘Default Mudarabah Fund’ as fund ID.
The system populates the fund MIS details for a contract which is linked to the Fund ID.
Future D/P Receivable
Specify the future D/P receivable. Your customer need not pay the entire down payment amount in a single installment. The customer can pay it in parts. In such cases, you can specify the amount to be received in the future from the customer. The aggregate of down payments received and ‘Future D/P Receivable’ should be equal to the ‘Down Payment’ amount.
For instance, suppose the down payment is 10000 BHD, down payment received is 8000 BHD and future down payment is 2000 BHD, then Disbursement event will be triggered.
Note
Amount specified in this field cannot exceed the total down payment amount for the contract. This field should be operationally controlled, because the system does not track the ‘Future D/P Receivable’ amount which is received from the customer.
Staff Finance
Specify the staff finance details.
Total Amount
Specify the sum of amount financed and down payment.
Balloon + Principal
Specify the total of balloon and principal amount.
Rab AI MAL
Book Date
The system displays the booking date.
Value Date
Specify the value date.
Profit Sharing Ratio
Specify the profit sharing ratio of the bank.
Customer Share%
Profit Sharing Ratio
Specify the profit sharing ratio of the customer.
Taken Over Asset Details
Collateral Taken over
Check this box to indicate that the collateral is taken over.
Sale Value
Total Sale Value
Specify the total sale value.The system displays the total of principal and profit amount as of initiation date. If the ‘Recompute schedule on IRR’ field is checked in the ‘Product Maintenance’ screen for the linked product and if you specify the balloon amount, the system will compute this value as the sum of principal, normal profit, balloon principal and balloon profit.
Asset Details
Asset Type
Select the type of asset from the drop-down list. The options available are:
- New - To indicate the asset is a new asset
- Used - To indicate the asset is an old asset
Effective Date
Effective Date
Select the effective date from the adjoining calendar.
User Defined Elements
User Data Elements Id
Specify the user data elements ID. Alternatively, you can select the UDE ID from the option list. The list displays all valid user defined elements ID.
Value
Specify the UDE value.
Rate Code
Specify the rate code of the UDE. Alternatively, you can select the rate code from the option list. The list displays all valid rate codes.
Code Usage
Select the code usage. It can be periodic or automatic.
Rate Basis
Select the rate basis from the drop-down list. The list displays the following values:
- Not Applicable
- Per Annum
- Per Month
- Quote Basis
Resolved Value
Specify the resolved value.
Account EMI Change
Effective Date
Select the effective date from the adjoining calendar.
Percentage Change in EMI
Specify the percentage change in EMI.
Amount Change in EMI
Specify the amount change in EMI.
2.4.5 Components Tab
Click ‘Components’ tab to maintain component details.
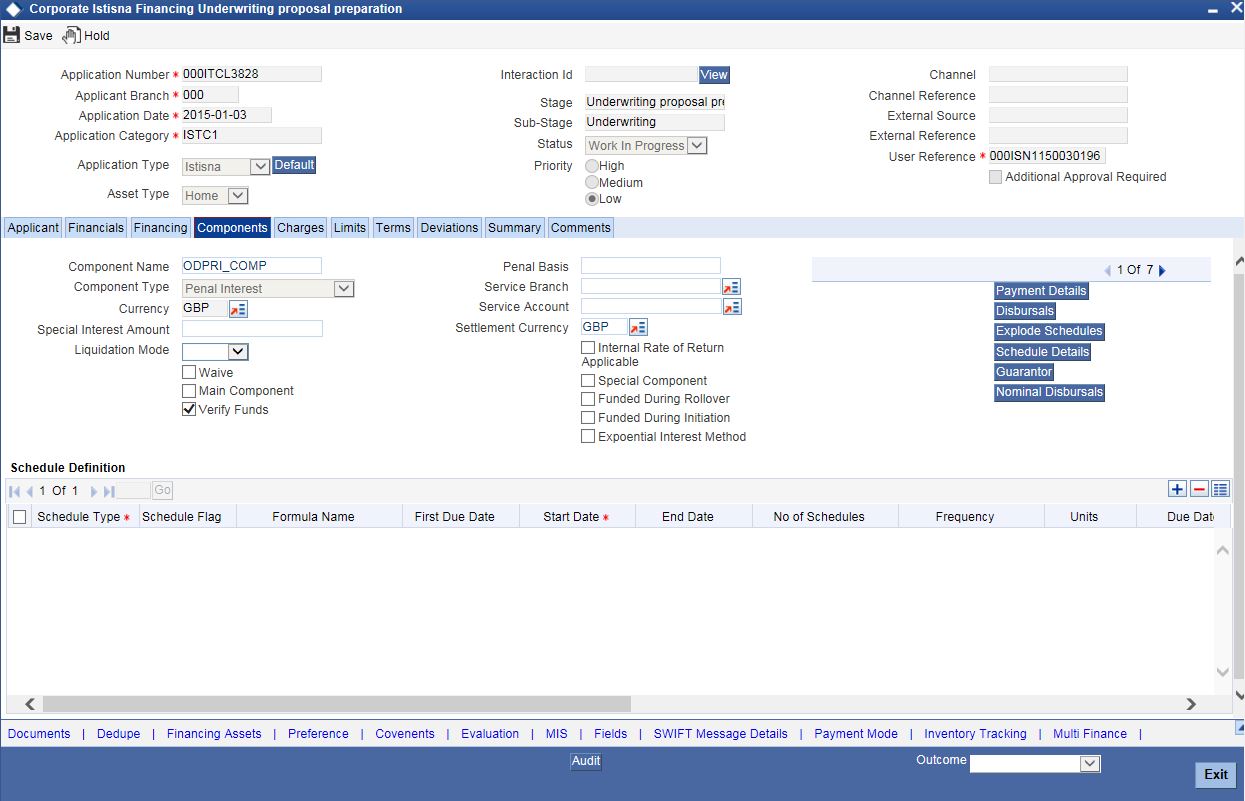
Component Name
The system displays the component name.
Component Type
Select the component type from the adjoining drop-down list. The list displays the following values:
- Formula with schedule (Component Type - Interest)
- Formula without schedule (Charge)
- Penal Interest
- Prepayment Penalty
- Discount
- Schedule without formula (Principal)
- No schedule No formula (Ad Hoc Charges)
- Penalty Charges
Currency
The system displays the currency code.
Special Interest Amount
The system displays the special interest amount.
Liquidation Mode
The system defaults the mode of liquidation from the product level. However you can modify the same to indicate the mode of liquidation of the component from the drop-down list. The following options are available for selection:
- Auto
- Manual
Waive
Select this option to waive the component for the account.
Main Component
Check this box to indicate that the specified component should be main component.
Verify Funds
Check this box to verify funds.
Penal Basis
The system displays the penal basis.
Service Branch
The system displays the service branch.
Service Account
The system displays the service account.
Settlement Currency
The system displays the settlement currency.
Internal Rate of Return Applicable
Check this box if internal rate of return is applicable.
Special Component
Check this box if the component is a special Interest type. This implies that the computed value of the component can be overridden with the entered value.
Funded During Rollover
Check this box if the component can be funded during the rollover process.
Funded During Initiation
Check this box if the component can be funded during the INIT event.
Exponential Interest Method
Check this box to provide restrictions for exponential finances.If you check this, the system validates the following for exponential interest method calculation:
- COMPOUND_VALUE SDE is maintained in book formula
- Compound days is maintained as one.
Schedule Definition
Schedule Type
Select the type of schedule from the drop-down list. Schedule can be a payment, a disbursement or a rate revision schedule.
Schedule Flag
Select the option for the Schedule flag from the option list. The options are Normal or Moratorium.
You can select the option Moratorium if there are no scheduled repayments for the component for the Moratorium period. However the component is accrued for a certain Moratorium period.
Formula Name
Specify the formula name. Alternatively, you can select the formula name from the option list. The list displays all valid formula names.
First Due Date
Select the first due date from the adjoining calendar.
Start Date
Select the start date from the adjoining calendar.
End Date
Select the end date from the adjoining calendar.
No of Schedules
Specify the number of schedules.
Frequency
Specify the frequency.
Units
Select the units from the drop-down list.
Due Date On
Select the due date from the adjoining calendar.
Amount
Specify the amount.
EMI Amount
Specify the EMI amount.
Compound Days
Specify the compound days.
Compound Months
Specify the compound months.
Compound Years
Specify the compound years.
Days in Month
Select the number of days that would constitute a month for calculation from the drop-down list. The list displays the following values:
- Actual: The actual number of days in a month is taken
- 30(Euro): Thirty days is considered for all months including February irrespective of leap year or not
- 30(US): Thirty days is considered for all months except February where the actual number of days is considered
- Working Days: Working days in a month is considered
Days in Years
Select the number of days that would constitute a year for calculation from the drop-down list. The list displays the following values:
- 252: Number of days in a year is taken as 252, which is the number of working days
- 360: Number of days in a year is taken as 360 irrespective of actual number of calender days
- 365: Number of days in a year is taken as 365 for leap as well as non leap year
- Actual: Actual number of days in a year is taken for interest calculation which is 366 for leap year and 365 for non leap year
Waive
Select this option to specify if you need to allow a waiver of the component payments for the schedule.
Capitalize
Select this option if the schedule amounts are to be capitalized.
Click ‘Payment Details’ button to specify the payment details.
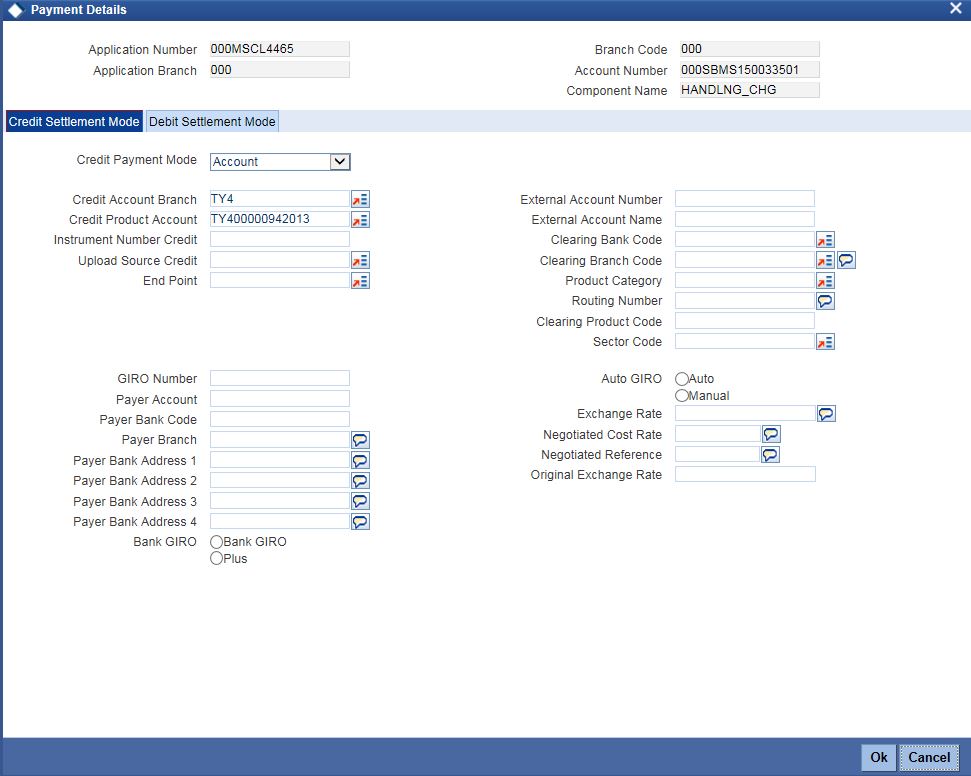
Click ‘Credit Settlement Mode’ tab to specify the credit settlement mode details.
Application Number
The system displays the application number.
Application Branch
The system displays the application branch.
Branch Code
The system displays the branch code.
Account Number
The system displays the account number.
Component Name
The system displays the component name.
2.4.6 Credit Settlement Mode
Credit Payment Mode
Select the credit settlement mode from the drop-down list. The options are as follows:
- Account
- Credit Card
- Clearing
- Debit Card
- External Account
- Electronic Pay Order
- GIRO
- Internal Cheque Instrument
- Cash/Teller
Credit Account Branch
Specify the credit account branch. Alternatively, select the credit account branch from the option list. The displays the valid branch codes maintained in the system.
Credit Product Account
Specify the credit product account. Alternatively, select the credit product account from the option list. The displays the valid product accounts maintained in the system.
Instrument Number
Specify the instrument number.
Upload Source Credit
Specify the upload source credit details. Alternatively, select the source credit details from the option list. The displays the valid credit details maintained in the system.
End Point
Specify the end point. Alternatively, select the end point from the option list. The displays the valid end points maintained in the system.
GIRO Number
Specify the GIRO number.
Payer Account
Specify the payer account.
Payer Bank Code
Specify the payer bank code.
Payer Branch
Specify the payer branch.
Payer Bank Address 1
Specify the payer bank address 1.
Payer Bank Address 2
Specify the payer bank address 2.
Payer Bank Address 3
Specify the payer bank address 3.
Payer Bank Address 4
Specify the payer bank address 4.
Bank GIRO
Select the bank GIRO to be maintained. The options are as follows:
- Bank GIRO
- Plus
External Account Number
Specify the external account number.
External Account Name
The system displays the external account name.
Clearing Bank Code
Specify the clearing bank code. Alternatively, select the clearing bank code from the option list. The displays the valid clearing bank code maintained in the system.
Clearing Branch Code
Specify the clearing branch code. Alternatively, select the clearing branch code from the option list. The displays the valid branch codes maintained in the system.
Product Category
Specify the product category. Alternatively, select the product category from the option list. The displays the valid product categories maintained in the system.
Routing Number
Specify the routing number.
Clearing Product Code
Specify the clearing product code.
Sector Code
Specify the sector code. Alternatively, select the sector code from the option list. The displays the valid sector codes maintained in the system.
Auto GIRO
Select the auto GIRO details. The options are as follows:
- Auto
- Manual
Exchange Rate
Specify the exchange rate prevailing.
Negotiated Cost Rate
Specify the negotiated cost rate.
Negotiated Reference
Specify the negotiated reference number.
Original Exchange Rate
Specify the original exchange rate.
2.4.6.1 Debit Settlement Mode Tab
Click ‘Debit Settlement Mode’ tab to specify the credit settlement mode details.

Specify the following details:
Debit Payment Mode
Select the debit settlement mode from the drop-down list. The options are as follows:
- Account
- Credit Card
- Clearing
- Debit Card
- External Account
- Electronic Pay Order
- GIRO
- Internal Cheque Instrument
- Cash/Teller
- PDC
Debit Account Branch
Specify the debit account branch. Alternatively, select the debit account branch from the option list. The displays the valid branch codes maintained in the system.
Debit Product Account
Specify the debit product account. Alternatively, select the debit product account from the option list. The displays the valid product accounts maintained in the system.
Card Number
Specify the card number.
Instrument Number Debit
Specify the instrument number debit.
Upload Source Debit
Specify the upload source debit details. Alternatively, select the source debit details from the option list. The displays the valid debit details maintained in the system.
End Point
Specify the end point. Alternatively, select the end point from the option list. The displays the valid end points maintained in the system.
Payer Account
Specify the payer account.
Payer Bank Code
Specify the payer bank code.
Payer Branch
Specify the payer branch.
Payer Bank Address 1
Specify the payer bank address 1.
Payer Bank Address 2
Specify the payer bank address 2.
Payer Bank Address 3
Specify the payer bank address 3.
Payer Bank Address 4
Specify the payer bank address 4.
GIRO Number
Specify the GIRO number.
Bank GIRO
Select the bank GIRO to be maintained. The options are as follows:
- Bank GIRO
- Plus
External Account Number
Specify the external account number.
External Account Name
The system displays the external account name.
Clearing Bank Code
Specify the clearing bank code. Alternatively, select the clearing bank code from the option list. The displays the valid clearing bank code maintained in the system.
Clearing Branch Code
Specify the clearing branch code. Alternatively, select the clearing branch code from the option list. The displays the valid branch codes maintained in the system.
Product Category
Specify the product category. Alternatively, select the product category from the option list. The displays the valid product categories maintained in the system.
Routing Number
Specify the routing number.
Clearing Product Code
Specify the clearing product code.
Sector Code
Specify the sector code. Alternatively, select the sector code from the option list. The displays the valid sector codes maintained in the system.
Auto GIRO
Select the auto GIRO details. The options are as follows:
- Auto
- Manual
Exchange Rate
Specify the exchange rate prevailing.
Negotiated Cost Rate
Specify the negotiated cost rate.
Negotiated Reference
Specify the negotiated reference number.
Original Exchange Rate
Specify the original exchange rate.
Click ‘Schedule Details’ button to view the schedule details.
2.4.6.2 Payments Schedules Tab

The system displays the following details.
- Application Number
- Application Branch
- Component Name
- Account
- Account Branch
- Component Currency
Schedule Details
The system displays the Payment schedule details.
- Schedules
- Schedule Date
- Pay By Date
- Amount Settled
- Amount Due
- EMI Amount
- Amortize Principal
- Accrued Amount
- Capitalized
- Waive
2.4.6.3 Disbursement Schedules Tab
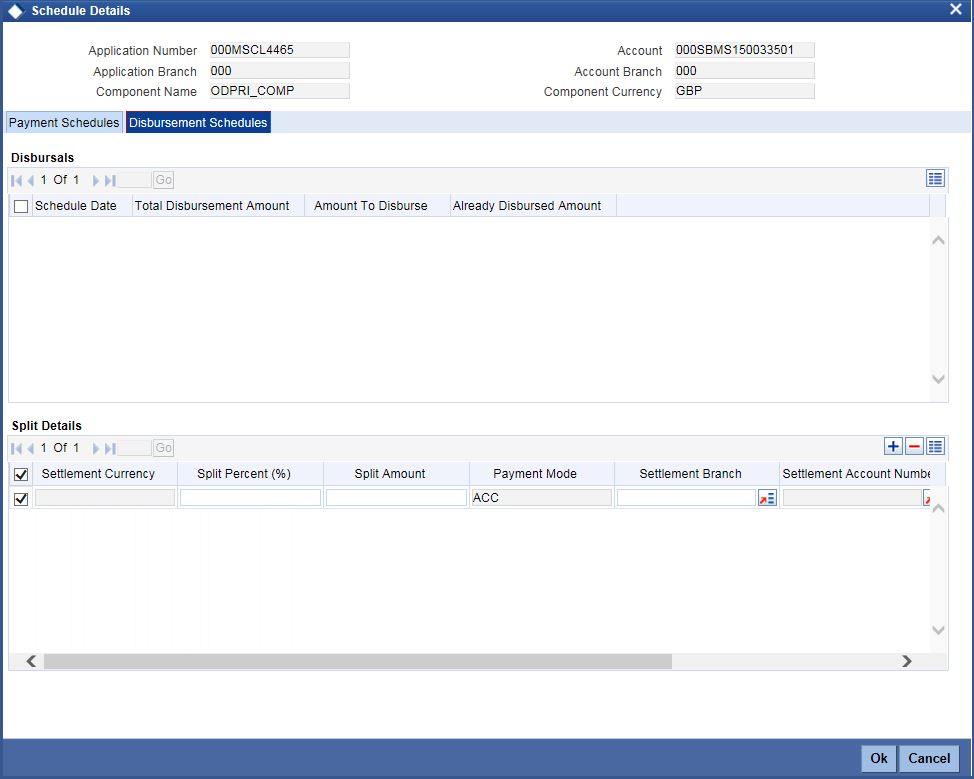
Disbursals
The system displays the Disbursement schedule details.
- Schedule Date
- Total Disbursement Amount
- Amount to Disburse
- Already Disbursed Amount
- Split Details
- Settlement Currency
- Split Percent (%)
- Split Amount
- Payment Mode
- Settlement Branch
- Settlement Account Number
- Account Description
- Customer
2.4.6.4 Guarantor Button
Click ‘Guarantor’ button to specify the guarantor details.
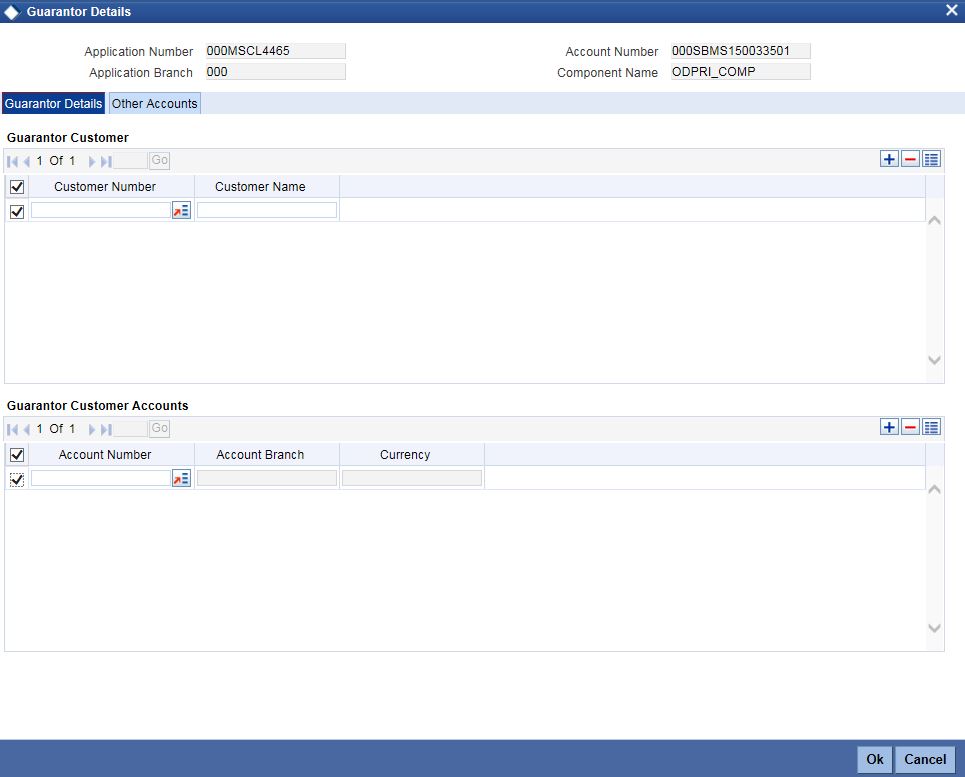
Specify the following details.
Application Number
The system displays the application number.
Application Branch
The system displays the application branch.
Account Number
The system displays the account number.
Component Name
The system displays the component name.
Guarantor Details
Guarantor Customer
Customer Number
Specify the customer number of the guarantor customer. Alternatively, you can select the customer number from the option list. The list displays the valid customer number maintained in the system.
Customer Name
The system displays the name of the guarantor customer.
Guarantor Customer Accounts
Account Number
Specify the account number of the guarantor customer. Alternatively, you can select the account number from the option list. The list displays the valid account number maintained in the system.
Account Branch
The system displays the account branch of the guarantor customer.
Currency
The system displays the currency of the guarantor customer.
Other Accounts
Click ‘Other Accounts’ tab to specify other details of the account.
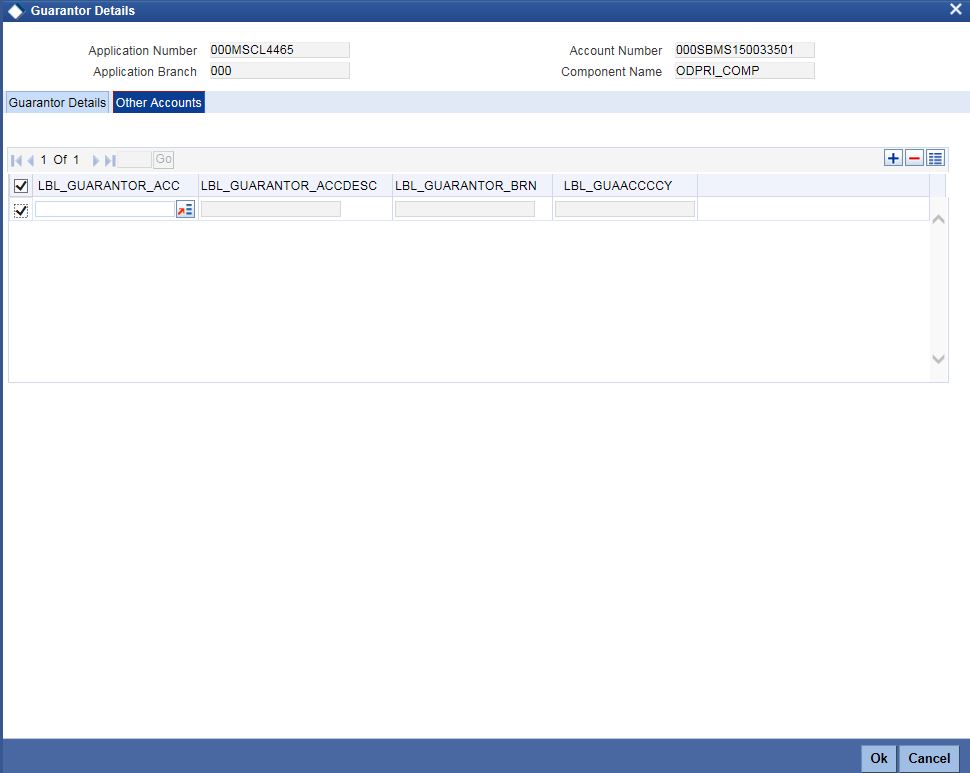
Specify the following details:
Guarantor Account
Specify the guarantor account. Alternatively, you can select the guarantor account number from the option list. The list displays the valid guarantor account numbers maintained in the system.
Guarantor Account Description
The system displays the description of the guarantor account.
Guarantor Branch
The system displays the branch code of the guarantor.
Guarantor Account Currency
The system displays the account currency of the guarantor.
2.4.6.5 Nominal Disbursals button
Click ‘Nominal Disbursal’ button to specify the nominal disbursal details.
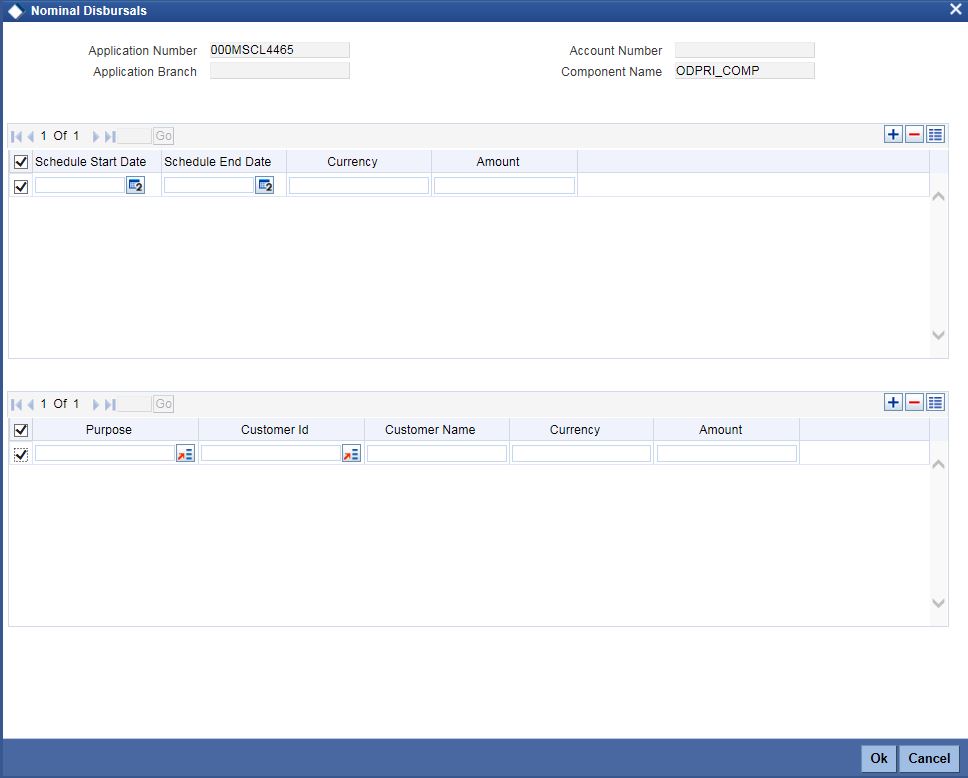
Specify the following details:
Application Number
The system displays the application
Application Branch
The system displays the application branch.
Account Number
The system displays the account number.
Component Name
The system displays the components name.
Schedule Start Date
Specify the start date of the Disbursement Schedule from the adjoining calendar.
Schedule End Date
Specify the end date of the Disbursement Schedule from the adjoining calendar.
Currency
Specify the currency code for the disbursement.
Amount
Specify the amount to be financed for disbursal schedules
Purpose
Specify the purpose of disbursement from the option list. Alternatively, you can select the purpose from the option list. The list displays the different types of purpose maintained in the system.
Customer ID
Specify the customer ID for each contractor. Alternatively, you can select the customer ID from the option list. The list displays the valid customer IDs maintained in the system.
Customer Name
The system displays the customer name.
Currency
Specify the currency code for the customer ID selected.
Amount
Specify the amount to be disbursed against the customer ID for the purpose mentioned.
2.4.7 Charges Tab
Click ‘Charges’ tab to maintain charge details.
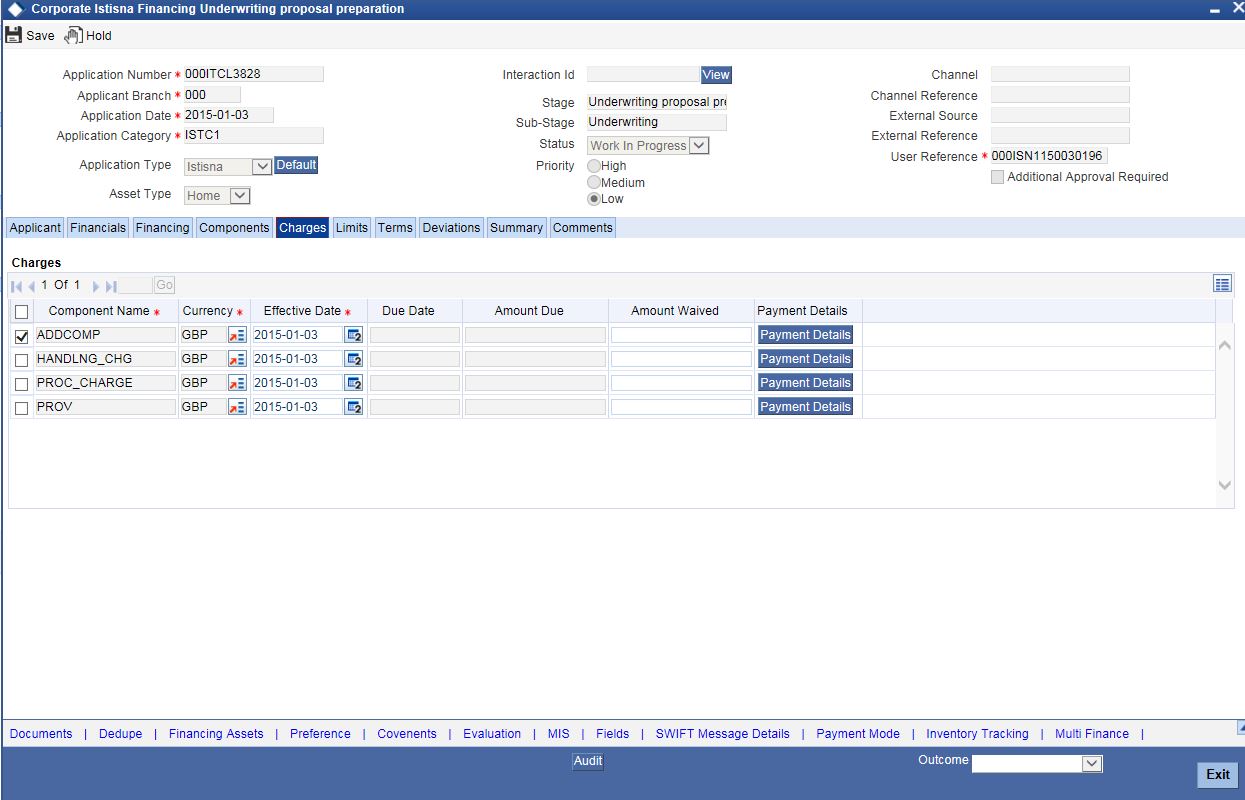
Charges
Component Name
The system displays the component name.
Currency
The system displays the currency.
Effective Date
Select the effective date from the adjoining calendar.
Due Date
The system displays the due date.
Amount Due
The system displays the amount due.
Amount Waived
The system displayed the amount waived.
Click ‘Payment Details’ button to specify the payment details.
Click ‘Credit Settlement Mode’ tab to specify the credit settlement mode details.
Application Number
The system displays the application number.
Application Branch
The system displays the application branch.
Branch Code
The system displays the branch code.
Account Number
The system displays the account number.
Component Name
The system displays the component name.
2.4.8 Credit Settlement Mode
Credit Payment Mode
Select the credit settlement mode from the drop-down list. The options are as follows:
- Account
- Credit Card
- Clearing
- Debit Card
- External Account
- Electronic Pay Order
- GIRO
- Internal Cheque Instrument
- Cash/Teller
Credit Account Branch
Specify the credit account branch. Alternatively, select the credit account branch from the option list. The displays the valid branch codes maintained in the system.
Credit Product Account
Specify the credit product account. Alternatively, select the credit product account from the option list. The displays the valid product accounts maintained in the system.
Instrument Number
Specify the instrument number.
Upload Source Credit
Specify the upload source credit details. Alternatively, select the source credit details from the option list. The displays the valid credit details maintained in the system.
End Point
Specify the end point. Alternatively, select the end point from the option list. The displays the valid end points maintained in the system.
GIRO Number
Specify the GIRO number.
Payer Account
Specify the payer account.
Payer Bank Code
Specify the payer bank code.
Payer Branch
Specify the payer branch.
Payer Bank Address 1
Specify the payer bank address 1.
Payer Bank Address 2
Specify the payer bank address 2.
Payer Bank Address 3
Specify the payer bank address 3.
Payer Bank Address 4
Specify the payer bank address 4.
Bank GIRO
Select the bank GIRO to be maintained. The options are as follows:
- Bank GIRO
- Plus
External Account Number
Specify the external account number.
External Account Name
The system displays the external account name.
Clearing Bank Code
Specify the clearing bank code. Alternatively, select the clearing bank code from the option list. The displays the valid clearing bank code maintained in the system.
Clearing Branch Code
Specify the clearing branch code. Alternatively, select the clearing branch code from the option list. The displays the valid branch codes maintained in the system.
Product Category
Specify the product category. Alternatively, select the product category from the option list. The displays the valid product categories maintained in the system.
Routing Number
Specify the routing number.
Clearing Product Code
Specify the clearing product code.
Sector Code
Specify the sector code. Alternatively, select the sector code from the option list. The displays the valid sector codes maintained in the system.
Auto GIRO
Select the auto GIRO details. The options are as follows:
- Auto
- Manual
Exchange Rate
Specify the exchange rate prevailing.
Negotiated Cost Rate
Specify the negotiated cost rate.
Negotiated Reference
Specify the negotiated reference number.
Original Exchange Rate
Specify the original exchange rate.
2.4.8.1 Debit Settlement Mode Tab
Click ‘Debit Settlement Mode’ tab to specify the credit settlement mode details.
Specify the following details:
Debit Payment Mode
Select the debit settlement mode from the drop-down list. The options are as follows:
- Account
- Credit Card
- Clearing
- Debit Card
- External Account
- Electronic Pay Order
- GIRO
- Internal Cheque Instrument
- Cash/Teller
- PDC
Debit Account Branch
Specify the debit account branch. Alternatively, select the debit account branch from the option list. The displays the valid branch codes maintained in the system.
Debit Product Account
Specify the debit product account. Alternatively, select the debit product account from the option list. The displays the valid product accounts maintained in the system.
Card Number
Specify the card number.
Instrument Number Debit
Specify the instrument number debit.
Upload Source Debit
Specify the upload source debit details. Alternatively, select the source debit details from the option list. The displays the valid debit details maintained in the system.
End Point
Specify the end point. Alternatively, select the end point from the option list. The displays the valid end points maintained in the system.
Payer Account
Specify the payer account.
Payer Bank Code
Specify the payer bank code.
Payer Branch
Specify the payer branch.
Payer Bank Address 1
Specify the payer bank address 1.
Payer Bank Address 2
Specify the payer bank address 2.
Payer Bank Address 3
Specify the payer bank address 3.
Payer Bank Address 4
Specify the payer bank address 4.
GIRO Number
Specify the GIRO number.
Bank GIRO
Select the bank GIRO to be maintained. The options are as follows:
- Bank GIRO
- Plus
External Account Number
Specify the external account number.
External Account Name
The system displays the external account name.
Clearing Bank Code
Specify the clearing bank code. Alternatively, select the clearing bank code from the option list. The displays the valid clearing bank code maintained in the system.
Clearing Branch Code
Specify the clearing branch code. Alternatively, select the clearing branch code from the option list. The displays the valid branch codes maintained in the system.
Product Category
Specify the product category. Alternatively, select the product category from the option list. The displays the valid product categories maintained in the system.
Routing Number
Specify the routing number.
Clearing Product Code
Specify the clearing product code.
Sector Code
Specify the sector code. Alternatively, select the sector code from the option list. The displays the valid sector codes maintained in the system.
Auto GIRO
Select the auto GIRO details. The options are as follows:
- Auto
- Manual
Exchange Rate
Specify the exchange rate prevailing.
Negotiated Cost Rate
Specify the negotiated cost rate.
Negotiated Reference
Specify the negotiated reference number.
Original Exchange Rate
Specify the original exchange rate.
2.4.9 Limits Tab
Click ‘Limits’ tab to maintain limit details.
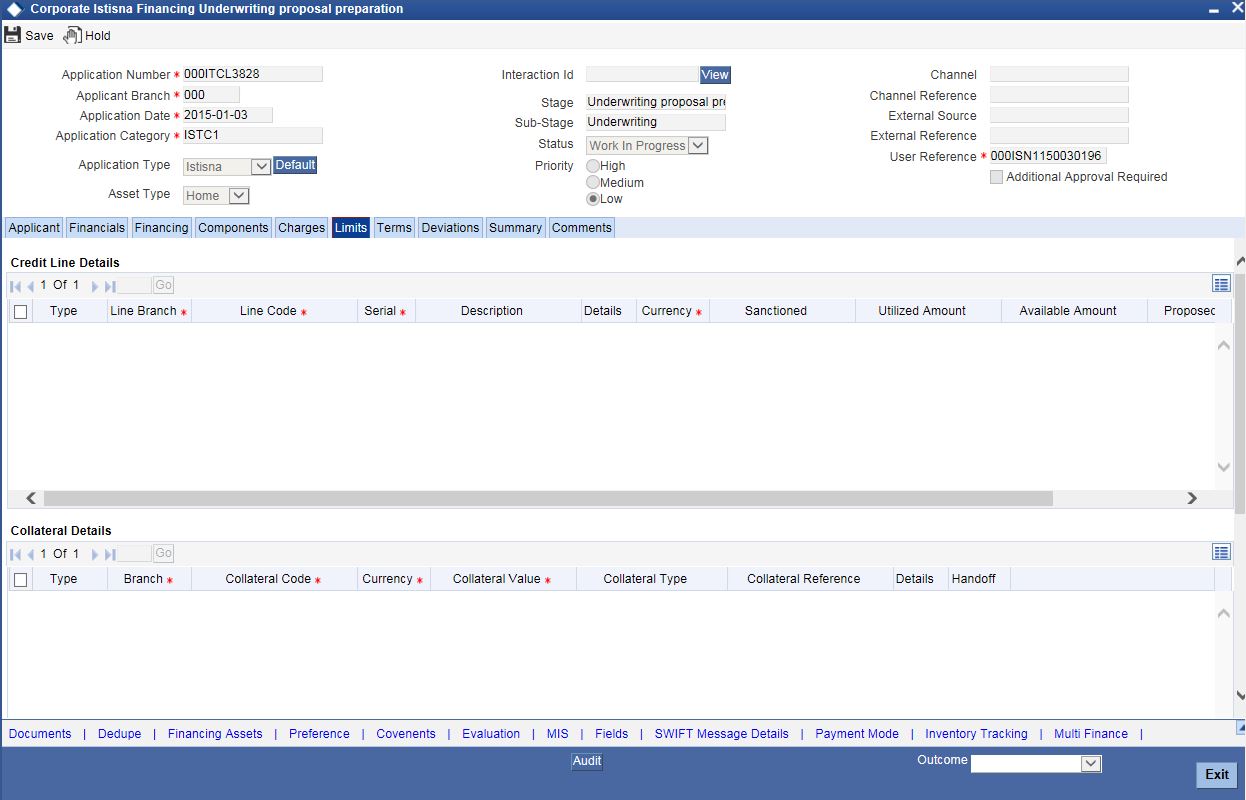
Credit Line Details
Type
Select the credit line type from the drop-down list. The list displays the following values:
- Existing - Select this option if the customer is an existing customer.
- New - Select this option if the customer is a new customer.
Line Branch
Specify the line branch. Alternatively, you can select the line branch from the option list. The list displays all valid line branches.
Line Code
Specify the line code. Alternatively, you can select the line code from the option list. The list displays all valid line codes.
Serial
Specify the line serial number.
Description
Give a brief description on the credit line.
Click details button to launch ‘Facility Details’ screen.
Currency
Specify the currency of the credit line. Alternatively, you can select the currency from the option list. The list displays all valid currency codes.
Sanctioned
Specify the sanctioned credit line.
Utilized Amount
Specify the utilized amount.
Available Amount
Specify the available amount.
Proposed Amount
Specify the proposed amount.
Handoff
Check this box to hand-off the modified details to the ELCM system. You should check this box for new facilities created.
Collateral Details
Type
Select the collateral type from the drop-down list. The list displays the following values:
- Existing - Select this option if the customer is an existing customer.
- New - Select this option if the customer is a new customer.
Branch
Specify the line branch. Alternatively, you can select the line branch from the option list. The list displays all valid line branches.
Collateral Code
Specify the collateral code. Alternatively, you can select the collateral code from the option list. The list displays all valid collateral codes.
Currency
Specify the currency of the credit line. Alternatively, you can select the currency from the option list. The list displays all valid currency codes.
Collateral Value
Specify the value of the collateral.
Collateral Type
Specify the collateral type.
Collateral Reference
Specify the collateral reference.
Click ‘Details’ button to launch ‘Collateral Details’ screen.
Handoff
Check this box to hand-off the modified details to the ELCM system. You should check this box for new collateral created.
Financial Linkage
Utilization Order
Specify the utilization order.
Linkage Type
Select a type of linkage to which you need to link the specified account from the adjoining drop-down list. This list displays the following values:
- Collateral – Select if you need to link the account to existing collateral.
- Pool – Select if you need to link the account to collateral pool.
- Facility – Select if you need to link the account to a facility.
- Commitment - Select if you need to link the account to a commitment.
Branch
Specify the branch code of the customer. Alternatively, you can select the branch code from the option list. The list displays all valid branch codes.
Linked Reference ID
Specify the linked reference ID. Alternatively, you can select the linked reference ID from the option list. The list displays all valid reference IDs.
Currency
Specify the currency of the credit line. Alternatively, you can select the currency from the option list. The list displays all valid currency codes.
Limit Amount
Specify the limit amount.
Linkage Amount
Specify the linkage amount.
Linkage (%)
Specify the linkage percentage.
For details on Collaterals, refer to the section ‘Collateral Maintenance’ in the chapter 'Limits and Collaterals' in Limits and Collateral Management User Manual.
2.4.10 Asset Details Tab
Click Asset Details tab to view the details of the asset.

Specify the following details:
Finance Currency
The system displays the finance currency.
Fixed Asset Product
The system displays the fixed asset product.
Status
Specify the status of the asset.
Asset Category
Specify the asset category. Alternatively, you can select the asset category from the option list. The list displays the asset categories maintained in the system
Category Description
The system displays the asset category description.
Location
Specify the location of the asset.
Location Description
The system displays the description of the location of the asset.
Booking Date
Specify the date of booking from the adjoining calendar.
Capitalization Date
Specify the capitalization date from the adjoining calendar.
Fixed Asset Contract Reference
Specify the fixed asset contract reference.
Fixed Asset User Reference
Specify the fixed asset user reference.
2.4.11 Hamish Jiddayah Tab
Click ‘Hamish Jiddayah’ tab to specify the Hamish Jiddayah details.
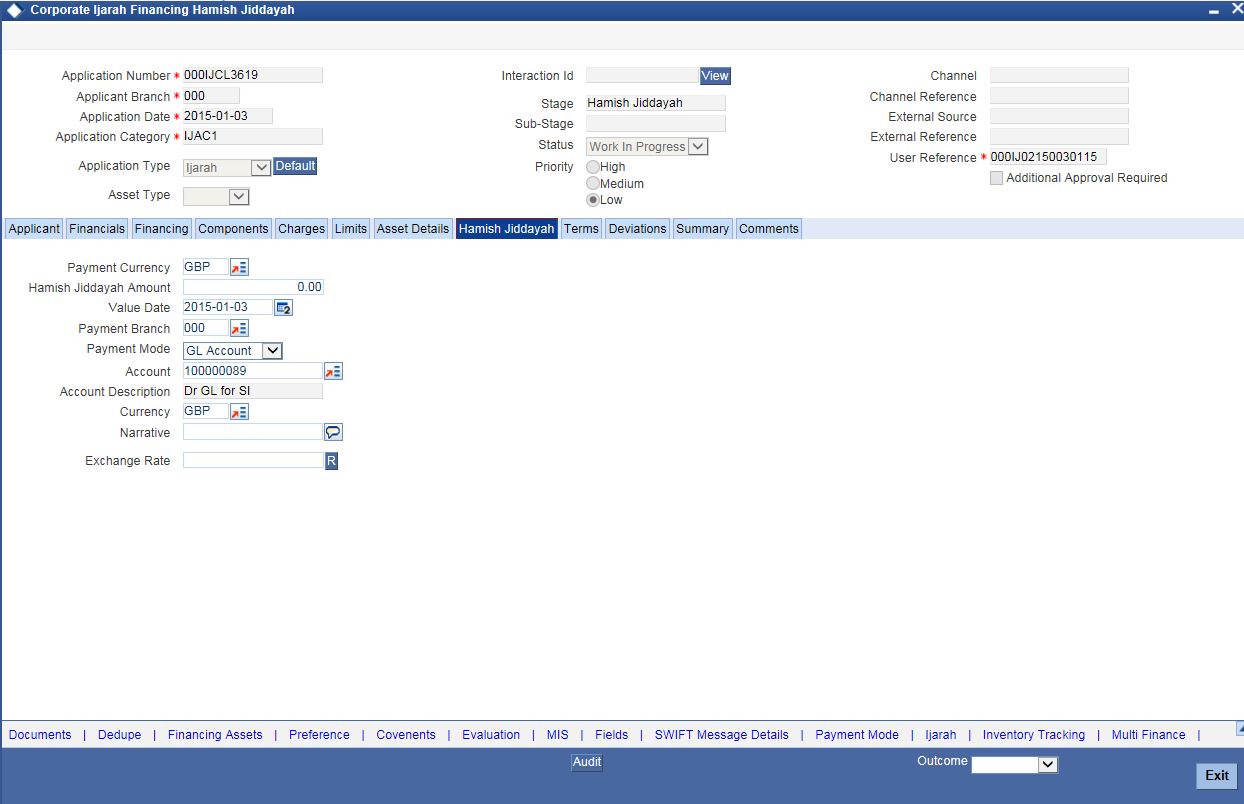
Specify the following details:
Payment Currency
Specify the payment currency. Alternatively, you can select the payment currency from the option list. The list displays the valid currency codes maintained in the system.
Hamish Jiddayah Amount
Specify the Hamish Jiddayah amount.
Value Date
Specify the value date from the adjoining calendar.
Payment Branch
Specify the payment branch. Alternatively, you can select the payment branch from the option list. The list displays the valid payment branch maintained in the system.
Payment Mode
Select the payment mode from the drop-down list. The options are as follows:
- GL Account
- Account
- Own Account
Account
Specify the account number from the drop-down list. Alternatively, you can select the account number from the option list. The list displays the valid account number maintained in the system.
Account Description
The system displays the account description.
Currency
Specify the currency code. Alternatively, you can select the currency from the option list. The list displays the valid currency codes maintained in the system.
Narrative
Specify remarks if any.
Exchange Rate
Specify the exchange rate.
2.4.12 Terms Tab
Click ‘Terms’ tab to maintain terms details. You can also maintain ‘Terms’ for the category in ORDCTERM. The system defaults these terms on click of ‘Default’ button.
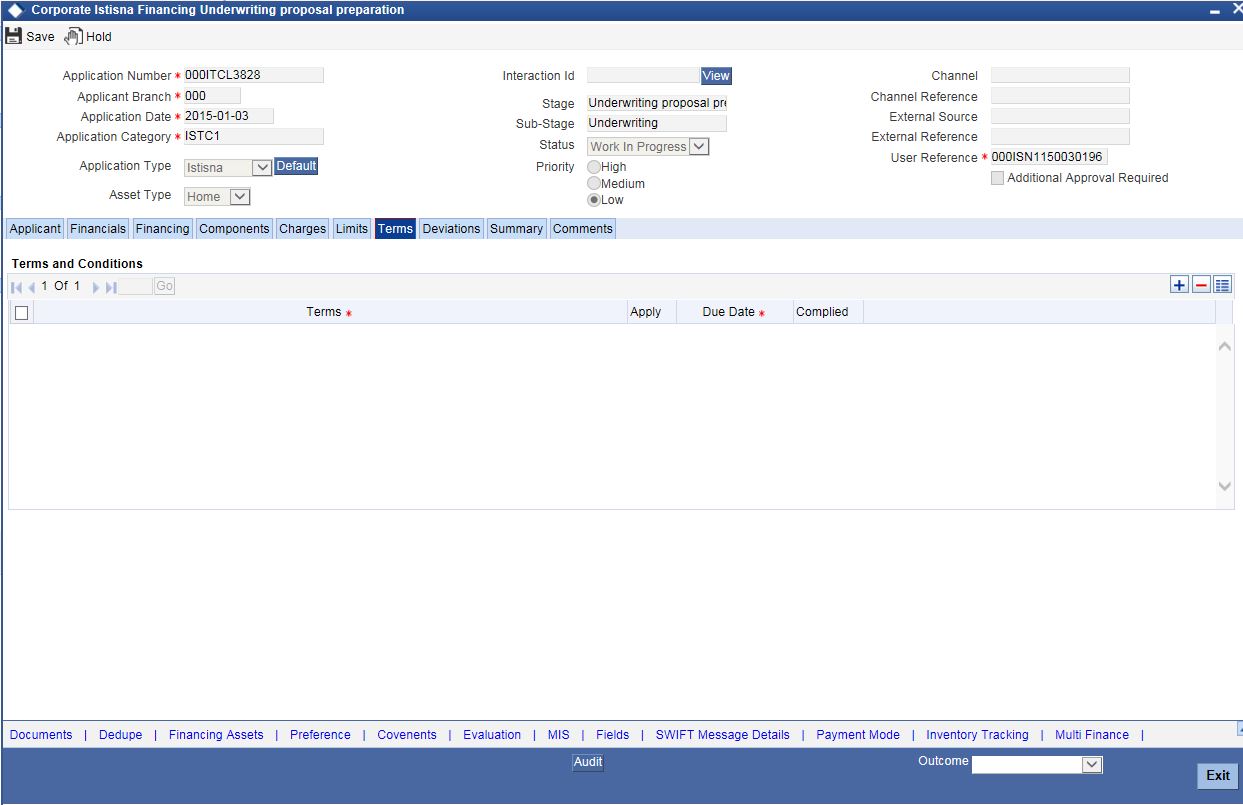
Terms and Conditions
Terms
Specify the terms and conditions of the finance creation.
Apply
Check this box to apply the terms to finance application.
Due Date
Select the date when the terms will be expired from the adjoining calendar.
Complied
Check this box if you comply with the terms.
2.4.13 Deviations Tab
Click ‘Deviations’ tab to view deviation details.
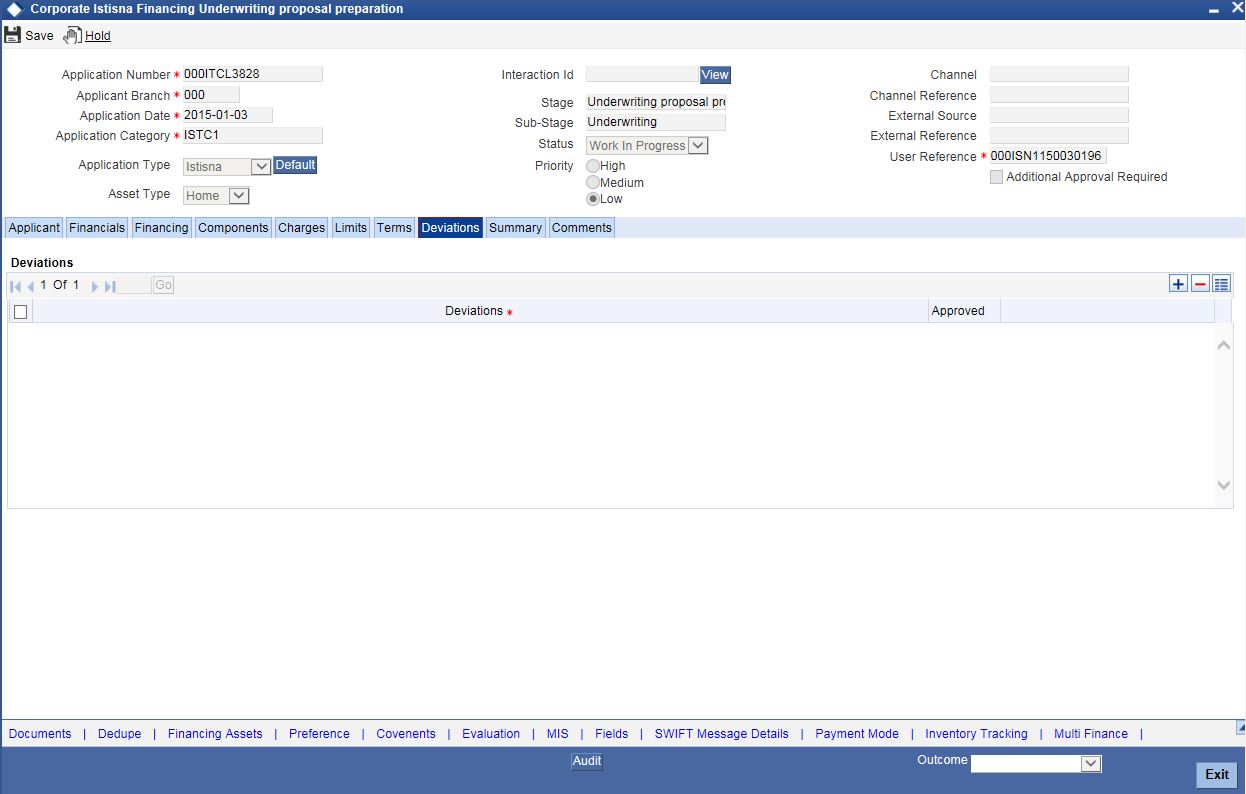
Deviations
Specify the deviations.
Approved
Check this box if the deviations are approved.
2.4.14 Summary Tab
Click ‘Summary’ tab to view summary details.
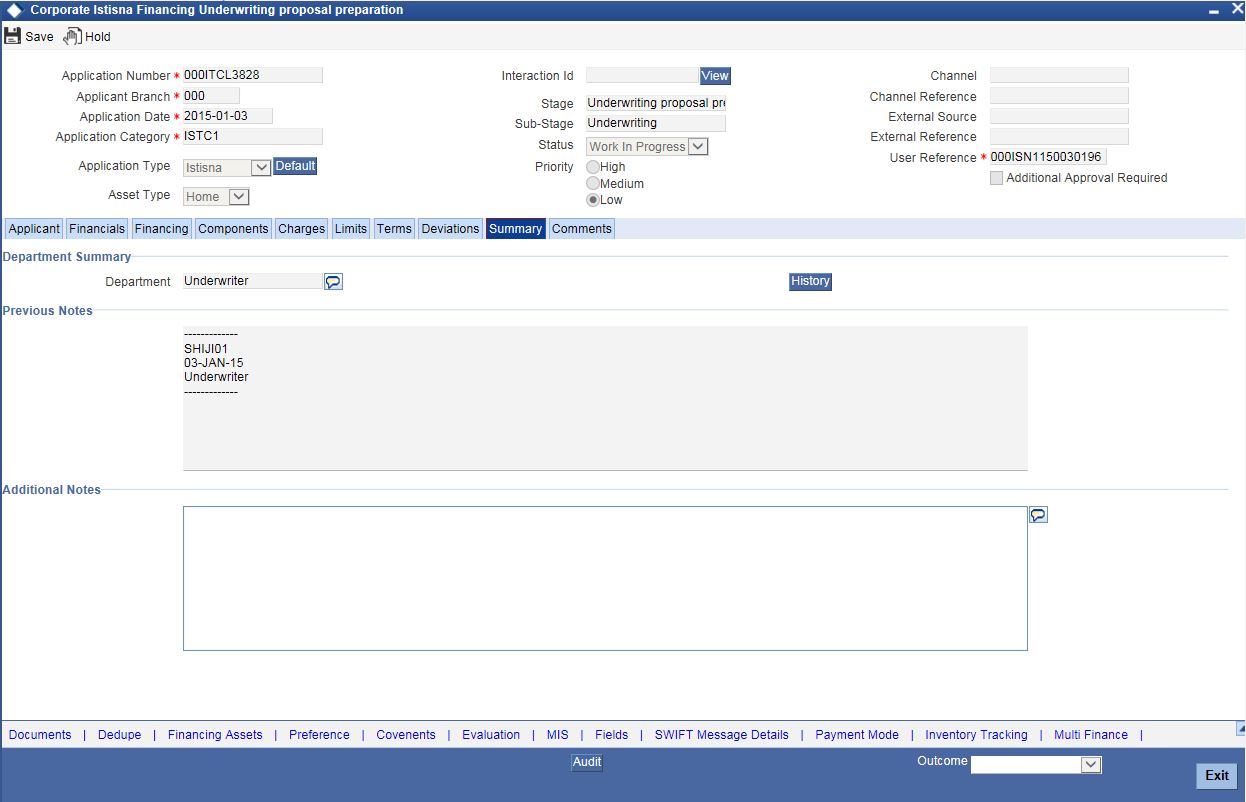
Department Summary
Department
Specify the name of the department.
Previous Notes
The system defaults the previous department notes. The system displays any comments given in any of the previous stages by the same department.
For example, when RM initiates the application, the comments may be provided in the Additional notes section. When the application moves to ‘Follow up’ stage or any stage that has to be proceeded by the RM users, the system displays the comments given in the first stage.
Additional Notes
Specify additional department notes.
Click ‘History’ button, to invoke the ‘Department Wise Summary’ screen. The system generates a report of the comments given in all previous stages regardless of the department.
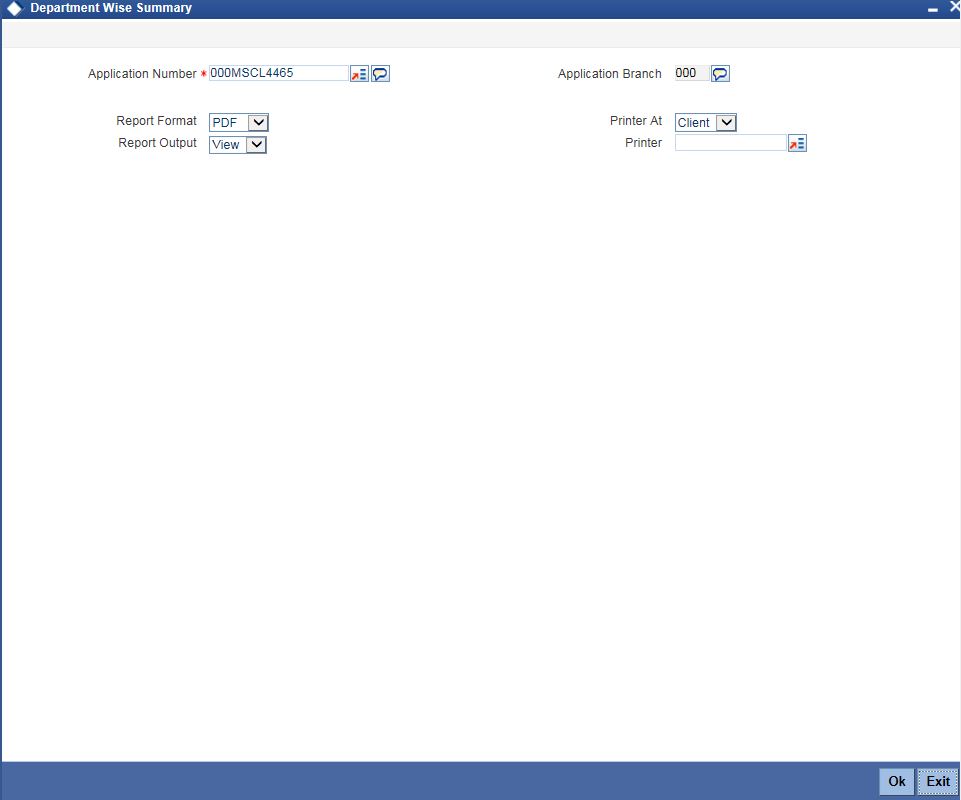
Specify the following details.
Application Number
Specify the application number of the transaction. Alternatively, you can select the application number from the option list. The list displays all the valid application numbers maintained in the system.
Application Branch
The system displays the application branch code.
Report Format
Select the format in which you need to generate the report from the drop-down list. The options are as follows:
- HTML – Select to generate report in HTML format.
- RTF – Select to generate report in RTF format.
- PDF – Select to generate report in PDF format.
- EXCEL – Select to generate report in EXCEL format.
Report Output
Select the report output in which you need to generate the report from the drop-down list. The options are as follows:
- Print – Select to print the report.
- View – Select to print the report.
- Spool – Select to spool the report to a specified folder so that you can print it later.
Printer At
Select location where you wish to print the report from the drop-down list. The options are as follows:
- Client – Select if you need to print at the client location.
- Server – Select if you need to print at the server location
Printer
Specify the printer from which the report has to be printed. Alternatively, you can select the printer from the option list. The list displays all the valid printers maintained in the system.
2.4.15 Comments Tab
Click ‘Comments’ tab to view comment details.

Previous Comments
The system displays the previous stage comments.
Additional Comments
Specify the additional comments in the current stage, if any.
To view history of remarks updated during a transaction. Click ‘Remarks’ button to view the remarks..
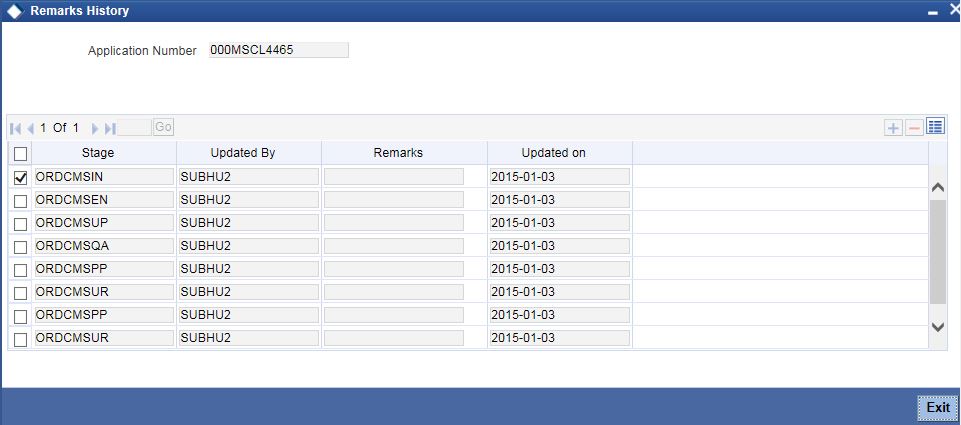
The system displays the following details:
- Application Number
- Stage
- Updated By
- Remarks
- Updated on
2.4.16 Documents Button
You can capture the finance related documents details through the ‘Documents Upload’ screen. Click ‘Documents’ button to invoke this screen.
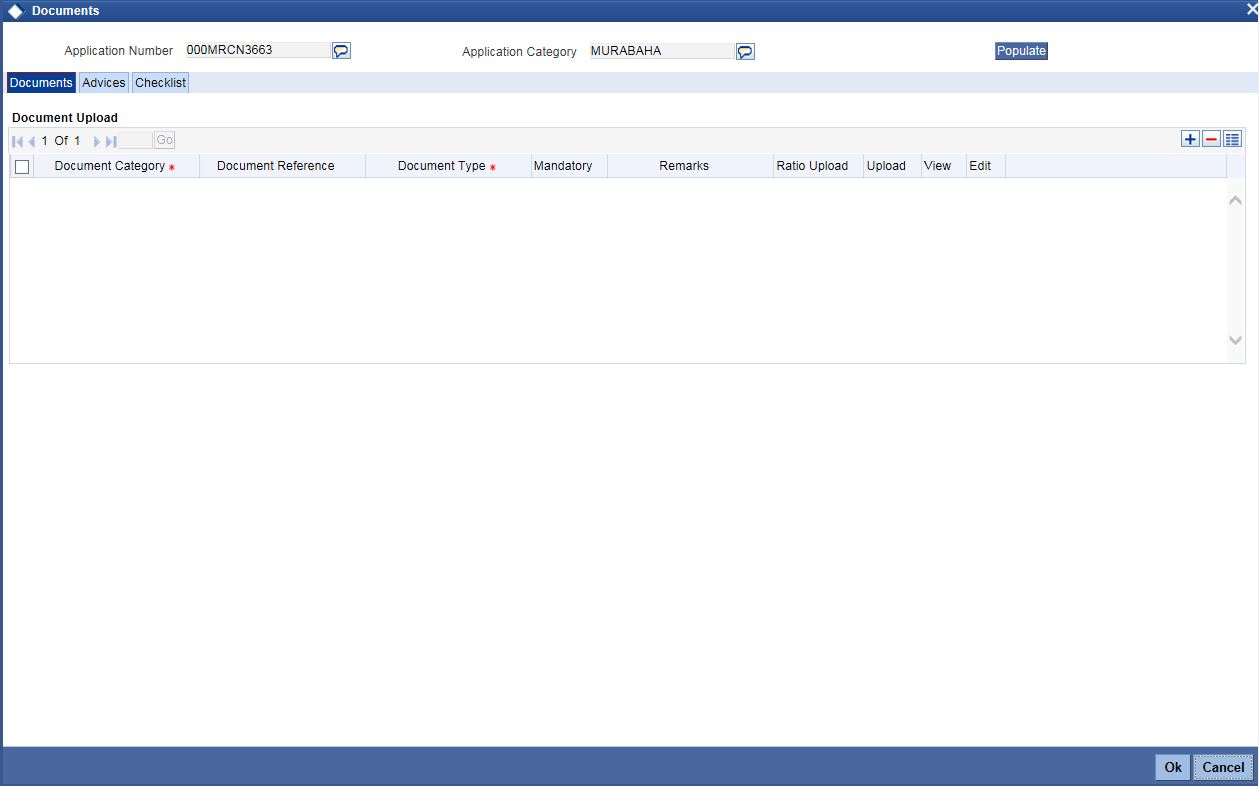
Application Number
The system displays the application number.
Application Category
The system displays the application category.
Documents
Document Category
Select the document category from the adjoining option list.
Document Reference
Specify the document reference number.
Document Type
Select the type of document.The adjoining option list displays all the document types maintained in the system. Select the appropriate one.
Mandatory
Check this box to indicate whether the document is mandatory.
Remarks
Specify remarks, if any.
Ratio Upload
Check this box if you require ratio upload.
Upload
Click ‘Upload’ button to open the ‘Document Upload’ sub-screen. The ‘Document Upload’ sub-screen is displayed below:

In the ‘Document Upload’ sub-screen, specify the corresponding document path and click the ‘Submit’ button. Once the document is uploaded through the upload button, the system displays the document reference number.
View
Click ‘View’ to view the document uploaded.
Edit
Click ‘Edit’ to edit the uploaded documents.
2.4.17 Advices Tab
Click ‘Advices’ tab in Documents screen to view advice details.
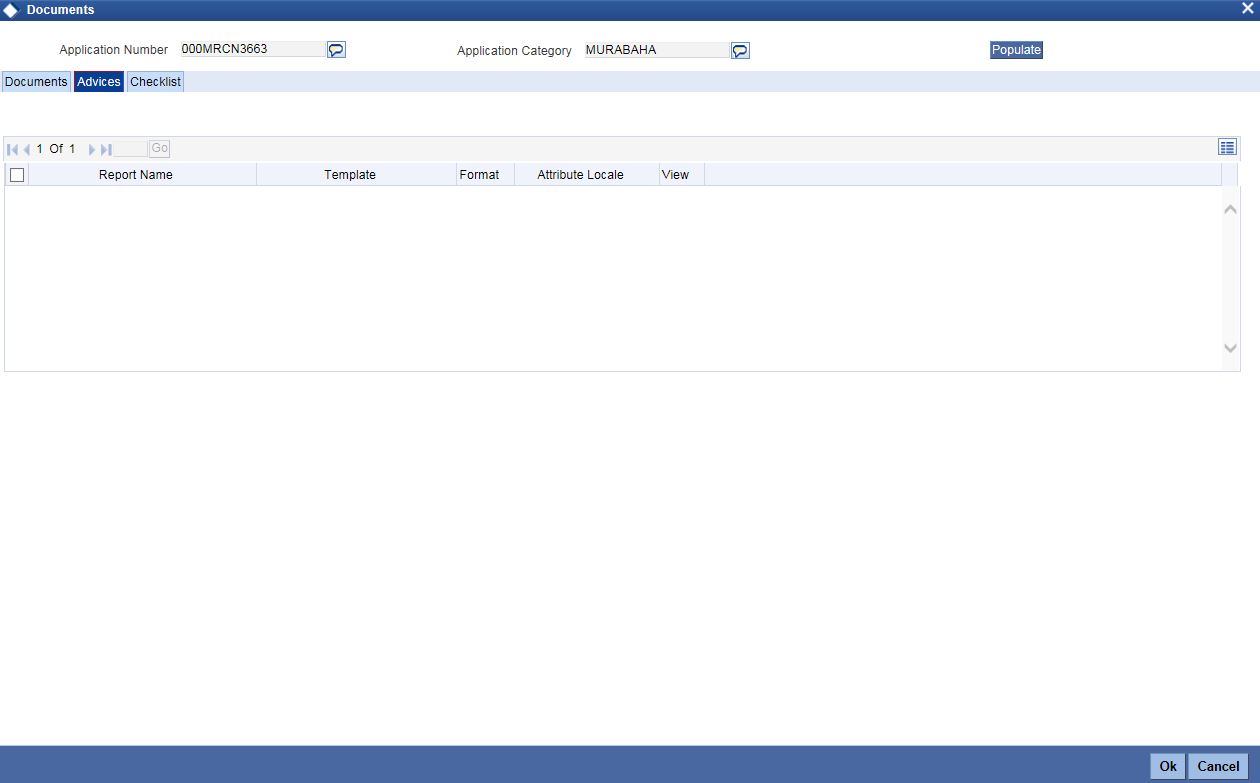
Report Name
The system displays the report name.
Template
The system displays the template.
View
Click ‘View’ to view the uploaded document.
2.4.18 Checklist Tab
Click ‘Checklist’ tab in Documents screen to view checklist details.
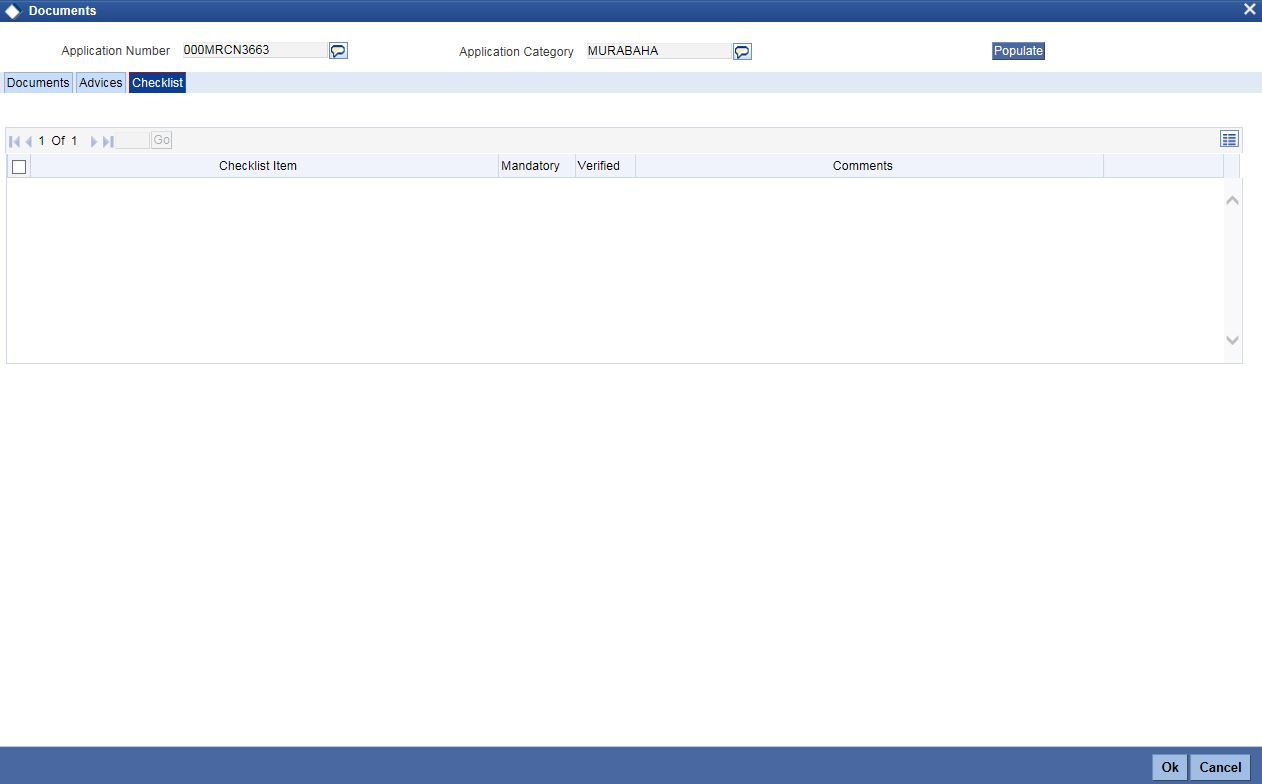
Checklist Item
The system displays the checklist details.
Mandatory
This field is updated based on the maintenances in Documents sub screen.
Verified
Check this box to confirm that the corresponding checklist is verified.
Comments
Specify comments, if any.
2.4.19 Dedupe Button
You can query the duplicate details in the Dedupe screen.
When a customer or prospect applies for a finance, the bank verifies if there are any duplicate applications initiated by customer or prospect in the system. If there are any pipeline applications that are suspected to be duplicate of an already initiated application or an existing finance contract, the system identifies and displays the existing transactions details in the Dedupe screen.
Click ‘Dedupe’ button to invoke Dedupe details screen.

2.4.19.1 Customers
Applications
In the Application section, the system checks for any duplicates in the applications that are already initiated from Origination.
Existing Customers
In the Existing Customers section, the system checks for any duplicate entry in the existing customer details based on First Name, Middle Name, Last Name, Short Name and National ID.
2.4.19.2 Contracts
Applications
In the Application section, the system checks for any duplicates in the finance applications that are already initiated from Origination.
Existing Customers
In the Existing Customers section, the system checks for any duplicate entry in the existing finance details based on Number of Instalments, Frequency, Frequency Unit, Requested Amount.
2.4.20 Financing Asset Button
You can capture the finance asset details based on the finance type. You can capture the finance type details from this Asset Details screen. You can invoke this screen by clicking ‘Financing Assets’ button

Application Category
The system displays the application category.
Application Number
The system displays the application number.
Application Type
Select the type of application from the drop-down list. The list displays the following values:
- Home
- Vehicle
- Personal
- Mortgage
- Others
Finance Branch
The system displays the finance branch.
Finance Reference
The system displays the finance reference number.
Finance Currency
The system displays the finance currency.
Customer Branch
The system displays the customer branch.
Customer ID
The system displays the customer ID.
Customer Name
The system displays the customer name.
For information on Home, Vehicle, Others, Mortgage and Valuation Tabs, refer to the section ‘Assets Button’ in the chapter 'Account Creation' in Retail Lending User Manual.
2.4.21 Insurance Tab
Click ‘Insurance’ tab to view the insurance details.

Policy Type
Select the type of policy from the drop-down list. The list displays the following values:
- Asset Insurance
- Life Insurance
Policy No
The system displays the policy number.
Insurer
The system displays the insurer.
Customer
The system displays the customer number.
Insurance Status
The system displays the insurance status.
Policy Currency
The system displays the policy currency.
Policy Amount
The system displays the policy amount.
Premium Amount
The system displays the premium amount.
Insurance Expiry
The system displays the insurance expiry date.
Policy Start Date
The system displays the policy start date.
Policy End Date
The system displays the policy end date.
Insured Name
The system displays the insured name.
Managed By
The system displays the name of the person who manages the policy.
Agent ID
The system displays the identification number of the agent.
Agent Name
The system displays the name of the agent.
Agent Contract No
The system displays the contract number of the agent.
Insurer Address 1,2,3,4
The system displays the address of the insurer.
2.4.22 Preference Button
You can capture finance preference details in the Finance Preference screen. Click ‘Preference’ button to invoke this screen.
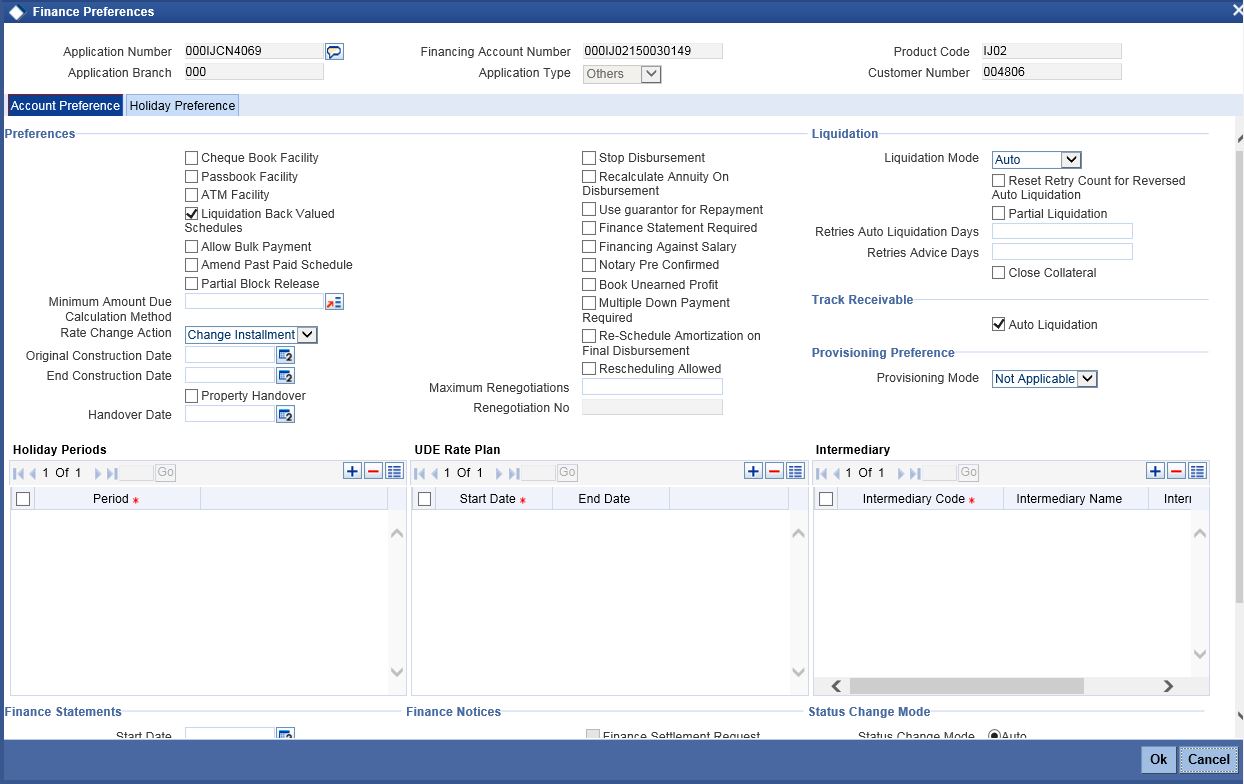
Specify the following details.
Cheque Book Facility
Check this box to issue a cheque book to the account holder.
Passbook Facility
Check this box to issue a passbook to the account holder.
ATM Facility
Check this box to allow account accessible for ATM operations.
Liquidation Back Valued Schedules
Check this box to liquidate all the schedules with a due date less than the system date on initiation of a back value dated finance.
Allow Bulk Payment
Check this box to allow bulk payment.
Amend Past Paid Schedule
Check this box to amend past paid schedule.
Partial Block Release
Check this box to release partial block.
Minimum Amount Due Calculation Method
Specify the minimum amount due calculation method. Alternatively, you can select the amount from the option list. The list displays the valid amount details maintained in the system.
Rate Change Action
Select the rate change action from the drop-down list. The options are as follows:
- Change Instalment
- Change Tenor
Original Construction Date
Specify the original construction date from the adjoining calendar.
End Construction Date
Specify the end construction date from the adjoining calendar.
Property Handover
Check this box to allow property handover.
Handover Date
Specify the date of handover from the adjoining calendar.
Stop Disbursement
Check this box to stop disbursement.
Recalculate Annuity On Disbursement
Check this box to recalculate annuity on disbursement.
Use guarantor for Repayment
Check this box to use guarantor for repayment.
Finance Statement Required
Check this box to indicate finance statement is required.
Financing Against Salary
Check this box to allow financing against salary.
Notary Pre Confirmed
Check this box to indicate notary pre confirmation.
Book Unearned Profit
Check this box to book unearned profit.
Multiple Down Payment Required
Check this box to indicate multiple down payment required.
Re-Schedule Amortization on Final Disbursement
Check this box to re-schedule amortization on final disbursement.
Rescheduling Allowed
Check this box to allow rescheduling.
Maximum Renegotiations
Specify the maximum renegotiations count.
Renegotiation No
The system displays the renegotiation number.
Liquidation
Liquidation Mode
Select the liquidation mode from the drop-down list. The options are as follows:
- Auto
- Manual
- Component
Reset Retry Count for Reversed Auto Liquidation
Check this box to allow to reset retry count for reversed auto liquidation.
Partial Liquidation
Check this box to allow partial liquidation.
Retries Auto Liquidation Days
Specify the retries auto liquidation days.
Retries Advice Days
Specify the retries advice days.
Close Collateral
Check this box to close collateral.
Track Receivable
Auto Liquidation
Check this box to allow auto liquidation.
Provisioning Preference
Provisioning Mode
Select the auto provisioning mode. The options are as follows:
- Auto
- Manual
- Not Applicable
Holiday Periods
Period
Specify the holiday period. Alternatively, you can select the period from the option list. The list displays the valid periods maintained in the system.
UDE Rate Plan
Start Date
Specify the start date of the UDE rate plan from the adjoining calendar.
End Date
Specify the end date of the UDE rate plan from the adjoining calendar.
Intermediary
Intermediary Code
Specify the intermediary code. Alternatively, you can select the code from the option list. The list displays the codes maintained in the system.
Intermediary Name
The system displays the intermediary name.
Intermediary Ratio
Specify the intermediary ratio.
Finance Statements
Start Date
Specify the start date of the finance statement.
Frequency
Select the frequency from the drop-down list. The options are as follows:
- Daily
- Monthly
- Quarterly
- Half Yearly
- Yearly
Frequency Units
Specify the frequency units.
Finance Notices
Finance Settlement Request
Check this box to allow finance settlement request.
Notice Date
Specify the notice date.
Expected Closure Date
Specify the expected closure date.
Status Change Mode
Status Change Mode
Select the status change mode. The options are as follows:
- Auto
- Manual
Grace Period
Customer Grace Period
Specify the customer grace period.
Frequency
Specify the grace period frequency of the customer.
Supplier Grace Period
Specify the supplier grace period.
Frequency
Specify the grace period frequency of the supplier.
Click ‘Holiday Preference’ tab to specify the holiday preferences.
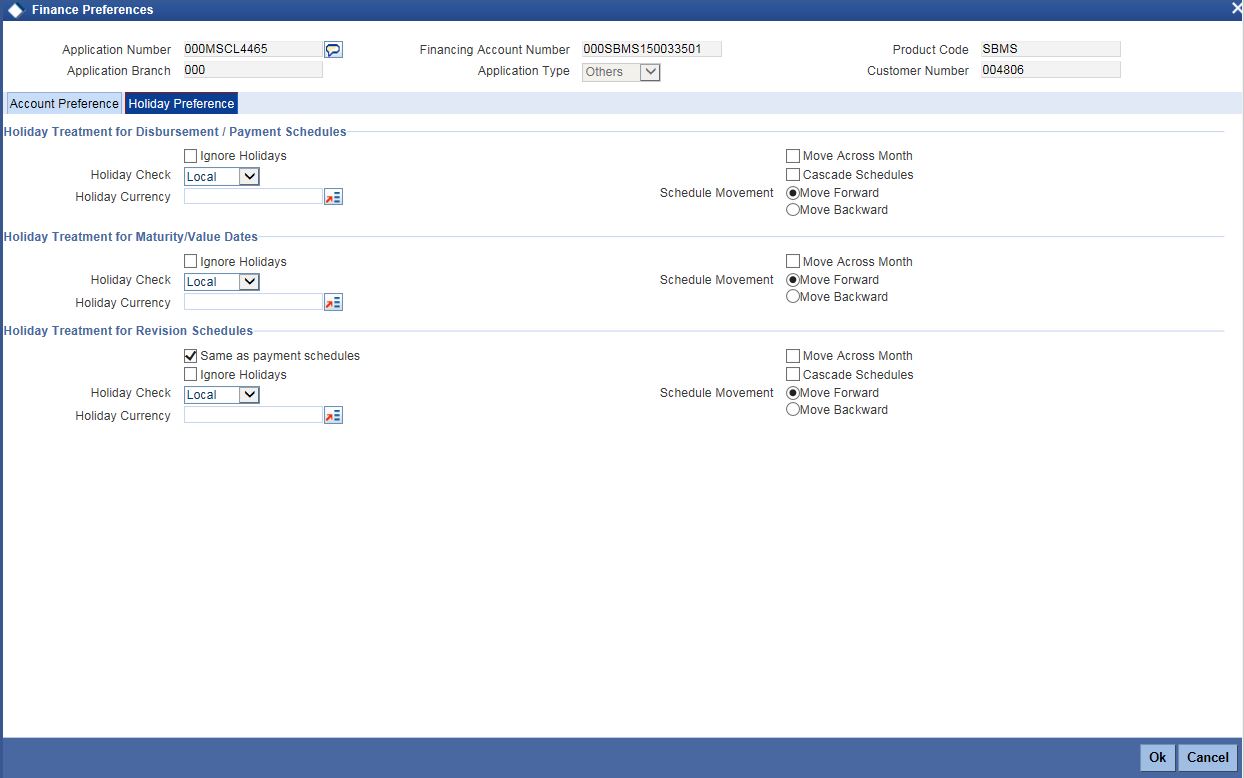
For details on Holiday Preferences, refer to the section ‘Holiday Preferences Tab’ in the chapter 'Defining Product Categories and Product' in Retail Lending User Manual.
2.4.23 Covenant Button
You can capture the covenant details in covenant screen. Click ‘Covenant’ button to invoke this screen.
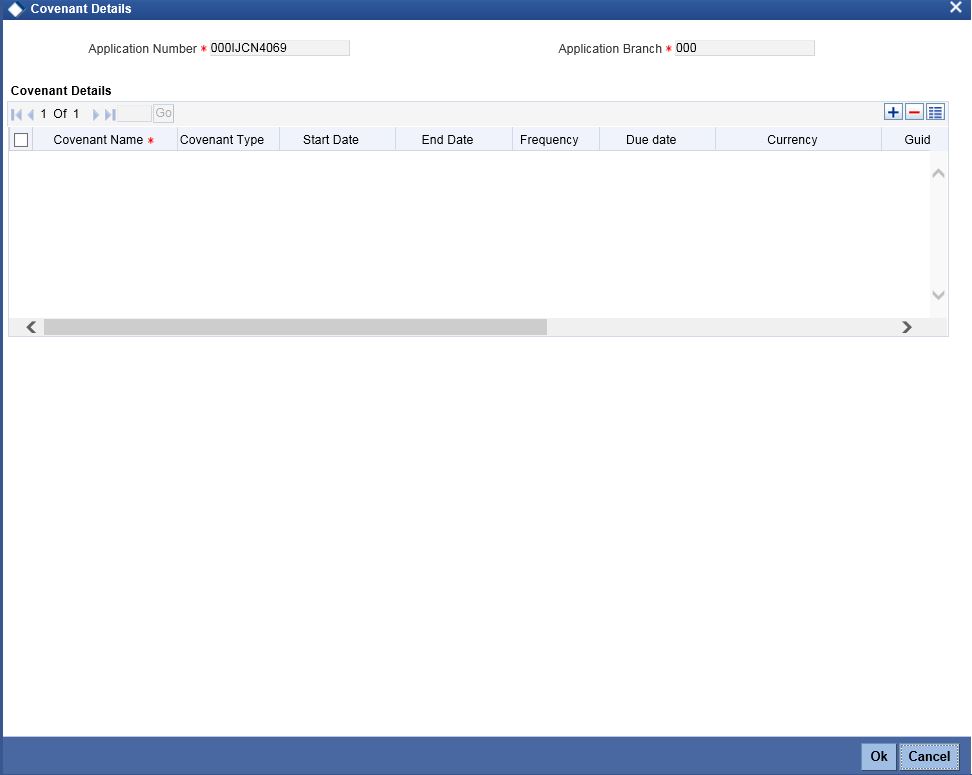
Application Number
The system displays the application number.
Application Branch
The system displays the application branch.
Covenant Details
Covenant Name
Select the covenant name from the list available here. The list displays the covenant names maintained in Covenant Maintenance screen.
Covenant Type
Specify the type of covenant.
Start Date
Select the start date from the adjoining calendar.
End Date
Select the end date from the adjoining calendar.
Frequency
Select a frequency according to which the Convent has to collected/revised. You may select any one of the following frequencies:
- Yearly
- Half Yearly
- Quarterly
- Monthly
- Weekly
- Daily
Due Date
Specify the number of days after which the covenant needs to be reviewed.
Currency
Specify the currency. Alternatively, you can select the currency from the option list. The list displays all valid currency codes.
Guideline Value
Specify the guideline value.
Actual Value
Specify the actual value.
Waived
Check this box to waive the covenant.
Remarks
Specify the remarks about the covenant maintenance.
2.4.24 Evaluation Button
You can capture the evaluation details in evaluation screen. Click ‘Evaluation’ button to invoke this screen.
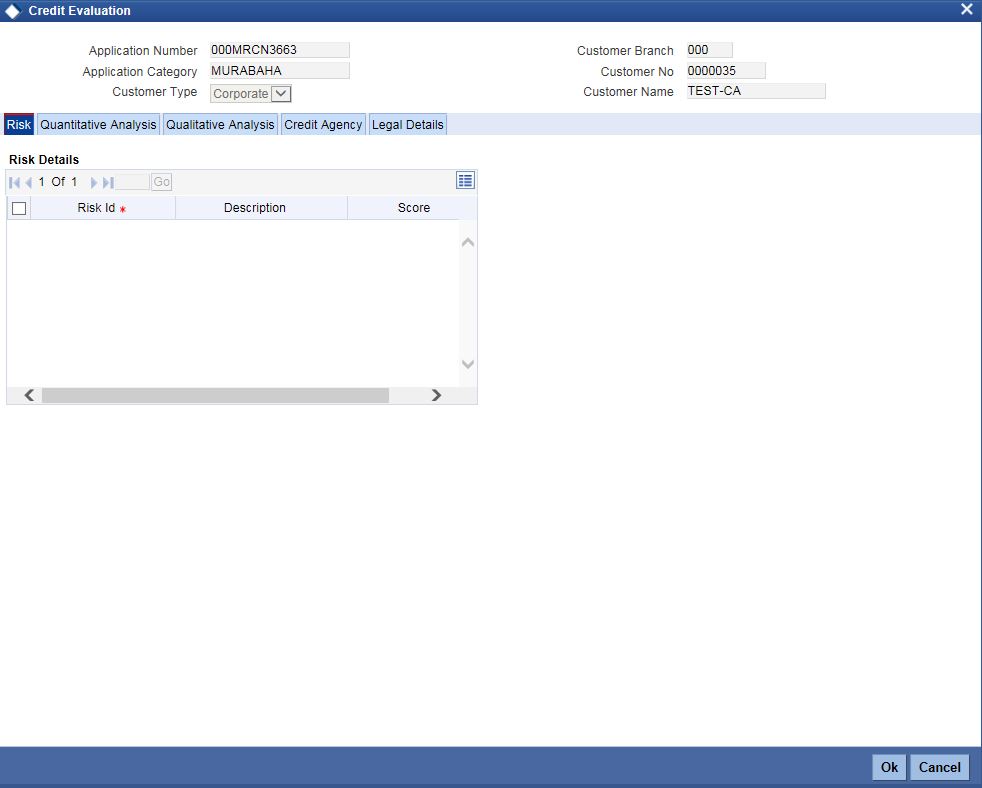
Application Number
The system displays the application number.
Application Branch
The system displays the application branch.
Application Category
The system displays the application category.
Customer No
The system displays the customer number.
Customer Type
The system displays the customer type.
2.4.25 Risk Tab
Risk Details
Risk ID
Specify the risk ID.
Description
Give a brief description on the risk ID.
Score
Specify the score.
2.4.26 Quantitative Analysis Tab
Click ‘Quantitative Analysis’ button to invoke this screen.
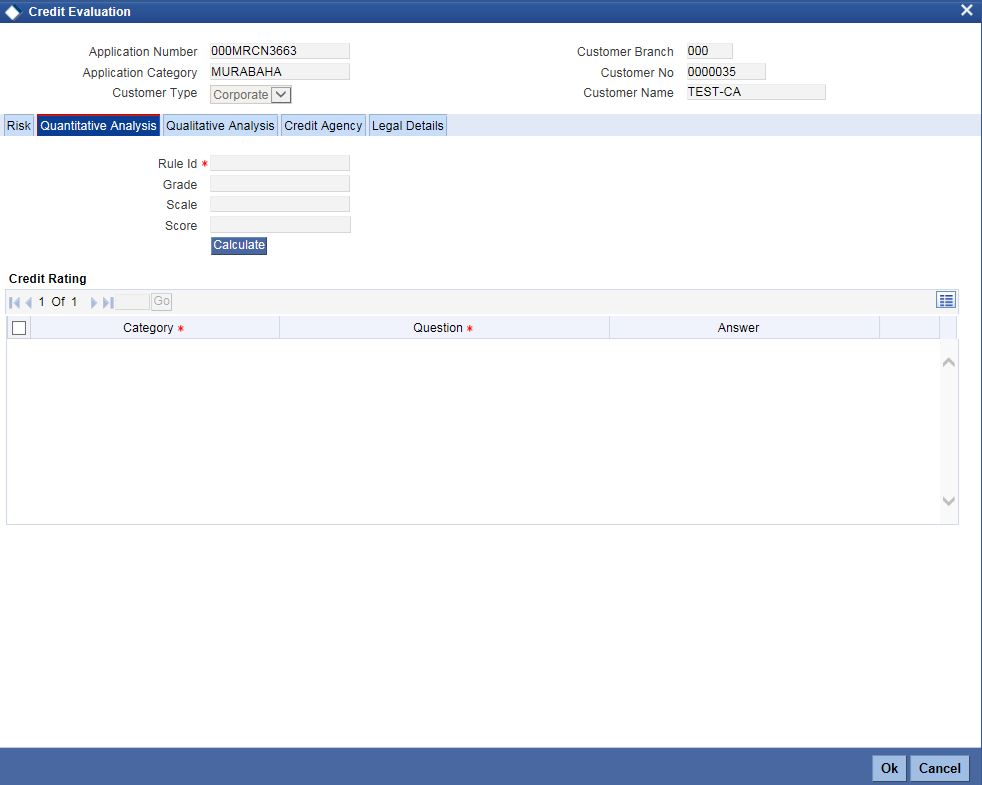
Rule ID
The system displays the rule ID.
Grade
The system displays the grade.
Scale
The system displays the scale.
Score
The system displays the score.
Credit Rating
Question ID
Specify the question ID.
Category
Specify the category.
Question
Specify the question.
Answer
Specify the answer.
2.4.27 Qualitative Analysis Tab
Click ‘Qualitative Analysis’ button to invoke this screen.
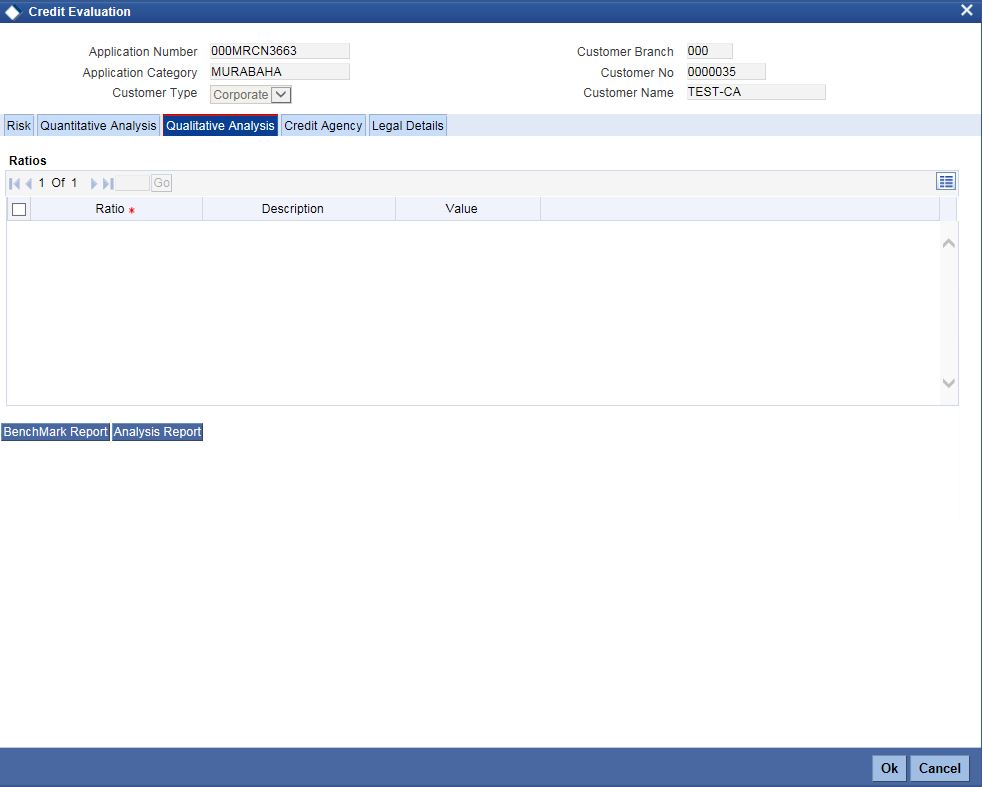
Ratios
Ratio
The system displays the ratio.
Description
The system displays the description.
Value
The system displays the value.
2.4.28 Credit Agency Tab
Click ‘Credit Agency’ tab to view credit rating details.
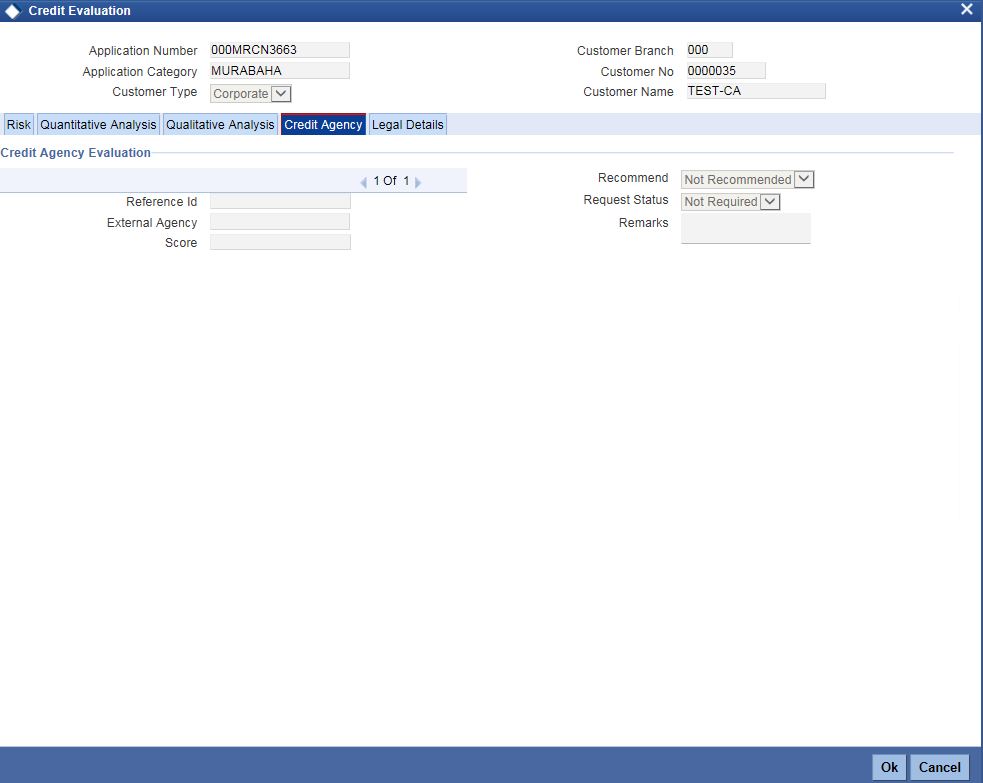
Request ID
Specify the request ID.
External Agency
Specify the external agency.
Score
Specify the score.
Recommend
Specify if the external credit rating is recommended or not.
Request Status
Specify the request status.
Remarks
Specify remarks, if any.
2.4.29 Legal Details Tab
Click ‘Legal Details’ tab to view legal details.
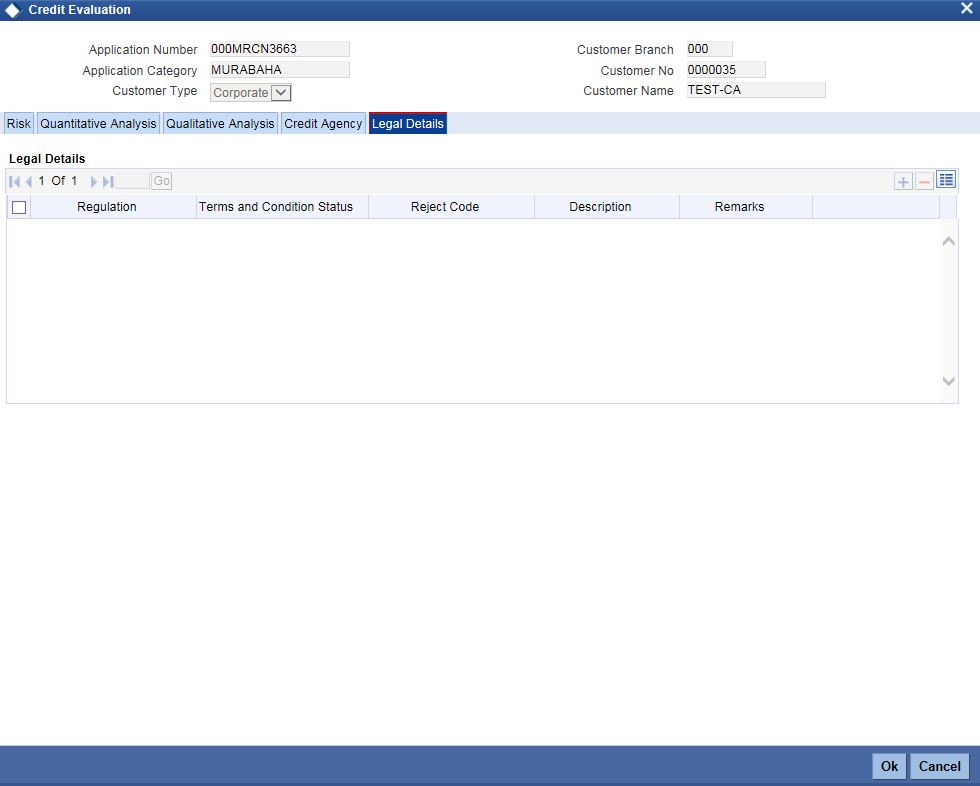
Regulation
Specify the regulation details.
Terms and Conditions Status
Specify the terms and condition status.
Reject Code
Specify the reject reason code.
Description
Specify the reject reason description.
Remarks
Specify remarks, if any.
2.4.30 MIS Button
You can capture MIS details in MIS screen. Click ‘MIS’ button to invoke this screen.
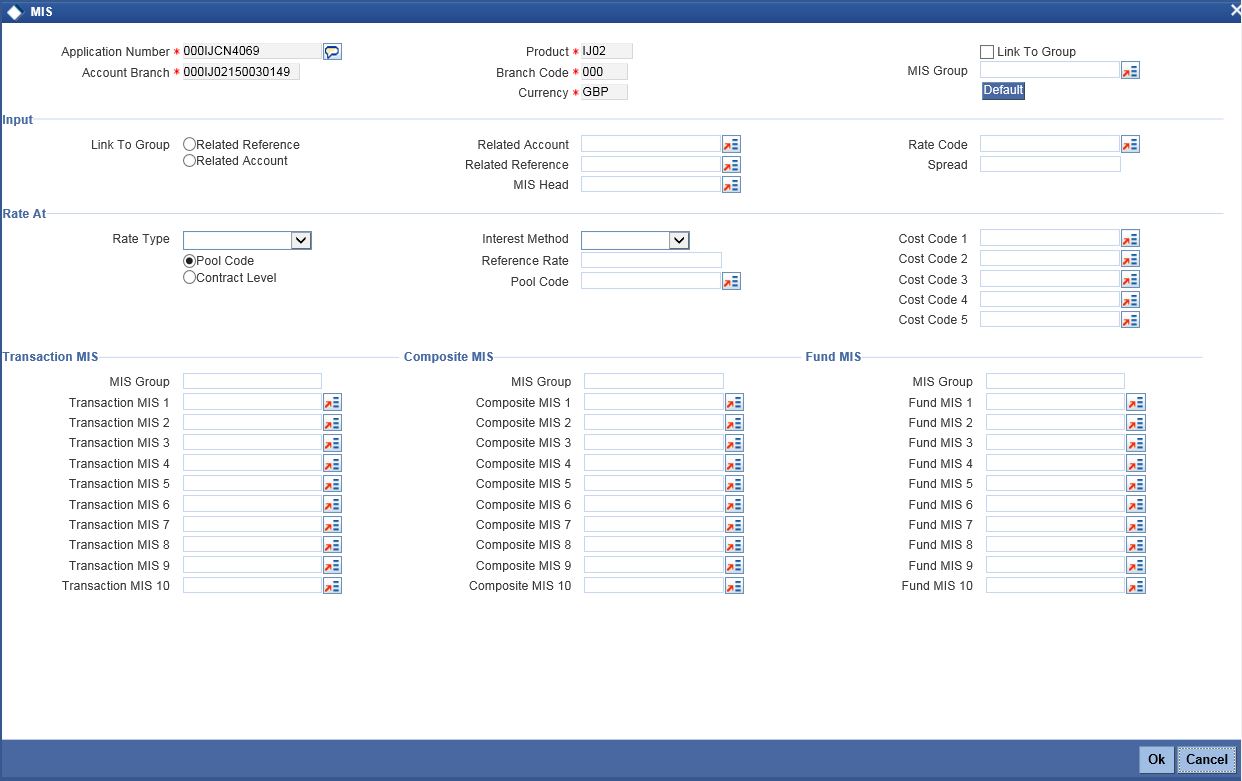
For information on MIS, refer to the section ‘MIS Button’ in the chapter 'Account Creation' in Retail Lending User Manual.
2.4.31 Fields Button
You can capture the UDF details in ‘Fields’ screen. Click ‘Fields’ button to invoke this screen.
For information on Finance UDF, refer to the section ‘Fields Tab’ in the chapter 'Account Creation' in Retail Lending User Manual.
2.4.32 SWIFT Message Button
You can capture SWIFT message details in SWIFT Message Details screen. Click ‘SWIFT Message’ to invoke the following screen:

For details on SWIFT Message, refer to the section ‘SWIFT Message Details Button’ in the chapter 'Account Creation' in Retail Lending User Manual.
2.4.33 Payment Mode Button
You can capture Payment details in Payment screen. Click ‘Payment Mode’ button to invoke this screen.
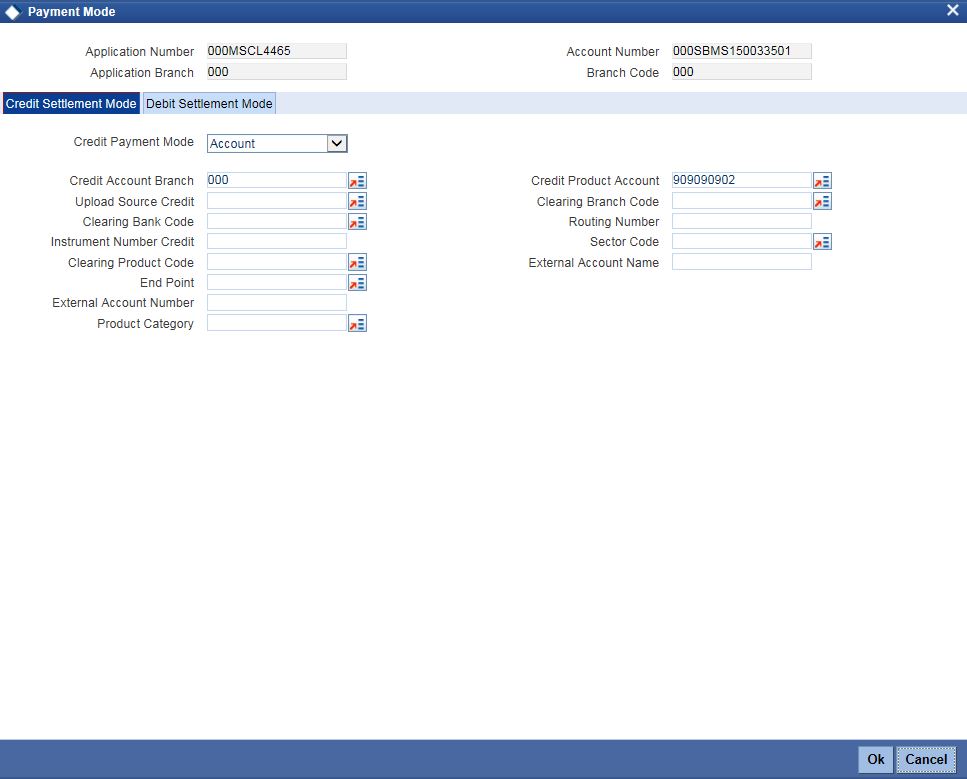
Specify the following details.
Application Number
The system displays the application number.
Application Branch
The system displays the application branch.
Account Number
The system displays the account number.
Branch Code
The system displays the branch code.
2.4.33.1 Credit Settlement Mode
Click the ‘Credit Settlement Mode’ tab to specify the credit settlement mode details.
Specify the following details.
Credit Payment Mode
Select the mode of payment by which the account is credited from the drop-down list. The options are as follows:
- Account
- Credit Card
- Clearing
- Debit Card
- External Account
- Electronic pay order
- GIRO
- Internal Cheque
- Instrument
- Cash/Teller
Credit Account Branch
Specify the credit account branch where the account is credited. Alternatively, you can select the branch from the option list. The list displays the valid branch codes maintained in the system.
Upload Source Credit
Specify the upload source credit. Alternatively, you can select the it from the option list.
Clearing Bank Code
Specify the clearing bank code. Alternatively, you can select the bank code from the option list. The list displays the bank codes maintained in the system.
Instrument Number Credit
Specify the credit instrument number.
Clearing Product Code
Specify the clearing product code. Alternatively, you can select the product code from the option list. The list displays the product codes maintained in the system.
End Point
Specify the end point. Alternatively, you can select the end point from the option list. The list displays the valid end points maintained in the system.
External Account Number
Specify the external account number of the creditor.
Product Category
Specify the product category. Alternatively, you can select the product category from the option list. The list displays the valid product categories maintained in the system.
Credit Product Account
Specify the credit product account. Alternatively, you can select the account from the option list. The list displays the valid accounts maintained in the system.
Clearing Branch Code
Specify the clearing branch code. Alternatively, you can select the branch code from the option list. The list displays the valid branch codes maintained in the system.
Routing Number
Specify the routing number.
Sector Code
Specify the sector code. Alternatively, you can select the sector code from the option list. The list displays the valid sector codes maintained in the system.
External Account Name
Specify the external account name.
2.4.33.2 Debit Settlement Mode
Click the ‘Debit Settlement Mode’ tab to specify the credit settlement mode details.
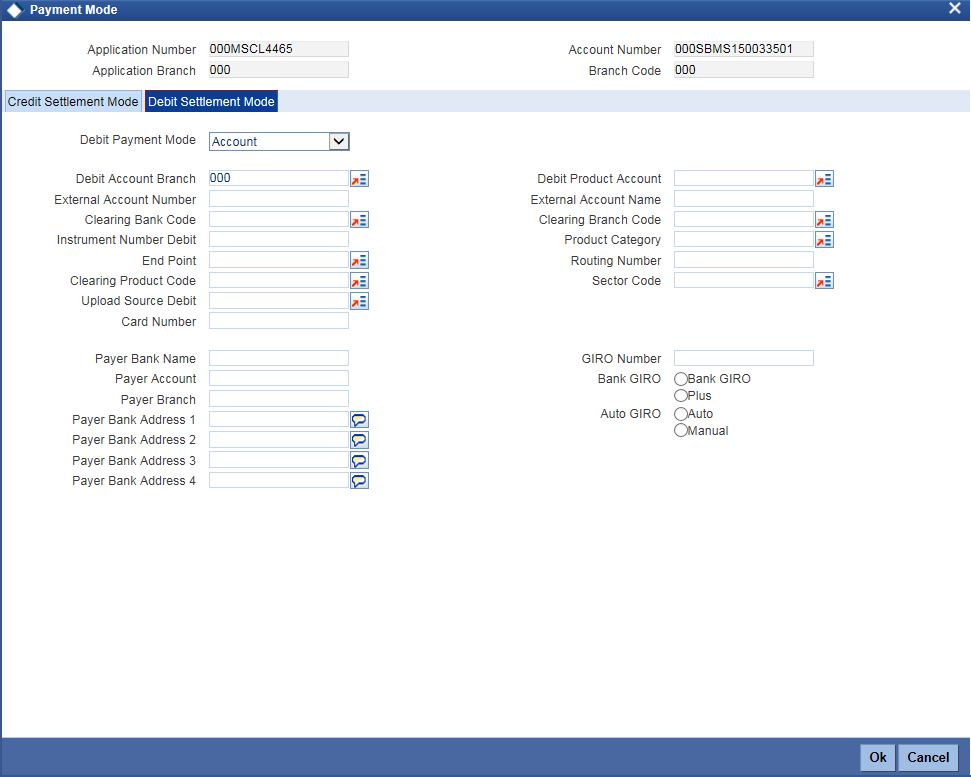
Specify the following details.
Debit Payment Mode
Select the mode of payment by which the account is debited from the drop-down list. The options are as follows:
- Account
- Credit Card
- Clearing
- Debit Card
- External Account
- Electronic pay order
- GIRO
- Internal Cheque
- Instrument
- Cash/Teller
- PDC
Debit Account Branch
Specify the debit account branch where the account is debited. Alternatively, you can select the branch from the option list. The list displays the valid branch codes maintained in the system.
External Account Number
Specify the external account number of the debtor.
Clearing Bank Code
Specify the clearing bank code. Alternatively, you can select the bank code from the option list. The list displays the bank codes maintained in the system.
Instrument Number Debit
Specify the debit instrument number.
End Point
Specify the end point. Alternatively, you can select the end point from the option list. The list displays the valid end points maintained in the system.
Clearing Product Code
Specify the clearing product code. Alternatively, you can select the product code from the option list. The list displays the product codes maintained in the system.
Upload Source Debit
Specify the upload source credit. Alternatively, you can select the it from the option list.
Card Number
Specify the debit card number.
Payer Bank Name
Specify the bank name of the payer.
Payer Account
Specify the account number of the payer.
Payer Branch
Specify the branch of the payer.
Payer Bank Address 1
Specify the payer bank address 1.
Payer Bank Address 2
Specify the payer bank address 2.
Payer Bank Address 3
Specify the payer bank address 3.
Payer Bank Address 4
Specify the payer bank address 4.
Debit Product Account
Specify the debit product account. Alternatively, you can select the account from the option list. The list displays the valid accounts maintained in the system.
External Account Name
Specify the external account name.
Clearing Branch Code
Specify the clearing branch code. Alternatively, you can select the branch code from the option list. The list displays the branch codes maintained in the system.
Product Category
Specify the product category. Alternatively, you can select the product category from the option list. The list displays the valid product categories maintained in the system.
Routing Number
Specify the routing number.
Sector Code
Specify the sector code. Alternatively, you can select the sector code from the option list. The list displays the valid sector codes maintained in the system.
GIRO Number
Specify the GIRO number.
Bank GIRO
Specify the bank GIRO number.
Auto GIRO
Specify the auto GIRO number.
For information on Payment Details, refer to the section ‘Payment Mode Details Button’ in the chapter 'Account Creation' in Retail Lending User Manual.
2.4.34 Inventory Tracking Button
You can view inventory tracking details in ‘Inventory Tracking’ screen. Click ‘Inventory Tracking’ button to invoke this screen.
![]()
Specify the following details:
Application Number
The system displays the application number.
Branch
The system displays the application category.
Account
The system displays the account number.
Financing Currency
The system displays the financing currency.
Asset Category
The system displays the asset category.
Inventory details
Fixed Asset Contract Reference
Specify the fixed asset contract reference number.
Acquisition Date
Specify the application date.
Sale Date
Specify the date of sale.
Asset Code
Specify the asset code.
Available Quantity
Specify the quantity available.
Booked Quantity
Specify the quantity booked.
Unit Price
Specify the unit price of the inventory.
Total Cost
Specify the total cost of the inventory.
Vendor Code
Specify the inventory code.
2.4.35 Multi Finance Button
You can view the multi finance details. Click ‘Multi Finance’ button to invoke this screen.

Specify the following details:
Application Number
The system displays the application number.
Application Branch
The system displays the application category.
Account Number
The system displays the account number.
Branch Code
The system displays the branch code.
Multi Finance Company Details
Borrower
Specify the borrower number. Alternatively, you can select the borrower number from the option list. The list displays the borrower details maintained in the system.
Borrower Name
The system displays the borrower name for the borrower number selected.
Currency
Specify the currency code. Alternatively, you can select the currency code from the option list. The list displays the currency code maintained in the system.
Amount
Specify the amount borrowed.
Rate
Specify the rate.
Value Date
Specify the value date.
Maturity Date
Specify the date of maturity.
Remarks
Specify the remarks if any.
2.4.36 Hamish Jiddayah Details Button
You can view the Hamish Jiddayah details. Click ‘Hamish Jiddayah Details’ button to invoke this screen.
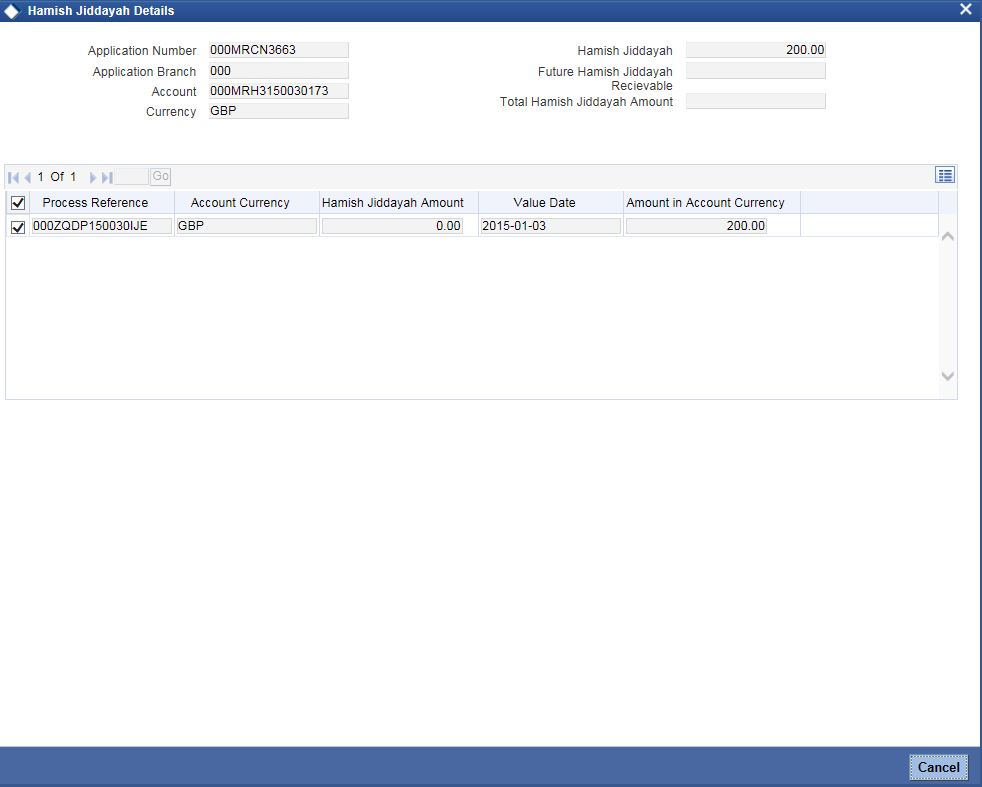
Application Number
The system displays the application number.
Application Branch
The system displays the application branch.
Account
The system displays the account number.
Currency
The system displays the currency code.
Hamish Jiddayah
The system displays the Hamish Jiddayah amount.
Future Hamish Jiddayah Recievable
The system displays the future Hamish Jiddayah receivable.
Total Hamish Jiddayah Amount
The system displays the total Hamish Jiddayah amount.
Process Reference
The system displays the process reference number.
Account Currency
The system displays the account currency.
Hamish Jiddayah Amount
The system displays the Hamish Jiddayah amount.
Value Date
The system displays the value date.
Amount in Account Currency
The system displays the amount in account currency.
2.4.37 Multiple Asset Button
You can capture the collateral details in the ‘Multiple Asset’ screen. Click ‘Multiple Asset’ button to invoke this screen.
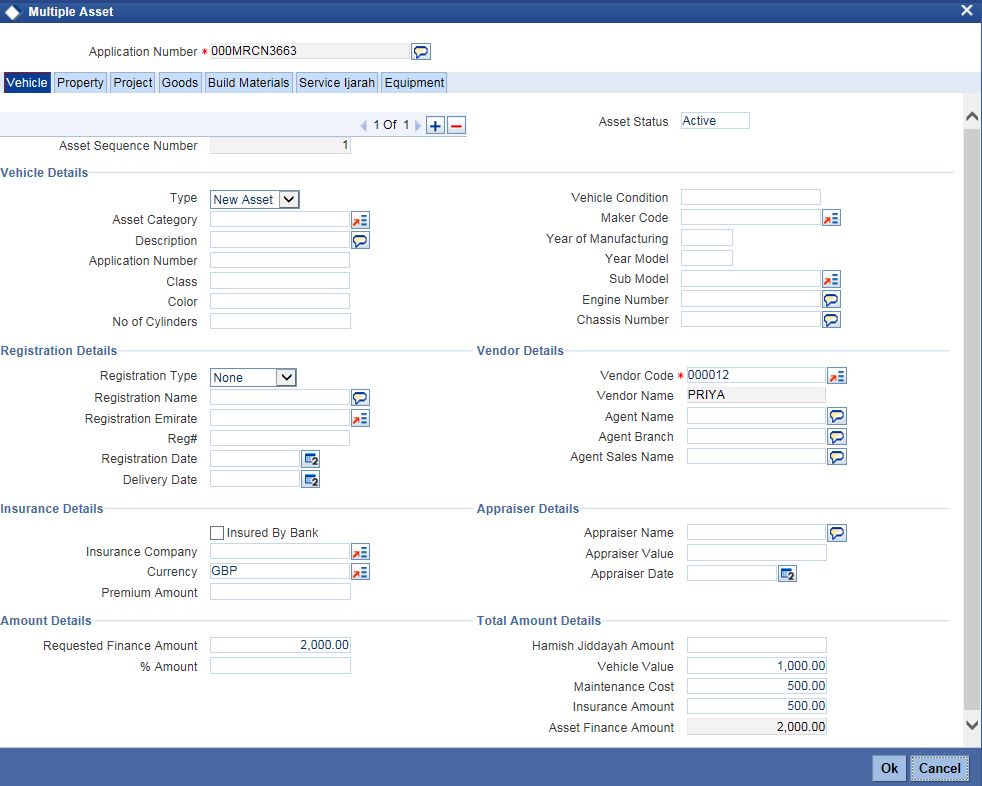
Application Number
The system displays the application number.
Asset Sequence Number
The system displays the asset sequence number.
Asset Status
The system displays the status of the asset.
2.4.37.1 Vehicle Tab
Vehicle Details
Type
Select the type of asset from the drop-down list.
Asset Category
Specify the asset category.
Description
Specify the description of the asset.
Application Number
Specify the application number of the asset.
Class
Specify the asset class.
Color
Specify the color of the asset.
No. of Cylinders
Specify the cylinder numbers.
Vehicle Condition
Specify the condition of the vehicle.
Maker Code
Specify the maker code of the vehicle.
Year of Manufacturing
Specify the manufacturing year of the vehicle.
Year Model
Specify the model of the vehicle.
Sub Model
Specify the sub model of the vehicle.
Engine Number
Specify the engine number of the vehicle.
Chassis Number
Specify the chassis number.
Registration Details
Specify the registration details of the vehicle.
Registration Type
Specify the registration type of the vehicle.
Registration Name
Specify the registration name of the vehicle.
Registration Emirate
Specify the registration emirate.
Reg#
Specify the registration number.
Registration Date
Specify the registration date of the vehicle.
Delivery Date
Specify the date of delivery of the vehicle.
Insurance Details
Specify the insurance details of the vehicle.
Insured By Bank
Specify whether the vehicle is insured by the bank.
Insurance Company
Specify the insurance company name.
Currency
Specify the currency code.
Premium Amount
Specify the premium amount of the vehicle insurance.
Amount Details
Specify the amount details.
Requested Finance Amount
Specify the requested finance amount.
% Amount
Specify the amount in percentage.
Vendor Details
Specify the vendor details.
Vendor Code
Specify the vendor code.
Vendor Name
The system displays the name of the vendor.
Agent Name
Specify the name of the agent.
Agent Branch
Specify the branch of the agent.
Agent Sales Name
Specify the sales name of the agent.
Appraiser Details
Specify the appraiser details.
Appraiser Name
Specify the name of the appraiser.
Appraiser Value
Specify the appraiser value.
Appraiser Date
Specify the date of the appraiser.
Total Amount Details
Specify the total amount details.
Hamish Jiddayah Amount
Specify the Hamish Jiddayah Amount.
Vehicle Value
Specify the value of the vehicle.
Maintenance Cost
Specify the maintenance cost.
Insurance Amount
Specify the insurance amount.
Asset Finance Amount
Specify the asset finance amount.
2.4.37.2 Property Tab
Click ‘Property’ tab to specify the property details

Specify the following details:
Property Details
New Property Type
Select the new property type from the drop-down list. The options are as follows:
- Yes
- No
Property Type
Specify the property type.
Description
Specify the description of the property.
Building Name
Specify the name of the building.
Builder Name
Specify the name of the builder.
Project Name
Specify the name of the project.
Wing Name
Specify the wing name.
District/Area
Specify the district or area details.
Area In Other Country
Specify the area in other country.
Plot Number
Specify the plot number.
Lot Number
Specify the Lot number.
Property Status
Specify the status of the property.
Property Area
Specify the area of the property.
Property Usage
Specify the usage of the property.
Property Area In
Specify the property area in details.
Date of Completion
Specify the date of completion.
Title Deed Number
Specify the title deed number.
Registration On Name Of
Specify the registration on name of details.
Reg#
Specify the registration number,
Registration Date
Specify the date of registration.
Title Deed Issue Date
Specify the title deed issue date.
Title Deed Issue From
Specify the title deed issue from.
Villa/Apartment Number
Specify the villa or apartment number.
Building compound Name
Specify the building compound name.
Street Name
Specify the name of the street.
Post Box Number
Specify the post box number.
Emirate
Specify the emirate details.
Area In Emirate
Specify the area in emirate.
City
Specify the city.
Country
Specify the country
Mortgage Degree
Specify the mortgage.
Amount Details
Currency
Specify the currency code.
Requested Amount
Specify the requested amount.
Hamish Jiddayah Amount
Specify the Hamish Jiddayah amount.
Valuation
Specify the valuation details.
Insurance Value
Specify the insurance value.
Asset Finance Amount
Specify the asset finance amount.
Insurance Details
Insurance Company
Specify the insurance company.
Insurance Paid By
Specify the insurance paid by details.
Premium Amount
Specify the premium amount.
Insurance Name
Specify the insurance name.
Expiry Date
Specify the date of expiry.
Property Management
Company Name
Specify the company name.
Managed By
Specify the name of the person manages the property.
Contact Person
Specify the contact person details.
Contact Number
Specify the contact number.
Vendor Details
Vendor Code
Specify the vendor code.
Vendor Name
Specify the name of the vendor.
Property Evaluation Details
Evaluation Name
Specify the evaluation name.
Evaluation Value
Specify the evaluation value.
Evaluation Date
Specify the date of evaluation.
Property Vendor Details
Vendor Type
Specify the vendor type.
Vendor Code
Specify the code of the vendor.
Chosen By
Specify the chosen By details of the vendor.
Account Value
Specify the account value.
Account Date
Specify the account date.
Account Start Date
Specify the start date of account.
Account End Date
Specify the end date of the account.
2.4.37.3 Project Tab
Click ‘Project’ tab to specify the project details.
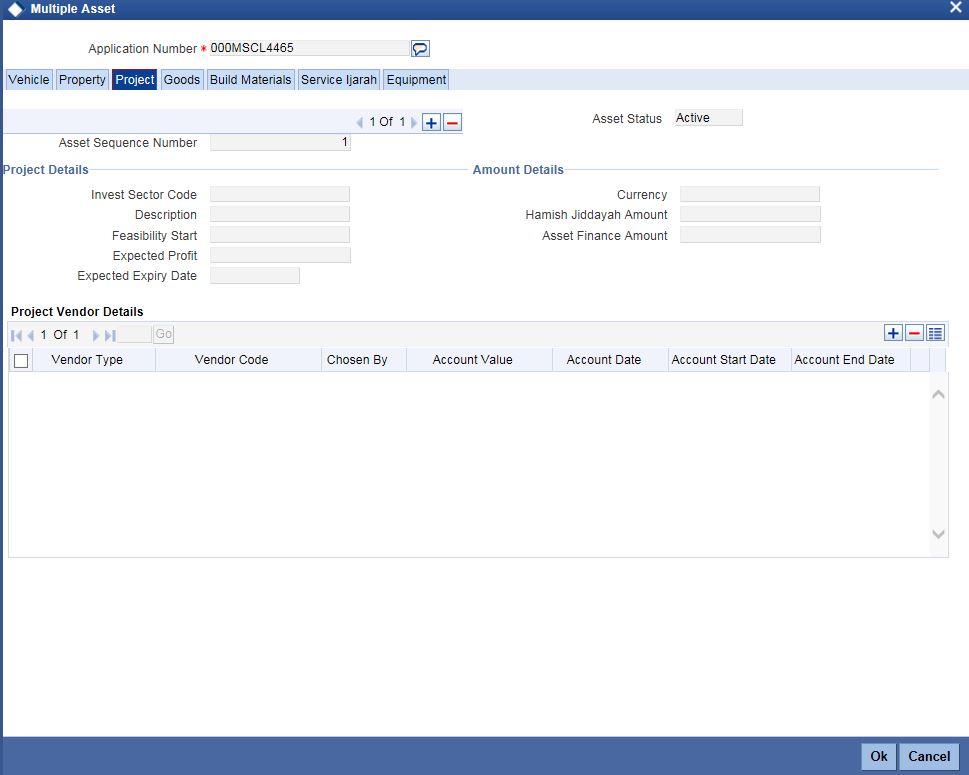
Project Details
Invest Sector Code
Specify the investor sector code.
Description
Specify the description of the project.
Feasibility Start
Specify the feasibility start.
Expected Profit
Specify the expected profit.
Expected Expiry Date
Specify the expected expiry date.
Amount Details
Currency
Specify the currency code.
Hamish Jiddayah Amount
Specify the Hamish Jiddayah Amount.
Asset Finance Amount
Specify the asset finance amount.
Project Vendor Details
Vendor Type
Specify the type of vendor.
Vendor Code
Specify the vendor code.
Chosen By
Specify the chosen by details of the project vendor.
Account Value
Specify the account value.
Account Date
Specify the date of account.
Account Start Date
Specify the account start date.
Account End Date
Specify the account end date.
2.4.37.4 Goods Tab
Click ‘Goods’ tab to specify the goods details.
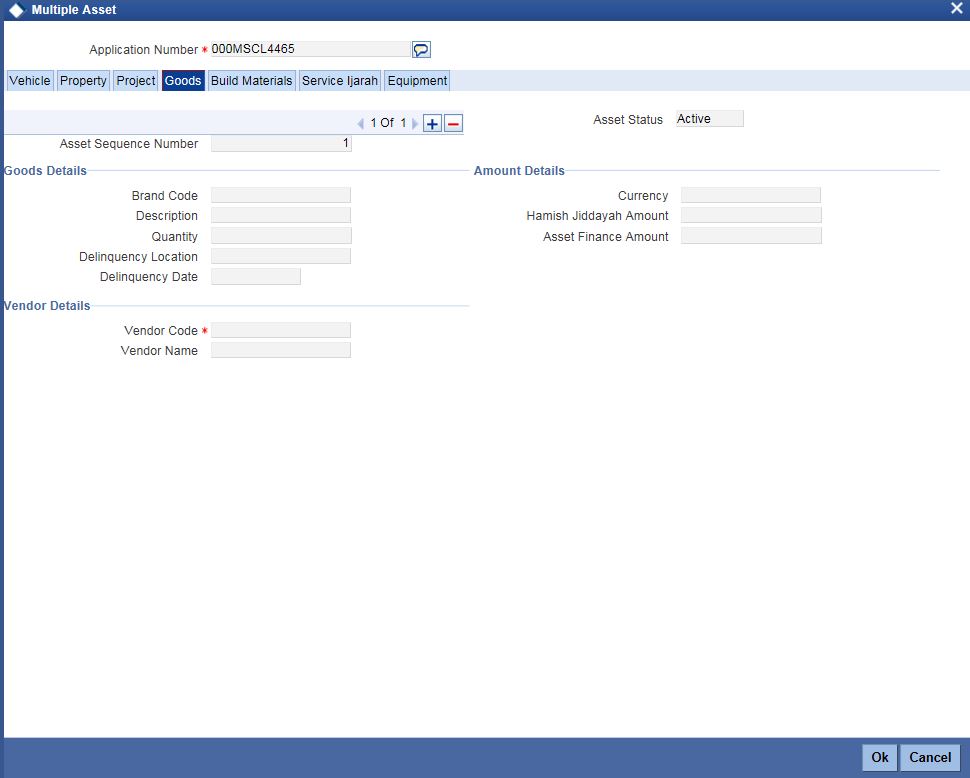
Goods Details
Brand Code
Specify the brand code of the goods.
Description
Specify the description of the goods.
Quantity
Specify the quantity of the goods.
Delinquency Location
Specify the delinquency location of the goods.
Delinquency Date
Specify the delinquency date of the goods.
Amount Details
Currency
Specify the currency code.
Hamish Jiddayah Amount
Specify the Hamish Jiddaya amount.
Asset Finance Amount
Specify the asset finance amount.
Vendor Details
Vendor Code
Specify the code of the vendor.
Vendor Name
Specify the name of the vendor.
2.4.37.5 Build Materials Tab
Click ‘Build Material’ tab to specify the build materials details.
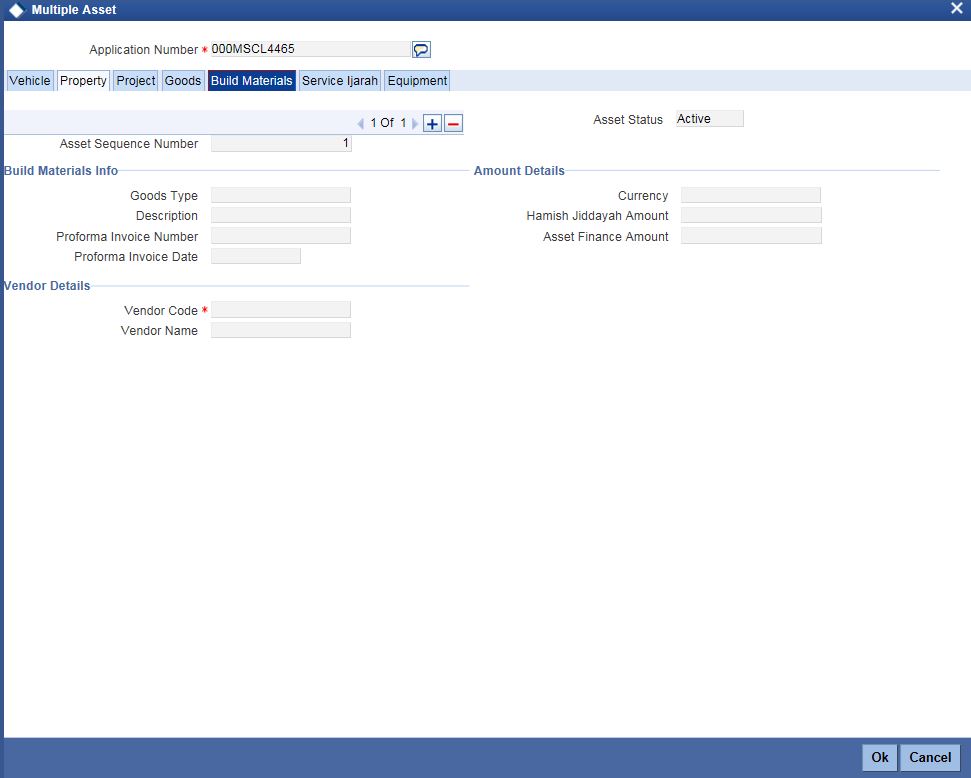
Build Materials Info
Goods Type
Specify the goods type.
Description
Specify the description of the goods type.
Proforma Invoice Number
Specify the proforma invoice number.
Proforma Invoice Date
Specify the proforma invoice date.
Amount Details
Currency
Specify the currency.
Hamish Jiddayah Amount
Specify the Hamish Jiddayah amount.
Asset Finance Amount
Specify the asset finance amount.
Vendor Details
Vendor Code
Specify vendor code details.
Vendor Name
Specify name of the vendor.
2.4.37.6 Service Ijarah Tab
Click ‘Service Ijarah’ tab to specify the service Ijarah details.
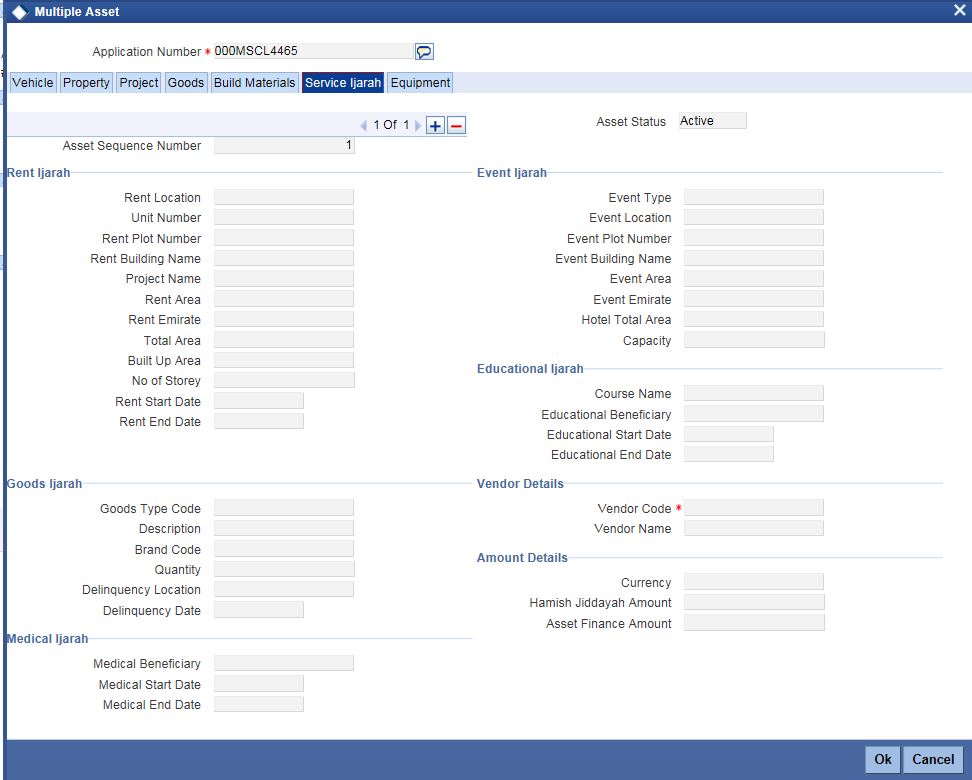
Rent Ijarah
Rent Location
Specify the rent location.
Unit Number
Specify the unit number.
Rent Plot Number
Specify the rent plot number.
Rent Building Name
Specify the rent building name.
Project Name
Specify the project name.
Rent Area
Specify the rent area.
Rent Emirate
Specify the rent emirate.
Total Area
Specify the total area details.
Built Up Area
Specify the built up area.
No of Storey
Specify the no of storey.
Rent Start Date
Specify the start date of the rent from the adjoining calendar.
Rent End Date
Specify the end date of the rent from the adjoining calendar.
Event Ijarah
Event Type
Specify the event type.
Event Location
Specify the location of the event.
Event Plot Number
Specify the plot number of the event.
Event Building Name
Specify the event building name.
Event Area
Specify the even area.
Event Emirate
Specify the event emirate.
Hotel Total Area
Specify the total area of the hotel.
Capacity
Specify the capacity details.
Educational Ijarah
Course Name
Specify the name of the course.
Educational Beneficiary
Specify the beneficiary of the education.
Educational Start Date
Specify the start date of the education from the adjoining calendar.
Educational End Date
Specify the end date of the education from the adjoining calendar.
Goods Ijarah
Goods Type Code
Specify the code of the goods type.
Description
Specify the description of the goods.
Brand Code
Specify the brand code details.
Quantity
Specify the quantity of the goods.
Delinquency Location
Specify the delinquency location.
Delinquency Date
Specify the date of delinquency.
Medical Ijarah
Medical Beneficiary
Specify the medical beneficiary.
Medical Start Date
Specify the medical start date from the adjoining calendar.
Medical End Date
Specify the medical end date from the adjoining calendar.
Vendor Details
Vendor Code
Specify the vendor code.
Vendor Name
The system displays the name of the vendor.
Amount Details
Currency
Specify the currency code.
Hamish Jiddayah Amount
Specify the Hamish Jiddayah amount.
Asset Finance Amount
Specify the asset finance amount.
2.4.37.7 Equipment Tab
Click ‘Equipment’ tab to specify the equipment details.
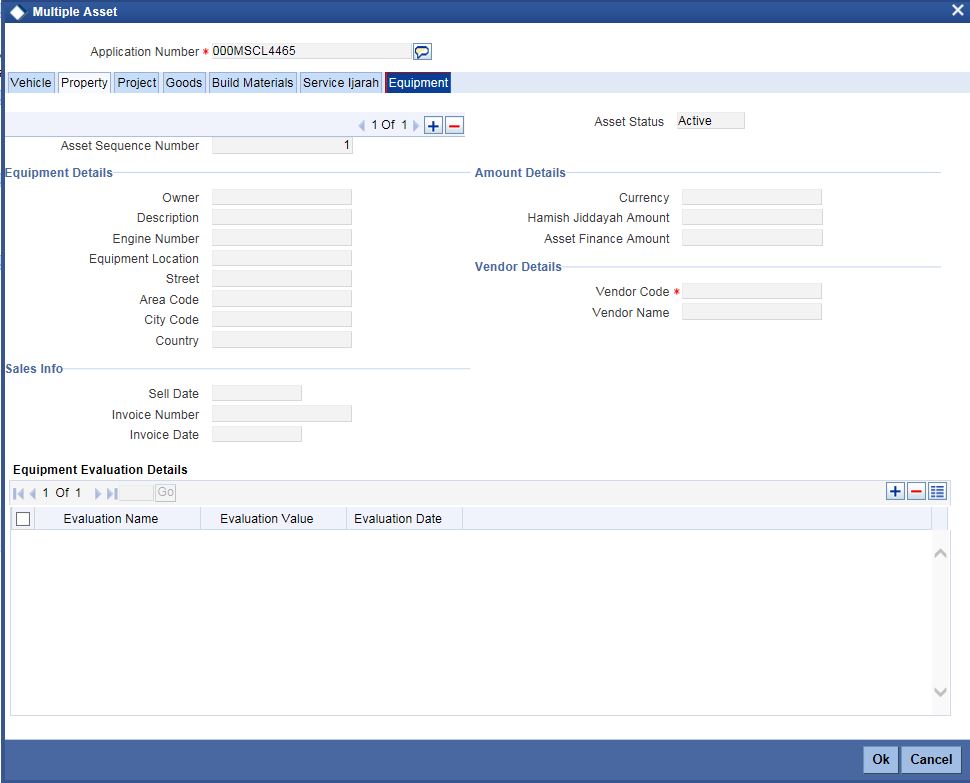
Equipment Details
Owner
Specify the owner of the equipment.
Description
Specify the description of the equipment.
Engine Number
Specify the engine number of the equipment.
Equipment Location
Specify the location of the equipment.
Street
Specify the street details of the equipment is located.
Area Code
Specify the area code of the equipment.
City Code
Specify the city code of the equipment.
Country
Specify the country code of the equipment.
Amount Details
Currency
Specify the currency code.
Hamish Jiddayah Amount
Specify the Hamish Jiddayah amount.
Asset Finance Amount
Specify the asset finance amount.
Vendor Details
Vendor Code
Specify the vendor code.
Vendor Name
The system displays the name of the vendor.
Sales Info
Sell Date
Specify the sell date from the adjoining calendar.
Invoice Number
Specify the invoice number.
Invoice Date
Specify the invoice date from the adjoining calendar.
Equipment Evaluation Details
Evaluation Name
Specify the evaluation name.
Evaluation Value
Specify the evaluation value.
Evaluation Date
Specify the evaluation date.
2.5 Manual Liquidation
This section contains the following topics:
- Section 2.5.1, "Capturing Manual Liquidation Details"
- Section 2.5.2, "Payment Details Tab"
- Section 2.5.3, "Penalty Rates Tab"
- Section 2.5.4, "Check List Tab"
- Section 2.5.5, "Specifying Events Details"
2.5.1 Capturing Manual Liquidation Details
If the disbursement has happened and the user has rejected the offer, then you can liquidate the contract manually. For liquidation, full disbursed amount should be selected. You can invoke this screen by typing ‘ORDCITML’ in the field at the top right corner of the Application tool bar and clicking the adjoining arrow button
Specify the following details:
Application Number
The system displays the application number.
Application Branch
The system displays the application branch.
Branch Code
The system displays the branch code.
Account
The system displays the account number.
Application Date
The system defaults the application initiation date.
Status
The system defaults the application status based on the current stage of the process.
Product
The system displays the product based on the facility selected.
Product Description
Give a brief description on the product.
Application Priority
Select application priority from the adjoining drop-down list.The options available are:
- Low
- Medium
- High
Customer Id
Specify the customer ID. Alternatively, you can select the customer ID from the option list. The list displays the valid customer ID maintained in the system.
Event Sequence Number
Specify the event sequence number.
2.5.2 Payment Details Tab
Click the ‘Payment Details’ tab to capture payment details.
Value Date
Select the value date from the adjoining calendar.
Execution Date
Select the date of execution of payment from the adjoining calendar.
Limit Date
Select the limit date from the adjoining calendar.
Main Interest Rate
The system displays the main interest rate.
Mudarabah
Gross Profit
Specify the gross profit.
Excess Profit
Specify the excess profit.
Customer Incentive
Specify the customer incentive.
Bank Profit
Specify the bank profit.
External Reference
The system displays the external reference number.
Narrative
Specify comments if any.
Payment Details
Reversed
Check this box to indicate the settlement is reversed.
Payment Mode
Select the payment mode from the drop-down list. The options are as follows:
- Account
- Cash/Teller
- Clearing
- Instrument
- Electronic Pay Order
- Credit Card
- Debit Card
- External Account
- Internal Cheque
Settlement Currency
The system displays the settlement currency.
Settlement Amount
Specify the settlement amount.
Financing Currency Equivalent
Specify the financing currency equivalent.
Original Exchange Rate
The system displays the original exchange rate.
Exchange Rate
Specify the current exchange rate.
Settlement Branch
Specify the settlement branch code. Alternatively, you can select the branch code from the option list. The list displays all the valid branch code maintained in the system.
Settlement Account
Specify the settlement account number. Alternatively, you can select the account number from the option list. The list displays all the valid account number maintained in the system.
Account Description
The system displays the account description.
Settlement Product
Specify the settlement product.
Instrument Number
Specify the instrument number.
End Point
This system defaults the end point maintained in the clearing system.
Card Number
Specify the card number.
External Account Number
Specify the external account number.
External Account Name
Specify the external account name.
Clearing Bank
Specify the clearing bank code. Alternatively, you can select the clearing bank code from the option list. The list displays all the valid bank code maintained in the system.
Clearing Through Branch
Specify the branch code through which the clearing has to take place.
Sector Code
Specify the sector code. Alternatively, you can select the sector code from the option list. The list displays all the valid sector code maintained in the system.
Routing No
Specify the routing number.
Settlement Reference
The system displays the settlement reference number.
Negotiated Cost Rate
Specify the negotiated cost rate.
Negotiated Reference
Specify the negotiated reference number.
To specify Settlement Component, Click ‘Settlement Component’ button under the field ‘Settlement Component’.

Component Name
Specify the name of the component.
Component Currency Equivalent
Specify the equivalent component currency.
Component Details
Component Name
The system displays the component name.
Currency
The system displays the currency code of the component.
Amount Due
The system displays the amount due of the component.
Adjustment Due
The system displays the adjustment date of the component.
Amount Overdue
The system displays the amount overdue of the component.
Amount Not Due
The system displays the amount not due of the component.
Amount Waived
Specify the waived amount.
Amount Capitalized
Specify the amount capitalized.
Amount Paid
Specify the amount paid.
Prepayment of Amortized Finance
Recomputation Basis
Select the recomputation basis of prepayment of amortized finance from the drop-down list. The options are as follows:
- Change Installment
- Reduce Tenor
Recomputation Effective From
The system displays the option ‘Value Date’ by default as recomputation effective from.
New Maturity Date
Select the new maturity date of prepayment of amortized finance from the adjoining calendar.
Next Schedule Date
Select the next schedule date of prepayment of amortized finance from the adjoining calendar.
Old Maturity Date
Select the old maturity date of prepayment of amortized finance from the adjoining calendar.
Prepayment of Simple Finance
Recomputation Basis
Select the recomputation basis of prepayment of simple finance from the drop-down list. The options are as follows:
- Change Installment
- Reduce Tenor
New Maturity Date
Select the new maturity date of prepayment of simple finance from the adjoining calendar.
Old Maturity Date
Select the old maturity date of prepayment of simple finance from the adjoining calendar.
2.5.3 Penalty Rates Tab
Click the ‘Penalty Rates’ tab to capture penalty rates details.
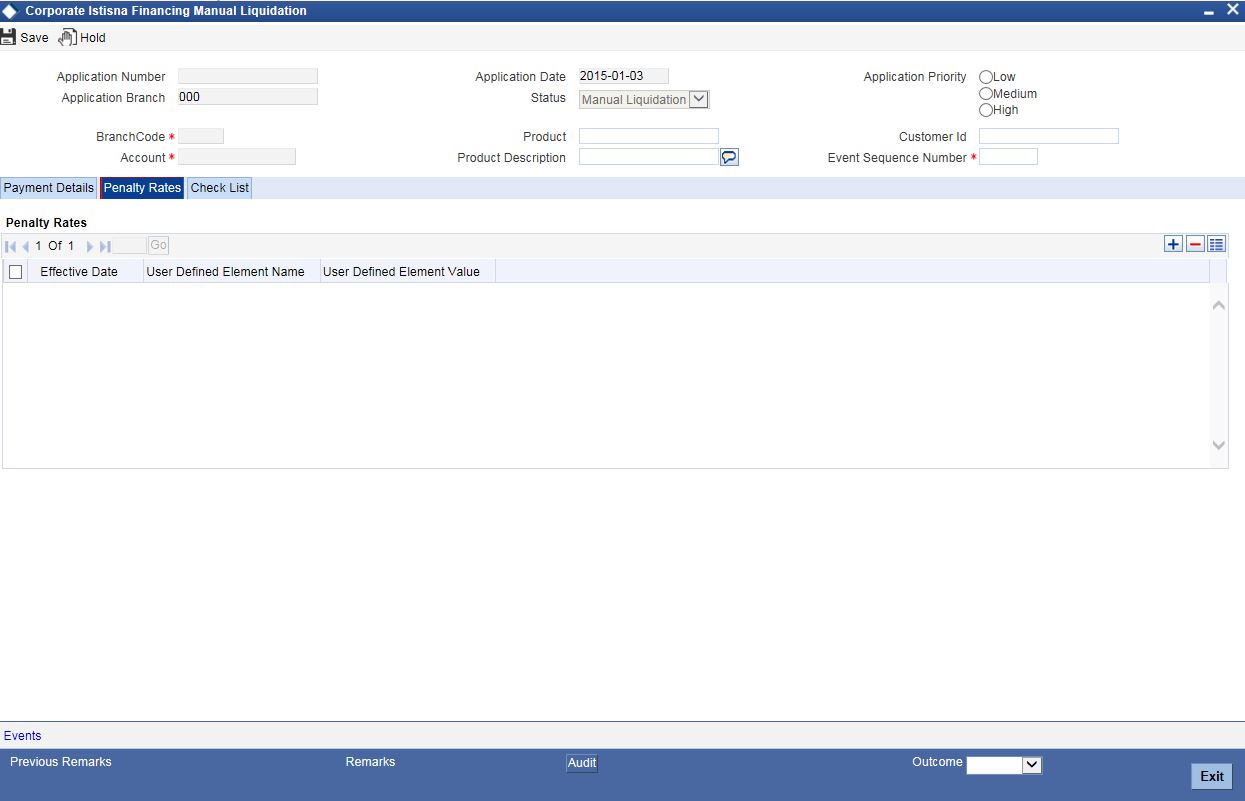
Effective Date
Select the effective date of penalty rates from the adjoining calendar.
User Defined Element Name
The system displays the user defined element name.
User Defined Element Value
Specify the user defined element value.
2.5.4 Check List Tab
Click the ‘Check List’ tab to capture check list details.
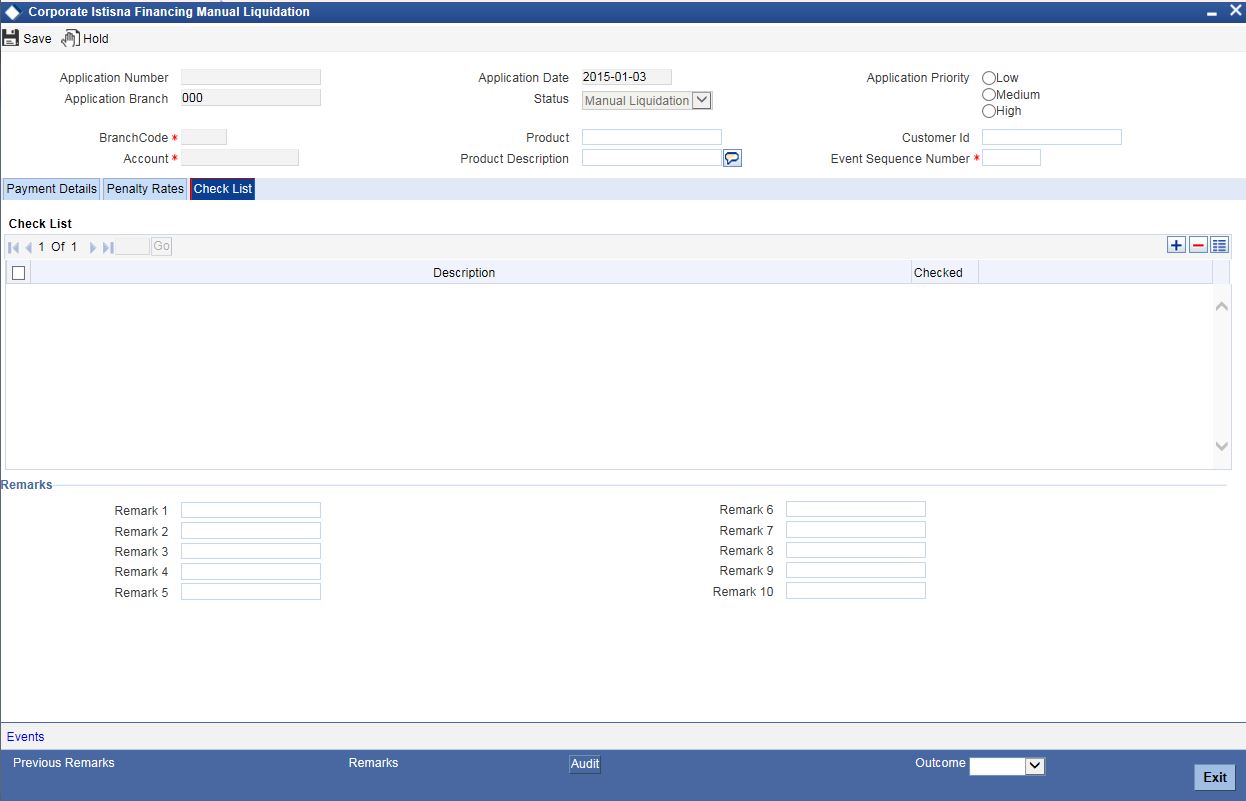
Description
Specify the description for the checklist.
Checked
Check this box to select the checklist.
Remarks
Remark 1 to 10
Specify remarks if any for the checklist.
2.5.5 Specifying Events Details
Click the ‘Events’ button to capture events details.

Fields
Field Name
The system displays the field name.
Value
Specify the value of the event. Alternatively, you can select the value from the option list. The list displays all the valid values maintained in the system.