Creating simple email campaigns
Tip: Enroll in our free Udemy course to learn about the basics of marketing automation and creating a simple email campaign in Oracle Eloqua.
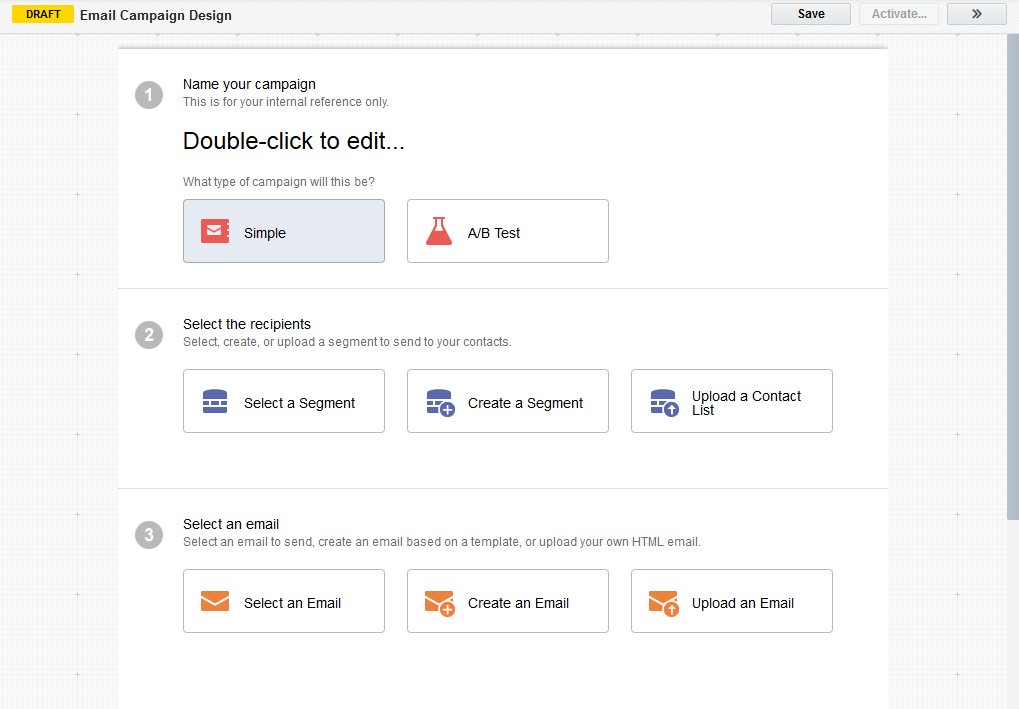
If you want to send a single email to a group of contacts, you can create a simple email campaign. The Simple Email Campaign Wizard lets you send an email to a segment in a few steps and without having to touch the campaign canvas.
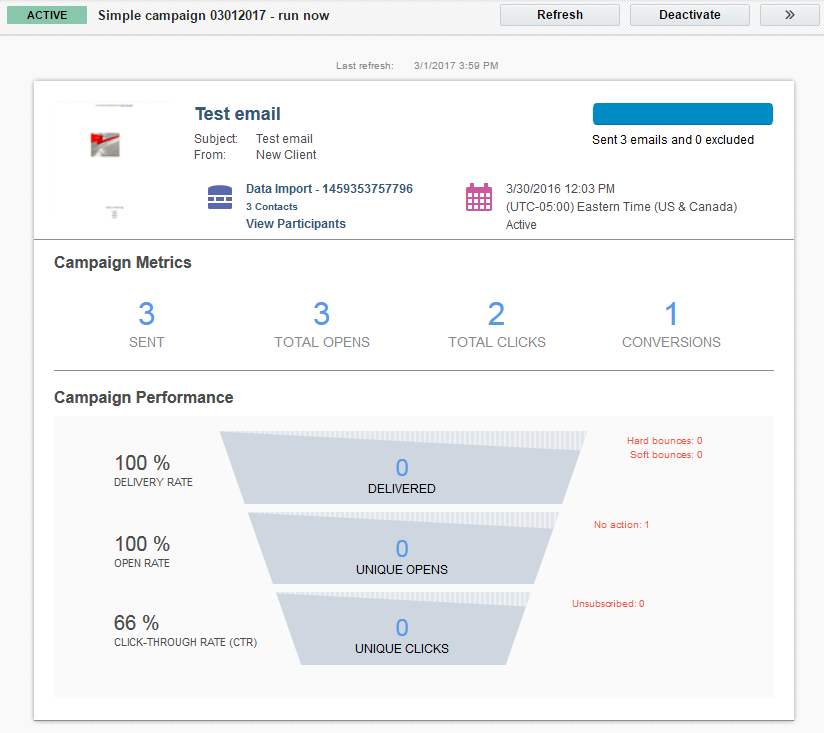
After you send the email, you can immediately start to see the email's performance and metrics such as email opens, click-throughs, and conversions.
Learn more by watching the video!
Note: The approvals workflow is not available for simple email and A/B test campaigns.
To create a simple email campaign:
- Navigate to Orchestration
 , then click Campaigns.
 - Click Create a Simple Email Campaign.
The simple campaign design wizard opens.

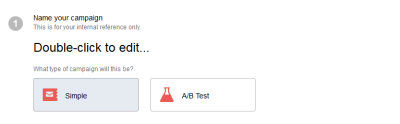
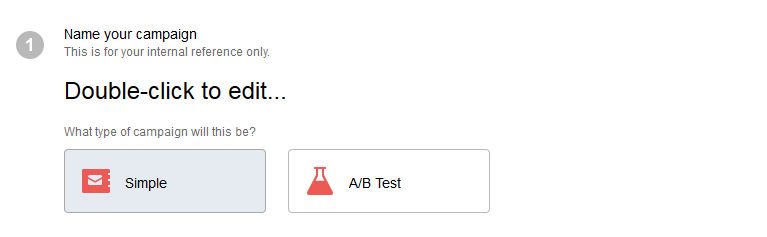
- Complete Step 1 of the design wizard, giving your campaign a name and ensuring that you select Simple.
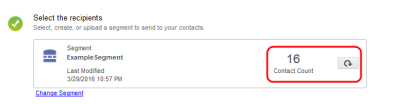
- Specify the segment to include in the campaign by configuring Step 2 of the design wizard.

After you add a segment, the number of contacts included in the segment displays. To refresh the contacts, click
 .
.
Tip: As you configure the wizard, Oracle Eloqua validates your configuration. Steps that have errors appear with a caution symbol
 . Click the caution symbol to view the error details.
 - Specify the email to use in the campaign by configuring Step 3 of the design wizard.

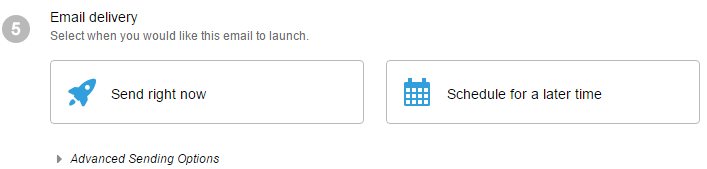
- Specify when to launch the campaign by configuring Step 4 of the design wizard:
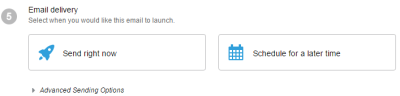
- To start the campaign immediately after you active it, click Send right now. Use the advanced options to restrict the time of day that the email is sent.
- To start the campaign on a specific date and time, click Schedule for a later time, then specify the date and time to start the campaign.
-
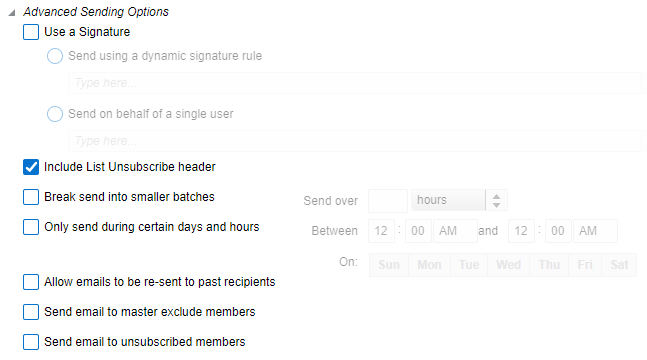
Click Advanced Sending Options to configure other email options.
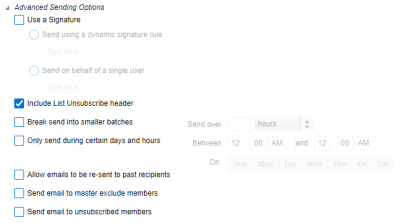
- Use a Signature: Enable the Use a Signature check box (optional), then select either Send using a dynamic signature rule or Send on behalf of a single user, and select an option from the corresponding drop-down list.
The sender's user account does not need to be active nor does the person associated to the user account need to have access to Oracle Eloqua. The user account and associated signature fields will be used to populate the email sender and sender information like a signature where applicable. Learn more.
- Include List Unsubscribe header: Add an unsubscribe header to your email.
- Break send into smaller batches: Break up sending emails into smaller batches. The period you use depends on the size of the segment. If you are not sure what period to set, start with about 1000 emails per hour. So, for a segment of 3000, sending the email over 3 hours will send 1000 per hour.
- Only send during certain days and hours: Specify when to send the email. For example, use this option to send only at off-peak hours or at an optimal time that you've determined.
- Allow emails to be re-sent to past recipients: Allow this email to be re-sent to past recipients. Typically, you do not want to select this option so that you don't send duplicate emails to your contacts.
- Send email to master exclude members: This option sends the email to contacts on the master exclude list. This ensures that members on this list do not miss out on critical non-marketing emails, such as product information.
- Send email to unsubscribed members: This option sends the email to unsubscribed contacts, this ensures that unsubscribed members do not miss out on critical non-marketing emails, such as product information.
- Use a Signature: Enable the Use a Signature check box (optional), then select either Send using a dynamic signature rule or Send on behalf of a single user, and select an option from the corresponding drop-down list.
- If you want to configure campaign fields, click Actions
 , then click Settings. Here you can set campaign fields like product, country, and so on required by your company, and change the CRM sync or closed-loop reporting settings.
Note: The setting Allow contacts to enter the campaign more than once does not apply to an simple email campaign since you are only sending the email one time.
- Click Save.
- Click Activate Campaign.
Note: You must resolve all errors before you can active the campaign.
Oracle Eloqua sends the email or sends it according to the schedule you set. The campaign's status changes to Active or Scheduled. You cannot change the campaign once it is Active or Scheduled. Find out more about changing an active or scheduled campaign.


After the campaign is Active, you can see a real-time view of the email's performance. To view the latest information, click Refresh. To view which contacts were included or excluded from the email, click View Participants. Oracle Eloqua continues to track all activity for the email campaign for 12 months after the campaign started. For more information about the email performance metrics, see Campaign reporting and metrics.
Changing an active simple email campaign
After the campaign is Active or Scheduled, you cannot change the campaign. If you need to make changes, you must first deactivate or unschedule the campaign.
When you reactivate the campaign, Oracle Eloqua continues sending the email to those contacts in the segment that had not already been sent the email.
However, if you do not reactivate the campaign within 3 months, Oracle Eloqua closes the campaign and removes any contacts from the campaign that were not sent the email. The change is associated to the user who last modified the campaign. For more information, you can check out the retention policy.