Editing contacts
Eloqua allows you to edit the records for existing contacts. You can add, remove, or change information to keep your contact records accurate and up-to-date.
Important: You will receive a validation error when attempting to update to a contact with non-breaking spaces in their email address. When notified of the error, please update the email address as it is invalid and contacts with these email addresses will not be able to be re-saved, included in data imports or have forms and emails submitted to them.
To edit a contact:
- Navigate to Audience
 , then click Contacts.
 - Type a string of letters or numbers corresponding with a contact's First Name, Last Name, or Email Address field values into the Search bar in the upper-right corner. This search is not case-sensitive.
-
Select a contact from the search results. Then, do one of the following:
- Double-click the contact.
- Right-click the contact, then select Open.
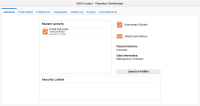
The Edit Contact configuration window opens with the Summary tab selected. This tab includes static information, namely the contact's recent activity, whether they have subscribed globally to emails from your company, the validity of their email address, their physical address and sales information (if applicable).
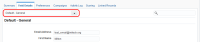
- Click the Field Details tab to edit the contact's information. The fields to configure vary depending on the selected contact view.
-
(Optional) Select a
Note: Contact views can be created and edited by an Administrator. Learn more about
-
Click the Preferences tab to modify the contact's email preferences.
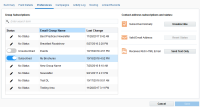
From this tab, you can change the contact's email subscription settings, reset the status on the email address entered for the contact, and change the format in which the contact receives emails (Rich HTML or Text Only).
- Click Save when you have finished making your changes.


The contact record is updated with your changes.