34 Working with Document Task Flows and Document Components
This chapter describes how to enable document functionality to allow WebCenter Portal users to work with files, folders, and other document components (such as links, inline frames, and images) in WebCenter Portal, and how to add and manage document task flows.
After an application specialist or portal moderator has provided access to content by adding task flows or components to a page, end users can create and edit content at runtime, collaborate on documents, integrate with Microsoft Office and Windows Explorer, and add wikis and blogs to a portal. These tasks for end users are described in the "Working with Documents," "Working with Wikis," and "Working with Blogs" chapters in Using Oracle WebCenter Portal.
This chapter includes the following topics:
Permissions:
To perform the tasks in this chapter, you need the following portal-level permissions:-
Basic Services: Edit Page Access and Structure(standard permissions) orPages: Edit Pages(advanced permissions) -
Documentspermissions (advanced permissions).
For more information about permissions, see Section 29.1, "About Roles and Permissions for a Portal."
34.1 About the Document Task Flows
The document task flows provide a variety of formats to display folders and files, including wikis and blogs, on a page in a portal. You can choose the task flows appropriate for your application to provide features for accessing, adding, and managing folders and files; configuring and viewing file and folder properties; and searching file and folder content in Content Server, Oracle Portal, or SharePoint content repositories.
Note:
The availability of SharePoint as a content repository requires the installation of the SharePoint adapter. Administration for SharePoint is performed using WLST commands, not Oracle Enterprise Manager Fusion Middleware Control Console.In a portal, you can add document task flows to a page without necessarily enabling the Documents tool in the portal. If the Documents tool is not enabled in a portal, adding a document task flow to a page does not auto-populate the task flow with folders and files by default, unless you edit the default task flow properties.
When the Documents tool is enabled in the portal template on which a new portal is based, the Documents tool is also enabled in the new portal upon creation. WebCenter Portal handles any necessary configuration with the back-end server at first use, not at portal creation. This is known as "lazy provisioning" and speeds the successful creation of a new portal by deferring the provisioning of tools until they are first used. Alternately, you can manually enable tools such as the Documents tool in a portal; in this case, WebCenter Portal immediately handles any necessary configuration with the back-end server. For more information, see Section 39.1, "About Tools and Services."
When the Documents tool is enabled in a portal (see Section 39.2, "Enabling and Disabling Tools and Services Available to a Portal"), the following content functionality is made available:
-
Document task flows added to the portal are auto-populated by default with folder and file listings based on the default content repository connection.
-
Documents added to the portal are stored in a folder whose security is managed by the portal.
-
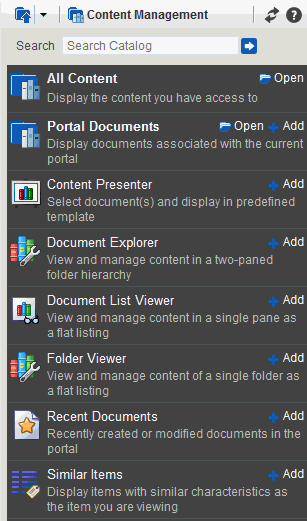
You can add a document task flow that displays only the documents belonging to the current portal (in the Content Management section of the resource catalog, select Portal Documents).
Table 34-1 provides an overview of the document task flows, which offer different ways to display folder and file listings to add and manage content in the connected content repository, or to display individual files in a portal.
Table 34-1 Document Task Flows
| Folder and File Listings | Individual Folders | Individual Files | |
|---|---|---|---|
|
Document Explorer task flow. Displays folders and files in two panes, combining the functionality of the Document Navigator and Folder Viewer task flows. It provides in-place previewing and editing, and robust document management capabilities with an interface that should be familiar to users of Windows Explorer. Size: medium to full page width. |
X |
X |
|
|
Document List Viewer task flow. Displays folders and files in a single pane as a flat listing. It provides preview and editing in separate window, and some management capabilities. Size: narrow to medium page width. |
X |
X |
|
|
Document Manager task flow. Displays folders and files as specified by its |
X |
X |
|
|
Document Navigator task flow. Displays a nested hierarchy of folders and files in a single pane, providing expand and collapse on folders to show the full hierarchy. Intended for use as a component of another Documents task flow (such as the Document Explorer task flow). Clicking folders and files in this task flow standalone performs no action. Size: narrow to medium page width. |
X |
X |
|
|
Folder Viewer task flow. Displays the contents of a folder in a single pane as a flat listing, providing in-place preview and editing, and robust document management capabilities with a straightforward interface that should be familiar to Windows users. Size: medium to full page width. |
X |
X |
|
|
Recent Documents task flow. Displays a list of the files most recently created or modified in the current folder. This task flow is available only when the connected content repository is Content Server. |
X |
||
|
Document Viewer task flow. Displays a preview of a file, or file properties for files that do not support a preview. A tabbed set of panes at the bottom of the task flow provide access to comments, tags, history, info (properties), and links. |
X |
||
|
Document Mini Properties task flow. Displays the Basic properties of a file in a read-only view. |
X1 |
X |
|
|
Document Properties task flow. Displays both Basic and Advanced properties of a file, along with an Edit button to allow you to modify property values. |
X1 |
X |
|
|
Document Version History task flow. Displays a list of versions of a file, allowing for deletion of a selected version. |
X |
Footnote 1 To show folder information in a Document Viewer, Document Mini Properties, or Document Properties task flow, you must set the task flow's Item ID or Resource ID property to the ID of the target folder. See Chapter 35, "Setting Document Task Flow and Document Component Properties."
For more information about each document task flow, refer to the following sections:
-
Section 34.1.1, "Understanding the Document Explorer Task Flow"
-
Section 34.1.2, "Understanding the Document List Viewer Task Flow"
-
Section 34.1.3, "Understanding the Document Manager Task Flow"
-
Section 34.1.4, "Understanding the Document Navigator Task Flow"
-
Section 34.1.6, "Understanding the Recent Documents Task Flow"
-
Section 34.1.7, "Understanding the Document Viewer Task Flow"
-
Section 34.1.8, "Understanding the Document Mini Properties Task Flow"
-
Section 34.1.9, "Understanding the Document Properties Task Flow"
-
Section 34.1.10, "Understanding the Document Version History Task Flow"
34.1.1 Understanding the Document Explorer Task Flow
The Document Explorer task flow displays a list of folders and files in two panes, combining the functionality of the Document Navigator and Folder Viewer task flows. The left pane shows folders in a nested hierarchy, and the right pane shows the contents of the currently selected folder (Figure 34-1). This task flow provides robust document management capabilities with an interface that should be familiar to users of Windows Explorer. The size of this task flow is medium to full page width.
This is the task flow used to display folders and files on the Documents page in a portal, as shown in Figure 34-2 (see Section 8.1, "About System Pages").
Note:
The Documents tool is exposed on the Documents page and administration settings in a portal only with Content Server 11g. If the connected content repository is Content Server 10g, the Documents page is not shown in a portal, and the Documents tool is not available in the portal administration settings (Services and Roles). To use the documents functionality in 10g, you can create a page in a portal and add document task flows to the page (see Section 34.4, "Adding a Document Task Flow to a Page").If you see only a single pane (default), click the Restore Pane icon ( ![]() ) at the left of the task flow to expose the left pane.
) at the left of the task flow to expose the left pane.
Conversely, click the Collapse Pane icon ( ![]() ) at the left of the task flow to hide the left pane.
) at the left of the task flow to hide the left pane.
The Document Explorer task flow is a feature-rich document task flow for viewing, managing, and collaborating on folders and files. In the Document Explorer task flow, you can:
-
Click the expand and collapse icons for a folder to show and hide the subfolders.
-
Click a folder in the left or right pane to display the contents of that folder in the right pane, and drill down further into subfolders.
-
Click a file in the right pane to display a preview of the file contents in the Document Viewer preview pane, with file management options, including in-place editing for some file types. If the file type does not support a preview (for example,
.mp3music files, video files, or.zipfiles), the preview pane displays the file properties (see Section 34.1.7, "Understanding the Document Viewer Task Flow"). -
Click in a row (not on the folder or file name) in the right pane to perform menu actions on the folder or file in that row (see Section 34.5, "Understanding the Document Task Flows Menus and Actions").
Alternatively, right-click a folder or file to display a context menu of available actions.
-
Drag and drop folders and files in the task flow hierarchy to reorganize the file or folder structure.
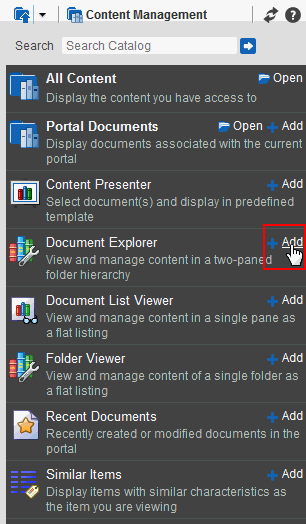
To add a Document Explorer task flow to a page, refer to Section 34.4, "Adding a Document Task Flow to a Page." In the Default Portal Catalog, open Content Management, then click Add next to Document Explorer to display the default listing of folder and files in the root folder of the active content repository connection.
34.1.1.1 Changing the Document Explorer Task Flow Default Listing
You can change the default listing displayed in a Document Explorer task flow in either of the following ways:
Selecting a Specific Folder in the Resource Catalog
To change the default listing displayed in a Document Explorer task flow by selecting a specific folder to display:
-
Drill down to a target folder in the resource catalog, then click the corresponding Add link, and select Document Explorer (Figure 34-3). For more information, see Section 34.3, "Adding a Selected Folder or File to a Page."
Figure 34-3 Document Explorer Option in Add Menu for Folder
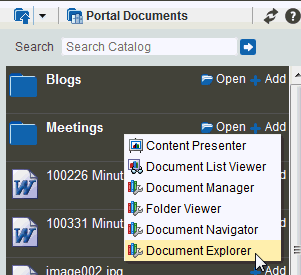
Description of ''Figure 34-3 Document Explorer Option in Add Menu for Folder''
To change the default listing displayed in a Document Explorer task flow by modifying the task flow properties:
-
Edit the page, and click the properties Edit icon (wrench) in the task flow chrome (Figure 34-4) to open the Component Properties dialog.
-
To change the target folder, set the
Connection NameandRoot Folder Pathproperties on the Parameters tab (see Table 35-1, "Document Explorer Task Flow Parameters").
34.1.2 Understanding the Document List Viewer Task Flow
The Document List Viewer task flow displays the contents of a folder in a single pane as a flat listing (Figure 34-5). In this task flow, you can navigate a folder hierarchy, and customize search queries. While this task flow may be useful for a specific need, its search functionality is replicated and enhanced by using the Content Presenter task flow instead. The size of this task flow is narrow to medium page width.
Figure 34-5 Document List Viewer Task Flow (with Show Folders enabled)
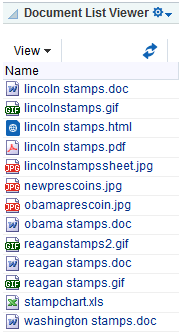
Description of ''Figure 34-5 Document List Viewer Task Flow (with Show Folders enabled)''
In the Document List Viewer task flow, you can:
-
Click a folder to display the contents of that folder, and drill down further into subfolders.
-
Click a file to display a preview of the file contents in a separate Document Viewer preview window, with file management options, including editing for some file types. If the file type does not support a preview (for example,
.mp3music files, video files, or.zipfiles), the preview window displays the file properties. See Section 34.1.7, "Understanding the Document Viewer Task Flow." -
Click in a row to perform View menu actions on the folder or file in that row. View is the only menu available for this task flow.
To add a Document List Viewer task flow to a page, refer to Section 34.4, "Adding a Document Task Flow to a Page." In the Default Portal Catalog, open Content Management, then click Add next to Document List Viewer.
34.1.2.1 Changing the Document List Viewer Task Flow Default Listing
You can change the default listing displayed in a Document List Viewer task flow in any of the following ways:
Selecting a Specific Folder in the Resource Catalog
To change the default listing displayed in a Document List Viewer task flow by selecting a specific folder to display:
-
Drill down to a target folder in the resource catalog, then click the corresponding Add link, and select Document List Viewer (Figure 34-6). For more information, see Section 34.3, "Adding a Selected Folder or File to a Page."
Figure 34-6 Document List Viewer Option in Add Menu for Folder
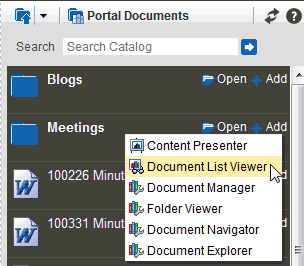
Description of ''Figure 34-6 Document List Viewer Option in Add Menu for Folder''
To change the default listing displayed in a Document List Viewer task flow by modifying the task flow properties:
-
Edit the page, and click the properties Edit icon (the second wrench icon in the task flow chrome) (Figure 34-7) to open the Component Properties dialog.
-
To display folders as well as files, select the
Show Foldersparameter check box. -
To change the target folder, set the
Connection NameandRoot Folder Pathproperties on the Parameters tab (see Table 35-2, "Document List Viewer Task Flow Parameters").
Specifying Detailed Content Source Criteria
To change the default listing displayed in a Document List Viewer task flow to list content that matches specified criteria:
-
In the task flow heading, click the configuration Edit icon (the first wrench icon in the task flow chrome) (Figure 34-8) to open the Document List Viewer Configuration dialog.
-
In the Document List Viewer Configuration dialog (Figure 34-9), select from the Content Source drop-down list:
Figure 34-9 Document List Viewer Configuration Dialog
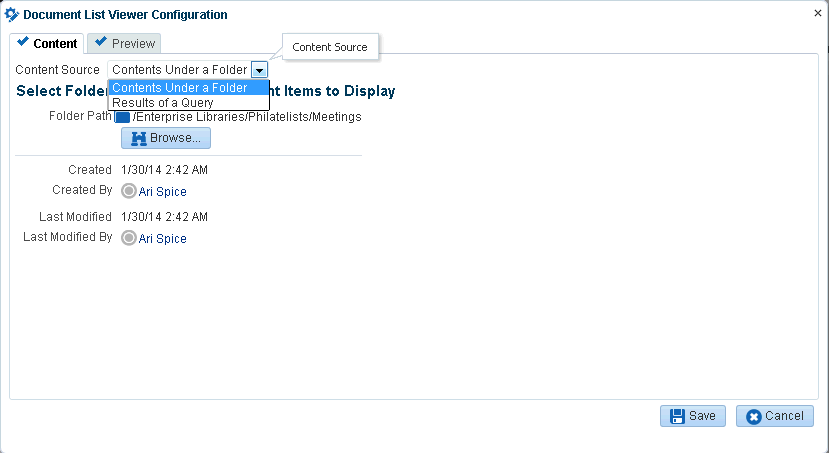
Description of ''Figure 34-9 Document List Viewer Configuration Dialog''
-
Contents Under a Folder (folders display in the task flow pane only when the
Show Foldersparameter is selected). Click the Browse icon, navigate to and select the folder with the content you want to initially display in the task flow, then click Save. -
Results of a Query. In the Results of a Query pane (Figure 34-10 and Figure 34-11), enter desired values in the fields that you want the query to retrieve, as described in Table 34-2.
Figure 34-10 Results of a Query Pane: All Content Types
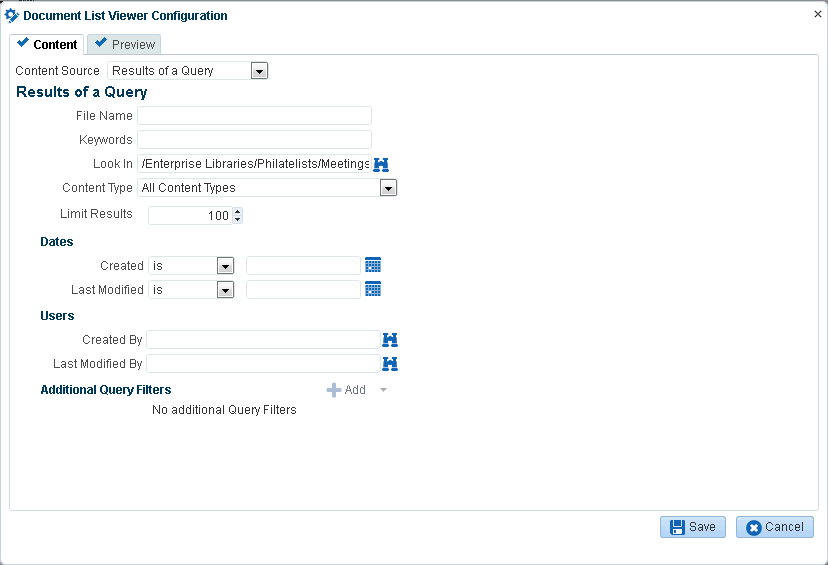
Description of ''Figure 34-10 Results of a Query Pane: All Content Types''
Figure 34-11 Results of a Query Pane: Selected Content Type
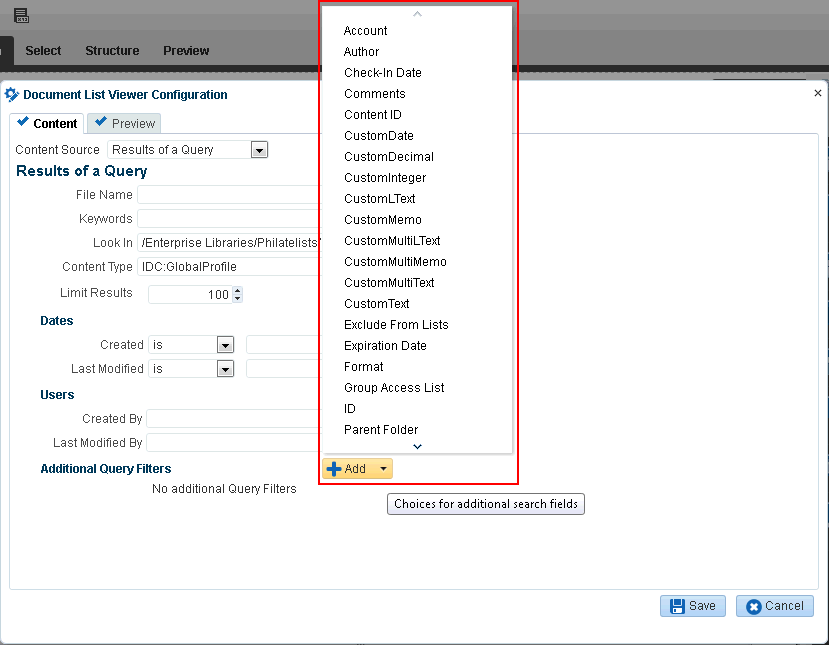
Description of ''Figure 34-11 Results of a Query Pane: Selected Content Type''
Table 34-2 Specifying Query Criteria for Results of a Query
Element Description File Name
Enter the name of a file in the specified Repository that you want to display in the Document List Viewer task flow. You can use
*as a wild card character to retrieve multiple files; for example:*.jpg.Keywords
Enter any value that may be present in the content of the documents. The value may be one or more words or phrases. Keyword search requires full-text search to be configured in Content Server by enabling FullText Search Option, as described in the "Configuring the Content Server Instance" section in Installing and Configuring Oracle WebCenter Content.
Content Type
Select All Content Types to retrieve content items regardless of the content type. Or, select the name of a content type profile defined in Content Server. A content type profile specifies properties that define a specific type of content (for example, a press release, or a news flash, or an image). The content type IDC:GlobalProfile is the name of a default content type profile defined in Content Server that can be applied if no other content type profiles are defined.
Limit Results
Specify the maximum number of content items to be returned by the query.
Dates
In the Created and/or Last Modified fields, select a modifier to search for content items matching an exact date (is), a following date (is after), a preceding date (is before), or a date between two other dates (is between), which adds an additional date field for entering the second date. Click the Select Date icon to select a date in the correct format (
mm/dd/yy), for example11/18/11, or enter a date manually.Users
In the Created By (user who uploaded) and Last Modified By fields, enter a user name for the creator or last modifier of the content item, or click the Browse icon to open the Search Users dialog where you can select from a list of users or search for a user name. For tips on searching for a user in the identity store, see Section 30.5.1, "Searching for a User or Group in the Identity Store."
Additional Query Filters
Not applicable when Content Type is set to All Content Types. For a selected content type profile (prefixed IDC:), click the Add icon to list all the properties that are defined for the selected profile (Figure 34-11). Select one or more properties to refine the query to find content items with specific property settings.
Sort Order
Not applicable when Content Type is set to All Content Types. For a selected content type profile (prefixed IDC:), specify a sort order for the properties shown in the Sort On list.
-
-
Click the Preview tab to view the content that will display in the Document List Viewer task flow.
Note:
If the content repository includes an invalid type configuration, then no content displays on the Preview tab. Instead, an error message reportsUnable to retrieve content type information.
34.1.3 Understanding the Document Manager Task Flow
The Document Manager task flow displays folders and files as specified by its Layout property (see Section 35.4, "Setting Document Manager Task Flow Properties"):
-
Explorer layout (default): Displays folders and files in two panes; the left pane shows folders, and the right pane show the contents of the currently selected folder (Figure 34-12). This layout is identical to the Document Explorer task flow, without the properties
Show Documents,Show Folders, andCollapse Tree Navigation(see Section 35.2, "Setting Document Explorer Task Flow Properties"). -
Table layout: Displays only the contents of the current folder in a single pane, with the capability to click a folder to drill down, refreshing the pane with the folder contents (Figure 34-13).
-
Tree Table layout: Displays the folder hierarchy in a single pane, beginning with the root folder, with the capability to expand and collapse folders (Figure 34-14). This layout may be familiar to Mac OS X users.
Figure 34-12 Document Manager Task Flow: Explorer Layout

Description of ''Figure 34-12 Document Manager Task Flow: Explorer Layout''
Figure 34-13 Document Manager Task Flow: Table Layout

Description of ''Figure 34-13 Document Manager Task Flow: Table Layout''
Figure 34-14 Document Manager Task Flow: Tree Table Layout

Description of ''Figure 34-14 Document Manager Task Flow: Tree Table Layout''
In the Document Manager task flow, you can:
-
Click the expand and collapse icons for a folder to show and hide the contents in the folder within the folder hierarchy.
-
Click a folder to display the contents of only that folder, and drill down further into subfolders.
-
Click a file to display a preview of the file contents in the Document Viewer preview pane, with file management options, including in-place editing for some file types. If the file type does not support a preview (for example,
.mp3music files, video files, or.zipfiles), the preview pane displays the file properties (see Section 34.1.7, "Understanding the Document Viewer Task Flow"). -
Click in a row (not on the folder or file name) in the right pane to perform menu actions on the folder or file in that row (see Section 34.5, "Understanding the Document Task Flows Menus and Actions").
Alternatively, right-click a folder or file to display a context menu of available actions.
-
Drag and drop folders and files in the task flow hierarchy to reorganize the file or folder structure.
To add a Document Manager task flow to a page, refer to Section 34.4, "Adding a Document Task Flow to a Page."
Note:
The Document Manager task flow is not available in the Default Portal Catalog, so you will only see an entry for it if it has been added to a custom resource catalog that has been made available to the page. However, if you navigate to a specific folder in the Default Portal Catalog, this task flow is selectable from the Add menu for the folder (Figure 34-3).For more information, see Section 23.5.1, "Adding a Resource to a Resource Catalog" (in the Add Resource Catalog Item dialog, select Task Flows, then scroll to Documents for a list of all available content task flows). To use the custom resource catalog for editing portal pages, make sure it is Available, then select it for use by pages in the portal, as described in Section 7.3.5, "Changing the Resource Catalogs for Pages and the Page Template for a Portal."
34.1.3.1 Changing the Document Manager Task Flow Default Listing
You can change the default listing displayed in a Document Manager task flow in either of the following ways:
Selecting a Specific Folder in the Resource Catalog
To change the default listing displayed in a Document Manager task flow by selecting a specific folder to display:
-
Drill down to a target folder in the resource catalog, then click the corresponding Add link, and select Document Manager (Figure 34-15). For more information, see Section 34.3, "Adding a Selected Folder or File to a Page."
Figure 34-15 Document Manager Option in Add Menu for Folder
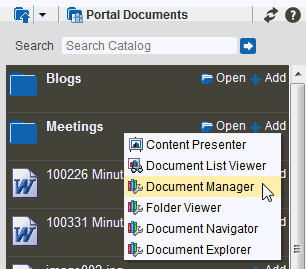
Description of ''Figure 34-15 Document Manager Option in Add Menu for Folder''
To change the default listing displayed in a Document Manager task flow by modifying the task flow properties:
-
Edit the page, and click the properties Edit icon (wrench) in the task flow chrome (Figure 34-16) to open the Component Properties dialog.
-
To change the target folder, set the
Connection NameandRoot Folder Pathproperties on the Parameters tab (see Table 35-3, "Document Manager Task Flow Parameters").
34.1.4 Understanding the Document Navigator Task Flow
The Document Navigator task flow displays a nested hierarchy of folders and files in a single pane, with the capability to expand and collapse folders to view folder hierarchy within the current folder (Figure 34-17). There are no menu options available for this task flow. This task flow is intended for use as a component of another document task flow (such as the Document Explorer task flow). Clicking folders and files in this task flow standalone performs no action. The size of this task flow is narrow to medium page width.
Figure 34-17 Document Navigator Task Flow
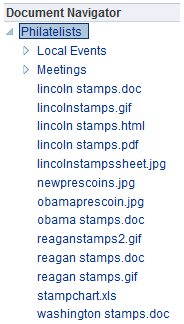
Description of ''Figure 34-17 Document Navigator Task Flow''
In the Document Navigator task flow, you can:
-
Click the expand and collapse icons for a folder to show and hide the contents in the folder within the folder hierarchy.
-
Drag and drop folders and files in the task flow hierarchy to reorganize the file or folder structure.
To add a Document Navigator task flow to a page, refer to Section 34.4, "Adding a Document Task Flow to a Page."
Note:
The Document Navigator task flow is not available in the Default Portal Catalog, so you will only see an entry for it if it has been added to a custom resource catalog that has been made available to the page. However, if you navigate to a specific folder in the Default Portal Catalog, this task flow is selectable from the Add menu for the folder (Figure 34-3).For more information, see Section 23.5.1, "Adding a Resource to a Resource Catalog" (in the Add Resource Catalog Item dialog, select Task Flows, then scroll to Documents for a list of all available content task flows). To use the custom resource catalog for editing portal pages, make sure it is Available, then select it for use by pages in the portal, as described in Section 7.3.5, "Changing the Resource Catalogs for Pages and the Page Template for a Portal."
34.1.4.1 Changing the Document Navigator Task Flow Default Listing
You can change the default listing displayed in a Document Navigator task flow in either of the following ways:
Selecting a Specific Folder in the Resource Catalog
To change the default listing displayed in a Document Navigator task flow by selecting a specific folder to display:
-
Drill down to a target folder in the resource catalog, then click the corresponding Add link, and select Document Navigator (Figure 34-18). For more information, see Section 34.3, "Adding a Selected Folder or File to a Page".
Figure 34-18 Document Navigator Option in Add Menu for Folder
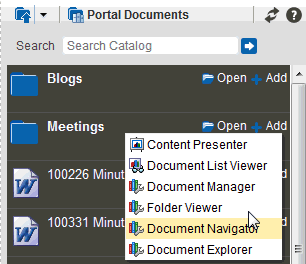
Description of ''Figure 34-18 Document Navigator Option in Add Menu for Folder''
To change the default listing displayed in a Document Navigator task flow by modifying the task flow properties:
-
Edit the page, and click the properties Edit icon (wrench) in the task flow chrome (Figure 34-19) to open the Component Properties dialog.
-
To change the target folder, set the
Connection NameandStart Folder Pathproperties on the Parameters tab (see Table 35-4, "Document Navigator Task Flow Parameters").
34.1.5 Understanding the Folder Viewer Task Flow
The Folder Viewer task flow displays the contents of a folder in a single pane as a flat listing (Figure 34-20), providing in-place preview and editing of the contents of the folder, and robust document management capabilities with a straightforward interface that should be familiar to Windows users. The size of this task flow is medium to full page width.
In the Folder Viewer task flow, you can:
-
Click a folder to display the contents of that folder, and drill down further into subfolders.
-
Click a file to display a preview of the file contents in the Document Viewer preview pane, with file management options, including editing for some file types. If the file type does not support a preview (for example,
.mp3music files, video files, or.zipfiles), the preview pane displays the file properties (see Section 34.1.7, "Understanding the Document Viewer Task Flow"). -
Click in a row (not on the folder or file name) in the right pane to perform menu actions on the folder or file in that row (see Section 34.5, "Understanding the Document Task Flows Menus and Actions").
Alternatively, right-click a folder or file to display a context menu of available actions.
-
Drag and drop folders and files in the task flow hierarchy to reorganize the file or folder structure.
To add a Folder Viewer task flow to a page, refer to Section 34.4, "Adding a Document Task Flow to a Page." In the Default Portal Catalog, open Content Management, then click Add next to Folder Viewer to display the default listing of folders and files in the root folder of the active content repository connection.
34.1.5.1 Changing the Folder Viewer Task Flow Default Listing
You can change the default listing displayed in a Folder Viewer task flow in either of the following ways:
Selecting a Specific Folder in the Resource Catalog
To change the default listing displayed in a Folder Viewer task flow by selecting a specific folder to display:
-
Drill down to a target folder in the resource catalog, then click the corresponding Add link, and select Folder Viewer (Figure 34-21). For more information, see Section 34.3, "Adding a Selected Folder or File to a Page."
Figure 34-21 Folder Viewer Option in Add Menu for Folder
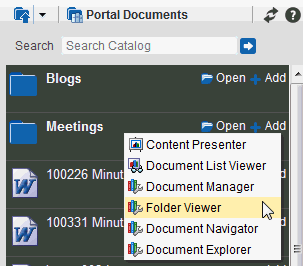
Description of ''Figure 34-21 Folder Viewer Option in Add Menu for Folder''
To change the default listing displayed in a Folder Viewer task flow by modifying the task flow properties:
-
Edit the page, and click the properties Edit icon (wrench) in the task flow chrome (Figure 34-22) to open the Component Properties dialog.
-
To change the target folder, set the
Connection NameandStart Folder Pathproperties on the Parameters tab (see Table 35-5, "Folder Viewer Task Flow Parameters").
34.1.6 Understanding the Recent Documents Task Flow
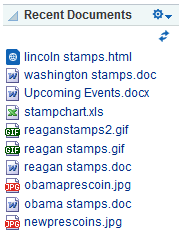
The Recent Documents task flow displays a listing of the files most recently created or modified by the current user (Figure 34-23).
In the Recent Documents task flow, you can:
-
Click a file to display a preview of the file contents in a separate Document Viewer preview window, with file management options, including editing for some file types. If the file type does not support a preview (for example,
.mp3music files, video files, or.zipfiles), the preview window displays the file properties. See Section 34.1.7, "Understanding the Document Viewer Task Flow."
To add a Recent Documents task flow to a page, refer to Section 34.4, "Adding a Document Task Flow to a Page." In the Default Portal Catalog, open Content Management, then click Add next to Recent Documents to display the most recently created or modified files in the current portal.
The default property settings add a listing of the most recently created or modified files in the entire root folder of the active content repository connection to the page. See Section 35.7, "Setting Recent Documents Task Flow Properties" to modify the property settings for the Recent Documents task flow.
34.1.7 Understanding the Document Viewer Task Flow
The Document Viewer displays different content depending on the type of item selected to appear:
-
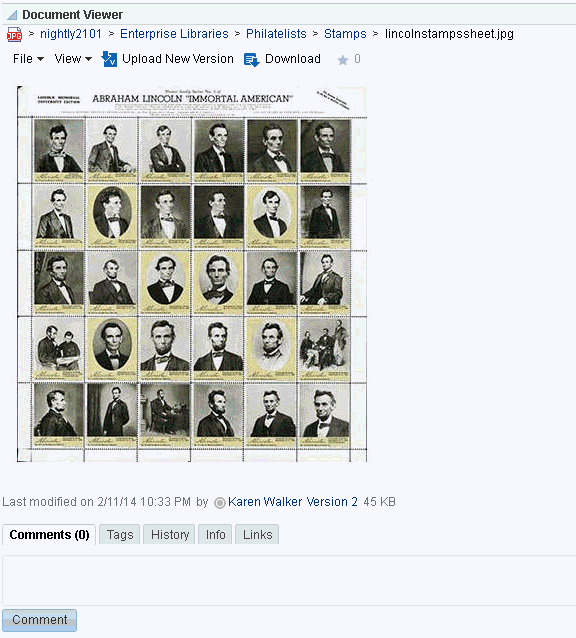
Images (Figure 34-24)
-
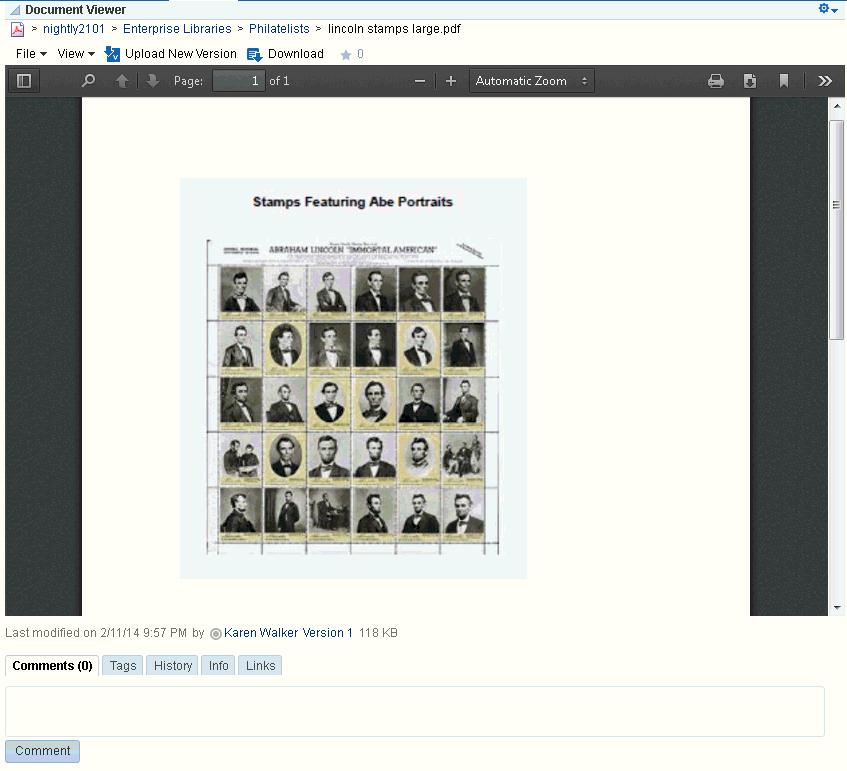
PDFs (Figure 34-25)
-
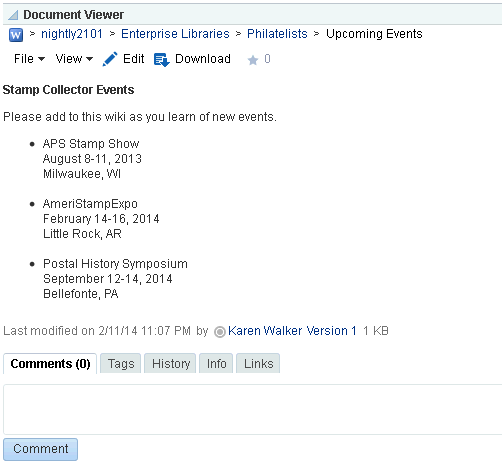
Wiki documents (Figure 34-26)
-
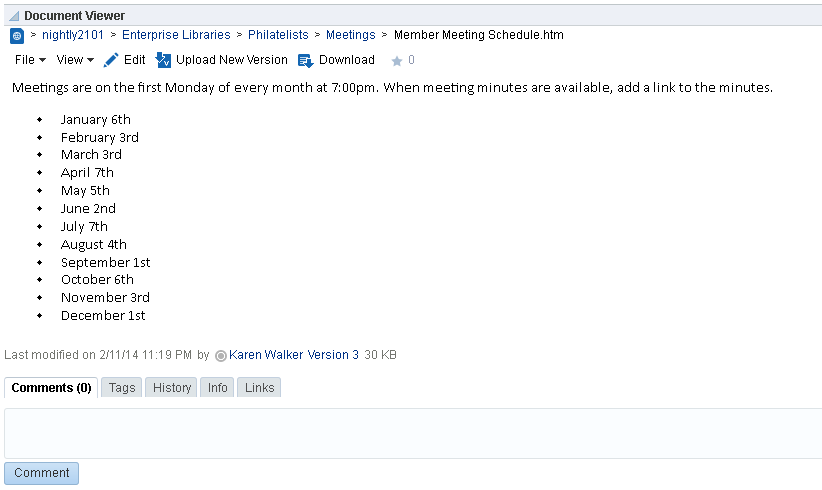
HTML files (Figure 34-27)
-
Microsoft Office files (Figure 34-28)
-
Files that do not support previews (for example,
.mp3music files, video files, or.zipfiles; Figure 34-29) -
Site Studio files (Figure 34-30)
-
Folders (Figure 34-31)
To show folder information in a Document Viewer task flow, you must set the task flow's
Item IDproperty to the ID of the target folder. See Section 35.8, "Setting Document Viewer Task Flow Properties."
The Document Viewer content can consist of:
-
Toolbar with menus and actions
For all item types; the options differ depending on the item type
-
File preview
For files that support a preview (for example, wiki documents, Microsoft files, images, PDFs)
-
Basic properties: the file name, content repository identifier, item type, size, date and time file was created, who created it, date and time file was last modified, and who modified it
For Microsoft files, and files that do not support a preview (for example,
.mp3music files, video files, or.zipfiles) -
Advanced properties
For Microsoft files and files that do not support a preview
-
The following tabbed panes:
-
Comments: Enter or delete comments for a file to provide additional information that you want to convey to other users about the file. See the "Commenting on Items" section in Using Oracle WebCenter Portal.
-
Tags: Specifies keywords related to the content of the file. Tags are useful for making a file more widely discoverable in search results. See the "Working with Tags" section in Using Oracle WebCenter Portal.
-
History: Provides version information about the current file, and allows you to selectively delete versions. For more information, see the "Viewing and Deleting File Version History" section in Using Oracle WebCenter Portal.
-
Info: Provides the option to edit some properties such a file name and description. In the Advanced section, displays metadata property settings for the file. See the "Working with Folder and File Properties" section in Using Oracle WebCenter Portal.
-
Links: Provides a way to view, access, and associate related information by linking a file to a discussion, document, event, note, or URL. For example, you can create a link to associate a project plan document with a list of project issues. See the "Managing Document Links" section in Using Oracle WebCenter Portal.
-
Recommendations: Provides suggestions of other documents you might want to view, based on the current document. This list uses the Similar Items task flow, which must be configured to display this pane. See the "Viewing Document Recommendations" section in Using Oracle WebCenter Portal.
By default, the Comments pane displays as the active pane. If you have previously launched the Document Viewer to preview a file in the current session, then select another file to preview, the active pane in the Document Viewer is the pane that you last selected when previewing the prior file.
-
Figure 34-24 Document Viewer Task Flow for Image File
Description of ''Figure 34-24 Document Viewer Task Flow for Image File''
Figure 34-25 Document Viewer Task Flow for PDF File
Description of ''Figure 34-25 Document Viewer Task Flow for PDF File''
Figure 34-26 Document Viewer Task Flow for Wiki Document
Description of ''Figure 34-26 Document Viewer Task Flow for Wiki Document''
Figure 34-27 Document Viewer Task Flow for HTML File
Description of ''Figure 34-27 Document Viewer Task Flow for HTML File''
Figure 34-28 Document Viewer Task Flow for Microsoft Word File
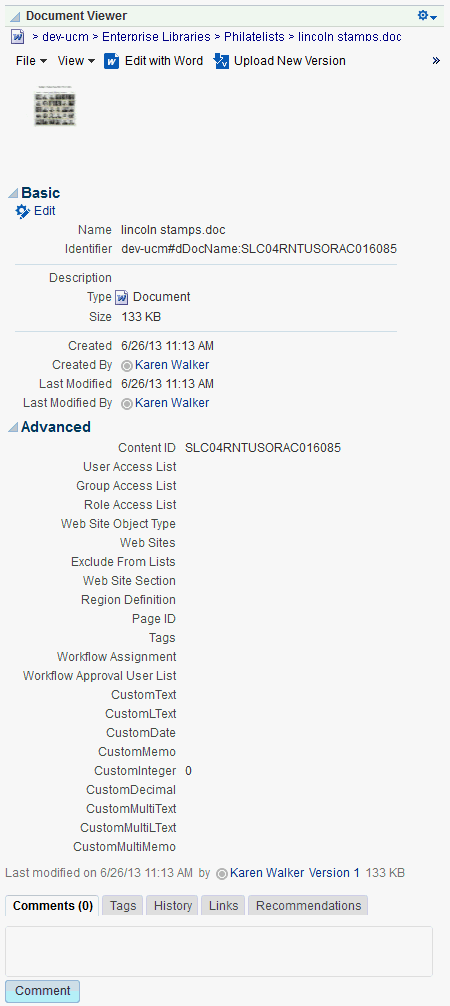
Description of ''Figure 34-28 Document Viewer Task Flow for Microsoft Word File''
Figure 34-29 Document Viewer Task Flow for Zip File
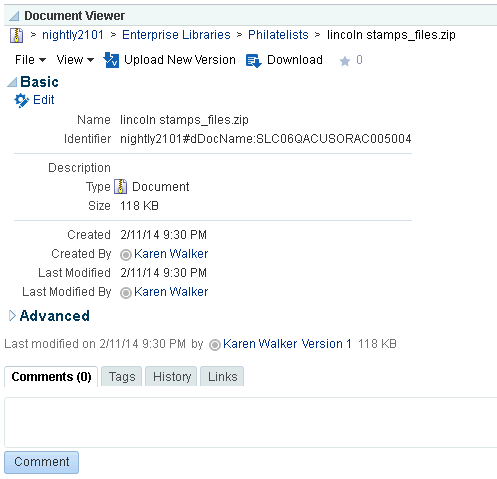
Description of ''Figure 34-29 Document Viewer Task Flow for Zip File''
Figure 34-30 Document Viewer Task Flow for Site Studio File
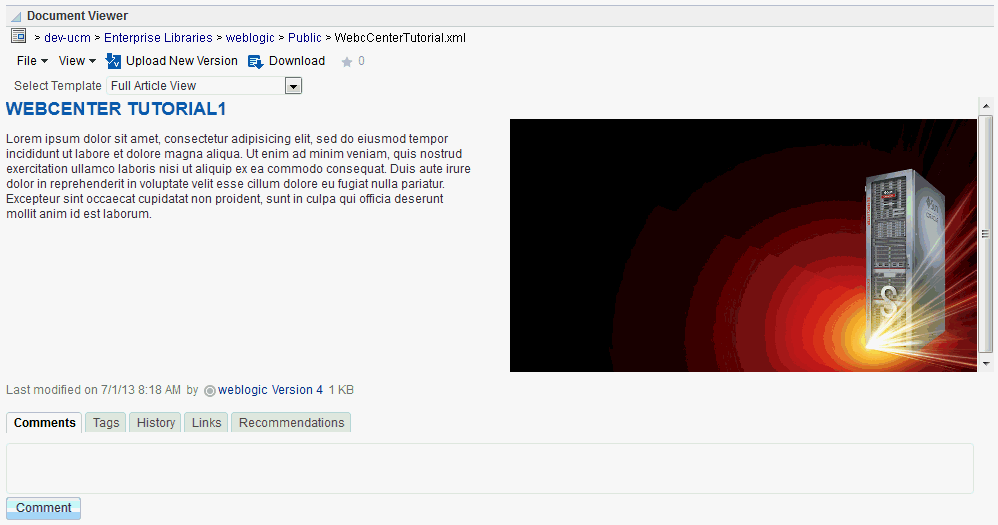
Description of ''Figure 34-30 Document Viewer Task Flow for Site Studio File''
Figure 34-31 Document Viewer Task Flow for Folder
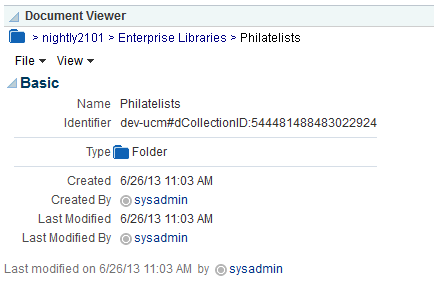
Description of ''Figure 34-31 Document Viewer Task Flow for Folder''
To add a Document Viewer task flow to a page, refer to Section 34.4, "Adding a Document Task Flow to a Page." In the Default Portal Catalog, open Content Management, navigate to the file that you want to add to the page, then click the Add link next to the file, and select Document Viewer. To show folder information in a Document Viewer task flow, you must set the task flow's Item ID property to the ID of the target folder.
For information about setting properties on the Document Viewer task flow, see Section 35.8, "Setting Document Viewer Task Flow Properties."
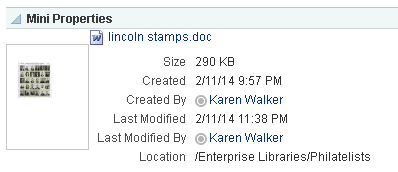
34.1.8 Understanding the Document Mini Properties Task Flow
The Document Mini Properties task flow can display:
-
The Basic properties of an individual file in a read-only view (Figure 34-32). This choice is available for all file types.
Figure 34-32 Mini Properties Task Flow for File
Description of ''Figure 34-32 Mini Properties Task Flow for File''
-
Folder properties and settings.
To add a Document Mini Properties task flow to a page, refer to Section 34.3, "Adding a Selected Folder or File to a Page." In the Default Portal Catalog, open Content Management, navigate to the file that you want to add to the page, then click the Add link next to the file, and select Mini Properties. To show folder information in a Document Mini Properties task flow, you must set the task flow's Resource ID property to the ID of the target folder.
For information about setting properties on the Mini Properties task flow, see Section 35.9, "Setting Document Mini Properties Task Flow Properties"
34.1.9 Understanding the Document Properties Task Flow
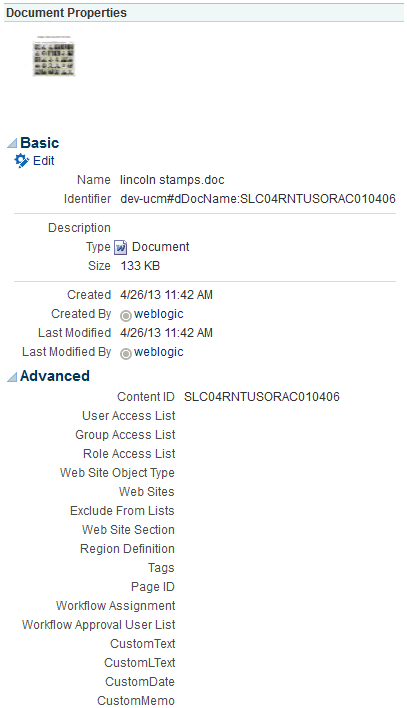
The Document Properties task flow can display:
-
Both Basic and Advanced properties of an individual file, along with an Edit button to allow you to modify property values (Figure 34-33). This choice is available for all file types. See the "Working with Folder and File Properties" section in Using Oracle WebCenter Portal.
Figure 34-33 Document Properties Task Flow for File
Description of ''Figure 34-33 Document Properties Task Flow for File''
-
Folder properties and settings.
To add a Document Properties task flow to a page, refer to Section 34.3, "Adding a Selected Folder or File to a Page." In the Default Portal Catalog, open Content Management, navigate to the file that you want to add to the page, then click the Add link next to the file, and select Document Properties. To show folder information in a Document Properties task flow, you must set the task flow's Item ID property to the ID of the target folder.
For information about setting properties on the Document Properties task flow, see Section 35.10, "Setting Document Properties Task Flow Properties."
34.1.10 Understanding the Document Version History Task Flow
The Document Version History task flow displays a list of versions of an individual file, allowing for deletion of a selected version (Figure 34-34 and Figure 34-35). This choice is available for all file types. See the "Viewing and Deleting File Version History" section in Using Oracle WebCenter Portal.
Figure 34-34 Version History Task Flow for File: Vertical Layout (Horizontal Layout property deselected (default))

Description of ''Figure 34-34 Version History Task Flow for File: Vertical Layout (Horizontal Layout property deselected (default))''
Figure 34-35 Version History Task Flow for File: Horizontal Layout property selected

Description of ''Figure 34-35 Version History Task Flow for File: Horizontal Layout property selected''
To add a Document Version History task flow to a page, refer to Section 34.3, "Adding a Selected Folder or File to a Page." In the Default Portal Catalog, open Content Management, navigate to the file that you want to add to the page, then click the Add link next to the file, and select Version History.
You can set the Horizontal Layout property of the task flow to specify whether you want the version history information to format vertically (Figure 34-34) or horizontally (Figure 34-35). For information about setting properties on the Document Version History task flow, see Section 35.11, "Setting Document Version History Task Flow Properties."
34.2 About Document Components
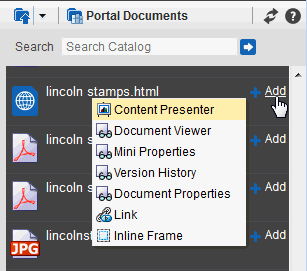
The Documents tool provides features for adding document components to a page in a portal. As described in Section 34.3, "Adding a Selected Folder or File to a Page", you use the resource catalog to add a document component to a page as a container for a selected folder or file (Figure 34-36).
Figure 34-36 Add Menu for HTML File in Resource Catalog
Description of ''Figure 34-36 Add Menu for HTML File in Resource Catalog''
Document components enable you to display an individual file on a page in a variety of ways, depending on the file type:
-
A Link displays the name of a selected file as a link, which end users can click to display the file content in its native application (Figure 34-37).
Figure 34-37 Link Component (for Microsoft Word file)

Description of ''Figure 34-37 Link Component (for Microsoft Word file)''
-
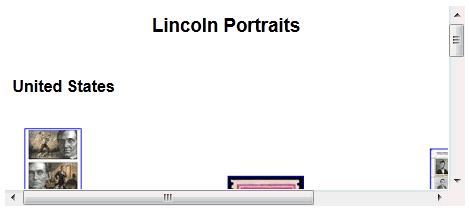
An Inline Frame displays the content of a selected file as a preview (Figure 34-38).
Figure 34-38 Inline Frame Component (for HTML file)
Description of ''Figure 34-38 Inline Frame Component (for HTML file)''
-
An Image displays a selected file as an image (Figure 34-39).
Figure 34-39 Image Component (for JPEG file)
Description of ''Figure 34-39 Image Component (for JPEG file)''
Table 34-3 shows the content types that support each of these document components.
Table 34-3 Components for Folders and Files
| Content Type | Document Components |
|---|---|
|
Documents of various types (XML, PDF, JAVA, TXT, DOC, XLS, HTM) |
Link |
|
Documents that can be rendered in a browser (HTML, flash, PDF and image) |
Inline frame |
|
Images (PNG, JPG, GIF) |
Link Inline frame Image |
To display a folder or file using one of these document components, see Section 34.3, "Adding a Selected Folder or File to a Page."
34.3 Adding a Selected Folder or File to a Page
Note:
If you want to place a single HTML file on a page, and no other components, it is more efficient to create a page using the HTML page style, rather than adding an HTML file to an existing page. For more information about the HTML page style, see Section 25.1, "About Page Styles."You can display an individual folder or file from a connected content repository on a page, by choosing the required container for the selected folder or file in the resource catalog, as shown in Figure 34-40 and Figure 34-41.
Note:
When you add a folder or file from Content Server to a page in a portal, it can be viewed and managed from within WebCenter Portal. However, any folder shortcuts created in Content Server cannot be viewed and managed from within WebCenter Portal.Figure 34-40 Add Menu for Folder in Resource Catalog
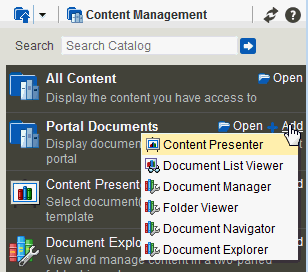
Description of ''Figure 34-40 Add Menu for Folder in Resource Catalog''
Figure 34-41 Add Menu for Image File in Resource Catalog
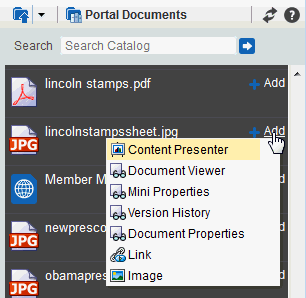
Description of ''Figure 34-41 Add Menu for Image File in Resource Catalog''
Table 34-4 lists all containers available for displaying folders and files on a portal page.
Table 34-4 Adding Individual Folders and Files to a Page
| For Folders | For Individual Files |
|---|---|
|
|
Footnote 1 To show folder information in a Document Viewer, Document Mini Properties, or Document Properties task flow, you must set the task flow's resource ID parameter to the ID of the target folder. See Chapter 35, "Setting Document Task Flow and Document Component Properties."
Footnote 2 You can add an image to a portal in any of the following ways:
-
An Image component, which can optionally link to another location when clicked. Note that image components cannot be returned in a search. To add an Image component to a page, see Section 15.2, "Adding a Web Development Component to a Page."
-
An image file, which is selected from the connected content repository to display on a page standalone or in a Content Presenter task flow. Image files can be returned in a search. This section describes how to add an image file to a page.
-
An image added to a wiki document or wiki page, using the Embed Image tool in the Rich Text Editor. To add an image to a wiki, see the "About the Rich Text Editor Toolbar" section in Using Oracle WebCenter Portal.
For more information about any of the containers listed in Table 34-4, see Section 33.1, "About the Content Presenter Task Flow," Section 34.1, "About the Document Task Flows," and Section 34.2, "About Document Components."
Notes:
-
Another way of adding folders and files to a page is through a custom navigation model added to a page. Application specialists can build custom navigation models, which can be added to the page templates for a portal to allow end users to navigate the documents in the portal. For more information, see Section 22.3.3, "Adding Items to a Navigation Model."
-
When an item that is stored in a content repository is added to a page, the WebCenter Portal application instructs the browser to check whether the content is up-to-date before a cached copy, if available, displays in the browser. The default content validation process supports collaboration use cases that require real-time content exchange.
-
For static content or content that does not change frequently, content validation checks incur an unnecessary performance overhead. For static content, Oracle recommends the following:
-
Content Server: use Content Presenter to display static content stored in Content Server. Content Presenter shows the latest released version of content; and provides controls to preview unreleased content that is in workflow.
-
Other content repositories (such as SharePoint): ask your administrator to override the default content cache setting by editing the Web Tier
mod_wl_ohsconfiguration file (mod_wl_ohs.conf). This is fully explained in "Setting the Cache-Control Response Header" in the white paper "Integrating the SharePoint 2007 Adapter with WebCenter Portal" available from Oracle Technology Network athttp://www.oracle.com/technetwork/middleware/webcenter/owcs-ps3-sharepoint-wcs-wp-335282.pdf.
-
To add a selected folder or file to a page in a portal:
-
Open the page in edit mode (see Section 12.4.3, "Opening a Page in the Page Editor (Composer)").
Note:
By default, the view switcher is set to and Composer displays the page in Design view showing the inline resource catalog.
 -
Navigate to the section of the resource catalog that provides access to the folders and files in the connected content repository.
Tip:
The presence or location of this section depends on how the resource catalog is configured. For example, in the Default Portal Catalog, next to Content Management, click Open to expose the content selections (Figure 34-42).Figure 34-42 Opening the Content Management Section in the Resource Catalog
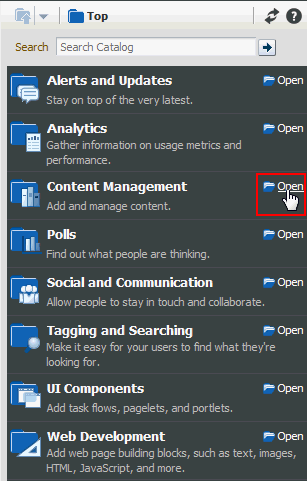
Description of ''Figure 34-42 Opening the Content Management Section in the Resource Catalog''
-
The next link you click depends on your current location in the application. If you are using the Default Portal Catalog (Figure 34-43):
-
Click All Content to display all folders and files to which you have access.
-
In a portal, click Portal Documents, which provides a shortcut to a list of all of the folders and files to which you have access in the current portal. This selection is shown only if the Documents tool is enabled in the portal (see Section 39.2, "Enabling and Disabling Tools and Services Available to a Portal").
-
In the Home portal, click Personal Documents, which provides a shortcut to a list of all the folders and files to which you have access in the Home portal.
Figure 34-43 Content Selections in a Portal
Description of ''Figure 34-43 Content Selections in a Portal''
-
-
Continue to drill down into folders until you arrive at the folder or file that you want to add to the page, then click the Add link next to the folder or file to display a menu of available containers for the folder or file, applicable to the file type (Figure 34-44, Figure 34-45, Figure 34-46, and Figure 34-47).
Note:
When you drill down to the folders and files in the connected content repository, you are drilling into the live connection with the content repository. The documents you see listed are not static resources, but reflect the latest status of folders and files in the content repository associated with your WebCenter Portal application.Figure 34-44 Add Menu for Folder in Resource Catalog

Description of ''Figure 34-44 Add Menu for Folder in Resource Catalog''
Figure 34-45 Add Menu for Microsoft Word File in Resource Catalog
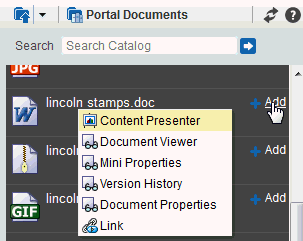
Description of ''Figure 34-45 Add Menu for Microsoft Word File in Resource Catalog''
Figure 34-46 Add Menu for HTML File in Resource Catalog

Description of ''Figure 34-46 Add Menu for HTML File in Resource Catalog''
Figure 34-47 Add Menu for Image File in Resource Catalog

Description of ''Figure 34-47 Add Menu for Image File in Resource Catalog''
-
Select the content task flow or document component that you wish to use. The menu displays only those containers that support the selected folder or file.
Note:
The Content Presenter task flow is available only when the connected content repository is Content Server. When you select the Content Presenter task flow, the folder or file displays in a default display template for its type. For more information, see Chapter 33, "Publishing Content Using Content Presenter."The Document Viewer, Document Mini Properties, and Document Properties task flows are not available in the Add menu for a folder. To show folder information in one of these task flows, you must first add the task flow for a file and then set the task flow's resource ID parameter to the ID of the target folder.
-
Click Save to save your changes.
34.4 Adding a Document Task Flow to a Page
See Section 34.1, "About the Document Task Flows" to help you select the task flow most appropriate for your needs.
If you want to add and manage a specific folder or file in a document task flow, refer to Section 34.3, "Adding a Selected Folder or File to a Page." This section describes how to select and add a document task flow independent of a specific folder or file. The task flow is auto-populated with the folders and files in the connected content repository.
To add a document task flow to a page:
-
Open the page in edit mode (see Section 12.4.3, "Opening a Page in the Page Editor (Composer)").
Note:
By default, the view switcher is set to and Composer displays the page in Design view showing the inline resource catalog.
 -
Navigate to the section of the resource catalog that provides access to the folders and files in the connected content repository.
Tip:
The presence or location of this section depends on how the resource catalog is configured. For example, in the Default Portal Catalog, next to Content Management, click Open to expose the content selections (Figure 34-48).Figure 34-48 Opening the Content Management Section in the Resource Catalog

Description of ''Figure 34-48 Opening the Content Management Section in the Resource Catalog''
For information about the selections shown in the Default Portal Catalog, see Section 32.2, "About Content Management Selections in the Resource Catalog."
-
Click Add next to the task flow that you want to add to your page (Figure 34-49).
Note:
The Document Manager and Document Navigator task flows are not available in the Default Portal Catalog, so you will only see an entry for it if it has been added to a custom resource catalog that has been made available to the page. However, if you navigate to a specific folder in the Default Portal Catalog, these task flows are selectable from the Add menu for the folder (Figure 34-3).For more information, see Section 23.5.1, "Adding a Resource to a Resource Catalog" (in the Add Resource Catalog Item dialog, select Task Flows, then scroll to Documents for a list of all available content task flows). To use the custom resource catalog for editing portal pages, make sure it is Available, then select it for use by pages in the portal, as described in Section 7.3.5, "Changing the Resource Catalogs for Pages and the Page Template for a Portal."
In a portal, if the Documents tool is enabled (see Section 39.2, "Enabling and Disabling Tools and Services Available to a Portal"), the selected task flow will by default display folders and files based on the primary content repository connection, or you can display only documents belonging to the portal. If the Documents tool is not enabled in a portal, folders and files will not display in the task flow unless you edit the default task flow properties to specify a content repository (see Chapter 35, "Setting Document Task Flow and Document Component Properties").
Use the menus and actions available in the document task flow you have added to work with folders and files in the connected content repository, as described in Section 34.5, "Understanding the Document Task Flows Menus and Actions."
34.5 Understanding the Document Task Flows Menus and Actions
The document task flows that offer content management functionality are Document Explorer, Folder Viewer, and Document Manager. For these task flows, the menus and actions for working with the folders and files are described in the "Actions for Working with Folders and Files" section in Using Oracle WebCenter Portal.
34.6 Troubleshooting Documents Tool Issues
This section includes the following subsections:
-
Section 34.6.1, "Document Permissions Not Working in a Portal"
-
Section 34.6.2, "Document Permissions Not Granted When Creating a Portal"
34.6.1 Document Permissions Not Working in a Portal
If a user cannot perform certain actions on documents, even though they are granted appropriate Document permissions in the portal, do one of the following:
Note:
You must be the portal moderator or have theManage Membership permission to grant permissions in the portal.-
Revoke the user's membership to the portal, and then add them back to the portal. For details, see Section 30.9, "Revoking Membership to a Portal" and Section 30.5, "Adding Members to a Portal."
-
Temporarily change the user's role, and then change it back to the required role. For details, see Section 30.6, "Changing Member Role Assignments."
If multiple users cannot perform actions on documents, even though they are granted appropriate permissions in the portal, try editing the role to which the affected users are assigned:
-
Identify the membership role that the affected users have and note down the current permission set. See Section 29.3, "Viewing and Editing Permissions of a Portal Role."
-
Deselect all permissions for the role, and click Save.
-
Edit the role again, select all required permissions for the role, and click Save.
34.6.2 Document Permissions Not Granted When Creating a Portal
If you see the following error when you create a portal based on a template that includes the Documents tool, an error occurred while attempting to grant permissions for the new portal on the back-end content server:
Granting permissions for Documents failed
Ask your system administrator to review the WebCenter Portal log (at DOMAIN_HOME/servers/WC_Spaces/logs/WC_Spaces-diagnostic.log) to see if any messages indicate the source of the error. If the cause of the error is not clear, try resetting Document permissions on each role in the portal:
-
Edit permissions for each role in turn. See Section 29.3, "Viewing and Editing Permissions of a Portal Role."
-
Deselect any Document permissions set for the role, and click Save.
-
Edit the role again, select the required permissions for the role, and click Save.
-
Repeat for all the roles in the portal.
Failures, if any, are logged in the WebCenter Portal log.


