3 Configuring Oracle HTTP Server in a WebLogic Server Domain
This chapter provides instructions for updating an existing Infrastructure domain with Oracle HTTP Server, using the Oracle Fusion Middleware Configuration Wizard.
Note:
Perform the configuration steps in this chapter only if you have selected Collocated HTTP Server (Managed through WebLogic server) in the Installation Type screen. If you have selected Standalone HTTP Server (Managed independently of WebLogic server), follow the tasks in Chapter 4.For information about Oracle HTTP Server domain configuration options, see Section 1.2, "Understanding Oracle HTTP Server Domain Configuration Options".
This chapter contains the following sections:
If you have not created the Oracle Fusion Middleware Infrastructure domain, you can create it at the same time as that of Oracle HTTP Server. For instructions, see "Configuring your Oracle Fusion Middleware Infrastructure Domain" in Installing and Configuring the Oracle Fusion Middleware Infrastructure. However, in Task 9 "Selecting Advanced Configuration", ensure that you select System Components too. When you reach the System Components screen, follow the instructions in this guide, beginning from Task 7.
3.1 Stopping the Administration Server
Before starting the configuration wizard, it is important to shut down the Administration Server. This is to prevent any configuration locks, saves, or activations from occurring during the configuration of the domain.
To stop the Administration Server, go to the DOMAIN_HOME/bin directory.
-
On UNIX
./stopWebLogic.sh
-
On Windows
stopWebLogic.cmd
You might be prompted for the login credentials of the Administrator user you provided when you configured the Oracle Fusion Middleware Infrastructure domain.
3.2 Starting the Configuration Wizard
To begin domain configuration, go to the ORACLE_HOME/oracle_common/common/bin directory on UNIX and ORACLE_HOME\oracle_common\common\bin on Windows and start the Oracle HTTP Server Server Configuration Wizard.
-
On UNIX
./config.sh
-
On Windows
config.cmd
3.3 Navigating the Configuration Wizard Screens to Extend the Domain
Follow the instructions in this section too update an existing Infrastructure domain with an Oracle HTTP Server instance.
Note:
When you are adding an Oracle HTTP Server instance to an existing domain, verify that the ports you are assigning to any new components are available. The Configuration Wizard does not perform automatic port allocation.-
Task 1, "Selecting the Domain Type and Domain Home Location"
-
Task 10, "Reviewing Your Configuration Specifications and Configuring the Domain"
-
Task 11, "Writing Down Your Domain Home and Administration Server URL"
- Task 1 Selecting the Domain Type and Domain Home Location
-
On the Configuration Type screen, select Update an existing domain.
In the Domain Location field, select the Domain home location specified while configuring the Infrastructure domain.
Tip:
More information about the Domain home directory can be found in "Choosing a Domain Home" in Planning an Installation of Oracle Fusion Middleware.More information about the other options on this screen can be found in "Configuration Type" in Creating Domains Using the Configuration Wizard.
- Task 2 Selecting the Configuration Templates
-
On the Templates screen, ensure that Update Domain Using Product Templates is selected, and then select Oracle HTTP Server (Collocated) - 12.1.3 [ohs]. This automatically selects Oracle Enterprise Manager Plugin for WEBTIER - 12.1.3.0 [em].
Tip:
More information about the options on this screen can be found in "Templates" in Creating Domains Using the Configuration Wizard. - Task 3 Specifying the Datasource Configuration Type
-
All fields are pre-populated, because you already configured the domain to reference the Fusion Middleware schemas that are required for the Infrastructure domain. Verify and ensure that credentials in all the fields are the same that you have provided while configuring Oracle Fusion Middleware Infrastructure.
Click Get RCU Configuration after you finish verifying the database connection information. The following output in the Connection Result Log indicates that the operating succeeded:
Connecting to the database server...OK
Retrieving schema data from database server...OK
Binding local schema components with retrieved data...OK

Successfully Done.
Tip:
More information about the RCU Data option can be found in "Understanding the Service Table Schema" in Creating Schemas with the Repository Creation Utility.More information about the other options on this screen can be found in "Datasource Defaults" in Creating Domains Using the Configuration Wizard.
- Task 4 Specifying JDBC Component Schema Information
-
Verify that the values on this screen are correct for all schemas. If you selected RCU Data on the previous screen, the schema table should already be populated appropriately.
Tip:
For high availability environments, see the following sections in High Availability Guide for additional information on configuring data sources for Oracle RAC databases:More information about the other options on this screen can be found in "JDBC Component Schema" in Creating Domains Using the Configuration Wizard.
- Task 5 Testing the JDBC Connections
-
Use this screen to test the datasource connections you have just configured.
Tip:
More information about the other options on this screen can be found in "Test Component Schema" in Creating Domains Using the Configuration Wizard - Task 6 Selecting Advanced Configuration
-
To update the domain configuration for the topology, select System Components on the Advanced Configuration.
- Task 7 Adding System Components
-
On the System Components screen, click Add to create a new Oracle HTTP Server instance.
-
Specify
ohs_1in the System Component field. -
Specify
OHSin the Component Type field. -
Restart Interval Seconds: Specify the number of seconds to wait before attempting a restart if an application is not responding.
-
Restart Delay Seconds: Specify the number of seconds to wait between restart attempts.
-
- Task 8 OHS Server screen
-
Use the OHS Server screen to configure the Oracle HTTP Server servers in your domain. In the System Component field specify the IP address of the host on which the Oracle HTTP Server instance will reside. Do not use "localhost". For more information, see "Specifying the Listen Address" in Creating WebLogic Domains Using the Configuration Wizard.
All of the remaining fields are pre-populated, but you can change the values as per your needs. For more information on the fields on this screen, see "OHS Server" in the Oracle Fusion Middleware Creating WebLogic Domains Using the Configuration Wizard guide.
- Task 9 Assign System Components to Machines
-
Oracle HTTP Server instances are associated with a machine. Use this screen to assign system components to the machine that you defined when you configured the initial Fusion Middleware Infrastructure domain.
-
In the Machine list box, select the machine (for example,
infra_machine_1) to which you want to assign the Oracle HTTP Server instance. -
Assign the Oracle HTTP Server instance to the selected machine in one of the following ways:
-
Double-click
ohs_1in the System Components list box. -
Select the
ohs_1in the System Components list box and click the right arrow.
-
Tip:
You can associate an Oracle HTTP Server machine to an existing machine or create a new machine. You typically create additional machines when you are planning to scale out the topology to multiple host computers. For more information, see "Scaling Out a Topology (Machine Scale Out)" in High Availability Guide. -
- Task 10 Reviewing Your Configuration Specifications and Configuring the Domain
-
The Configuration Summary screen contains the detailed configuration information for the domain you are about to extend. Review the details of each item on the screen and verify that the information is correct.
You can go back to any previous screen if you need to make any changes, either by using the Back button or by selecting the screen in the navigation pane.
Domain update will not begin until you click Update.
Tip:
More information about the options on this screen can be found in "Configuration Summary" in Creating Domains Using the Configuration Wizard. - Task 11 Writing Down Your Domain Home and Administration Server URL
-
The Configuration Success screen will show the updated Domain home location and URL of the Administration Server.
You must make a note of both items as you will need them to start the servers and access the Administration Server.
Click Finish to dismiss the configuration wizard.
Note:
You can rename the Oracle HTTP Server system component name (for example,ohs_1), when you re-run the configuration wizard and select Update an existing domain in the Configuration Type screen. But when you do this, the original Oracle HTTP Server component name and all customized values, like port designation, gets deleted and a new system component with default values get created. So, avoid renaming the Oracle HTTP Server component, unless you want the default settings.3.4 Starting the Servers
After configuration is complete, do the following to access the tools with which you can manage your domain:
Note:
For more information on additional tools you can use to manage your domain, see "Overview of Oracle Fusion Middleware Administration Tools" in Administering Oracle Fusion Middleware.3.4.1 Starting the Node Manager
To start your per-domain Node Manager, go to the DOMAIN_HOME/bin directory.
-
On UNIX
Start the Node Manager as shown below, using
nohupandnm.outas an example output file:nohup ./startNodeManager.sh > nm.out&
-
On Windows
startNodeManager.cmd
Note:
On Windows operating systems, it is recommended that you configure Node Manager to run as a startup service. This allows Node Manager to start up automatically each time the system is restarted.For more information, see "Running Node Manager as a Startup Service" in Administering Node Manager for Oracle WebLogic Server.
For more information about additional Node Manager configuration options, see Administering Node Manager for Oracle WebLogic Server.
3.4.2 Starting the Administration Server
To start the Administration Server, go to the DOMAIN_HOME/bin directory.
-
On UNIX
./startWebLogic.sh
-
On Windows
startWebLogic.cmd
You will be prompted for the login credentials of the Administrator user you provided when you configured the Oracle Fusion Middleware Infrastructure domain. You are prompted for credentials whenever the domain is configured using the Production Mode option in the configuration wizard.
Tip:
For more information about starting the Administration Server, see "Starting and Stopping Administration Servers" in Administering Oracle Fusion Middleware.In production mode, a boot identity file can be created to bypass the need to provide a user name and password when starting the Administration Server. For more information, see "Creating a Boot Identity File for an Administration Server" in Administering Server Startup and Shutdown for Oracle WebLogic Server.
You can verify that the Administration Server is up and running by accessing the Oracle Fusion Middleware Control. The URL is provided on the Configuration Success screen in Task 11.
Note:
Make sure that the database hosting your product schemas is up and running and accessible by the Administration Server.http://administration_server_host:administration_server_port/em
The default Administration Server port number is 7001.
Figure 3-1 Oracle Fusion Middleware Control
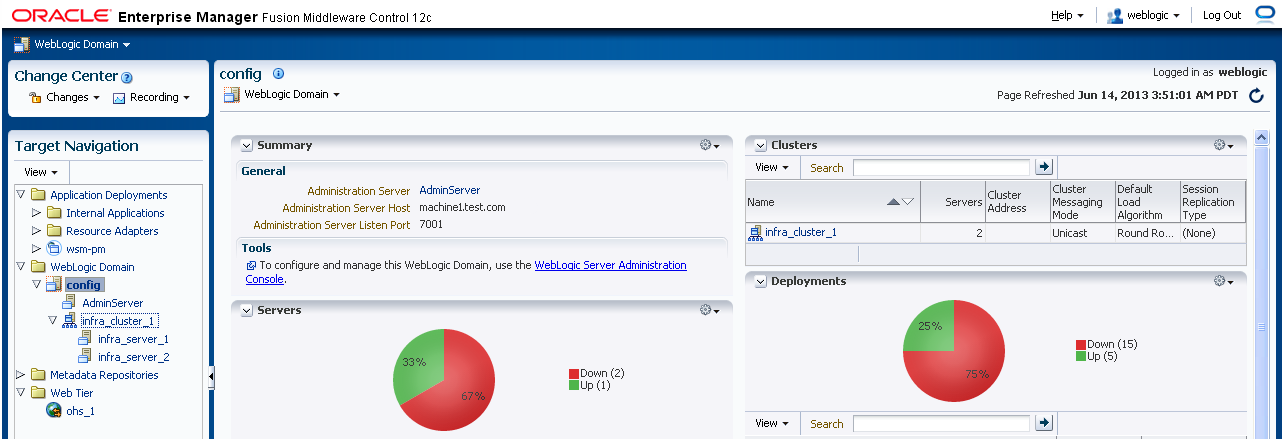
Description of "Figure 3-1 Oracle Fusion Middleware Control"
For more information about how to use the Administration Console, see "Getting Started Using Oracle Enterprise Manager Fusion Middleware Control" in Administering Oracle Fusion Middleware.
3.4.3 Starting the Oracle HTTP Server Instance
To start the Oracle HTTP Server instance:
-
Log in to Oracle Fusion Middleware Control:
http://administration_server_host:administration_server_port/em
The Administration Server host and port number were in the URL on the Configuration Success screen (Task 11). The default Administration Server port number is
7001.The login credentials were provided on the Administrator Account screen while installing.
-
Click WebTier in the navigation panel on your left-hand side.
-
Select the Oracle HTTP Server instance you want to start (for example,
ohs_1) and click Start Up from the top panel.
Tip:
More information about managing Oracle Fusion Middleware using Oracle Enterprise Manager Fusion Middleware Control can be found in Administering Oracle Fusion Middleware with Fusion Middleware Control.For other tools and instructions, see "Starting Oracle HTTP Server Instances" in Administering Oracle HTTP Server.
3.5 Next Steps
Your Oracle HTTP Server installation and configuration in a WebLogic Server domain is complete. For steps on what to do next, see Section 5.1.