4 Configuring Oracle HTTP Server in a Standalone Domain
This chapter describes how to create and configure your Oracle HTTP Server in a standalone domain by using the Oracle Fusion Middleware Configuration Wizard.
For more information on other methods available for domain creation, see "Additional Tools for Creating, Extending, and Managing WebLogic Domains" in Creating Domains Using the Configuration Wizard.
Note:
Perform the configuration steps in this section only if you have selected Standalone HTTP Server (Managed independently of WebLogic server) in the Installation Type screen. If you have selected Collocated HTTP Server (Managed through WebLogic server), follow the tasks in Chapter 3.For information about Oracle HTTP Server domain configuration options, see Section 1.2, "Understanding Oracle HTTP Server Domain Configuration Options".
This chapter contains the following sections:
4.1 Starting the Configuration Wizard
To begin domain configuration, go to the ORACLE_HOME/oracle_common/common/bin directory on UNIX and ORACLE_HOME\oracle_common\common\bin on Windows and start the Oracle HTTP Server Configuration Wizard.
-
On UNIX
./config.sh
-
On Windows
config.cmd
4.2 Navigating the Configuration Wizard Screens to Configure the Domain
Follow the instructions in this section to configure the Oracle HTTP Server in a Standalone domain.
Note:
When you are creating an Oracle HTTP Server instance for your domain, verify that the ports you are assigning to your components are available. The Configuration Wizard does not perform automatic port allocation.-
Task 1, "Selecting the Domain Type and Domain Home Location"
-
Task 7, "Reviewing Your Configuration Specifications and Configuring the Domain"
- Task 1 Selecting the Domain Type and Domain Home Location
-
On the Configuration Type screen, select Create a new domain.
In the Domain Location field, specify your Domain home directory.
It is recommended that you create your domain home outside of the Oracle HTTP Server Oracle home so that if you need to patch or upgrade your Oracle HTTP Server Oracle home, your domain data is not overwritten. Your domain home can reside anywhere on your system.
Tip:
More information about the Domain home directory can be found in "Choosing a Domain Home" in Planning an Installation of Oracle Fusion Middleware.More information about the other options on this screen can be found in "Configuration Type" in Creating Domains Using the Configuration Wizard.
- Task 2 Selecting the Configuration Templates
-
On the Templates screen, select Oracle HTTP Server (Standalone) - 12.1.3.0 [ohs].
Figure 4-1 Select Oracle HTTP Server (Standalone) - 12.1.3.0 [ohs]
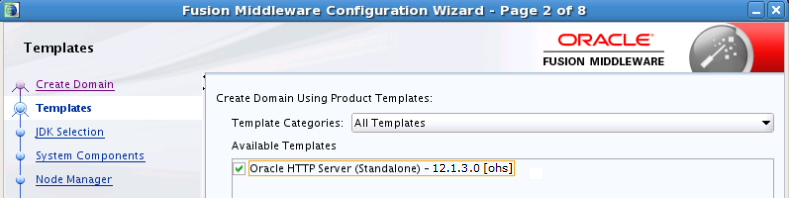
Description of "Figure 4-1 Select Oracle HTTP Server (Standalone) - 12.1.3.0 [ohs]"
Tip:
More information about the options on this screen can be found in "Templates" in Creating Domains Using the Configuration Wizard. - Task 3 Specifying the JDK
-
On the JDK Selection screen, select Oracle Hotspot JDK.
- Task 4 Selecting the System Components
-
To add an OHS instance in the System Components screen, click the Add icon and specify the system component name in the table. For example,
ohs_1. - Task 5 Specifying the OHS Server details
-
All options are auto populated except for the Listen Address. Even if defaults are provided for port numbers, ensure that these ports are not used by other services. The listen address is required if you need to limit the network interfaces used by Oracle HTTP Server for incoming connections. Specify the Listen Address if required. You can also change the other values as required.
Tip:
More information about the options on this screen can be found in "OHS Server" in Creating Domains Using the Configuration Wizard. - Task 6 Configuring Node Manager
-
The Node Manager screen can be used to select the type of node manager you want to configure, along with the Node Manager credentials.
Select Per Domain as the Node Manager type and specify the Node Manager credentials.
Tip:
More information about the options on this screen can be found in "Node Manager" in Creating Domains Using the Configuration Wizard.More information about the types of Node Manager can be found in "Node Manager Overview" in Administering Node Manager for Oracle WebLogic Server.
- Task 7 Reviewing Your Configuration Specifications and Configuring the Domain
-
The Configuration Summary screen contains the detailed configuration information for the domain you are about to create. Review the details of each item on the screen and verify that the information is correct.
You can go back to any previous screen if you need to make any changes, either by using the Back button or by selecting the screen in the navigation pane.
Domain creation will not begin until you click Create.
Tip:
More information about the options on this screen can be found in "Configuration Summary" in Creating Domains Using the Configuration Wizard.
4.3 Starting the Instances
After the configuration is complete, do the following to access the tools with which you can manage your domain:
Note:
-
For more information on additional tools you can use to manage your domain, see "Overview of Oracle Fusion Middleware Administration Tools" in Administering Oracle Fusion Middleware.
-
If you are attempting to create an Oracle HTTP Server instance that uses a TCP port in the reserved range (typically less than 1024), then you must perform some extra configuration to allow the server to bind to privileged ports. For more information, see "Starting Oracle HTTP Server Instances on a Privileged Port (Unix Only)" in Administering Oracle HTTP Server.
4.3.1 Starting the Node Manager
To start your per-domain Node Manager, go to the DOMAIN_HOME/bin directory. Domain_Home is the complete path to the location in which you have configured Oracle HTTP Server.
-
On UNIX
Start the Node Manager as shown below, using
nohupandnm.outas an example output file:nohup ./startNodeManager.sh > nm.out&
-
On Windows
startNodeManager.cmd
Note:
On Windows operating systems, it is recommended that you configure Node Manager to run as a startup service. This allows Node Manager to start up automatically each time the system is restarted.For more information, see "Running Node Manager as a Startup Service" in Administering Node Manager for Oracle WebLogic Server.
Do not close the terminal once you start Node Manager. For information about additional Node Manager configuration options, see Administering Node Manager for Oracle WebLogic Server.
4.3.2 Starting the Oracle HTTP Server Instance
To start the Oracle HTTP Server instance:
-
On UNIX
-
Go to the
Domain_Home/bindirectory.Domain_Homeis the complete path to the location where you have configured Oracle HTTP Server.For example:
cd /user_projects/domains/base_domain/bin -
Run the following command:
./startComponent.shsystem_component_nameIn the preceding command,
system_component_nameis the Oracle HTTP Server system component name you provided while configuring the domain.For example:
./startComponent.sh ohs_1
-
-
On Windows
-
Go to the
Domain_Home\bindirectory.Domain_Homeis the complete path to the location where you have configured Oracle HTTP Server.For example:
cd \user_projects\domains\base_domain\bin -
Run the following command:
startComponent.cmdsystem_component_nameIn the preceding command,
system_component_name is the Oracle HTTP Server system component name you provided while configuring the domain.For example:
startComponent.cmd ohs_1
-
For more information, see "Starting Oracle HTTP Server Instances from the Command Line" in Administering Oracle HTTP Server.
4.4 Next Steps
Your Oracle HTTP Server installation and configuration in a standalone domain is complete. For steps on what to do next, see Section 5.2.