H Working with Large Schemas in the XSLT Editor
These schema trees can become large and difficult to work with in a graphical mapping tool, such as the XSLT Editor. Some schema documents define hundreds of child nodes for each parent node. Expanding a few parent nodes like this, in the tree, can generate thousands of tree nodes to scroll through when trying to create an XSLT Map.
This appendix discusses strategies for both sparse and non-sparse maps, as well as ways to reduce clutter.
H.1 Sparse Mappings
Schemas are often created to handle a large range of possibilities. When schemas of this type are used to produce source and target trees, the trees can contain hundreds of thousands, or even millions of nodes. However, in many cases, the user is only interested in using or populating a small portion of the nodes defined in the schema.
There are various ways of handling sparse mappings.
Using Sample XML to Generate a Schema
The 12c XSLT Editor has the ability to create schemas from XML documents that can then be used as schema documents for a source or target tree. If you have a sample XML document for your source and/or target, this document can be used to build small schema documents that contain only those nodes that you need for the map.
To create an XSLT map using sample source and target XML documents, select the Generate from XML option while selecting the schema for a source or target in a new XSL map.
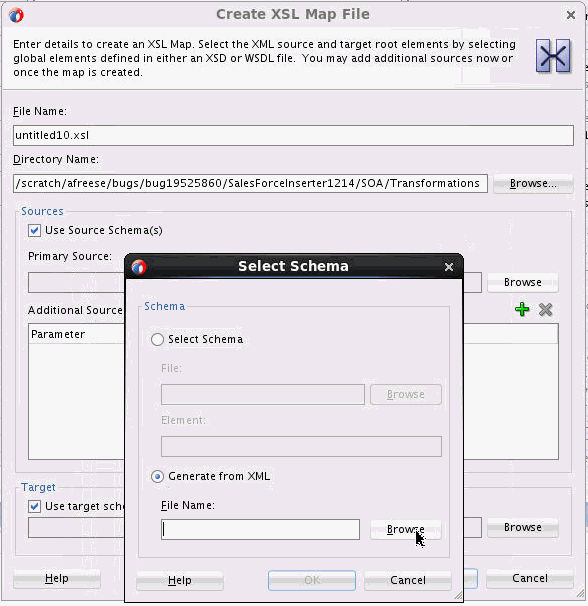
A schema is generated and placed in the Schemas folder. This schema will be used to create the source and target trees for your mapping, and consequently will contain only the nodes that exist in your original sample XML document.
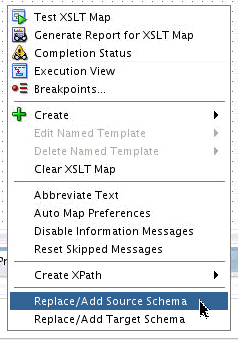
If you wish to switch back and forth from the small sample schema to the larger schema that you might be avoiding, you can select Replace/Add Source or Target Schema from the canvas context menu. Then select either the small sample schema from the Schemas folder or the larger schema.
Using XSLT View
The 12c editor contains a new view available within the Design View tab. This is the XSLT View. It can be reached by clicking the XSLT button on the top right of the XSLT editor toolbar.

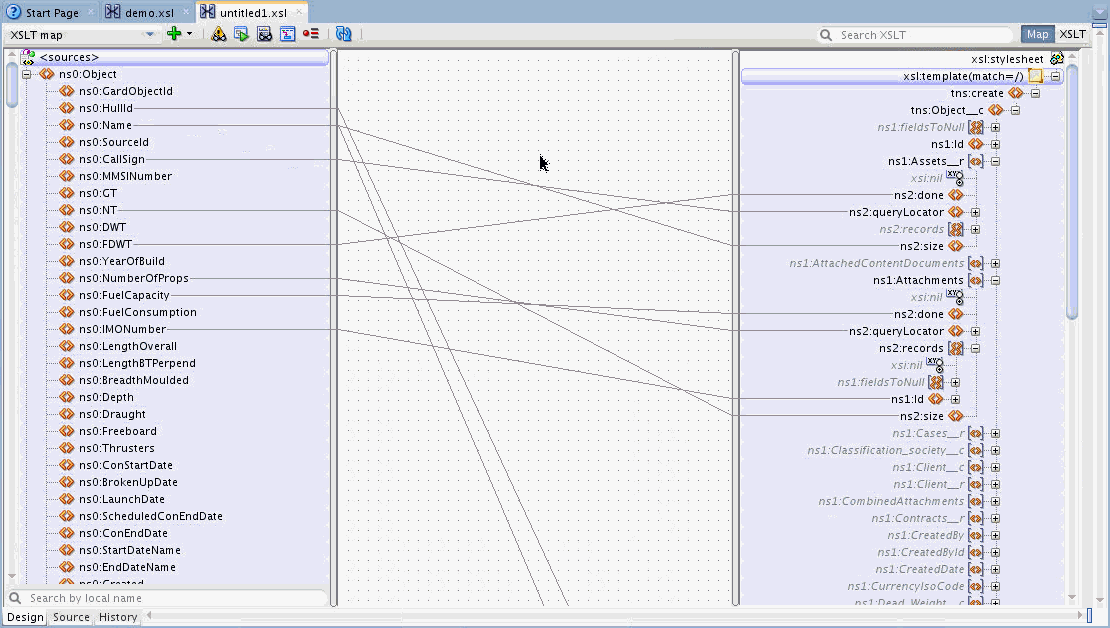
XSLT View shows the existing statements in the XSLT file. Users who have previously edited XSLT in a source xml editor may appreciate this view. It is organized in the same way as statements would appear in the XSLT source. Using this view will provide a condensed look at the mappings you are creating. For instance, here is a map against a large target schema document in Map View. Note that some lines run off the bottom of the display as they map to nodes that appear in the schema later in the tree.
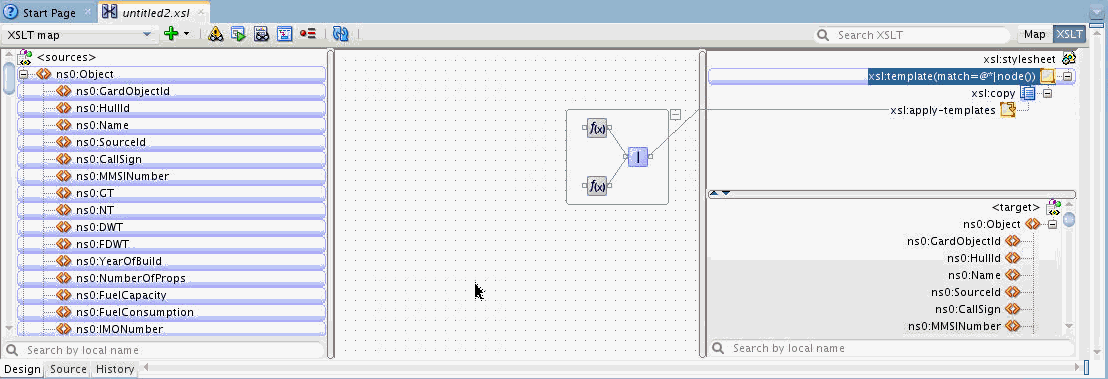
Here is the same mapping in XSLT view:
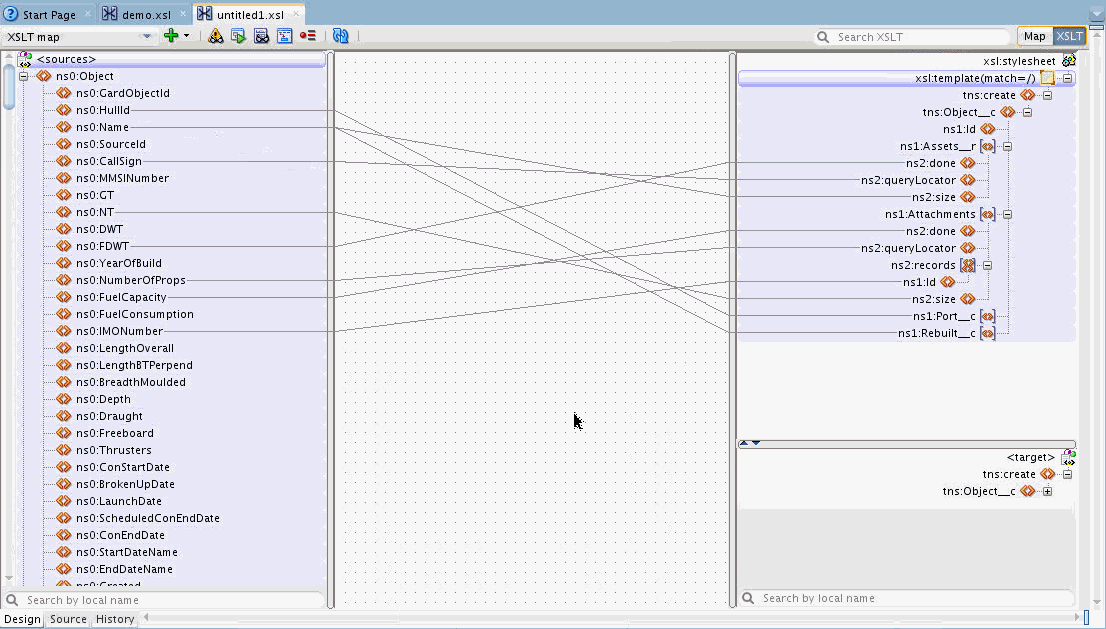
You can now see all of your mappings clearly without unused target nodes taking up space. If you need to add a new target element from the schema, use the Add Children From Schema option on the context menu.
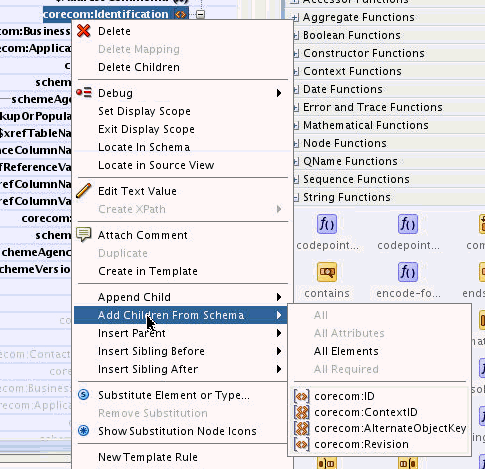
From the context menu on any parent node select the Add Children From Schema option and a list of possible child nodes will appear that can be selected and added. You also have the option to select All Attributes/All Elements/All Required from this menu for any parent node.
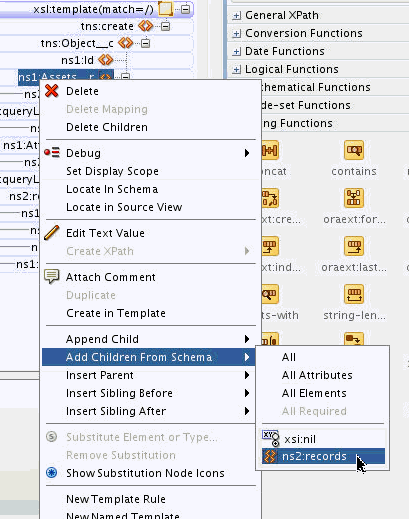
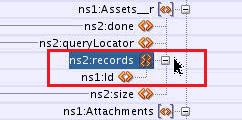
As an added bonus, when nodes are added this way, all required children of any node you insert will be added automatically for you. In the example above, when we select the ns2:records element to be added, it is inserted at its correct place in the tree and its required ns1:id node is automatically added for you.
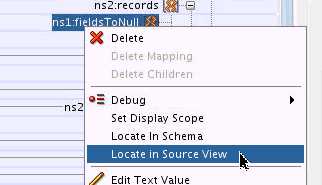
If you are used to editing in Source view, an option was added in 12.2.1.0.0 to allow you to move easily back and forth from source to design view. Right-click any node in the XSLT panel and select Locate in Source View.
The source view opens and the node is selected:
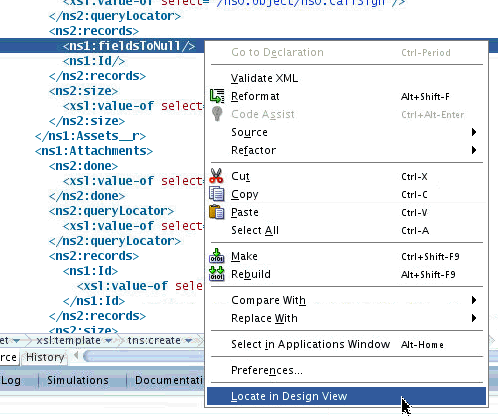
To navigate back to any node in Design view, you can select the Locate in Design View option while in Source View.
XSLT view can also be used to insert any XSLT statement and allows the use of named and matched templates (template rules). See Editing an XSLT Map in XSLT View for more information on XSLT view.
H.1.1 Quick Start for XSLT View
You can set the Preference settings to always start the XSLT Editor in XSLT view. These settings also control the automatic creation of target nodes to get you started. To set the preferences for XSLT View, select Tools > Preferences to bring up the Preferences dialog. Then select XSL Maps > XSL Editor.
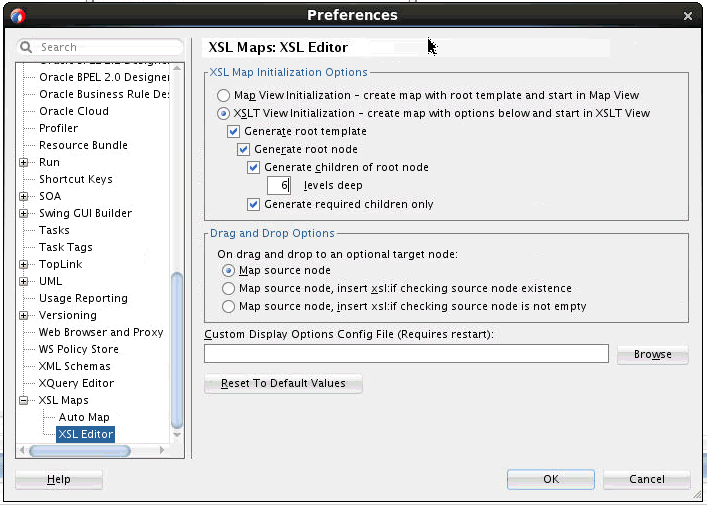
To start in XSLT View, select the XSLT View Initialization option with the desired options. If you are working with a large schema, it is a good idea to set a limit to the number of levels of children to be generated.
Then, when you create your XSLT map these options will be used. In addition, these options are used anytime you select the Clear XSLT Map option from the canvas context menu.
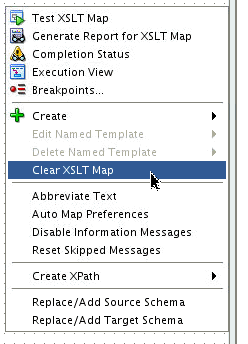
If you do not like your preference settings for a particular map, you can make changes to the preferences and regenerate the initial map by selecting Clear XSLT Map.
H.2 Non-Sparse Mappings
Sometimes, it is necessary to create or modify existing maps that contain large numbers of target elements and consequently large numbers of mappings. When editing a map like this, it can be difficult to keep track of what is going on. For such situations, the 12c XSLT Editor has a new feature that enables the user to set the scope of the mapping to show only mappings below a selected target node.
For instance, the following is a non-sparse mapping.
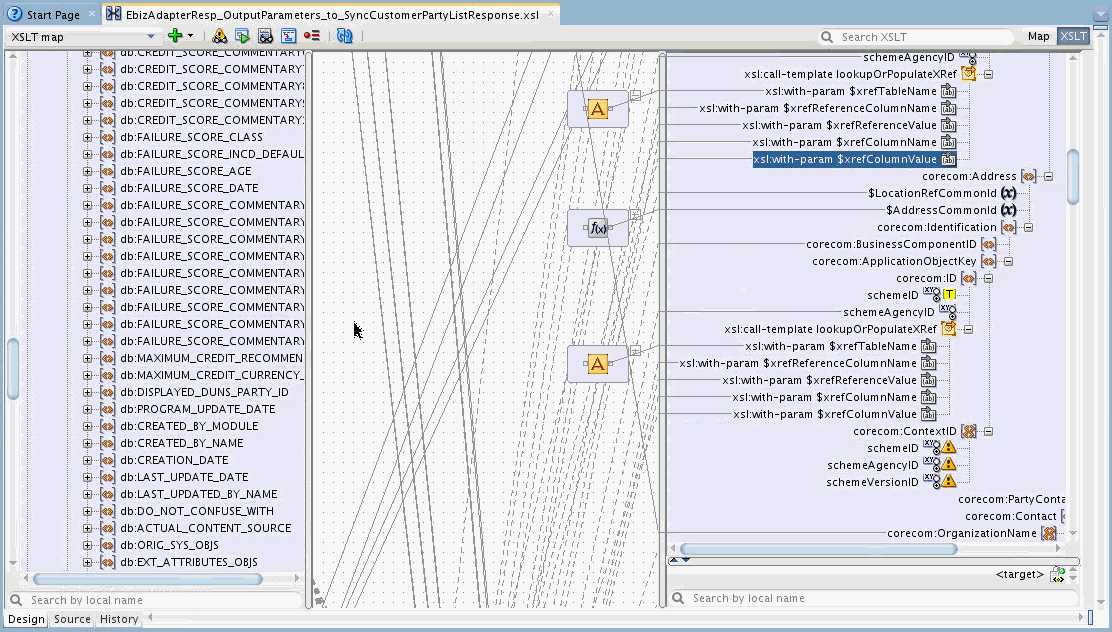
We can set the scope of the mapping to an area in the target tree we would like to work in. Right-click a target node, and select Set Display Scope.
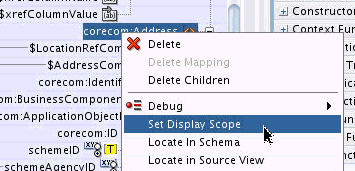
The display is scoped to the target node selected. All lines indicating mappings outside of this area are not drawn and the source tree becomes condensed, showing only nodes that are mapped.
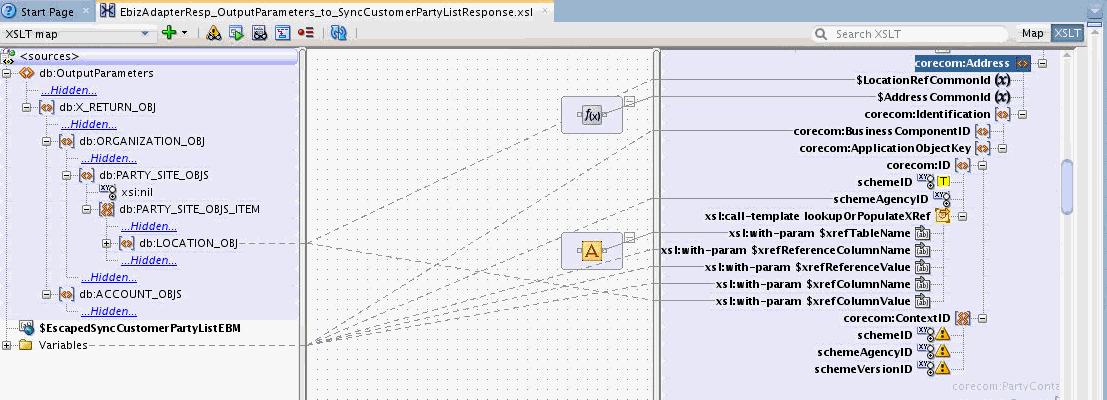
You can then continue to work in the scoped area.
Hidden areas in the source tree can be expanded to show nodes that might be needed for additional mapping. Right-click on any Hidden item in the Source tree to see a popup menu with options for searching within the tree and selecting nodes to be shown.
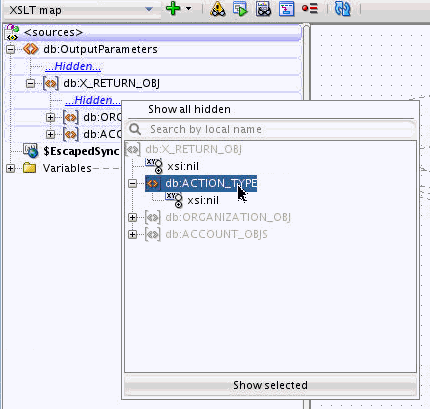
Any search done from this popup will wrap through the tree beyond the currently selected Hidden area, so that you do not have to select the correct Hidden area for the node you are looking for.
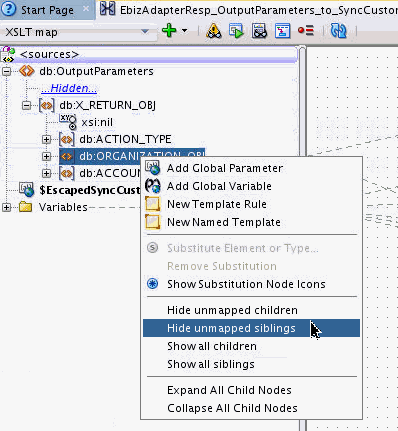
There are also options on the main context menu that will hide and expand areas of the source tree. If you right-click on any non-Hidden node in the tree, there are options to show and hide siblings and children of the selected node.
In the target tree, you can add nodes from the schema by using the Add Children from Schema option.
To exit the scoped display, click on a target node outside of the scoped area or select Exit Display Scope from the context menu in the target tree.
H.3 Reducing Textual Clutter
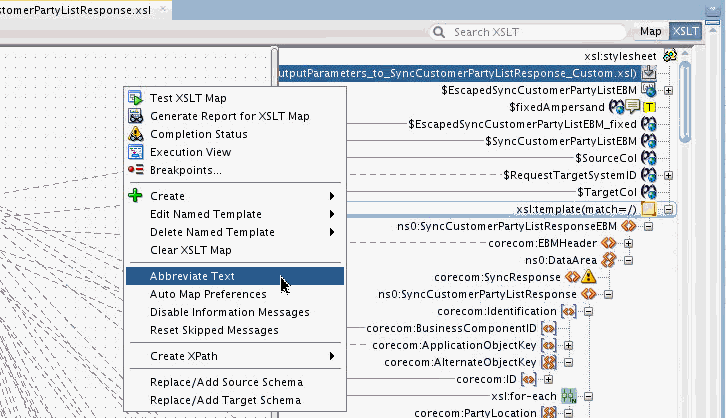
The 12c XSLT Editor provides the ability to abbreviate node names and other information in the source and target trees. If you select the Abbreviate Text option from the canvas context menu, prefixes will be hidden and the text for certain types of nodes will be abbreviated.
Before abbreviation:
After abbreviation:
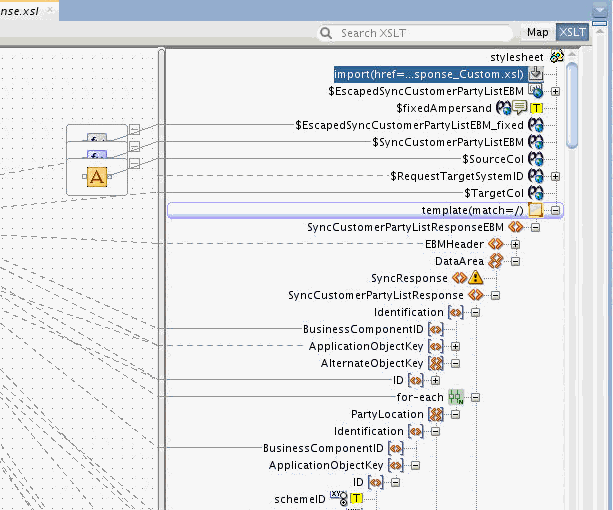
You may also create a Custom Display Options Config file where abbreviations for node name text may be defined. For instance, in the example above, the phrase CustomerPartyList appears in many node names. This could be abbreviated to CPL using a Custom Display Options Config file. Then node names such as $EscapedSyncCustomerPartyListEBM will appear as $EscapedSyncCPLEBM in the tree.
This does not change the node name in the XSLT or in any XPath statements generated. It only applies to the name that appears on the tree node and can help to reduce overall clutter when schema node definitions use verbose names.
A Custom Display Options Config file can be loaded under XSL Editor preferences. See How to Import a Customization File to Specify Display Preferences in the XSLT Map Editor for more details.
H.4 Searching Trees
When searching through large schemas for element names, the search can take long. In 12.1.3, the search does not have a cancel option. This has been added in 12.2.1.
If the search is taking too long, the tree size can be truncated by reducing the Expansion Depth for the trees in preferences. Go to Tools > Preferences. Select XSL Maps from the navigator. Click the Show Advanced Options button and change the Expansion Depth for the XML Schema Maximum Expansion Depth option to a much smaller value. For trees that have hundreds of children at a single level, this value needs to be around 10 levels. This will mean that the search will not go below the level set here, but some trees can contain millions of nodes and the search can take long in that event.
H.5 Copying and Modifying a Large Input Document
A user may be tempted to try to copy an input XML document by using the automap feature of the XSLT editor. However, automap generates specific XSLT statements for every node in the schema. On large schemas, this is not an efficient way to copy an input document. This can generate XSLT files that are many MBs in size, and these will be slow to load and difficult to edit. In addition, if the user’s mapping is sparse, generating thousands of lines of XSLT to execute against nodes that are defined in the schema, but will never exist at runtime is inefficient.
H.6 Generating Test Files with Element and Type Substitutions
It is possible in the XSLT editor to perform element and type substitutions based on derived types and substitution groups defined in the XSD. Many schemas contain abstract elements or types that can be overloaded with elements from substitution groups or elements from derived types using xsi:type.
The test tool in the XSLT editor does not currently support generation of input XML documents that contain substituted elements. So, when you invoke an XSLT map where substitutions have been made in the source tree, the following warning occurs.
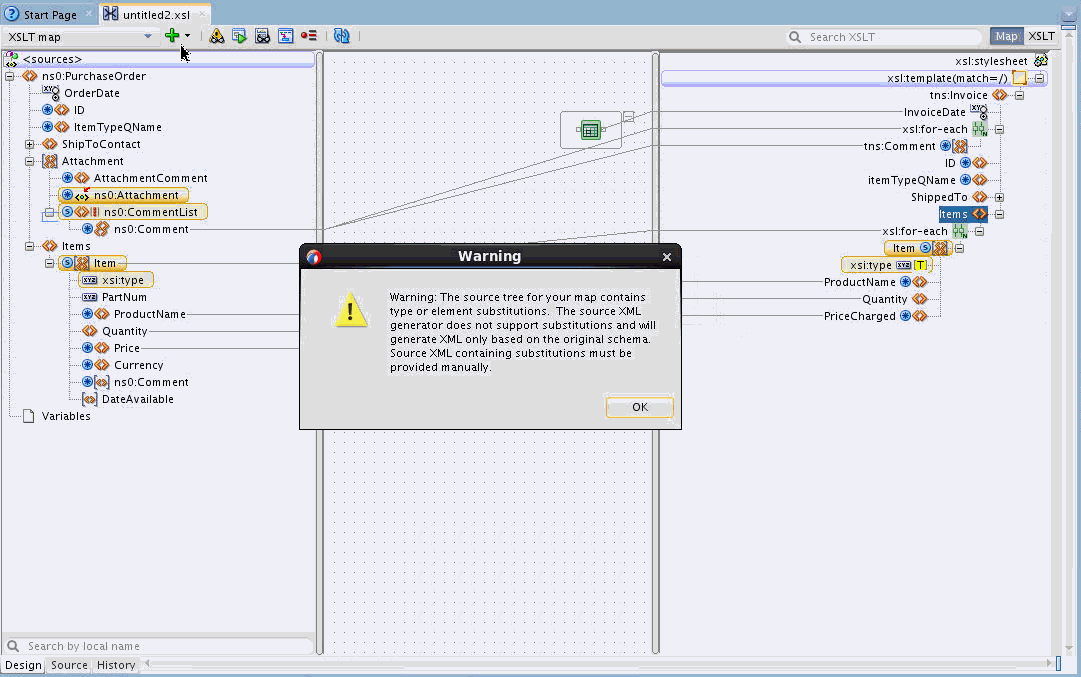
The user then has to modify the input document generated or provide their own test input document. This can become problematic, as the user must make the substitutions themselves in the input document with the correct syntax for the xsi:type definition or element substitution needed. This can be more problematic in large schemas where multiple substitutions have been made.
Using the XSLT editor, we can generate an input document that contains the correctly substituted elements with all of the appropriate namespaces/prefixes defined for us. This will provide us with a template for the input test document.
In the mapping above there are two substitutions done in the source tree. The first is a substituted element CommentList from a substitution group defined the schema document. The second is an Item type substitution for a derived item type defined in the schema document.
We would like to write a small XSLT map that will generate a document we can use as a test input file for testing this map. It has to contain the correct xsi:type and element substitution information defined in our source document.
We create a new map, selecting no schema document for the source and selecting the PurchaseOrder schema for the target, as we want to output a PurchaseOrder document we can use as test input for the PurchaseOrder source in our existing map.
By using Add Child From Schema and performing the same substitutions on the PurchaseOrder target that we have on our PurchaseOrder source, we can create a map that looks like the following:
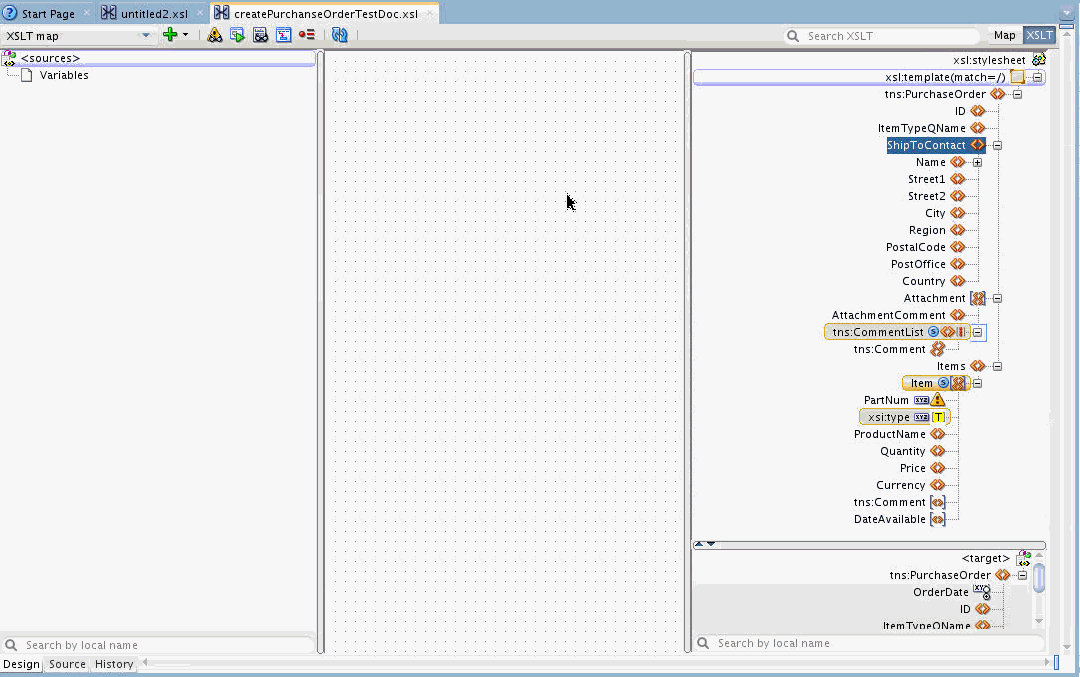
We then execute this XSLT with the test tool to create our PurchaseOrder template document.
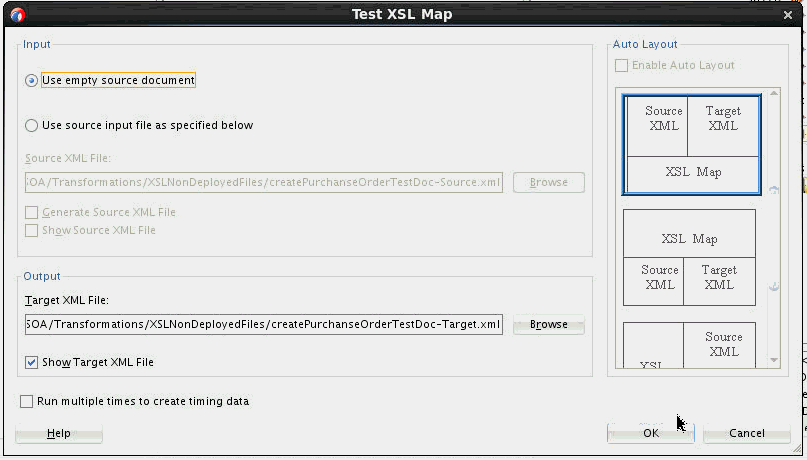
This generates a template for our test input document with the correct substitutions for our test.
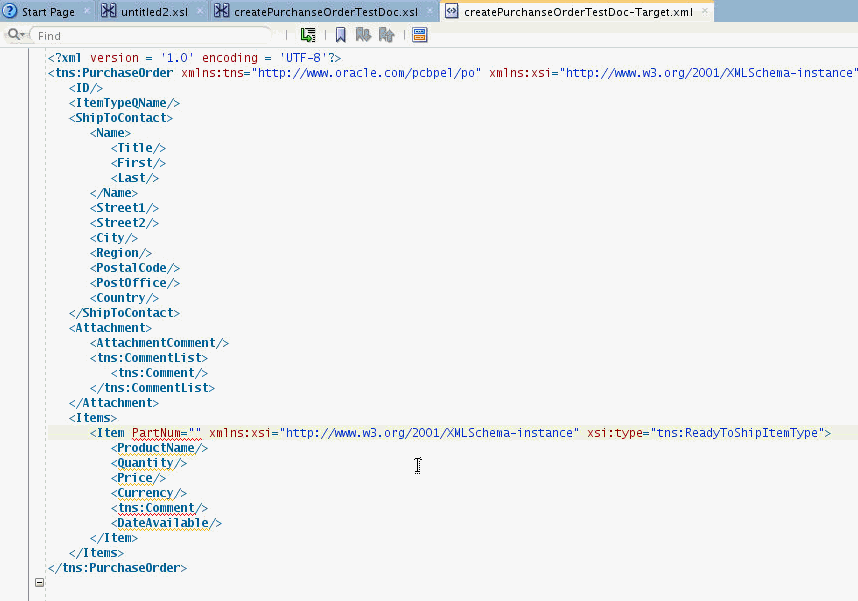
Appropriate test data can then be entered in the fields defined. Alternatively, you can define data values in the XSLT that generates the test file to pre-populate the test file.
