B Configuring User Messaging Service with AQ JMS
This appendix describes how to configure UMS to use AQ JMS instead of WLS JMS. This can be achieved through the WebLogic Server Administration Console.
User Messaging Service (UMS) can be configured to use Oracle Streams Advanced Queuing (AQ) JMS. AQ JMS uses a database connection and stores JMS messages in a database that is accessible to an entire WebLogic Server cluster, thus enabling the use of database features and tooling for data manipulation and backup. A typical use case would be enhanced high availability (HA), where the standard whole server migration support is not sufficient. If one UMS node in a cluster fails, then the other nodes will pick messages from the database for the failing UMS node, causing no loss of messages.
The following tasks describe how to configure UMS with AQ JMS through the WebLogic Server Administration Console.
-
Log into Oracle WebLogic Server Administration Console.
Shutdown all Managed servers in the domain.
-
In the Change Center on the left panel, click Lock and Edit to lock the domain for configuration changes.
-
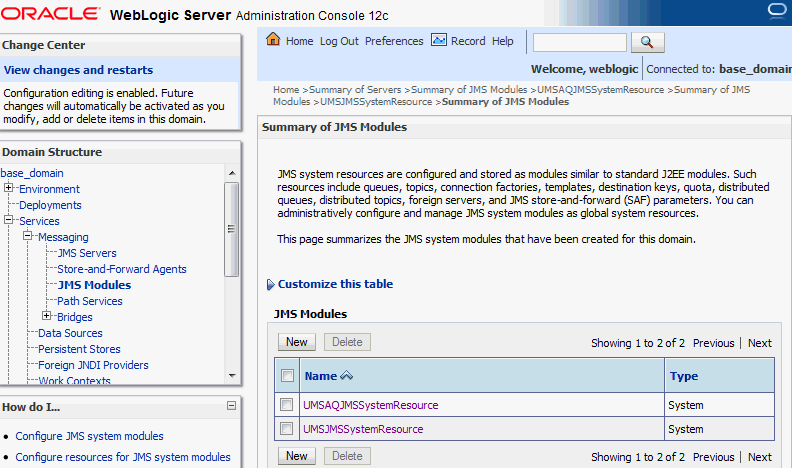
In the domain structure on the left, expand the Services node and navigate to JMS Modules under the Messaging node. A page listing the JMS system modules created for this domain is displayed, as shown in the following figure.

Description of the illustration ''jms_modules.gif''
-
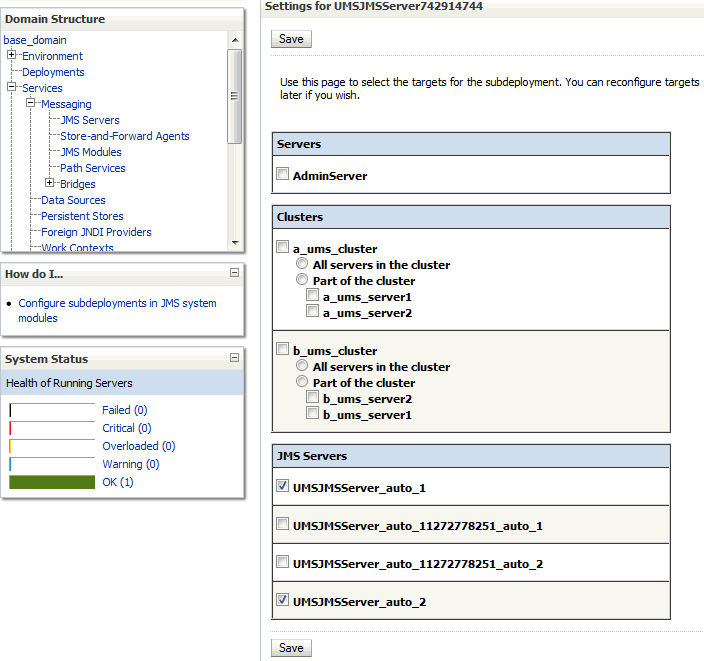
Select UMSJMSSystemResource and navigate to the Subdeployments tab. Navigate to the UMSJMSServer running on the cluster you want to reconfigure and un-target all the UMSJMSServer_auto_x servers as shown in the following figure. Click Save.

Description of the illustration ''jms_untarget.gif''
-
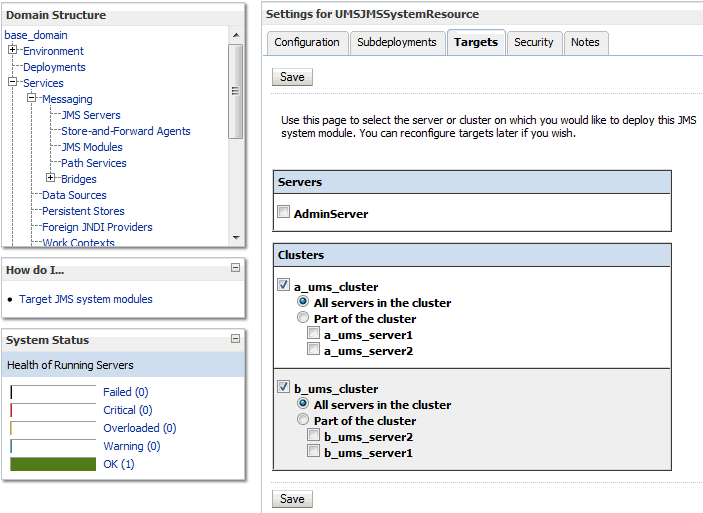
Navigate to the Targets tab for UMSJMSSystemResource. Un-target the UMSJMSSystemResource cluster(s) by deselecting the cluster check box as shown in the following figure. Click Save.

-
Navigate to UMSAQJMSSystemResource from the JMS Modules table as shown in the first figure.
-
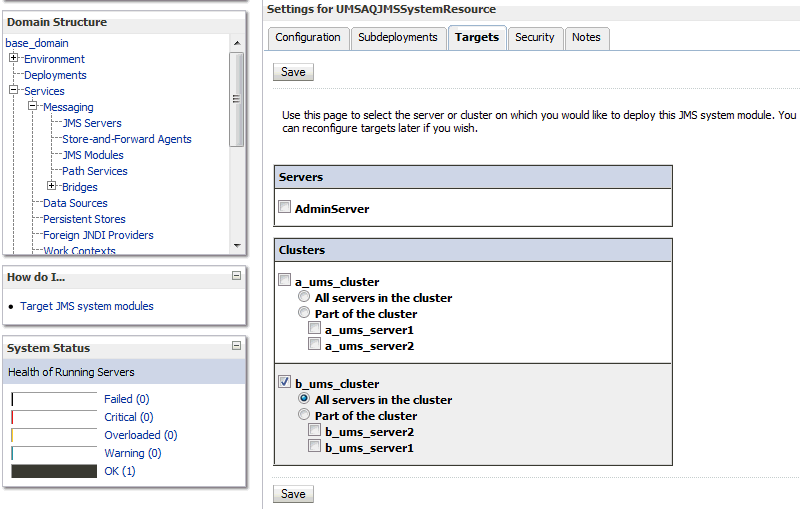
Navigate to the Targets tab for UMSAQJMSSystemResource and target the UMSAQJMSSystemResource to the same cluster from which you un-targeted the UMSJMSSYstemResource, as shown in the following figure.

Save the settings.
-
In the Change Center, click Activate Changes and start all Managed servers in the domain.