21.4 Create the report layout
In this section, you will create a default layout for your report. You will then add all the necessary layout objects for your checks.
21.4.1 Create the initial layout of your report
-
In the Data Model view, right-click on the canvas, then choose Report Wizard.
-
In the Report Wizard, on the Report Type page, select Create Paper Layout only.
-
On the Style page, select Group Above.
-
On the Groups page, click the following groups in the Available Groups list and click Down to specify the Print Direction and move them to the Displayed Groups list:
-
G_DEPTNO
-
G_DEPTNO1
-
-
On the Fields page:
-
Click the double right arrows (>>) to move all of the fields to the Displayed Fields list.
-
In the Displayed Fields list, click DEPTNO1 then click the left arrow (<) to move this field back to the Available Fields list.
-
Do the same for the COUNT_DETAIL and DETAIL_VAL fields.
-
-
On the Labels page, make any desired changes to the labels.
-
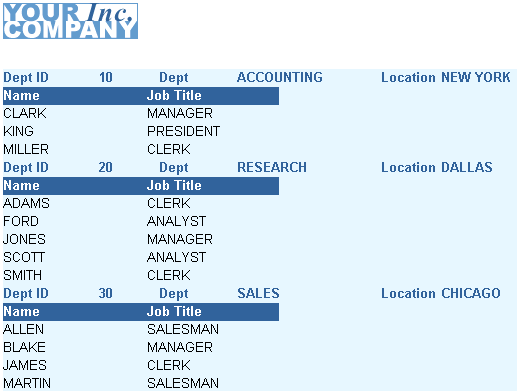
On the Template page, select Predefined Template and click Blue, then click Finish to display your report output in the Paper Design view. It should look something like this:
Figure 21-4 Paper Design view for the suppress labels report

Description of ''Figure 21-4 Paper Design view for the suppress labels report''
-
Save your report as
suppresslabels_your_initials.rdf.