|
Oracle® Database Lite Developer's Guide
10g (10.2.0) Part No. B15920-01 |
|
 Previous |
 Next |
|
Oracle® Database Lite Developer's Guide
10g (10.2.0) Part No. B15920-01 |
|
 Previous |
 Next |
SODA is an interface used for Oracle Database Lite C++ development that provides object-oriented data access using method calls, relational access using SQL and object-relational mapping to bridge the gap between the two. Object functionality is roughly three times faster than ODBC for simple operations. It enables rich datatypes—such as arrays and object pointers—as well as standard SQL columns. A programmer can store any data structure in the database and not think about relational design or performing joins.
A C++ developer can also use an interface for executing SQL statements. The resulting code is shorter and cleaner than ODBC. SQL queries can return objects to be examined and modified directly through the object-oriented layer, without calling any additional SQL statements.
Object-relational mapping enables the application to access relational data as if it was object hierarchy. Thus, your application can replicate rich data types or object pointers to the Oracle database server.
Oracle Database Lite includes SODA Forms, which is a library that simplifies the development of GUI applications for Palm and PocketPC devices. See Section 12.6.2, "Develop Your GUI Using the SODA Forms Library" for more details.
The SODA API method calls are documented in the SODA: Simple Object Data Access API Reference, which is located off the <ORACLE_HOME>/Mobile/index.htm page. The full sample code that is demonstrated in this chapter is located in the <ORACLE_HOME>/Mobile/doc/soda/sodadoc/html/sodasimple_8cpp-source.html file.
Section 12.2, "Using SQL Queries in SODA Code for PocketPC Platforms"
Section 12.3, "Virtual Columns and Object-Relational Mapping"
Section 12.4, "Behavior of Reference-Counted and Copy-By-Assignment Objects"
In order to get started with SODA quickly, the following sections discuss the most frequently used classes:
When developing your C++ application, you would use the following classes the most:
DBSession connects to the database and find and create classes.
DBClass creates new database objects.
DBObject modifies existing objects.
DBData wraps an attribute value and is used for type conversion.
DBQueryExpr builds single-table queries supported by SODA.
DBString (olString) is a C string wrapper used by SODA.
DBList (olList) is a template to store lists of values.
DBColList and DBDataList instantiate these objects.
For example, implement the DBObject method, as follows:
DBObject obj;
...
obj["NAME"] = "Jack"
For full documentation for the SODA API method calls, see the SODA: Simple Object Data Access API Reference, which is located off the <ORACLE_HOME>/Mobile/index.htm page.
The following example demonstrates most of the SODA object-oriented functionality, as discussed in Section 12.1.1, "Overview of the SODA Classes".
void helloSODA() {
  puts("Hello SODA");
  try {
   DBSession sess("POLITE"); // Connect to the DSN, creating it if necessary

   // Find or create our class
   DBClass cls;
   try {
     cls = sess["PEOPLE"];
   } catch(DBException e) {
   cls = sess.createClass("PEOPLE", DBAttrList() <<
   DBAttr("ID", DB_INT) << DBAttr("NAME", DB_STRING));
  }
  // Create several objects. We can identify columns by name or positions
  DBObject o = cls.create("ID", 10, "NAME", "Alice");

  // The previous syntax of col1, val1, col2, val2 ... works for up to
// 32 columns. This version works for any number of columns
   cls.create(DBSetList() << "ID" << 10 << "NAME" << "Alice");
   cls.create(0, 20, 1, "Bob");

   // Note the automatic type conversion
   cls.create("ID", "314", 1, 3.14159265358);

   // Execute a query (will return two objects)
   DBCursor c = cls.createCursor(DBColumn("ID") == 10 ||            DBColumn("NAME") == "Bob");

  DBObject ob;

  while (ob = ++c) {
   DBString s = ob["NAME"];
   puts(s);
   o["ID"] = (int)o["ID"]+1;
  }

  // Delete an object
  o.remove();

  // Clean up so that create class is successful next time
  sess.rollback();
 } catch(DBException e) {
 DBString s = e.getMessage();
 printf("Error: %s\n", (const char *)s);
 }
}
To add SQL queries to your SODA code for PocketPC platforms, do the following:
Include sodasql.h, instead of soda.h.
Link your program with sodasql.lib.
Install sodasql.dll at runtime.
Create a DBSqlSession object instead of the DBSession object. Execute relational queries and other SQL statements with the help of DBSqlStmt and DBSqlCursor classes. Query results can be returned either as column values or as DBObjects for matching rows.
The following is a sample that uses the SODA relational interface:
void helloSQL() {
 try {
  puts("Hello SQL");
  DBSqlSession sess("POLITE");
  sess.execute("create table odtest(c1 int, c2 varchar(80))");
  DBSqlStmt stmt = sess.prepare("insert into odtest values(?,?)");

  // The values stand in for two ?'s in the statement above
  stmt.execute(5, "John");
  stmt.execute(10, "Mike");
  stmt.execute(15, "Alice");

  // Execute a single-table query that will return DBObject's for matching
  // rows. Use a standard SODA interface to access the objects
  DBSqlCursor c = sess.execute("odtest", "c1 < 15");
  while (++c) {
    DBObject o = c.getObject();
    DBString s = o["c2"];
    int val = o["c1"];
    printf("%d %s\n", val, (const char *)s);
    o["c1"] = val+1; // Can modify objects in addition to just reading them
  }

  // Execute a usual relational query
  c = sess.execute("select * from odtest");
  while (++c) {
    DBString s = c["c2"];
    printf("%d %s\n", (int)c["c1"], (const char *)s);
  }
 } catch(DBException e) {
 DBString s = e.getMessage();
 printf("Error: %s\n", (const char *)s);
 }
}
A programmer does not view the data as column values that are stored in the database. For example, a master-detail relationship might be expressed as matching values in two tables, but for a program it is more natural to access a column in the master object, which contains an array of pointers to details.
The DBVirtualCol class enables the translation between the conceptual view of the data and the actual data in the tables. You can create a column that is completely under programmer's control through the get, set and remove methods and adding it to a class at runtime.
In fact, SODA contains a specialized DBValueRel class that extends the DBVirtualCol class to map master-detail relationships to object pointers. The following sample builds a binary search tree in the database using object-relational mapping:
struct HelloVirtual {
 int lpos, rpos, vpos;
 void visit(DBObject o);
 HelloVirtual();
};

void HelloVirtual :: visit(DBObject o) {
 while (o) {
 visit(o[lpos]);
 printf("%d\n", (int)o[vpos]);
 o = o[rpos];
 }
}

HelloVirtual :: HelloVirtual() {
 try {
   DBSession sess("POLITE");
   // TreeNode represent a binary tree with left and right pointers
   // that point back to parent's id column
   DBClass cls = sess.createClass("TreeNode",
   DBAttrList() << DBAttr("val", DB_INT) << DBAttr("id", DB_INT)
     << DBAttr("lchild", DB_INT) << DBAttr("rchild", DB_INT));
   // Create an index on id to speed up search
   cls.createIndex("i1", DBColList() << "id", true);
   // Set a sequence as a default value of id, so that we don't have to set it
   // explicitely
   DBSequence seq = sess.createSequence("s1");
   cls.defaultVal("id", seq);
   // Create the virtual columns
   DBValueRel lref("left", DBSrcCol(cls, "lchild") -> DBDstCol(cls, "id"),
        DB_UPD_DETAIL);
   DBValueRel rref("right", DBSrcCol(cls, "rchild") -> DBDstCol(cls, "id"),
        DB_UPD_DETAIL);
   // Cache column positions for frequent access
   lpos = cls["left"], rpos = cls["right"], vpos = cls["val"];
   // Root of the binary tree
   DBObject root;
   // Insert some random numbers into our binary search tree
   for (int i = 0; i < 50; i++) {
    int v = rand();
    DBObject o = cls.create(vpos, v); // Note automatically generated ids
    DBObject par; int dir;
    for(DBObject cur = root; cur; par = cur, cur = cur[dir])
    dir = (int)cur[vpos] >= v ? lpos : rpos;
    if (par) par[dir] = o; else root = o;
   }
   // Do in-order traversal of the tree, printing out numbers in sorted order
   visit(root);
  } catch(DBException e) {
  DBString s = e.getMessage();
  puts(s);
 }
}
Most C++ classes in SODA are reference-counted, which means that assigning one variable of one type to another cannot copy an object, but creates another way to refer to the same object. For example, the DBData class represents values that can be stored in persistent objects.
The following example demonstrates reference-counting:
DBData d = 5; // Create a new object containing value 5                   // and make a reference to it
DBData d2 = d; // Both reference the same object
d << 20; // Add another value to existing object.            // Both d and d2 reference the new array
d2 = 10; // d references the array, d2 is reassigned to the new data.
d.clear(); // Clear the last reference to the array of 5 and 20              //and free the array
The programmer does not need to free objects when they are no longer used. However, this method is relatively expensive and not practical for objects that are created and destroyed often, such as when new lists of values, such as DBSetList, are allocated for each SODA call. Various lists in SODA, such as DBSetList, DBDataList and so on, are copy-on-assignment rather than reference-counted objects.
The following example demonstrates copy-by-assignment:
DBSetList ls << "cost" << 1000;
DBSetList ls2 = ls; // Created a copy of ls
ls << "value" << "priceless" // Only ls is changed
ls2.clear(); // Just set this copy to size 0
|
Note: SODA includes non-database classes and templates for your convenience, which have names that start withol rather than DB—such as olHash. Avoid making unnecessary copies of these classes.
|
You can optimize your implementation by not creating an unnecessary copy by passing a reference or a const reference to the object, rather than an object, for both reference-counted and copy-on-assignment classes when calling a function. For example, void func(const DBData &v) avoids creating an unnecessary copy.
|
Note: Theclear method only nullifies a particular reference to reference-counted objects. DBSession and DBCursor classes provide a close method that releases the underlying database resources, even while the objects are still referenced. Using anything that relies on a closed cursor or database connection throws a DBException.
|
Many embedded compilers, such as Visual C++ for PocketPC, do not support C++ exceptions. Oracle Database Lite includes ALE, which is a library that closely mimics C++ exceptions. The following sections describe how to use ALE:
A decorated class is one that uses ALE for handling its exceptions. If your embedded compiler does not support exception handling, then use ALE, which relies on careful accounting of all objects that are already constructed or are being constructed. ALE supports stack unwinding and catching exceptions based on object type.
To use ALE, C++ source code needs to be modified where the try, catch and throw blocks are replaced with the ALE macros, which is known as decorating classes. The following is an example of a decorated class:
#include "ale.h"
struct Error {
    const char *msg;
    Error(const char *msg) :msg(msg) {}
};

aleTry {
    olArray<char> a(5);
    aleThrow(Error,Error("Adios"));// Or aleThrowObj(Error,("Adios"));
} aleCatch(Error,e) {
    puts(e.msg);
} aleCatch(aleBadAlloc,e) {
    puts("Tough!");
} aleCatchAll {
    puts("Some other exception happened\n");
    aleReThrow;
} aleEnd;
Table 12-1 ALE Macros for C++ Exceptions
| Macro | Action |
|---|---|
aleTry
|
Equivalent to C++ try. Use to enclose the code that might encounter any exception. |
aleCatch (type, varName)
|
Catch exception of a given type and store it in the variable varName, which is local to the block. Unlike the regular C++ exceptions, the type name string must match the argument of the throw exactly.
|
aleThrow (type, obj)
|
Throw an exception contained in obj of type. ALE supports single inheritence of exceptions, as described in Section 12.5.4, "Exceptions and Inheritance".
|
aleThrowObj (type, arg1, arg2, ....)
|
Construct a new object of type with the specified arguments and throw it as an exception.
|
aleCatchAll
|
Catch any exceptions that are not handled explicitly. |
aleReThrow
|
Rethrow the exception that is caught in the innermost aleCatch or aleCatchAll block.
|
aleEnd
|
Close the exception handling construct. Add a semi-colon ; after aleEnd.
|
If your embedded compiler does not support exception handling, then use ALE, which relies on careful accounting of all objects that are already constructed or are being constructed. Your class is involved in exception handling if the class is on the stack when an exception is thrown, its constructor may throw an exception, or it has a decorated superclass and member—even if the class does not do any additional exception-related processing.
When you decorate one class with ALE, you must decorate all classes involved with this class. If you omit a decoration in one of the classes, then the program might fail. Therefore, it is best to decorate all your classes except for plain C-style structures that do not have any constructors or destructors.
If your class does not have any constructors with a body that throws exceptions (it is OK if the superclass or member constructor does), then you can use a simple form of class decoration by adding ALELAST(ClassName), without a semicolumn, at the end of class declaration. ALELAST informs the library to register the class and clean-up if an error occurs. The following demonstrates how to use ALELAST:
template<class T> class PtrHolder {
   T *ptr;
public:
   ~PtrHolder() { delete ptr; }
   operator T *() { return ptr; }
   ALELAST(PtrHolder)
};
If any of the constructors throw exceptions, then you need to do the following:
Add ALECLAST(ClassName), rather than ALELAST to the end of the class body.
Add ALECONS(ClassName) in the beginning of the body of each constructor.
This is demonstrated, as follows:
template<class T> class Array {
    T *a;
    size_t len;
public:
    Array(size_t len=0} : len(len) {
        ALECONS(Array);
        a = new T[len];
    }
    Array(const Array &arr) : len(arr.len) {
        ALECONS(Array);
        for (size_t i = 0; i < len; i++)
            a[i] = arr.a[i];
    }
    ...
    ALECLAST(Array)
};
In this example, the class contains an explicit copy constructor. If your class does not contain an explicit copy constructor and instances can be copied, then you need to explicitly write a copy constructor and add ALECONS(ClassName); rather than using a copy constructor that is generated by the compiler. If you need a more complicated initialization than a default or copy constructor, then use a global pointer—which can be initialized by another global object, rather than a global instance.
Decorated classes can be safely used with the new and delete functions, including using new and delete for array and placement new. However, systems that do not support exceptions usually do not declare std::bad_alloc and std::no_throw types. Use aleBadAlloc and aleNoThrow instead of using std::bad_alloc and std::no_throw types.
One design decision is whether to decorate classes with constructors that only throw bad::alloc if they run out of memory using ALELAST or ALECLAST. If you are writing classes for a single application that does not allocate much memory, you might dispense with error checking and just use ALELAST. Your program might crash because of incorrect cleanup calls if it runs out of memory. If your class allocates a lot of memory or you are writing a highly-reusable framework, then it is best to use ALECLAST and decorate all the constructors.
If you need a global or static variable to be decorated with ALE, declare it using aleGlobal template, as follows:
aleGlobal<MyType> myGlobal; // Initialized with default constructor
aleGlobal<MyType> myGlobal1(MyType("Hello", 5")); // Initialized with copy constructor.
...
MyType *t = myGlobal; // Declared variables behave as pointers
Declare all global or static decorated instances using aleGlobal or you may receive runtime errors.
Unlike regular C++ exception handling, ALE requires that class names in aleThrow and aleCatch match exactly. Typedef names, throwing a subclass, and catching a superclass will not work. To build a hierarchy of exceptions, add ALEPARENT declaration to the subclass, as follows:
class BaseE {
    ALELAST(BaseE)
};
class DerivedE : public BaseE {
    ALELAST(DerivedE)
    ALEPARENT(BaseE)
};
DerivedE can be caught as BaseE. If you use multiple inheritance, then the first base class must be declared as a parent.
The Microsoft Embedded Visual C++ for ARM has a bug that is triggered when an ALE-decorated object (or any object with embedded pointers) is passed by value to a function or method. The affected code receives an ALE fatal error message at runtime. To avoid this problem, always pass SODA objects and instances of other classes that use ALE as a constant reference rather than value. For example, modify the following code:
void createName(DBClass cls, DBString name) {
	cls.create("name", name);
}
to the following implementation:
void createName(const DBClass &cls, const DBString &name) {
	cls.create("name", name);
If your classes are not decorated properly, then you will receive runtime errors. On PocketPC, ALE displays a message box explaining the problem, and then the program terminates. In addition, the error and the dump of the ALE stack is appended to aleDump.txt, which exists in the root directory of the device. In simple cases, the error message pinpoints the exact problem; for example ALECONS is missing for class MyArray. Usually, one of the classes found near the top of the ALE stack is not decorated properly. If you do not decorate a class and its superclasses or members are decorated, then you may receive a runtime error and see the superclasses/members on the stack.
To build a program that uses ALE, include ale.h from the Oracle Database Lite SDK and link with the olStdDll.lib library. You need olStdDll.dll at runtime.
For systems that already support C++ exceptions, like Win32, Oracle Lite includes a dummy ale.h that defines the same macros, but uses regular C++ exceptions to implement them. If you are writing code that must execute on both Win32 and PocketPC, remember to test the code with the actual ALE library to ensure that all your classes are decorated correctly. ALELAST, ALECLAST or ALECONS have no effect on the Win32 platform.
The following sections describe how to create a SODA Forms Application for PalmOS and PocketPC platforms:
Section 12.6.2, "Develop Your GUI Using the SODA Forms Library"
Section 12.6.6, "Setting List Choices for Status Contol on PocketPC"
SODA Forms relies on SODA, which is an easy-to-use C++ interface for the Oracle Lite database engine. Read SODA documentation before continuing with this manual. Make sure you understand objects, queries, cursors and virtual columns as a way to customize database schema for a particular application.
When developing for the Palm environment, use a PalmOS programming book. Focus on how to use Constructor for PalmOS, which is a visual tool to design forms. Also, familiarize yourself on how to use Metrowerks CodeWarrior to compile programs and PalmOS Emulator to execute them. Refer to FormOrders.mcp and build.html in the Palm documentation for instructions on creating a CodeWarrior project that uses SODA Forms.
Find and open FormOrders.mcp in the Oracle Database Lite PalmOS SDK. Execute the demo on your emulator or device with the Oracle Database Lite runtime installed and examine its behavior. When you are ready to continue, open the FormOrders.cpp and follow the code by reading this section.
When developing for the PocketPC environment, refer to the Microsoft Development Network. Focus on how to use Embedded Visual C++ to create resources and compile programs for PocketPC. Also, familiarize yourself with Windows UI controls, including their formats and styles.
If you want to use SQL in your application, understand the SODA SQL support. The FormsOrder demo uses SODA SQL to support custom queries.
Find and open FormOrders.vcp in SodamFormCE\FormOrders directory under the samples for SODA on the PocketPC. This is the demo for PPC2003.
SODA Forms is a quick way to create data entry GUI.
The GUI for data entry applications performs the same actions, as follows:
Copy values from different columns of a database record into controls, such as text fields and checkboxes.
Track what the user is doing by handling various UI events, like "field entered" or "button clicked". The user typically examines or edits the data on the screen and presses a button or picks a menu item to designate the next action.
To perform the action requested by the user, the application performs database and UI calls. For example, to save changes, the application retrieves the values in the UI controls and eventually executes a SQL update statement. An application needs to be able to discard changes, delete records, create new records, go to the previous or the next entry, and search for data that satisfies user-selected conditions.
Normally, you duplicate the UI code for each screen supported by the program, which can result in a bulky program. Instead, use Soda Forms, as described in Section 12.6.2.2, "Trimming Your PalmOS and PocketPC UI Code With SODA Forms", to streamline your UI code.
We moved the boilerplate UI code to a library and to enable the programmer to concentrate on application logic, not the tasks of copying values from database rows to UI controls. Oracle Database Lite provides this library for both PalmOS and PocketPC.
The following example creates a form:
DBSession sess("OrdersODB"); // Open a database connection
DBClass cls = sess["ORD_MASTER"]; // Locate a table in the database
DBForm frm(OrderForm, cls, orderCols, OL_COUNTOF(orderCols)); // Initialize a form
frm.edit(cls.createCursor()); // Let the user edit all records in ORD_MASTER table
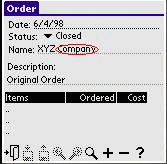
If using the PalmOS UI designer, then the form is created visually with the Constructor with values from the first row of ORD_MASTER table1, as follows:
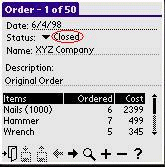
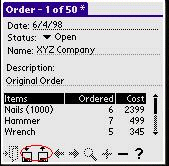
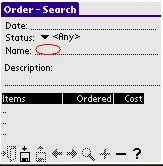
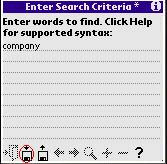
If designing an application for PocketPC, then the form is created with Embedded Visual C++ resource editor with values from the first row of ORD_MASTER table1, as follows:
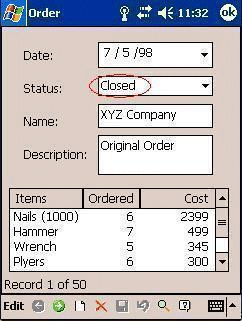
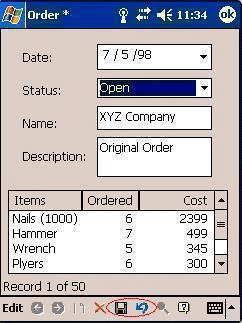
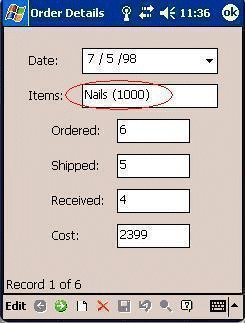
The user can update the current record and then either save the changes or discard them and reload from the database. He or she can also search data using any values visible on the screen, scroll through all the records as well as delete existing entries or create new ones. No special code is needed to support these operations.
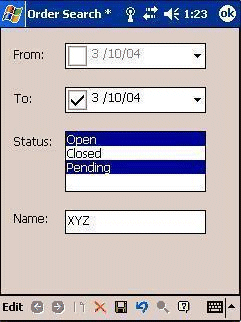
On PocketPC, you can also see a lens button on the toolbar. When this button is clicked, the application can launch a cusomtized dialog for entering search conditions, retrieve their values, an dexecute custom queries. For PocketPC, we only support queries implemented by the application. Whereas, PalmOS has built-in queries.
For the PocketPC platform, a SODA form is a Windows dialog. Thus, the first step is to design dialogs for every form using the Embedded Visual C++ resource editor. In the FormOrders project, click on the resource tab, open the dialog folder and click on the IDD_FORMORDERS_MASTER dialog. This shows the dialog for the master form, as follows:
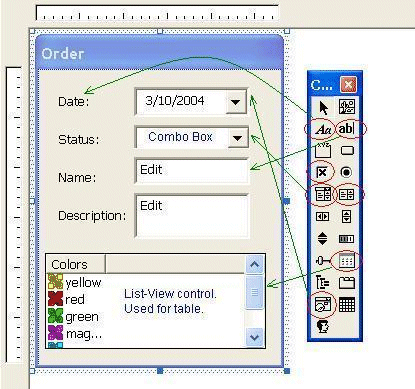
The controls on the master form, labels (also called static controls, such as "Date:", "Status:", and so on), edit controls (name and description fields), Date-Time picker (for date field), ComboBox (for status field), and list view control for the detail table. There are corresponding icons on the toolbox used to create these controls.
Each control has separate formats and styles that can be customized through the resource editor to find the appearance and behavior you want. For every control there is a resource symbol with numeric id assigned to it. Right-click on the FormOrders.rc and select Resource Symbols, as follows:
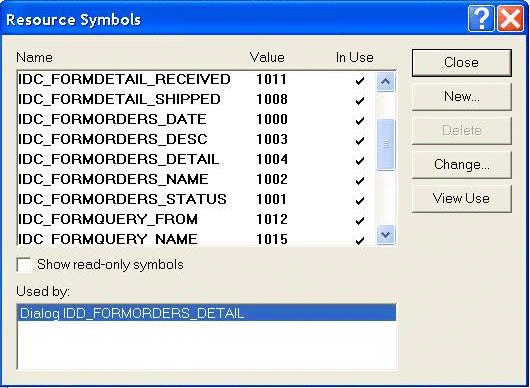
You can either create your own identifiers or let the resource editor create them for each symbol. Look at the header file, resource.h, which is generated by the resource editor, to see how identifiers are assigned to resource symbols using #define statements.
The following SODA code connects the application to an Oracle Lite database and retrieves the DBClass objects for two tables used in the demo—ORD_MASTER and ORD_DETAIL:
DBSession sess("OrdersODB"); // Open a database connection
DBClass mCls = sess["ORD_MASTER"];
DBClass dCls = sess["ORD_DETAIL"];
However, values stored in the database do not exactly match what should be shown to the user. SODA allows each application to customize how the schema is shown. Both the ORD_MASTER and ORD_DETAIL tables have ID columns, which are primary keys and should be initialized to some unique value when a new record is created. To avoid asking the user to pick unique values, set the default value of each column to a sequence, as follows:
mCls.defaultVal("ID", sess.findSequence("OrderSeq"));
dCls.defaultVal("ID", sess.findSequence("DetailSeq"));
In addition, the UI shows the order status as "Open", "Closed" or "Pending"; however, the "STATUS" column in ORD_MASTER stores numbers, such as 0, 1 or 2. The following line creates a virtual column named strStatus that contains a mapped value:
DBMapCol mc("strStatus", mCls, "STATUS", DBDataList() << 0 << "Open" << 1 << "Closed" << 2 << "Pending" << DBNULL << DBNULL);
Finally, modify the Order screen to contain a table of items included in the order. SODA Forms populates a table by reading a column that stores a list of DBObject pointers and copying values from each object to a table row. In our case, ORD_DETAIL rows relate to a row in ORD_MASTER through the values of the KEY column, which matches the value of the master ID. The following declaration creates a pseudo-column that contains an array of pointers and updates KEY values as assigned:
DBValueRel rDet("detail", DBSrcCol(mCls, "ID") -> DBDstCol(dCls, "KEY"), DB_UPD_CASCADE);
If a mapping you are looking for is not part of SODA, then you can create your own by subclassing the DBVirtualCol class. Default values and virtual columns are transient and not stored in the database. Thus, declare them in every application that requires access to your abstractions.
Once you complete customizing the database schema, you can map columns in the database to values that appear on the user screen when editing a particular record. The following sections describe how to map the columns for both PalmOS and PocketPC:
Section 12.6.5.1, "Binding UI to Data for the PalmOS Environment"
Section 12.6.5.2, "Binding UI to Data for the PocketPC Environment"
For each column that you are going to map, you need to define a DBFormCols structure that has the following fields.
The resource id assigned to a particular UI control by the PalmOS Constructor. The Constructor generates a header file that has a #define for each item. For example, if you define a list named Status in a form named Orders, then OrderStatusList is defined to the ID of that control.
A column name to which the UI control is to be bound.
An optional field that specifies how the control should be edited. For example, you can specify that a text field should be edited as a date, number or string. If omitted, the default method is used.
Here is the mapping for our two forms:
//Mapping for ORD_MASTER table
static const DBFormCols orderCols[] = {
    {OrderDateField, "DDATE", DBFormEditDate},
    {OrderNameField, "NAME"},
    {OrderDescField, "DESCRIPTION"},
    {OrderStatusList, "strStatus"},
    {OrderDetailTable, "detail"}
};
//Mapping for ORD_DETAIL table
static const DBFormCols detailCols[] = {
    { DetailDateField, "DDATE", DBFormEditDate },
    { DetailItemsField, "DESCRIPTION" },
    { DetailOrderedField, "QTYORDERED", DBFormEditDigits },
    { DetailShippedField, "QTYSHIPPED", DBFormEditDigits },
    { DetailRecievedField, "QTYRECEIVED", DBFormEditDigits },
    { DetailCostField, "COST", DBFormEditDigits }
};
Once the mapping is in place, create DBForm objects by specifying the resource ID of the form itself, DBClass of objects that the form will be used to edit and the mapping table with the number of elements it contains:
DBForm mFrm(OrderForm, mCls, orderCols, OL_COUNTOF(orderCols));
DBForm dFrm(DetailForm, dCls, detailCols, OL_COUNTOF(detailCols));
For each column, you need to define a DBFormCols structure that has the following fields.
The resource id assigned to a particular UI control.
The column name to which the UI control will be bound.
The optional argument that specifies how the control should be edited. For PocketPC, the only relevant value is DBFormEditListIndex, which asks to use the index of the selection, rather than its string value, for ListBox and ComboBox controls. If omitted, the default method is used.
Here is the mapping for our two forms:
//Mapping for ORD_MASTER table
static const DBFormCols orderCols[] = {
	{IDC_FORMORDERS_DATE, "DDATE", DBFormEditDate},{	IDC_FORMORDERS_NAME, "NAME"},
{	IDC_FORMORDERS_DESC, "DESCRIPTION"},
{	IDC_FORMORDERS_STATUS, "strStatus"},
{	IDC_FORMORDERS_DETAIL, "detail"}
};
//Mapping for ORD_DETAIL table
static const DBFormCols detailCols[] = {
    { IDC_FORMDETAIL_DATE, "DDATE", DBFormEditDate },
    { IDC_FORMDETAIL_ITEMS, "DESCRIPTION" },
    { IDC_FORMDETAIL_ORDERED, "QTYORDERED", DBFormEditDigits },
    { IDC_FORMDETAIL_SHIPPED, "QTYSHIPPED", DBFormEditDigits },
    { IDC_FORMDETAIL_RECEIVED, "QTYRECEIVED", DBFormEditDigits },
    { IDC_FORMDETAIL_COST, "COST", DBFormEditDigits }
};
Once the mapping is in place, create the DBForm objects by specifying the resource ID of the form itself, the DBClass of objects that the form will be used to edit and the mapping table with the number of elements it contains, as follows:
DBForm mFrm(OrderForm, mCls, orderCols, OL_COUNTOF(orderCols));
DBForm dFrm(DetailForm, dCls, detailCols, OL_COUNTOF(detailCols));
For listbox and ComboBox controls in the PocketPC environment, set the string list of choices. You cannot set the list choices for the listbox in the resource editor, and it can be difficult to set for the combobox. Thus, set the list choices for both the listbox and the combobox programmatically through the setListItems function of DBFormCol, as follows:
DBList<DBString> stList;
stList << "Open" << "Closed" << "Pending";
mFrm[IDC_FORMORDERS_STATUS].setListItems(stList);
Specify which columns of the ORD_DETAIL table appear in the table and how the values are aligned within a cell and in the title of each column. The following array contains the information:
static const DBFormTblCols detailTblCols[] = {
    { "DESCRIPTION", "Items" },
    { "QTYORDERED", "Ordered", DBFormColRight },
    { "COST", "Cost", DBFormColRight }
};
Retrieve a handle to the table column and set its format, as follows:
DBFormCol tCol = mFrm[OrderDetailTable];
tCol.setTableInfo(dCls, detailTblCols, OL_COUNTOF(detailTblCols));
The following few lines of code constitute the logic of FormOrders application:
// Load all objects of ORD_MASTER into a form
DBCursor c = mCls.createCursor();
mFrm.load(c);
// Handle table select event in master form to launch the detail form
while (mFrm.edit() == OrderDetailTable)
        dFrm.edit(mFrm[OrderDetailTable]);
From this, the following occurs:
A list of objects from ORD_MASTER to edit is loaded into the order form.
The mFrm.edit function displays the UI and handles many of the user actions internally. Before the call returns, the user could have made changes, created new records, searched through the data, and so on.
The return values from the function call are an identifier of the UI control that was activated, which was not handled internally. In the case of the Orders demo, it would either be the OrderDetailTable—meaning that a row in that table was clicked—or the DBFormItemExit—if the exit icon on the toolbar was clicked.
If the user clicked the table, the demo asks the DBForm detail to edit the list of objects contained in the table.
Once the edit is completed, any pointers to new objects are saved in the detail virtual column of the ORD_MASTER row. The DBMapCol updates the KEY column of the objects to the identifier value that matches the master.
You can use SODA Forms to write concise UI code without replicating a boilerplate. The next sections explore more advanced capabilities of the library.
SODA can be compiled on Windows, PocketPC and PalmOS environments. Refer to the PalmOS documentation for instructions on building applications for that platform.
To build a SODA application on Win32, perform the following:
Add the Oracle Database Lite SDK to the include and library path in your compiler options.
Include the appropriate .h files and link with appropriate library files, as follows:
For most applications, include <soda.h> and link with olStdDll.lib and sodadll.lib.
If you are using Visual Studio.Net 2003 and you are building an application using SODA SQL binding, include the <sodasql.h> file instead of soda.h and link with olStdDll.lib, sodadll.lib, and sodasql.lib.
If you are using Visual C++ 6.0 and building and application using SODA SQL binding, then link with olStdDll6.lib, sodadll6.lib, and sodasql6.lib libraries. The olStdDll library contains utility classes that are not related to database, such as olString and olHash. It does not depend on the rest of Oracle Database Lite runtime, except ceansi.dll, on PocketPC platforms.
To build a SODA Forms application for PocketPC platform, include SodaForm.h into your program and link with the following import libraries: sodadll.lib (soda library), sodasql.lib (library for soda sql) and sodaform.lib (sodaform runtime). Also, install the Oracle Database Lite runtime and sodadll.cab in order to run your application. Sodadll.cab contains sodadll.dll, sodasql.dll, sodaform.dll and SodaFormHelp.html (default help file for SODA Forms). Currently, we support SODA Forms for two PocketPC platforms: Pocket PC 2002 and Pocket PC 2003. The soda libraries and sodadll.cab files are provided in the SDK for each platform—both for the device and the emulator.
SODA includes a software emulation library that requires some changes in syntax when using C++ exceptions, but keeps the program structure intact. See Section 12.5, "Another Library for Exceptions (ALE)" on how to support C++ exceptions.
The following sections describe the SODA Forms edit modes:
The code below enables a user to edit a specific object. To edit a list of objects, see Section 12.7.2, "Editing a List of Objects":
DBObject o;
DBFormItem id = frm.edit(o);
In this case, toolbar will not have arrows to scroll or "new" icon to create a new object. Query is disabled. If the user saves the changes or deletes the object, DBFormItemSave and DBFormItemDelete are returned respectively. With list edit, save or delete do not return, since the user can still make additional changes to another record.
The following example loads a list of objects into a form, and enables the user to insert, delete, update or query:
olList<DBObject> ls;
ls << obj1 << obj2 << obj3;
DBFormItem id = frm.edit(ls);
When the edit returns, the DBObject list is updated with the new list of objects that reflects creation and deletion. The DBFormItem variable has one of the following values:
Table 12-2 DBFormItem Identifier Values
| Value | Explanation |
|---|---|
| DBFormItemExit | User clicked one of the following:
|
| Identifier of a table column | User clicked on a row in a table. Use the frm[id].getSelectedRowfunction to determine which one it is. |
| Identifier of a button | User clicked on a button in the form. |
| Identifier of a menu item | User clicked on a menu item not handled internally by SODA forms. |
| Identifier of a pop-up list or checkbox | The UI control was changed and you called frm[resId].setChangeNotify(true) on that column. |
| DBFormItemRevert | You set DBFormRevertExit edit flag and the user reverted a change. |
There are several ways to customize the editing. The following example demonstrates a customization:
DBCursor cur = cls.createCursor(DBColumn("status") == "Active");
frm.load(cur, DBFormNew|DBFormUpdate|DBFormDirtyExit, DBSetList() << "zip" << 94403 << "status" << "Active");

DBFormItem id;
while ((id = frm.edit()) != DBFormItemExit)
    if (id == CustomerBelmontButton) {
        frm[CustomerZipField] = 94002;
        frm.dirty();
    }
olList<DBObject> ls;
frm.getList(ls);
The DBFormNew or DBFormUpdate edit modes are specified instead of the default DBFormListEdit mode, which disallows the deletion of records while creating and updates are OK. DBFormReadOnly enables users to view and search the data.
The DBFormDirtyExit flag means that a button press or menu selection would exit edit even if the form is dirty. The default is to beep and wait until the user saves or reverts the change.
Specifying a DBSetList provides initial values that are given when a new object is created. For bound, enabled columns, the user can change that value. For unbound database columns or columns bound to read-only UI controls, this is the final value.
You can specify objects to edit in two ways – by giving an explicit list of objects or by providing a DBCursor. In the later case, the results of a query are loaded into the form.
In this case, load the list of objects once, call edit one or more times, and then retrieve the final edited list. SODA Forms provides you a choice between calling the edit method with all the arguments or calling load, edit without arguments and then getList or getObject functions. Examples in this document only show one possibility and do not discuss each edit flag.
The example below loads initial values into a form and asks the user to modify the values. The user then either clicks Save to create a new record or clicks Delete to cancel the creation.
DBObject o = frm.create(DBSetList() << "zip" << 94403 << "status" << "Active");
This call returns the new object or DBNULL, if the creation was canceled. However, if you use the load/edit sequence, then call the getObject method to retrieve the object handle, if DBFormItemSave is returned by the edit method.
Although SODA Forms is designed for editing database records, you can use the same interface to retrieve input from the user. The following example enables the user to edit two fields and then retrieve the result:
DBForm frm(CustomerForm);
frm[CustomerZipField] = 94002;
frm[CustomerStatusField] = "Active";
DBFormItem id = frm.dialog();
if (id == DBFormItemSave) {
       DBString status = frm[CustomerStatusField];
       int zip = frm[CustomerZipField];
       ...
}
The values set before the frm.dialog call are default values. The user can make changes and then click Revert to restore the defaults and try again. Finally, the user clicks Save to send the changes to the program.
If you want to search on the list of objects loaded into a form, you can perform a custom query, which is the query logic implemented by the application. Execute the FormOrders demo and click on the lens toolbar button on the main form. It pops up a form—a dialog—to enter the search parameters for a custom query. Examine the IDD_FORMORDERS_QUERY dialog under the FormOrders resources to see how it enters the following search criteria: from- and to- dates, multiple list choices for the order status, and keyword search on the company name.
The following code sets up the query form:
//orders query form
//this constructor will automatically put the form into a dialog mode
DBForm qFrm(IDD_FORMORDERS_QUERY);
//set list choices
qFrm[IDC_FORMQUERY_STATUS].setListItems(stList); //same list as for the master form
qFrm[IDC_FORMQUERY_STATUS].setEditType(DBFormEditListIndex); //cannot use virtual column here
In order to enable the lens toolbar button, specify DBFormCustomQuery mode when loading the master form, as follows:
// Load all objects of ORD_MASTER into a form
DBCursor c = mCls.createCursor();
long mMode = DBFormListEdit | DBFormCustomQuery;
mFrm.load(c, mMode);
The full logic of the FormOrders application is as follows:
for(;;) {
    DBFormItem i = mFrm.edit();
    if (i == IDC_FORMORDERS_DETAIL)
        dFrm.edit(mFrm[i]);
    else if (i == DBFormItemQuery) {
        DBFormItem j = qFrm.edit();
        if (j == DBFormItemSave) {
	mFrm.load(doQuery(sess, qFrm), mMode);
	mFrm.setTitle("Search Results");
        }
        else if (j == DBFormItemDelete) {
	mFrm.load(mCls.createCursor(), mMode);
	mFrm.setTitle("Order");
        }
    }
    else //DBFormItemExit
        break;
}
Call the edit method on the master form and look at the return value. If the row in the table was clicked (i == IDC_FORMORDERS_DETAIL), then call the edit method on the detail form and then return to the master form through the loop as shown earlier in the document. If the user clicks on the query(lens) button (i == DBFormItemQuery), then pop up a query dialog (qFrm.edit). Once the user sets up the query parameters, the user can click on the Save button to execute the query (j == DBFormItemSave), Delete button to cancel the query (j == DBFormItemDelete) or exit the form to come back to the previous screen. The doQuery function creates the DBSqlCursor based on the search parameters in the query form. To execute the query, load the master form using the DBSqlCursor and change the form title to Search Results. If the query was canceled, reload the master form with the original list of objects (mCls.createCursor) and change its title back to the original.The doQuery function retrieves the search parameters from the query form as DBData from its columns. Then it creates a SQL where-clause string and the binding list for it. The multiple choices for the status list are stored inside DBData as an array of integers. For the company name field, the search is performed using a LIKE expression—LIKE %s%—so that any substring matches.
You can customize the UI of your application by configuring your resource file. Also, edit the sodares.rsrc file to modify the UI resources used by the SODA Forms library.
For PalmOS, set the Help identifier for your form to a string resource id to customize the help message displayed when the user clicks the ? icon. Alternatively, examine SodaHelp, WordsHelp, RangeHelp and QueryHelp strings in the sodares.rsrc file for the default help messages when the Help ID for your form is 0.
On PocketPC, when the user clicks on the help button on the toolbar, SODA Forms launches the Windows CE help editor and loads the help file. The default help file is SodaFormHelp.html, which describes editing the database record. This help file is copied under the \Windows directory on PocketPC during installation. If you want to display different helpfiles or customize help for every screen in your application, then SODA Forms calls the frm.setHelpFile method where you can pass in your help file name. Your custom help file should be located under the \Windows directory on your PocketPC. You may include images and hyperlinks in your help file.
On PalmOS, if the Menu identifier for your form is 0, then SODA Forms uses SodaMenu defined in the sodares.rsrc file. Customize the menu or copy it into your own resource file and add more items after the standard items.
For PocketPC, SODA Forms uses the PocketPC Menubar, which is a combination of menus and the toolbar. The default Menubar comes with the SODA Forms and includes the "Edit" menu and tool bar buttons ("Left", "Right", "New", "Delete", "Save", "Revert", "Query", "Help"). The menubar can be created in the resource editor, so you can create your own or modify the default one. Read the MSDN library on how to create Menubar resources.
Remember to keep the same identifiers for the Menubar itself (IDR_DBFORM_MENUBAR) and the predefined menu items. You can locate these identifiers in the file SodaRes.h, which comes with the SODA Forms source code. You should have all the menu and toolbar items that are in the default menubar with the identifiers defined in SodaRes.h. You can modify toolbar icons, caption, and place toolbar items in your menus, as long as you keep the same identifiers.
To create or modify the existing menubar within SodaForms, then rebuild the project and copy the new SodaForm.dll on the device for the changes to take effect.
For PalmOS, set the default button identifier for your form to specify what is to be returned from the edit if the user exits the application, such as when the user presses the home button.
For PalmOS, you can modify the appearance of SODA Forms toolbar by editing bitmaps in SodaToolbar and SodaToolbarDis (for disabled items) bitmap families, or add new family members for color icons and high screen resolutions. Make sure not to change size or positions of the items on the toolbar.
SODA Forms allows one table control on a form to be bound to a list of objects. This list can be specified by the user, using one of the overloaded setObjects methods in the DBFormCol class. You can also bind a table to a database column that contains a list of objects. SODA supports the object pointer array datatype directly, but only normalized relational data can be replicated to the Mobile Server. Use DBValueRel virtual columns to map master-detail relationships into pointers.
To bind a table to the database column, perform the following:
Add the column name for each environment, as follows:
For PalmOS, add the column name and table resource identifier to the DBFormCols array that you pass to the DBForm constructor.
For PocketPC, add the column name and the ListView resource identifier to the DBFormCols array that you pass to the DBForm constructor.
Call the setTableInfo method in the corresponding DBFormCol object to specify which columns of the objects are to be displayed in the table, what are the column titles, and how the data is to be aligned.
On PalmOS, to make a table scrollable, add a vertical scrollbar to the right of the table on the form. The library automatically detects and uses it.
Users can scroll through the table, click on the headers to sort on the column value and click a row to select it. In this case, the edit call returns with the object identifier of the selected row and executing the getSelectedPos method on the DBFormCol returns the row selected or DB_NEW_POS, if the user clicked on an empty space. These events are suppressed if the form is dirty.
The application handles any table click. However, you should load the list of objects into another DBForm, let user edit it, and then save the changes back to the table and to the corresponding database column. DBForm contains an overloaded edit(DBFormCol) method that does all the work automatically for you if you only have a single level of a master-detail relationship. For more complicated cases, you could do the following:
Maintain a stack of DBForm objects.
Call the DBForm::load(DBFormCol) method when you push a new form on the stack.
Call DBFormCol::saveTo(DBFormCol) before the pop.
SODA Forms supports multiple kinds of UI resources. For each, the values stored in the database and editing behavior can be customized by specifying an edit type in the third field of DBFormCols, as described in xxx, and optionally calling methods on the corresponding DBFormCol object.
In PalmOS, when editing a list of objects, the user can enter query mode by clicking a lens icon on the toolbar. In this mode, the user can click on various UI elements and enter an appropriate search condition. The library uses the control resource and edit types to determine what kind of search is supported.
The following tables summarize the behavior of the PalmOS and PocketPC control types:
When developing on PalmOS, use the following control types:
Table 12-3 Control Types for PalmOS
| Control and Edit Type | Edit Behavior | Value Stored in Database | Query Behavior |
|---|---|---|---|
| Text field/DBFormEditString (default edit type) | User enters any characters in the text field. | Any trailing spaces or newlines are stripped from user input. If the result is an empty string, null value is stored in the database. Otherwise, the trimmed result is stored. | User is able to enter space or comma-separated words in a popup dialog. By default, records that contain at least one word are displayed. Use +word to indicate that the word must be present in the results. Use -word to indicate that the word must not be present.For example, "snow -winter refresh retrace" locates records that contain the word "snow," and do not contain the word "winter," as well as contain either "refresh" or "retrace".Note that "snow" matches "snowball," but not "whatsnow." Use "snow -snowball" to filter the results. However, in Asian languages, the word is matched anywhere.Once finished, choose Save to set the new search criteria for this column, Revert to go back to the previous value or Exit to go back without making changes. |
| Text field/DBFormEditNumber | The user enters any number, for example 3.14e-99. | If the field contains spaces, a null value is stored in the database. Otherwise the number entered is stored. | User is able to search for several values, such as a range (like 5-15) or an arithmetic relation (<, <=, >, >=). The dialog box enables the user to select a search criteria and the value(s) to search for. |
| Text field/DBFormEditDigits | The user is able to enter digits 0-9 | If the field contains spaces, a null value is stored in the database. Otherwise the number entered is stored. | User is able to search for several values, such as a range (like 5-15) or an arithmetic relation (<, <=, >, >=). The dialog box enables the user select a search criteria and value(s) to search for. |
| Text field/DBFormEditDate, DBFormEditTime or DBFormEditDateTime | Calendar and/or clock dialogs pop up to pick a new value. If tbl[resId]. setAllowNull(true) is called on the column, then the Cancel button on the dialog enters a null value. | Date and/or time is stored in the database. | Same as for DBFormEditNumber, but clicking on any value fields brings up clock and/or calendar dialogs. Cancel button always clears the field in query mode, so that the user can remove some of the values to match or exclude. |
| Checkbox | Can be clicked on or off. If tbl[resId]. setAllowNull(true) is called, the checkbox becomes a tri-state, where grayed-out appearance means "Unknown" | True, false or null (for unknown value) is stored in the database. | Tristate mode is always active. Grayed out checkbox means no search is done on that column. |
| Pop-up list/DBFormEditDefault (default edit type) | User can choose the value from a pop-up list. | The string of the selected item is stored in the database. On input, unknown values or null are shown as an empty string. To allow user to choose a null value, include an empty string as one of the list selections. | User will be able to make multiple selections. Clicking on an item toggles its selection. If no items are selected, or <Any> is selected, then no search is done on that column. |
| Specify the list object ID in DBFormCols. SODA Forms automatically finds and updates the popup trigger object. Pop-up list/DBFormEditListIndex | User can choose the value from a pop-up list. | 0-based index of the selection is stored in the database. This mode is useful where the selection strings are language specific, but the database column should always have the same values. | User can make multiple selections. Clicking on an item toggles its selection. If no items are selected, or <Any> is selected, then no search is done on that column. |
The form developed on PocketPC can have controls that are not bound to database, such as push buttons. Clicking on a button returns from the edit method with the button Id. When developing on PocketPC, use the following control types:
Table 12-4 Control Types for PocketPC
| Control Type | Edit Behavior | Value stored in database |
|---|---|---|
| Edit | This is a text field for entering characters. Different styles can be specified in the resource editor, to change the appearance and the set of characters that can be entered into the field. For example, the Number style only allows numbers to be entered.
|
Any trailing spaces or newlines will be stripped from user's input. If the result is an empty string, null value will be stored in the database. Otherwise, the trimmed result will be stored. If the control is bound to a numeric column (control should have "Number" style), the entered number will be stored. |
| Date-Time Picker | The control stores and shows date and/or time values. It displays a month calendar to modify the value. You can use any of the following formats: Short Date, Long Date, Time, or a custom format. To set the custom format, call the tbl[resId].setDateFormat method with the custom format string. See the MSDN library for the DateTime_SetFromat method on how to construct the custom format. Use the Show None style to null the date/time. This places a check box on the left and the control has an unspecified (null) value when the check box is not checked. The Allow Edit style enables manual editing of the date string.
|
Date/time value is stored in the database. If the control has the Show None style and is in unspecified state, then a null value is stored.
|
| Checkbox | The checkbox can be checked on or off. If Tri-state style is specified, then the checkbox can have a greyed-out appearance if the value is unknown. | True, false or null (for unknown value) is stored in the database. |
| Listbox | Displays a list of text items. Set iether single or multiple selection type in the resource editor. The latter is useful for the query mode when you want to query by multiple choices within the list. | Single-selection listbox:
If the column edit type is default, the string of the selected item is stored in the database. On input, unknown values or null are shown as an empty string. To allow user to choose a null value, include an empty string as one of the list selections. If the column edit type is DBFormEditListIndex, 0-based index of the selection is stored in the database. This mode is useful where the selection strings are language specific but the database column should always have the same values. Multiple-selection listbox: List selections are stored as array of strings or numbers (when edit type is DBFormEditListIndex). Remember that DBData can store arrays of values of certain type. If there are no selections, null value is stored. |
| ComboBox | This is a combination of a listbox and the edit control. Drop List is a popup list. Dropdown is a popup list that contains edit control for editing the selection. Multiple selections are not supported for the Combobox.
|
Same as listbox. For "Dropdown" format, with the default edit type, the strings which are not in the original list can be loaded into the edit area of the combo box or stored in the database. |