| Oracle® Application Server Developer's Guide for Microsoft Office Interoperability 10g Release 3 (10.1.3) B25781-01 |
|
 Previous |
 Next |
| Oracle® Application Server Developer's Guide for Microsoft Office Interoperability 10g Release 3 (10.1.3) B25781-01 |
|
 Previous |
 Next |
This chapter shows how you can use various tools to save Microsoft Office documents to the Oracle Application Server Metadata Repository.
This chapter contains the following sections:
In any enterprise, documents are frequently spread across many different data sources. To make the information accessible and easy to find, the ideal solution is to save the data in one central content repository, such as the one provided by OracleAS Portal. But how do you move and publish distributed content into your portal? For simple, distributed, low-volume file transfer, you can map the Portal schema in the Oracle Application Server Metadata Repository as a Web Folder (Figure 12-1).
Figure 12-1 Pages and Content in WebDAV and OracleAS Portal
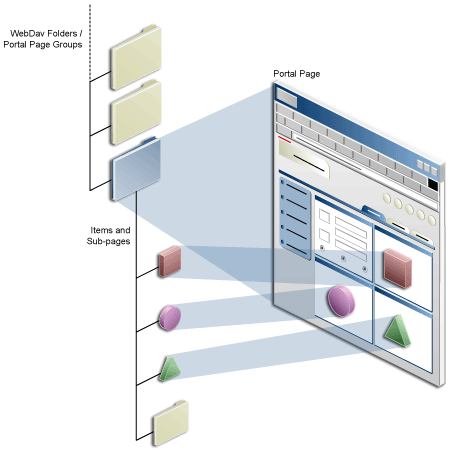
OracleAS Portal supports the use of a Web-based Distributed Authoring and Versioning (WebDAV) protocol. Using a WebDAV client, such as Web Folders, you can manage your portal content re-creating your computer's file system. You can also drag and drop files between your desktop and your portal page groups, move content between page groups, and move content between source repositories and the Portal schema in the OracleAS Metadata Repository. For example, you can mount both the Oracle Content Services and the Portal schema in the OracleAS Metadata Repository through a Web Folder, and exchange files. You can perform in-place opening, editing, and saving of portal content using WebDAV-compliant desktop applications, such as Microsoft Office 2003.
Using WebDAV clients with OracleAS Portal takes full advantage of the portal's content management capabilities. It enables users to manage content through their file systems, while adhering to the content structure and access rules specified for the portal.
For example, you can access the Portal schema in the OracleAS Metadata Repository through a WebDAV client, such as Oracle Drive. Connect as a particular user, and create a ZIP archive starting from the page group's root page. This operation adheres to the access rules established for the portal—only the logged-in user's content is copied to the archive. And it respects the portal structure by maintaining the WebDAV folder hierarchy of the targeted page group.
To perform the steps outlined in this chapter, first install the following software:
Oracle Application Server Portal 9.0.4.2 or later
Oracle Application Server Portal is part of Oracle Application Server.
Oracle Drive. You can download the latest version of Oracle Drive from the Oracle Collaboration Suite Downloads page at
http://www.oracle.com/technology/software/products/cs
|
Note: If you encounter a problem with Oracle Drive, report it to the Portal Content Management Forum on the Oracle Technology Network at
|
Microsoft Office (version 2000 or later)
This chapter shows you how to use several tools to save Microsoft Office documents to the OracleAS Portal content repository:
WebDAV is configured on both the server side (in OracleAS Portal) and the client side (your personal computer).
OracleAS Portal has a DAV configuration file (oradav.conf) that contains OraDAV parameters. When Oracle Application Server is installed, all required OraDAV parameters are set with values that enable access to Oracle Database content through a Web browser or a WebDAV client. If necessary, the portal administrator can modify parameter values if the default values do not meet your portal's needs.
If you are a portal administrator and would like detailed information about the oradav.conf file and how to modify OraDAV parameters, refer to Oracle Application Server Portal Configuration Guide.
Additionally, there are options within the OracleAS Portal user interface that you can set in advance to prepare the way for uploading content through a WebDAV client. For information about these options, refer to Oracle Application Server Portal User's Guide.
The steps required to set up a WebDAV client to connect to your portal vary depending on the client. But all clients will eventually request a URL. The WebDAV URL is very similar to the URL you use to access the portal in your Web browser. It uses the following format:
http://<hostname>:<port>/<dav_location>
Where dav_location is the location as specified in the oradav.conf file.
The default portal DAV URL is:
http://<hostname>:<port>/dav_portal/portal
The dav_portal part of the URL is the default name of a virtual directory that is used to differentiate between portal access through a WebDAV client and portal access through the portal user interface.
The portal part of the URL is the name of the database access descriptor (DAD) of the portal installation. Administrators can also configure virtual hosts to provide a different, simpler, or easier to remember URL for WebDAV access, if need be.
Directly access a particular page group or page by adding its name to the WebDAV URL, for example:
http://mymachine.mycompany.com:5000/dav_portal/portal/mypagegroup/mypage
You connect to a portal through WebDAV clients using the same user name and password that you use to log in to the portal itself. If the portal is in a hosted environment, then you also must add your company information to your user name, as follows:
<username>@<company>
If you are using Web Folders on Windows 2000, then you may be prompted for your user name and password twice: once when you click Next after specifying the WebDAV URL, and again when you click Finish.
Some WebDAV clients (such as, Windows 2000 or NT) do not support multiple simultaneous logins. If you want to log in as a new user, then you must clear your cookies, restart your computer to clear out the current login session, and then log in as the new user.
You may need to delete the file C:\Documents and Settings\<user>\Cookies from the command prompt window. You can do this only when no other processes are using the file.
If your WebDAV client has no explicit logout feature, you must log out of the operating system (such as Windows 2000 or NT) to log out of the portal.
Oracle Drive is a powerful WebDAV client that you can use to map the Portal schema in the OracleAS Metadata Repository as a drive, and perform desktop authoring and publishing, and portal-specific metadata attribution directly from the Windows desktop.
Key highlights include the following:
Mount OracleAS Portal Repositories as Microsoft Windows Drives
Edit and view content with any Windows application
Work with offline content and synchronize when online
Extra capabilities available in the right-click menus
Set properties, grant access, and preview content and pages
Access the repositories with a command line (DOS) utility
Search from Windows Explorer
In this example, a user (James Cooper) uses Oracle Drive to map the Portal schema as a drive and then work with Microsoft Office files within that portal.
To use Oracle Drive to add content to a page, perform the following steps:
Click the Oracle Drive icon in the system tray.
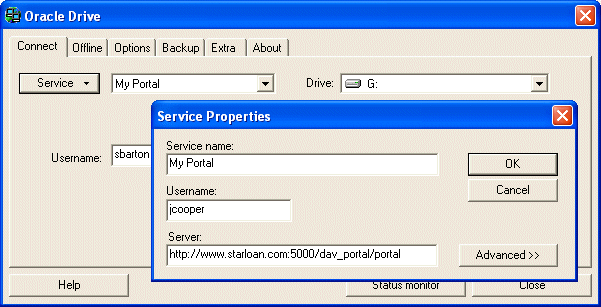
This displays the Oracle Drive dialog box, as shown in Figure 12-2.
If necessary, click the Connect tab to make it the active tab.
From the Service menu, select New.
In the Service name field, enter My Portal.
In the Username field, enter your portal user name.
In the Server field, enter the WebDAV URL for your portal. You can also specify a particular page within a portal. In our example, James enters the WebDAV URL of the Star Loan portal (see Figure 12-2)
http://www.starloan.com:5000/dav_portal/portal
Figure 12-2 Oracle Drive Service Properties
|
Note: The Server field has a limit of 64 characters, therefore if you have a long WebDAV URL or you are specifying a particular page, the whole URL may not fit. In this case, you can click the Advanced button and specify the Server, Port, and Server directory separately, for example:
|
Click OK.
From the Drive list, select a drive letter to map to the new Oracle Drive connection.
Click Connect.
Enter your portal password to authenticate and establish the connection.
The Oracle Drive WebDAV connection is assigned to the drive letter selected in Step 8 and is available in Windows Explorer. You can now use this drive in the same way as any other drive.
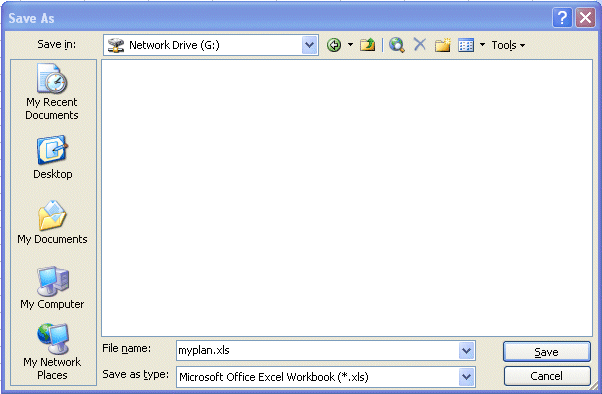
For example, James can create a new Microsoft Excel spreadsheet (myplan.xls) and save it directly to his portal, as shown in Figure 12-3.
Figure 12-3 Saving Files Directly to a Network Drive
In addition, when you right-click any file or folder under the mapped Oracle Drive, file and folder options specific to OracleAS Portal are displayed in the resulting menu.
For example, James wants to assign his spreadsheet to the Plan category, so he right-clicks the spreadsheet file, and then selects Set Properties from the shortcut menu, as shown in Figure 12-4.
Figure 12-4 Setting Properties of a File on the Network Drive
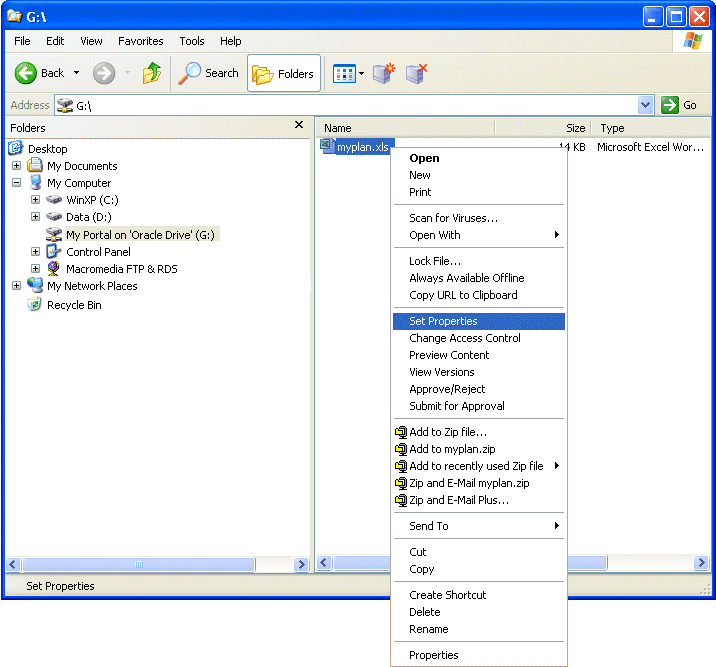
After providing his user name and password (this happens the first time he opens a file or folder through Oracle Drive; he will not need to reauthenticate for any other files or folders during this session), James sees the Edit Item window where he can assign a category for the file.
File Menu Options include the following:
Set Properties—Displays the Edit Item window for the current Active version of the item. If approvals are enabled, and a user is accessing a Draft, then Set Properties displays the user's own draft version of the item, if a draft exists, and the current user created it. If the current user is the approver of the item, then Set Properties displays the Edit Item window for the Pending version of the item, if one exists.
Change Access Control—When item-level security is enabled, Change Access Control displays the Item Access window for the current Active version of the item.
Preview Content—Previews item content of the current Active version of the item. If approvals are enabled, and a user is accessing a Draft, then Preview Content previews the user's own draft version of the item, if a draft exists, and the current user created it. If the current user is the approver of the item, then Preview Content previews the Pending version of the item, if one exists.
View Versions—When version creation is enabled, View Versions displays the version history of the item.
Approve/Reject—This menu option is usable only when the current item is Pending and the current user is an approver; otherwise, when a user selects Approve/Reject, an error message displays.
Submit for Approval—This menu option is usable only when the current item is a Draft item and the current user is the creator of the draft; otherwise, when a user selects Submit for Approval, an error message is displayed.
Folder Menu Options include the following:
Set Properties—Displays the Page Properties window.
Change Access Control—Displays the Page Access tab in the Page Properties window.
For information on which items are accessible in what states, refer to Oracle Application Server Portal User's Guide.
Web Folders is a Microsoft operating system extension that supports the WebDAV protocol. If you access Web Folders on your computer, then you can browse the content of your portal through Windows Explorer and drag and drop Microsoft Office documents into the pages of your portal.
In this example, a user (James Cooper) uses Web Folders to add a Microsoft Word document to the Star Loan portal.
|
Note: This example shows you how to use Web Folders in Windows XP where the Web Folders feature is built into the operating system as part of My Network Places. You should be able to access the Add Network Place Wizard by clicking My Network Places then double-clicking Add Network Place. To use Web Folders in Windows 9n/NT, you must install Internet Explorer 5.5 (rather than 6.0) and the Web Folders component. You can then upgrade to 6.0, and Web Folders will remain.If you have Internet Explorer 5.5 installed, but cannot find a Web Folders node under My Computer, you must explicitly install the Web Folders component of Internet Explorer through Add/Remove Programs in the Control Panel. |
To use Web Folders to add content to a page (Windows XP), perform the following steps:
Open Windows Explorer and click My Network Places.
Double-click Add Network Place to display the Add Network Place Wizard.
Make sure Choose another network location is selected, then click Next.
Enter the WebDAV URL for your portal. You can also specify a particular page within a portal. In our example, James enters the WebDAV URL of the Star Loan portal:
http://www.starloan.com:5000/dav_portal/portal
If you are not sure of the WebDAV URL for your portal, contact your portal administrator.
Click Next.
Enter a name for the network place. James enters My Portal.
Click Next.
Make sure that the Open this network place when I click Finish check box is selected, then click Finish.
When prompted, enter your portal user name and password.
|
Note: You can log in to Web Folders as one user at any given time. That is, multiple simultaneous logins are not allowed. If you want to log in to Web Folders as a new user, then clear your cookies, restart your computer to clear out the current login session, and then log in as the new user.Windows Web Folders sometimes stores your user name and password, or your portal session cookie, or both, and uses these details when creating subsequent Web Folders or re-creating a Web Folder that has previously existed. Consequently, it may not be possible to create multiple Web Folders for portals on the same host using different authentication information. Unless you understand exactly how your Web Folder implementation acts, on a given machine, do not create more than one Web Folder referencing any single host. Also, if you attempt to create a Web Folder that references the same portal as an existing (or previous) Web Folder but with different user log in details, then be vigilant—Windows may perform the login step without prompting you. |
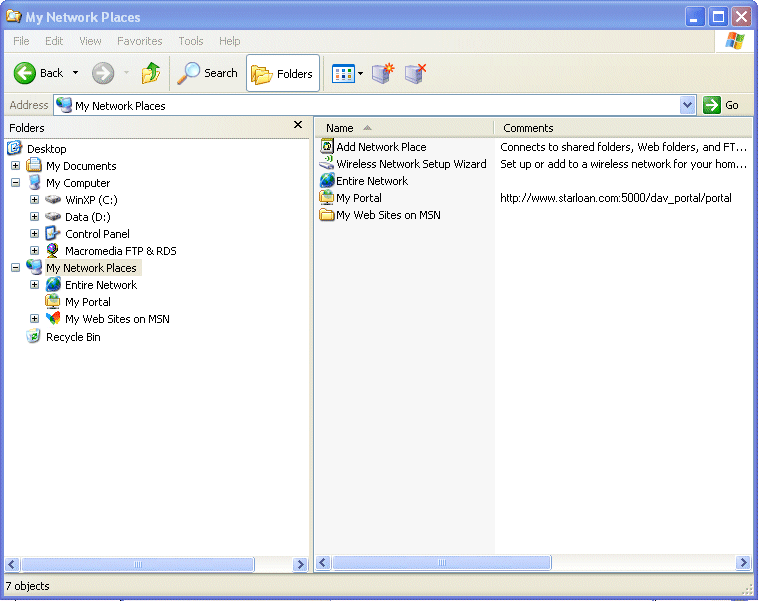
Windows Explorer opens a window displaying the contents of the portal or page you specified. The portal is now listed as one of your network places, as shown in Figure 12-5.
Figure 12-5 Portal Displayed As a Network Drive in Windows Explorer
Because you can access your portal's Web Folder just like any other folder in Windows Explorer, you can drag and drop files from any other folder into your portal.
You can use the drag and drop feature to move or copy files within the same page group. Copying files across page groups is not supported; though you can overcome this limitation by copying a file to your desktop, then copying it into a different page group.
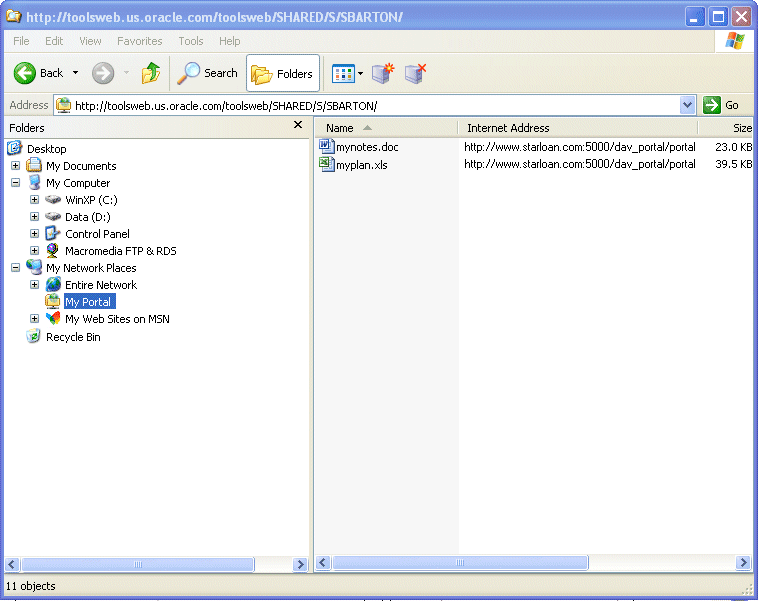
For example, James drags a Microsoft Word document called mynotes.doc from his local drive into My Portal, as shown in Figure 12-6.
Figure 12-6 Dragging and Dropping Files into the Web Folder
When you next access the page in the portal, it includes the new file. You may need to refresh the page to see your changes.
The display name of the new item is the same as the file name (with the extension removed). You can edit the item later to change this.
|
Note: The item is added to the default item region as one of the default WebDAV item types (depending on whether the file is a ZIP file, an image file, or a regular file). |
If you are using Microsoft Office 2003, a WebDAV-enabled desktop application, you can start the application, open a portal file that is exposed in a Web Folder, edit the content, and save it back to the portal. There is no need to download the document from the portal and then upload it again after you have edited it.
To use Microsoft Office 2003 to edit the content of a page, perform the following steps:
Set up Web Folders to access the page through Windows Explorer.
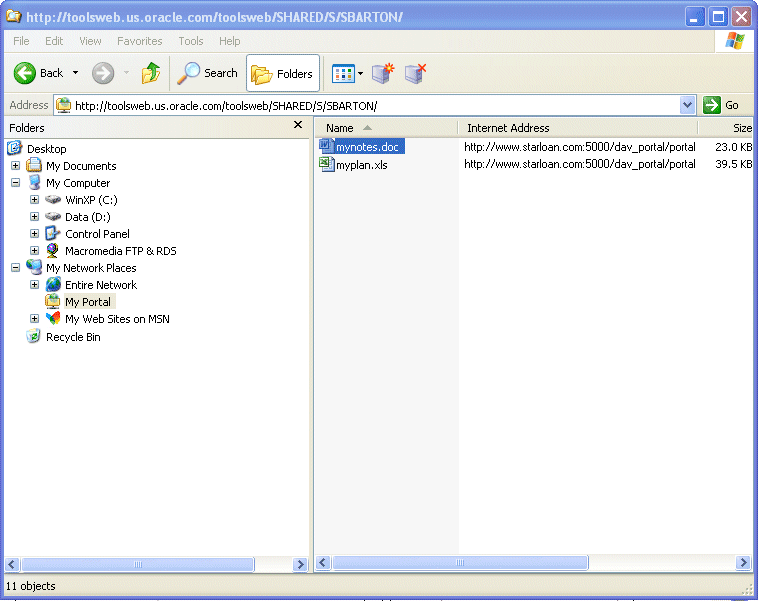
Double-click the file, as shown in Figure 12-7.
Figure 12-7 Working Directly with Files on the Web Folder
If prompted, enter your portal user name and password.
The selected file is opened by the relevant Microsoft Office 2003 application. For example, when James double-clicks mynotes.doc, it opens in Microsoft Word.
When opening a file, Microsoft Office 2003 locks the file and the related item is checked out in the portal. If the Microsoft Office application cannot lock the file (that is, it is locked by another WebDAV client, or the item was checked out in the portal), then it is opened as read-only. If the Microsoft Office application locked the document when it was opened, then it unlocks it when the document is closed.
Edit the document, and select File, then Save.
Exit Microsoft Word.
When you next access the file item in the portal, note that it includes the changes you made.
|
Note: You can also use Microsoft Office 2003 to create new items in the portal. Simply create the file and then save it directly to the Web Folder for your portal. The item is created as the default WebDAV item type for regular files, and is added to the default item region. |
For troubleshooting information about using WebDAV clients with OracleAS Portal, refer to Oracle Application Server Portal User's Guide.
For more detailed information about using WebDAV clients with OracleAS Portal, including general tips and information about other WebDAV clients, refer to Oracle Application Server Portal User's Guide.