| Oracle® Identity Manager Administrative and User Console Customization Guide Release 9.0 B25943-01 |
|
 Previous |
 Next |
| Oracle® Identity Manager Administrative and User Console Customization Guide Release 9.0 B25943-01 |
|
 Previous |
 Next |
This section describes how to customize the overall layout of the pages within your Oracle Identity Manager Administrative and User Console. This includes but is not limited to:
Adding links to the affected regions (for example, a link to your corporate home page from the company logo)
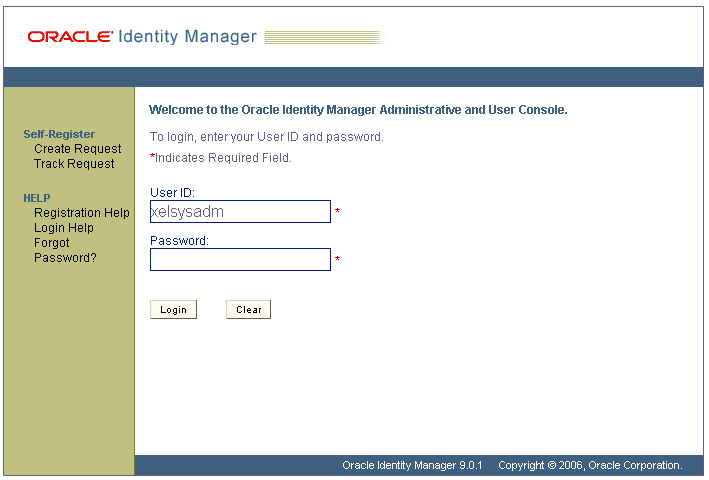
The various regions of the Oracle Identity Manager Administrative and User Console page are divided into regions. Figure 2-1 shows the Oracle Identity Manager Administrative and User Console login page. The page layout is controlled using a JSP page.
Figure 2-1 Oracle Identity Manager Administrative and User Console Layout

|
Note: This section assumes the reader is a developer familiar with JSPs and Struts. In addition, since the editing of the files mentioned in this section controls how the tiles are rendered, and potentially introduce cosmetic anomalies, it is strongly recommended that you test the effects of your changes before releasing them into a production environment. |
To control the layout of your Administrative and User Console GUI elements, edit the appropriate JSP file. For example, if you want your company logo to appear on the right-hand side of the header banner and the Oracle Identity Manager product logo to appear on the left-hand side of the header banner:
Locate the relevant portion of the tjspHeader.jsp file that controls the display of the logo image files to be aligned. This includes sections of the file that have references to the following:
This reference by default points to the Oracle Identity Manager logo, or the product logo.
This reference points to a placeholder image where you can add another logo if required. This logo can be replaced by any other logo if such a customization is desired.
Then swap the references to these two property variables within the file. For example, you would change the settings from this:
<TR>
<TD valign="center" align="center" width="150px" height="60px"        class="LogoCell">     <html:img pageKey="global.image.clientlogo"/>   </TD>   <TD valign="center" align="right" height="60px" colspan='2' >     <html:img pageKey="global.image.xelleratelogo"/>   </TD>   <TD width='20px'>     <html:img width='20px' pageKey="global.image.spacer"/>   </TD></TR>To this: <TR>  <TD valign="center" align="center" width="150px" height="60px"       class="LogoCell">    <html:img pageKey="global.image.xelleratelogo"/>  </TD>  <TD valign="center" align="right" height="60px" colspan='2' >    <html:img pageKey="global.image.clientlogo"/>  </TD>  <TD width='20px'>    <html:img width='20px' pageKey="global.image.spacer"/>  </TD></TR>
Save the changes to the tjspHeader.jsp file.
To test the display of your Administrative and User Console to ensure that the intended changes have taken effect, reload the Administrative and User Console page.