| Oracle® Retail Integration Bus Oracle® Universal Service Mapper User Guide Release 19.0 F25772-01 |
|

 Previous |
 Next |
| Oracle® Retail Integration Bus Oracle® Universal Service Mapper User Guide Release 19.0 F25772-01 |
|
Previous |
Next |
The USM web application allows you to manage and create project and project artifacts for service mapping to enable communication between two different applications.
There are 3 different type of users in USM who will have access to certain tabs based on their role. The Admin Role user is the administrator of the application and has access to all the tabs; the Operator Role user has restricted access to certain functions; and the Monitor Role user can only view the information. The following list shows the tabs with decreasing order of access from top to bottom.
Admin Role user
Admin tab
Configurations tab
Operator Roles user
Mapper Designer tab
Test Drivers tab
Import/Export tab
Monitor Role user
Home tab
Monitoring tab
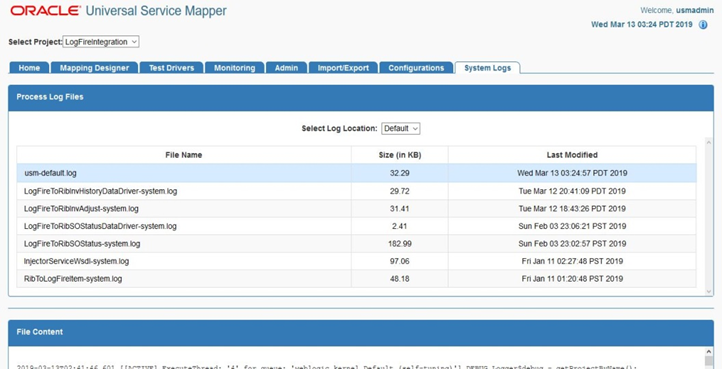
System Logs tab
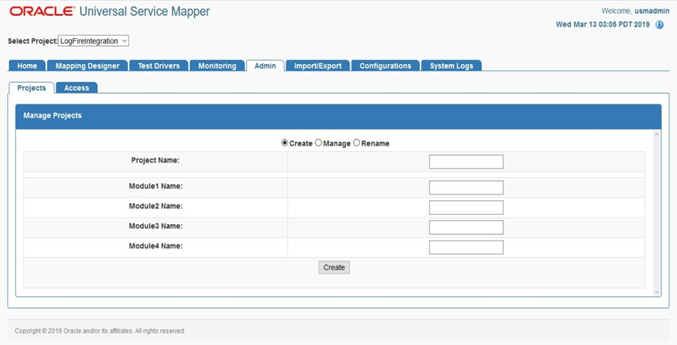
The Admin tab allows Administrators to manage projects and project access. In the projects sub-tab, administrators can create, update, rename, and delete projects.
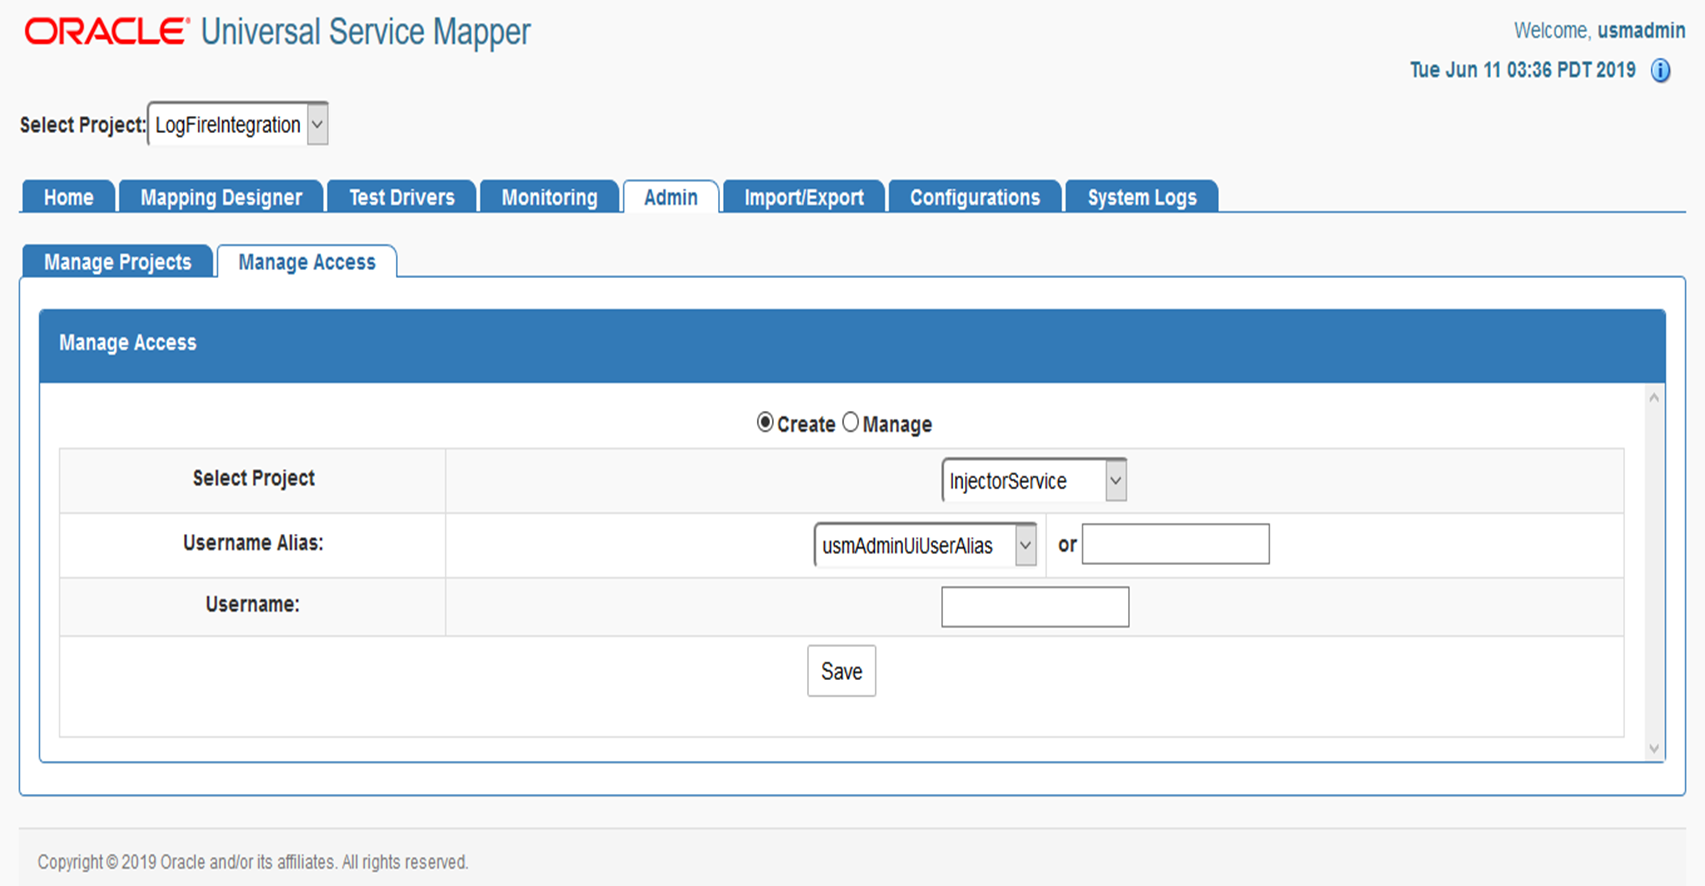
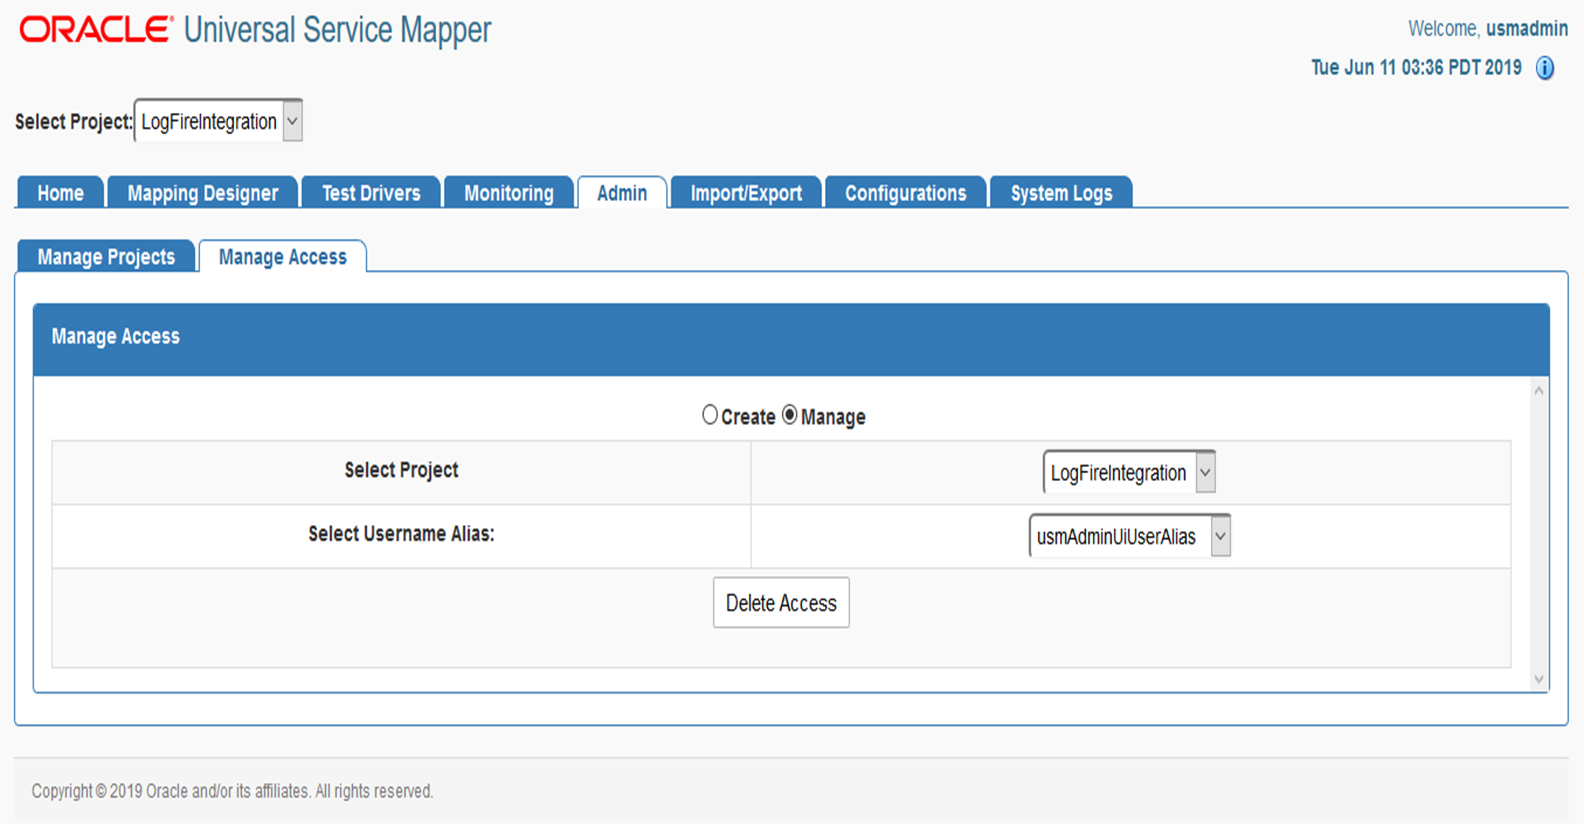
In the Access sub-tab, Administrators can create and manage access. Using the Create option, you can add users to projects by providing usernames and username aliases.
Using the Manage option, you can remove user access.
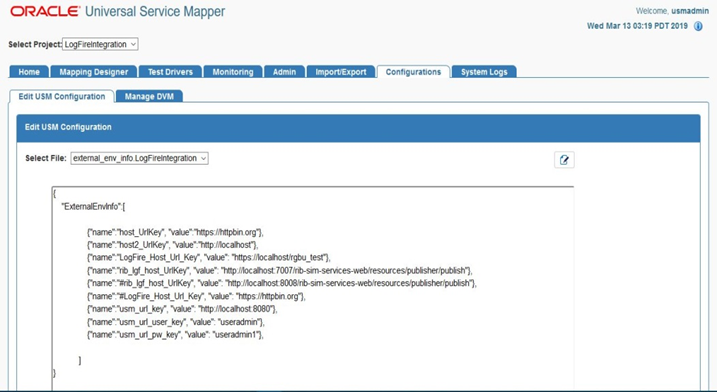
Configuration tab allows you to edit configuration files and manage DVM for the selected project. In the Edit USM Configuration tab, you can edit the configuration file.
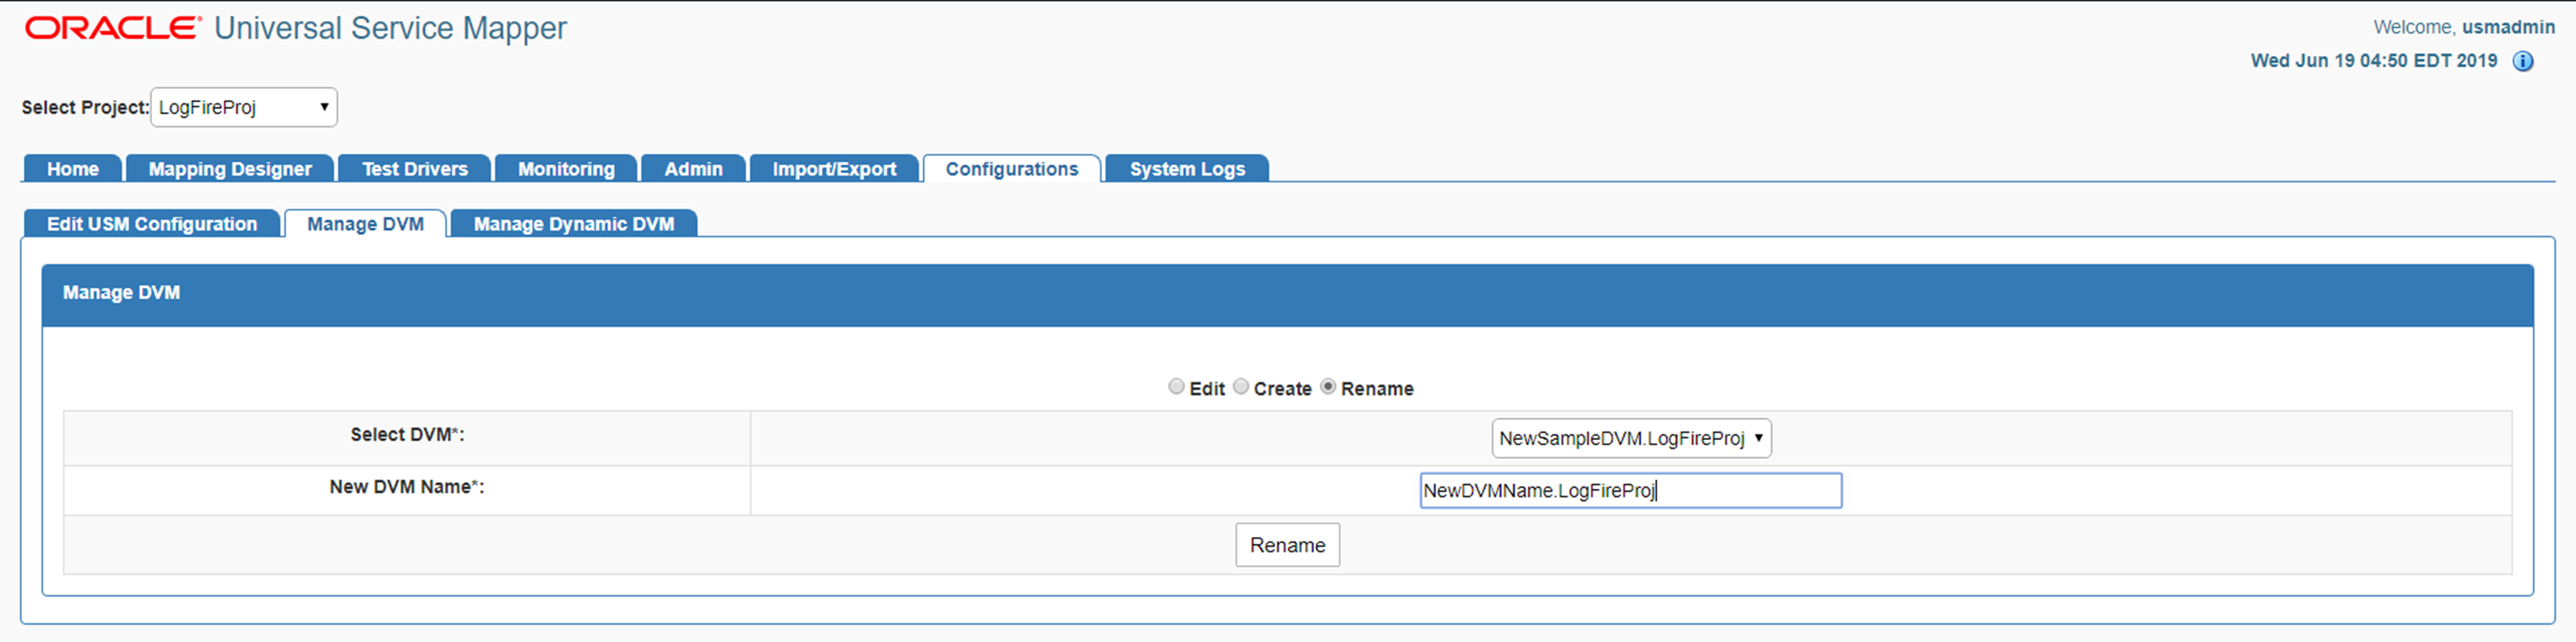
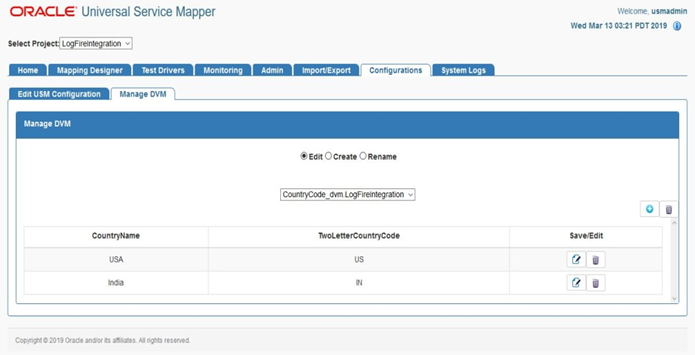
In the Manage DVM tab, you can edit DVM data. It also allows you to create, delete and rename DVM.
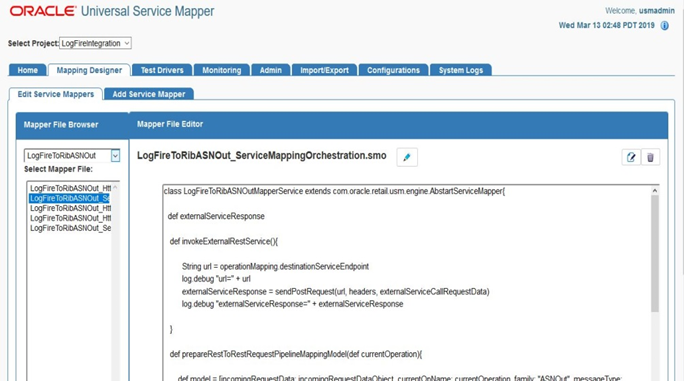
This tab allows you to manage and view Service Mappers for the selected project. In the Edit Service Mappers sub-tab you can browse existing service mappers, edit service mapper files, rename mappers, and delete mappers.
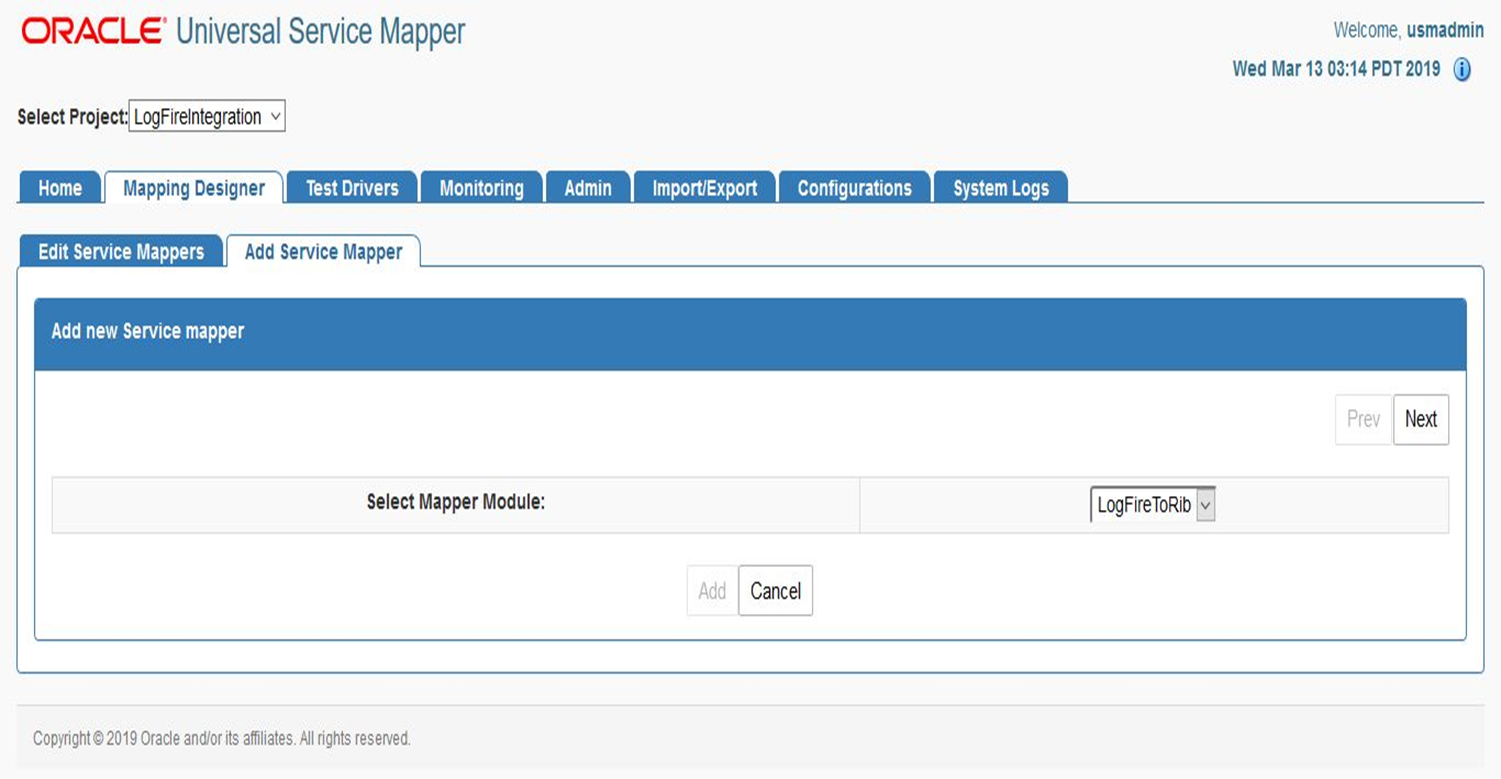
In the Add Service Mapper sub-tab, you can create new service mappers.
Test Data Drivers is a testing tool that enables you to test the service call by reading data from the file system and calling the service.
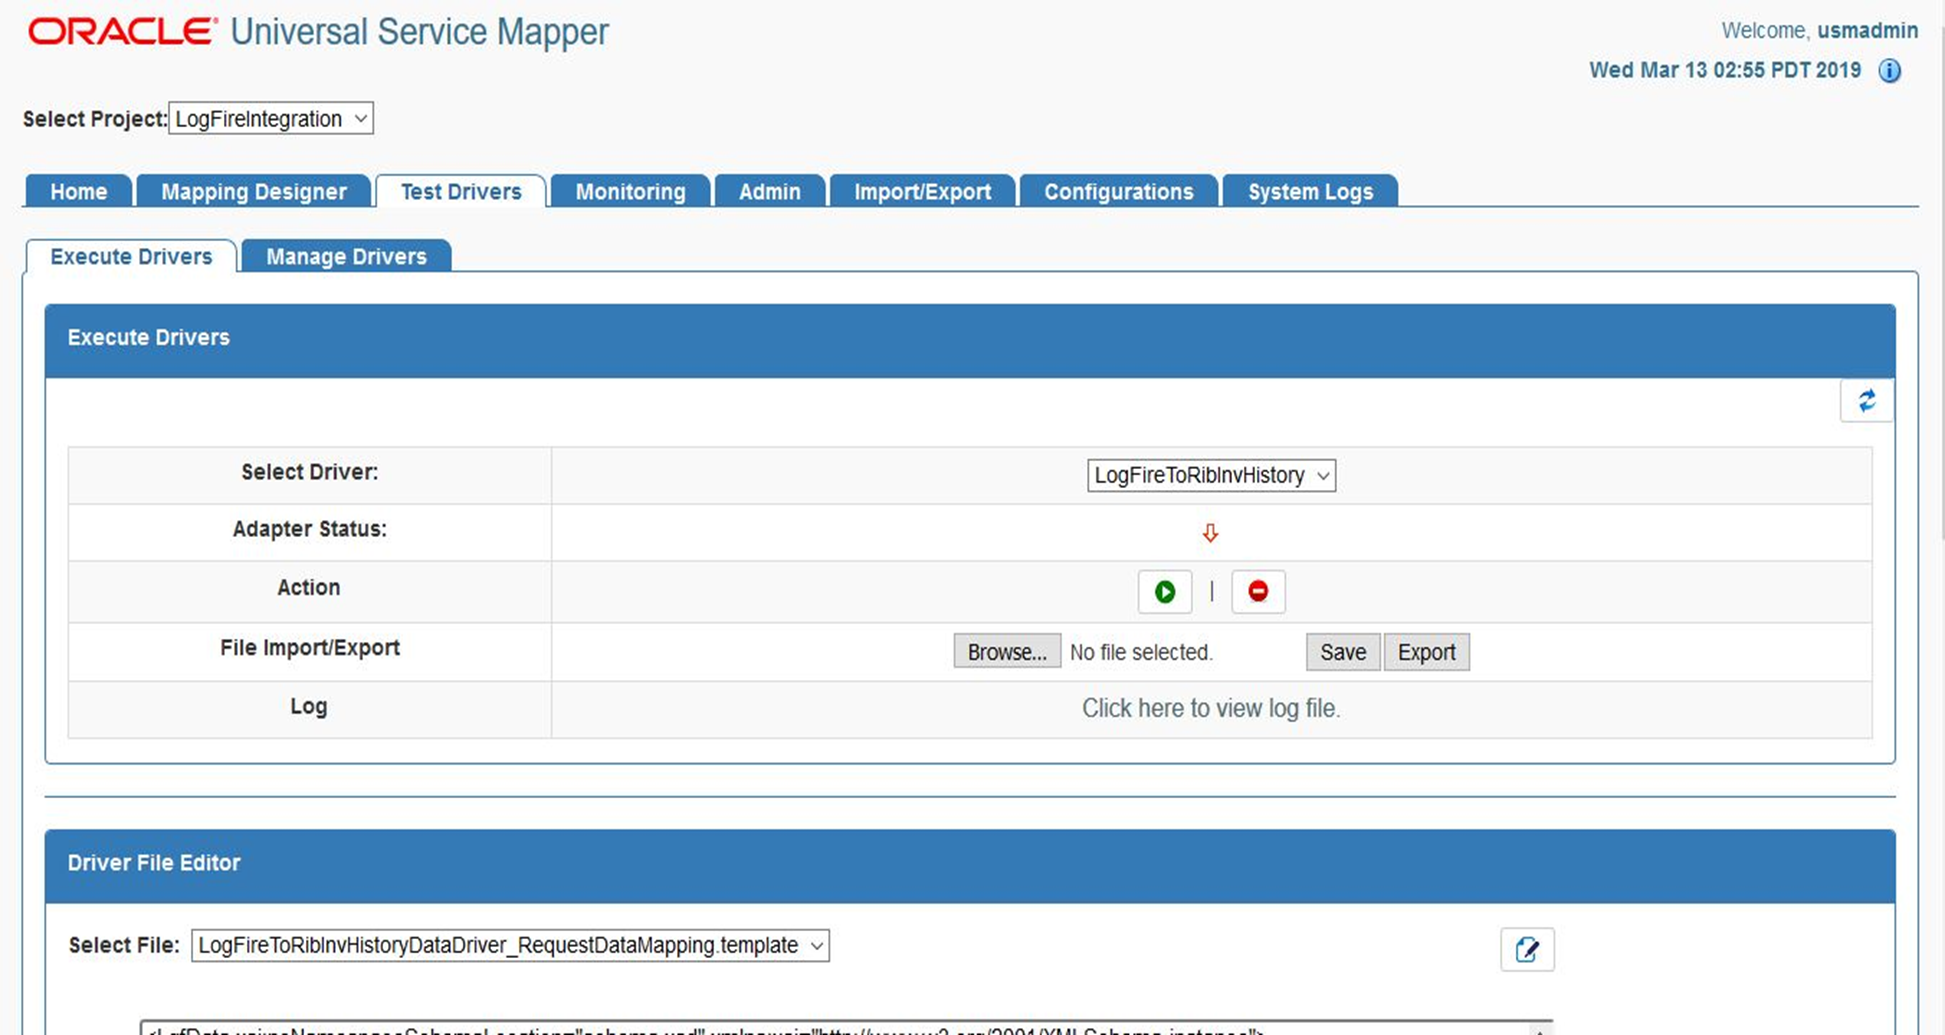
Test Drivers Tab allows you to manage and view data drivers. In the Execute Drivers sub-tab you can start or stop data drivers. It also allows you to edit the data driver files.
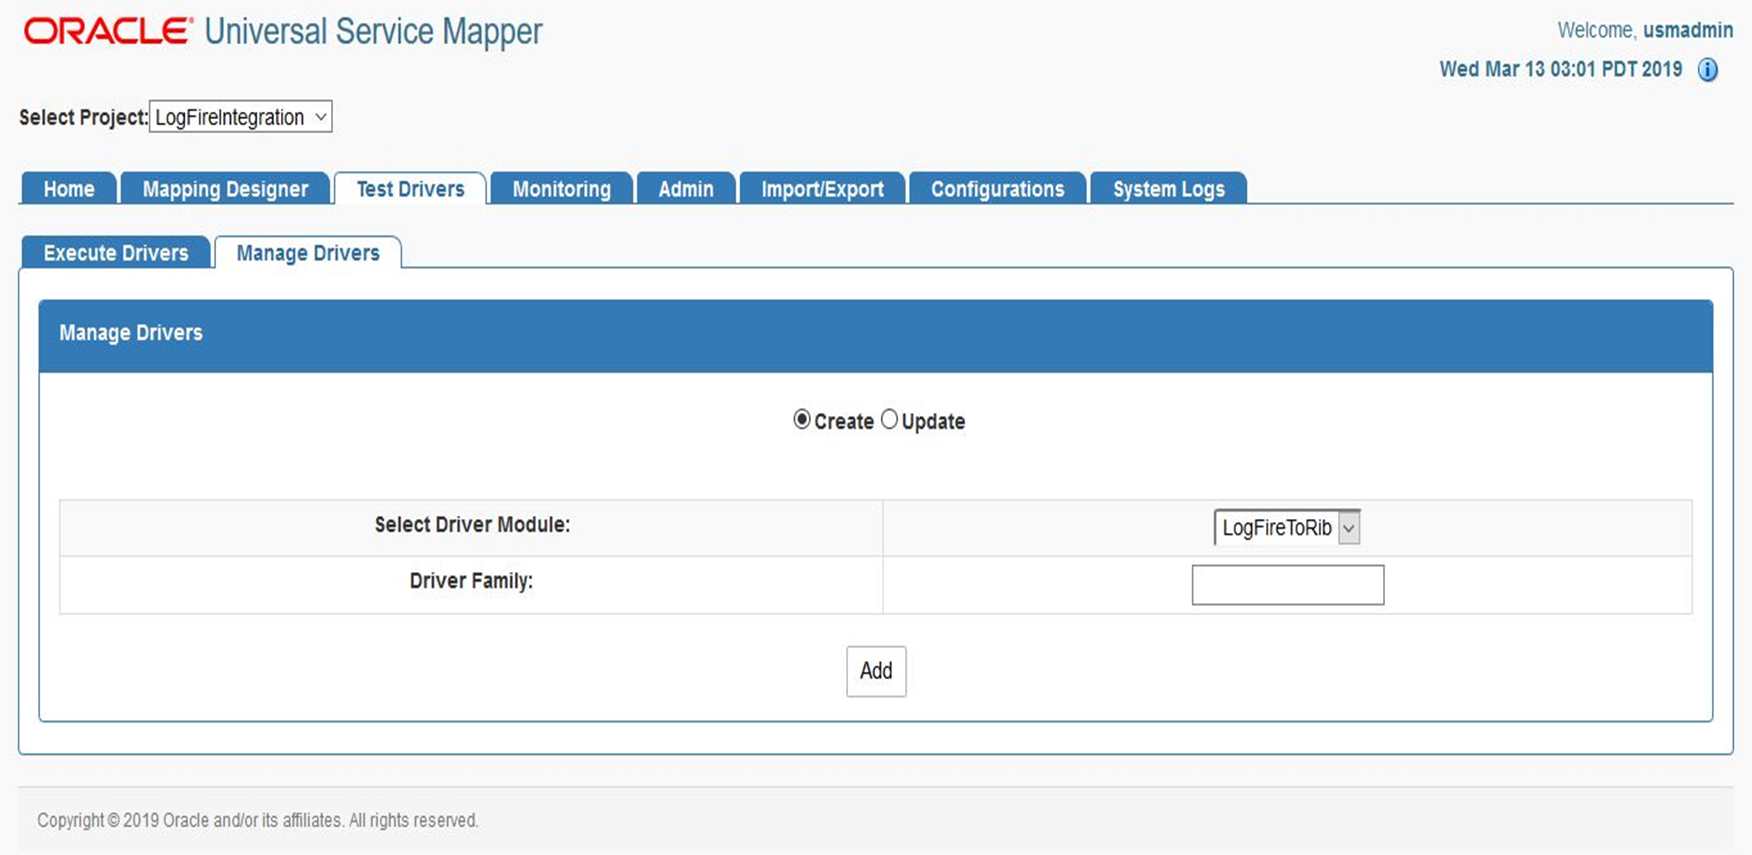
In the Manage Drivers sub-tab, you can create new data drivers. It also allows you to rename or delete an existing data driver.
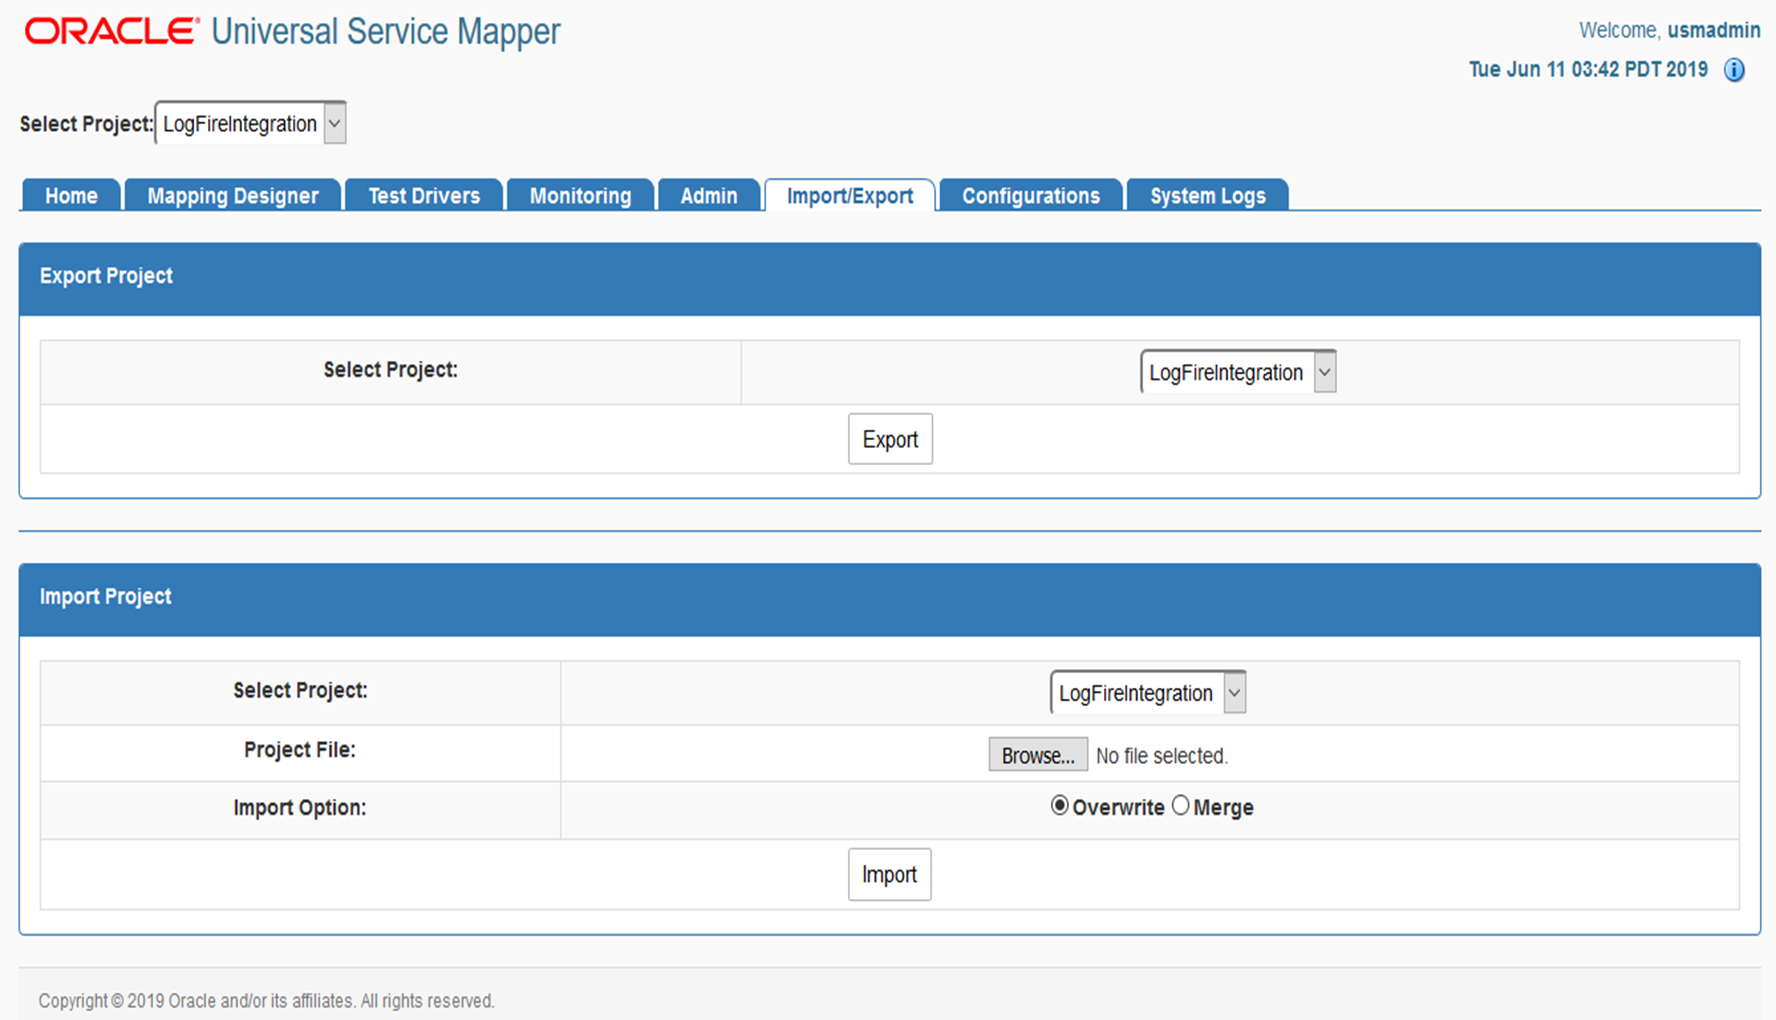
The Import/Export tab allows you to import and export project files in .zip format.
The Home tab displays the summary of the service mapper application. The System summary panel displays the available mappings, service activity count, and system health, successful and failed activity.
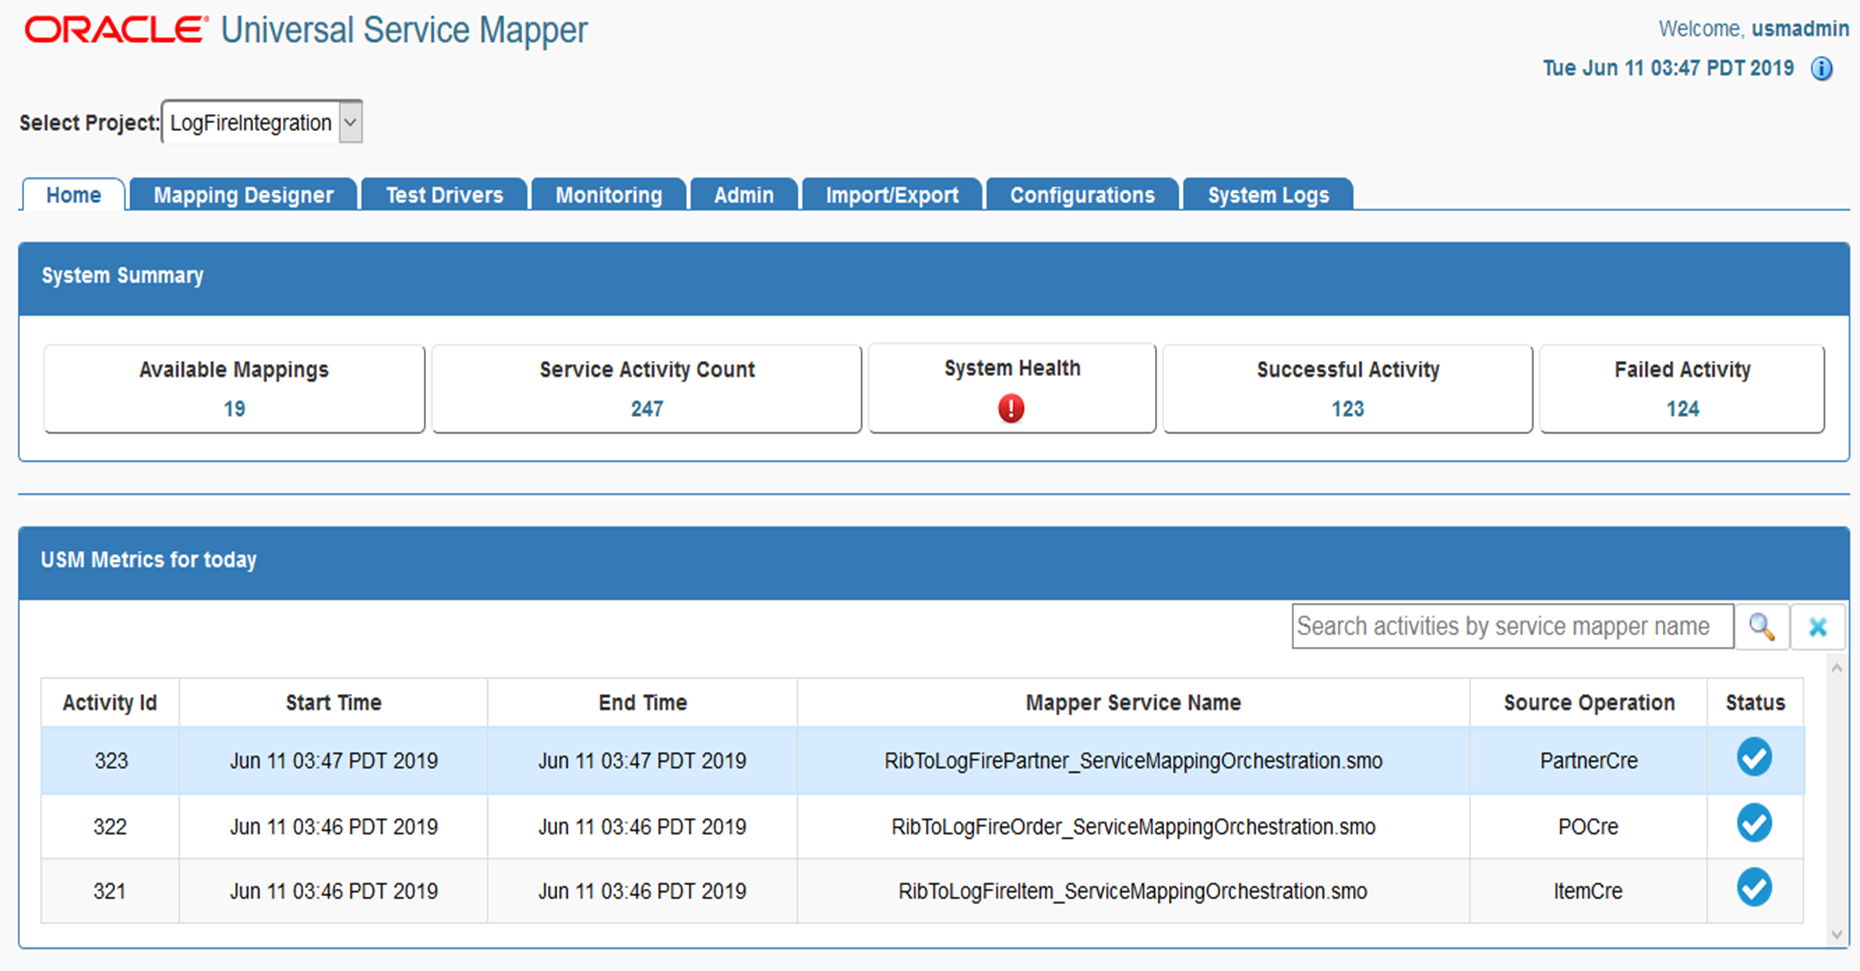
USM metrics for the Today panel show the mappings since midnight. You can select a mapping from the table to view the request and response mapping before and after the mapping.
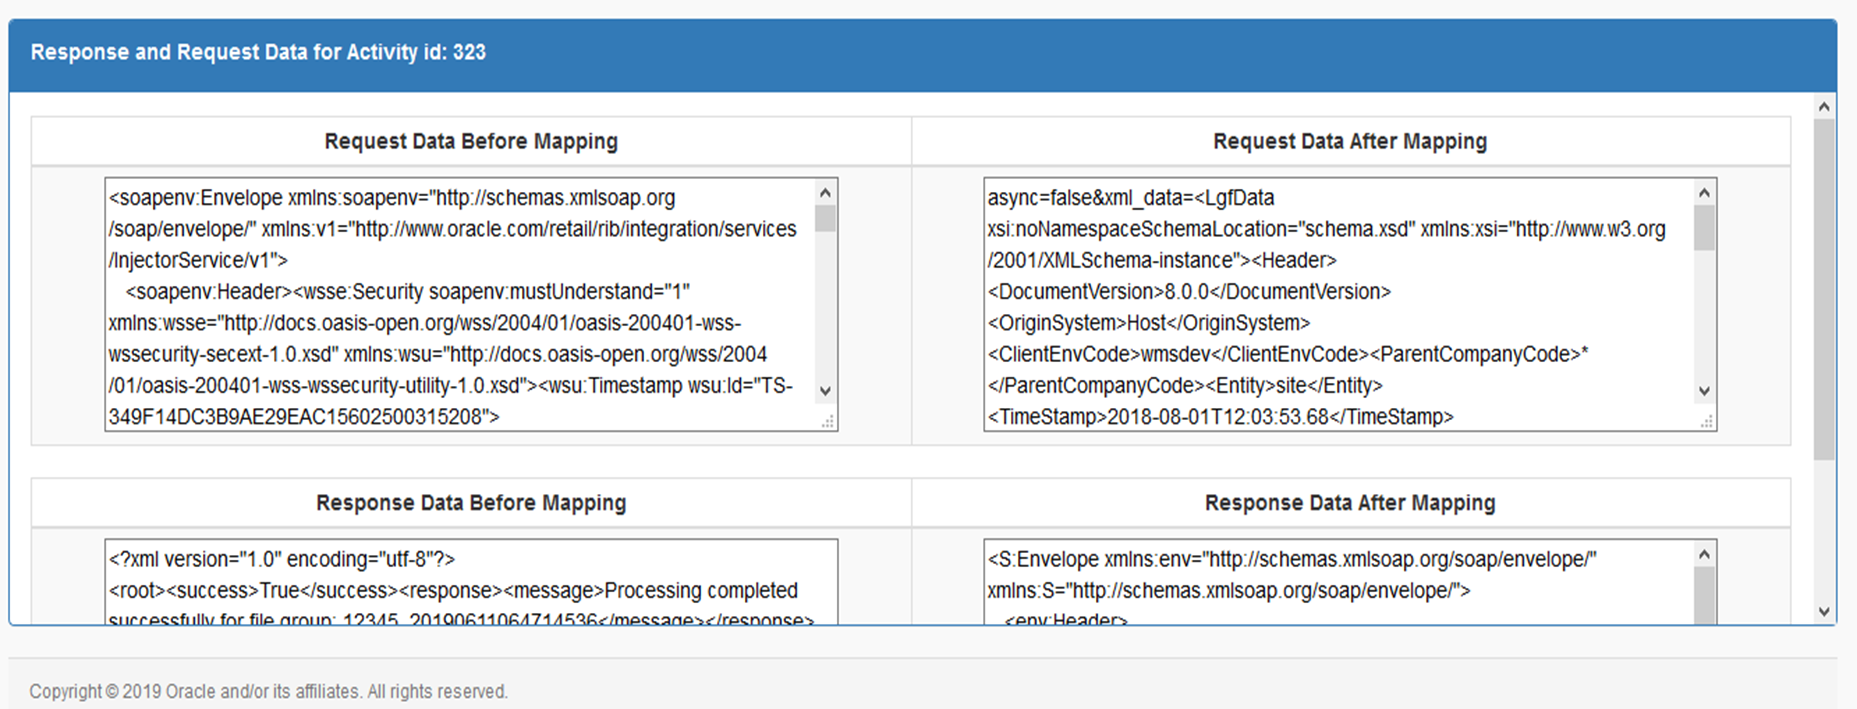
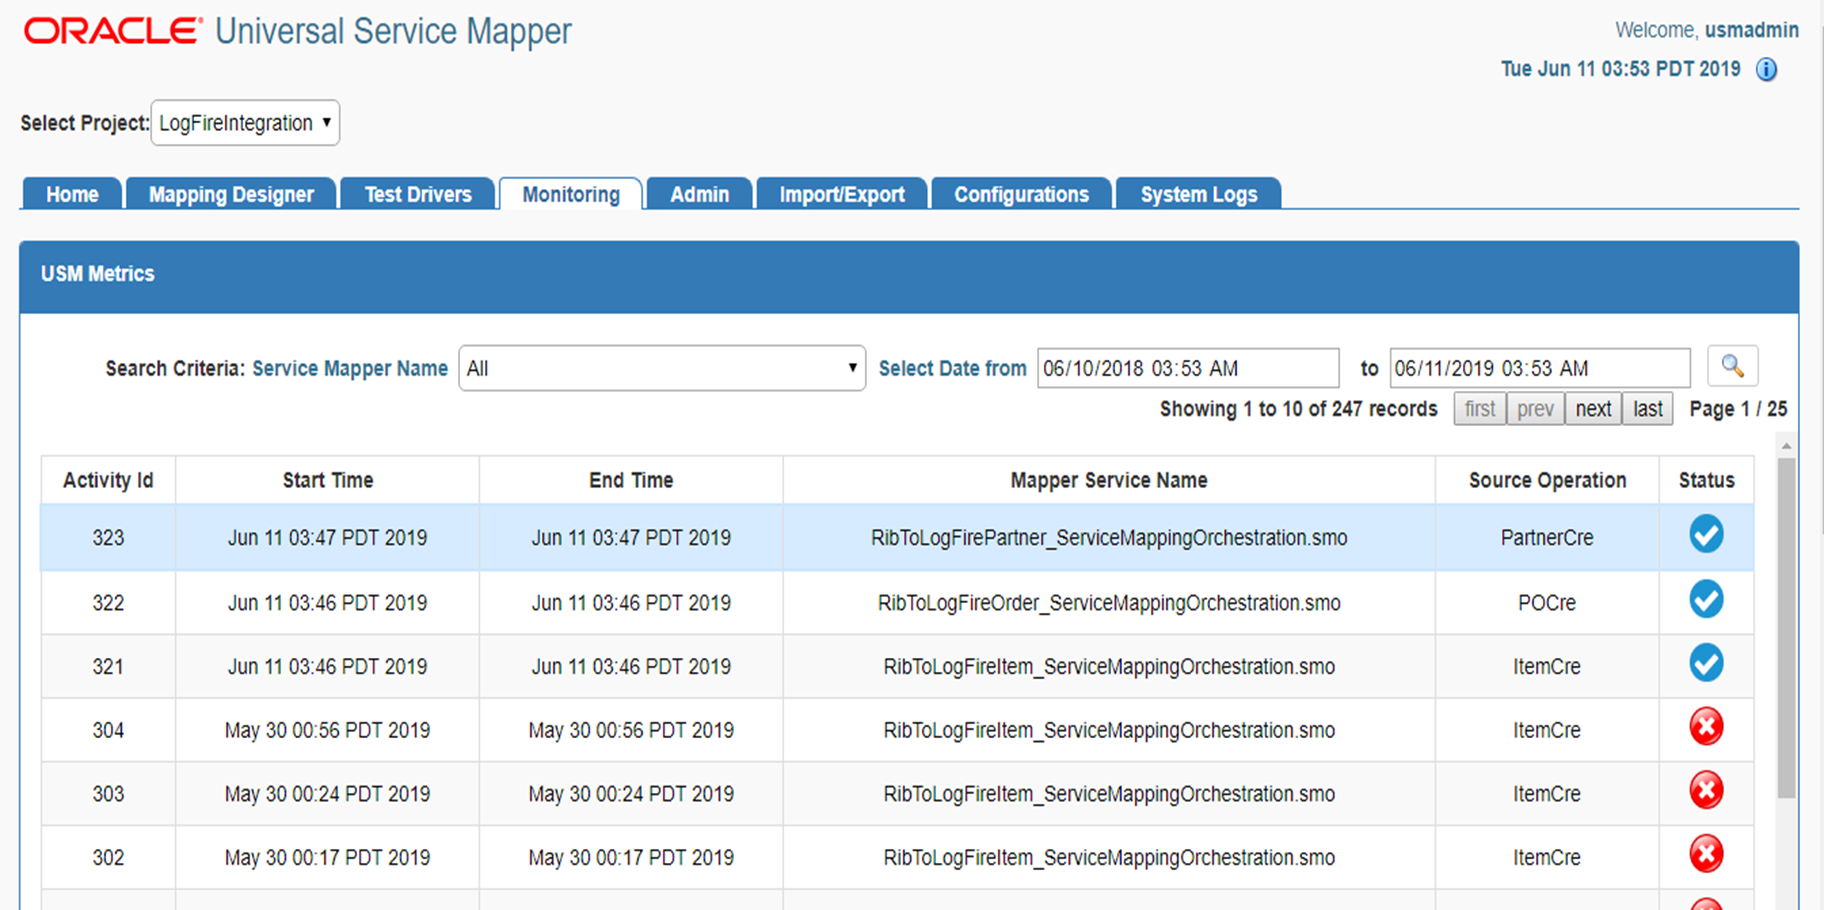
Monitoring tab displays USM metrics in a tabular format. The data on the monitoring tab has filters service mapper name and Date. User can view all the service mappings with the selected filters using the provided pagination buttons. User can also view the request and response data before and after the mapping by clicking the service mapping activity in the table. By default the monitoring tab displays the service mappings for all the mappers from last 24 hours.
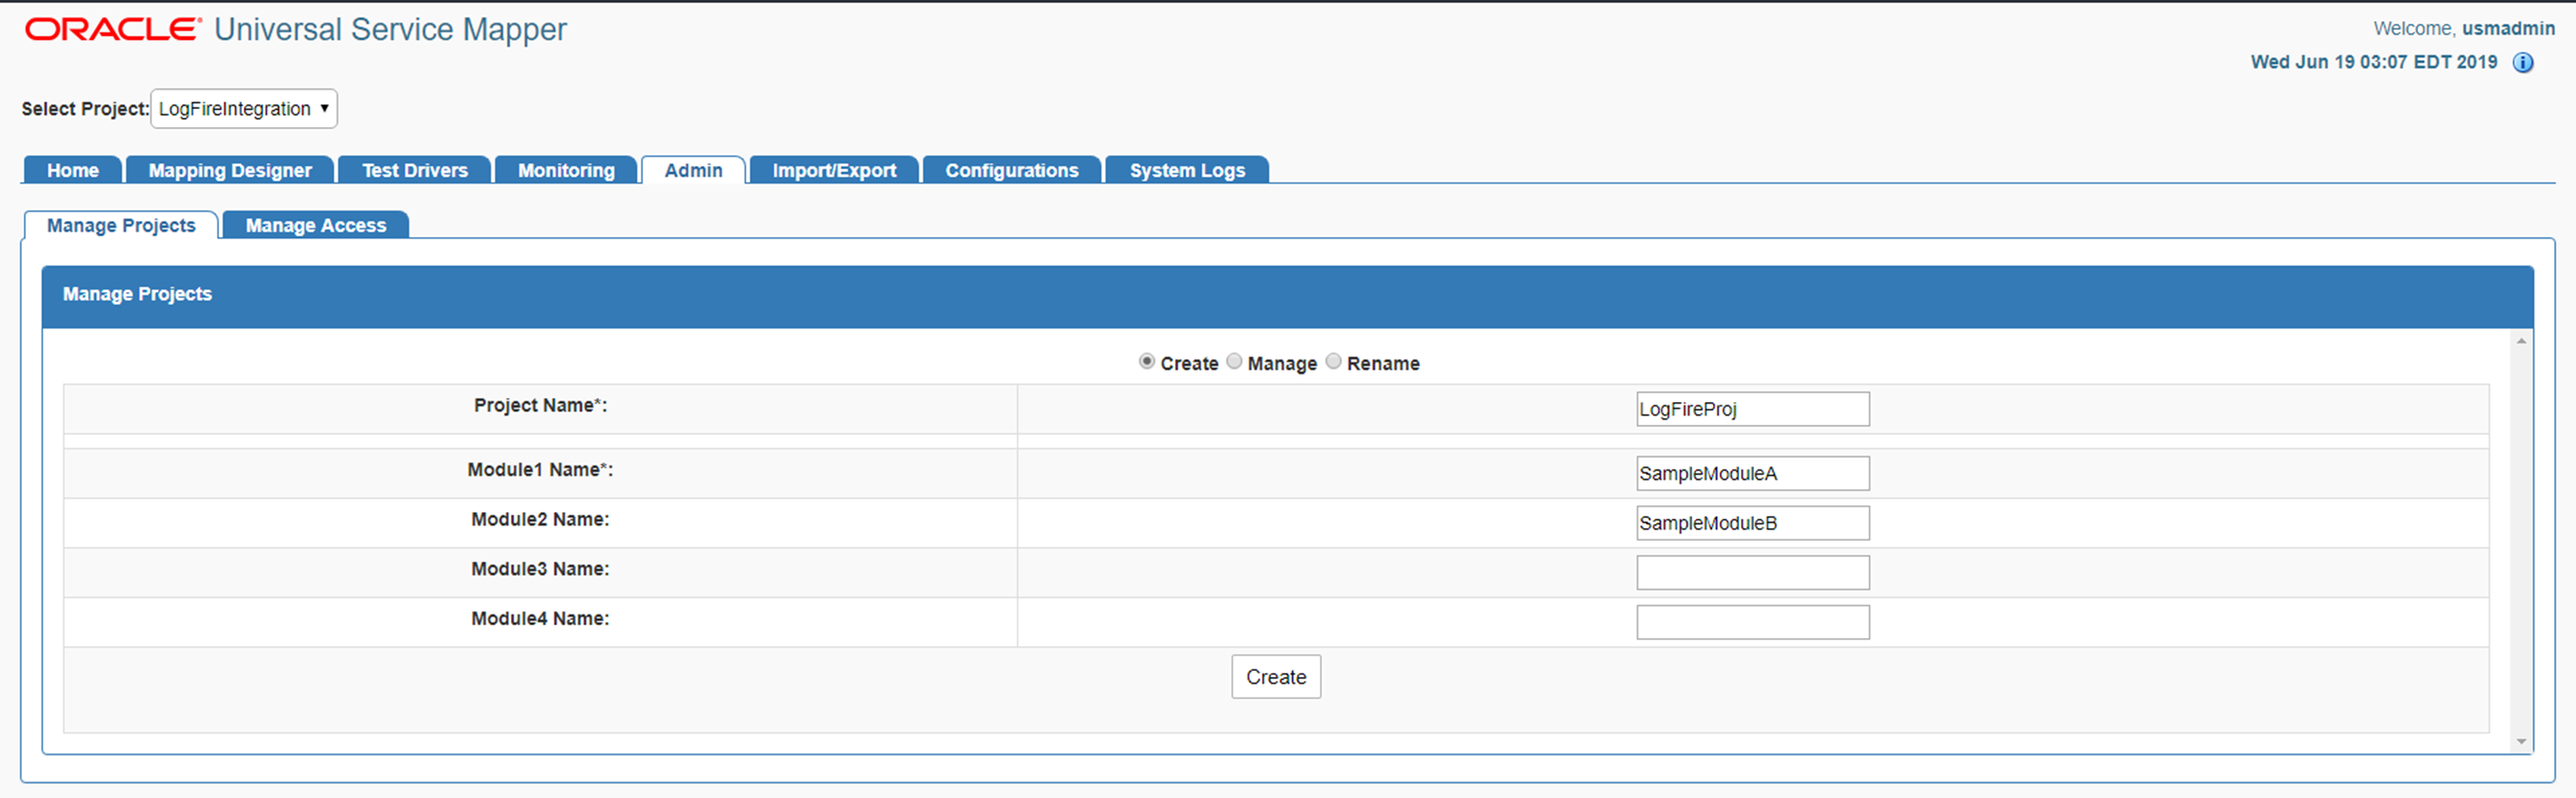
Go to the Admin tab.
Click on the Manage Projects sub-tab.
Select the Create radio button to create a new project.
Enter a new project name and a new module name.
Click on the Create button when done.
Now the Project is created.
Go to the Admin Tab.
In the Admin Tab, click on the Manage Projects sub-tab.
Click the Manage radio button to update the project's modules.
Select Project Name from the drop down.
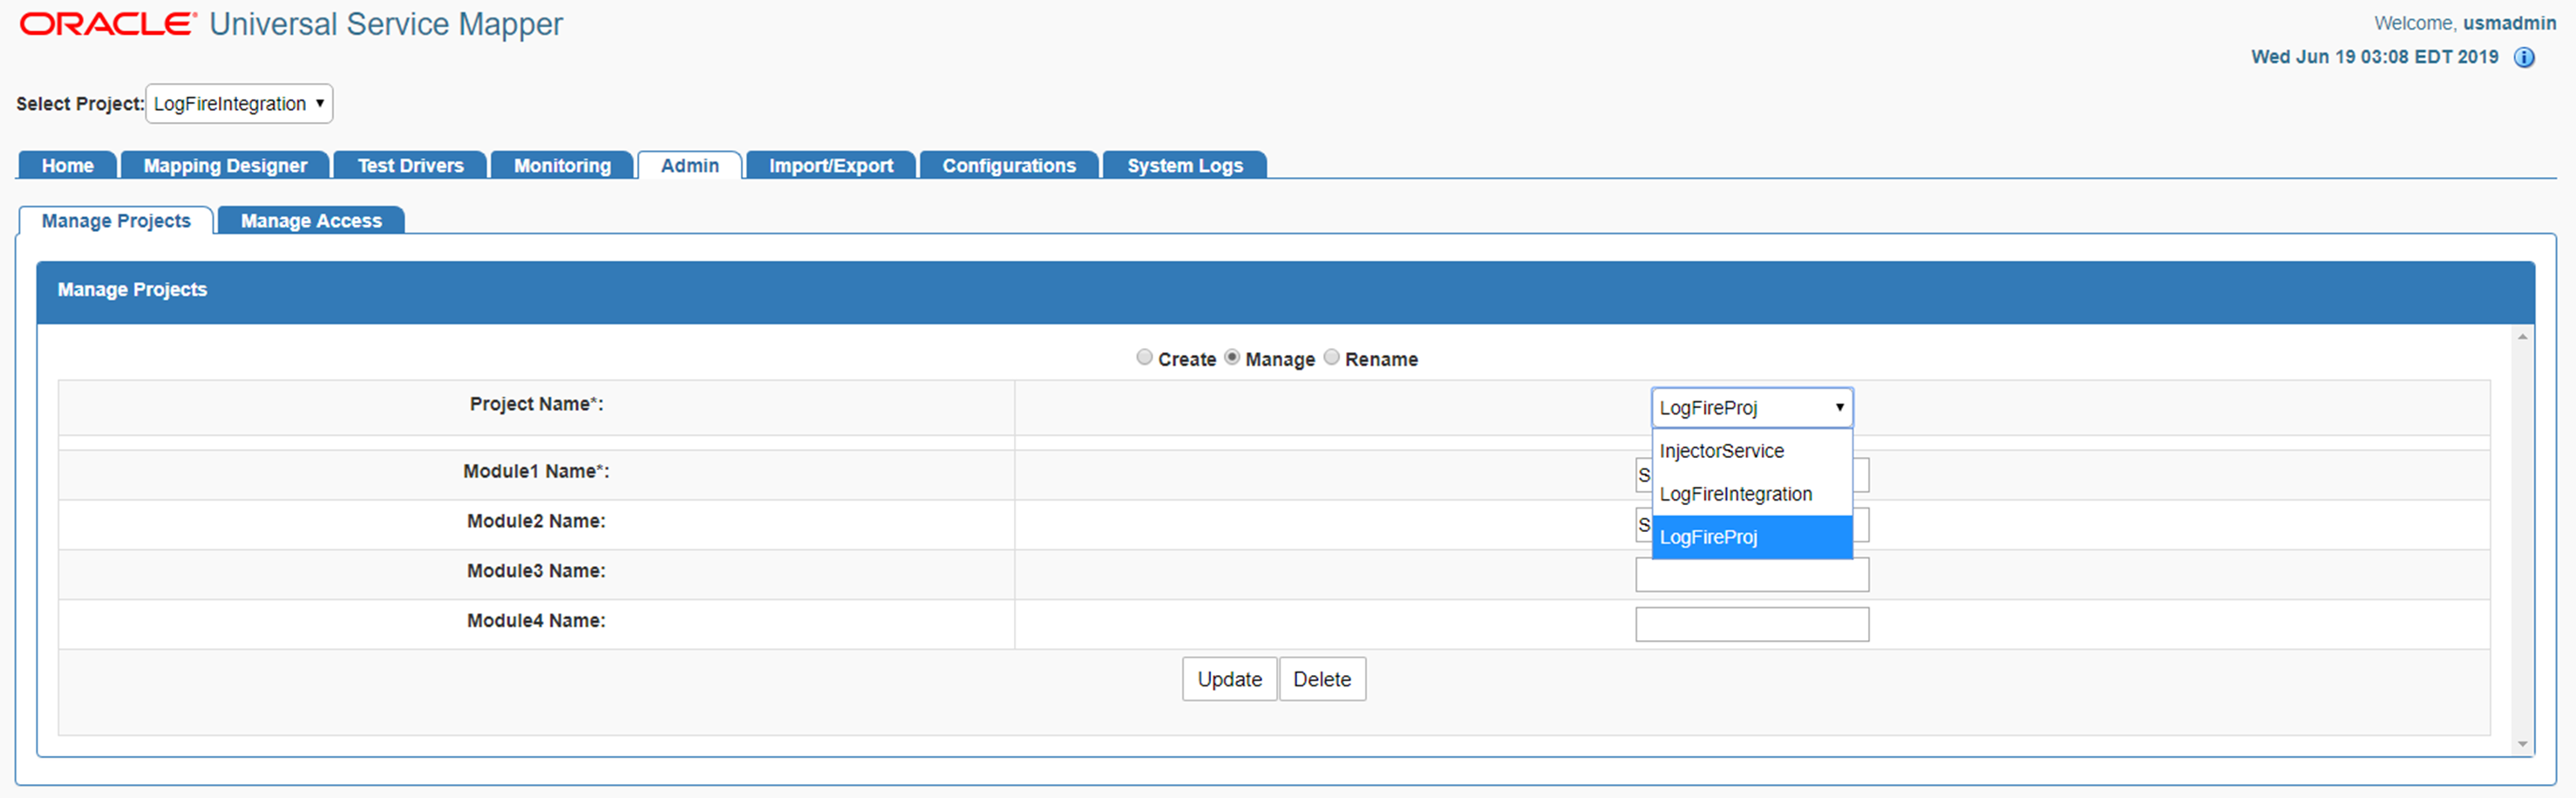
Now in the text fields, update the project module names, add or remove project modules as necessary.
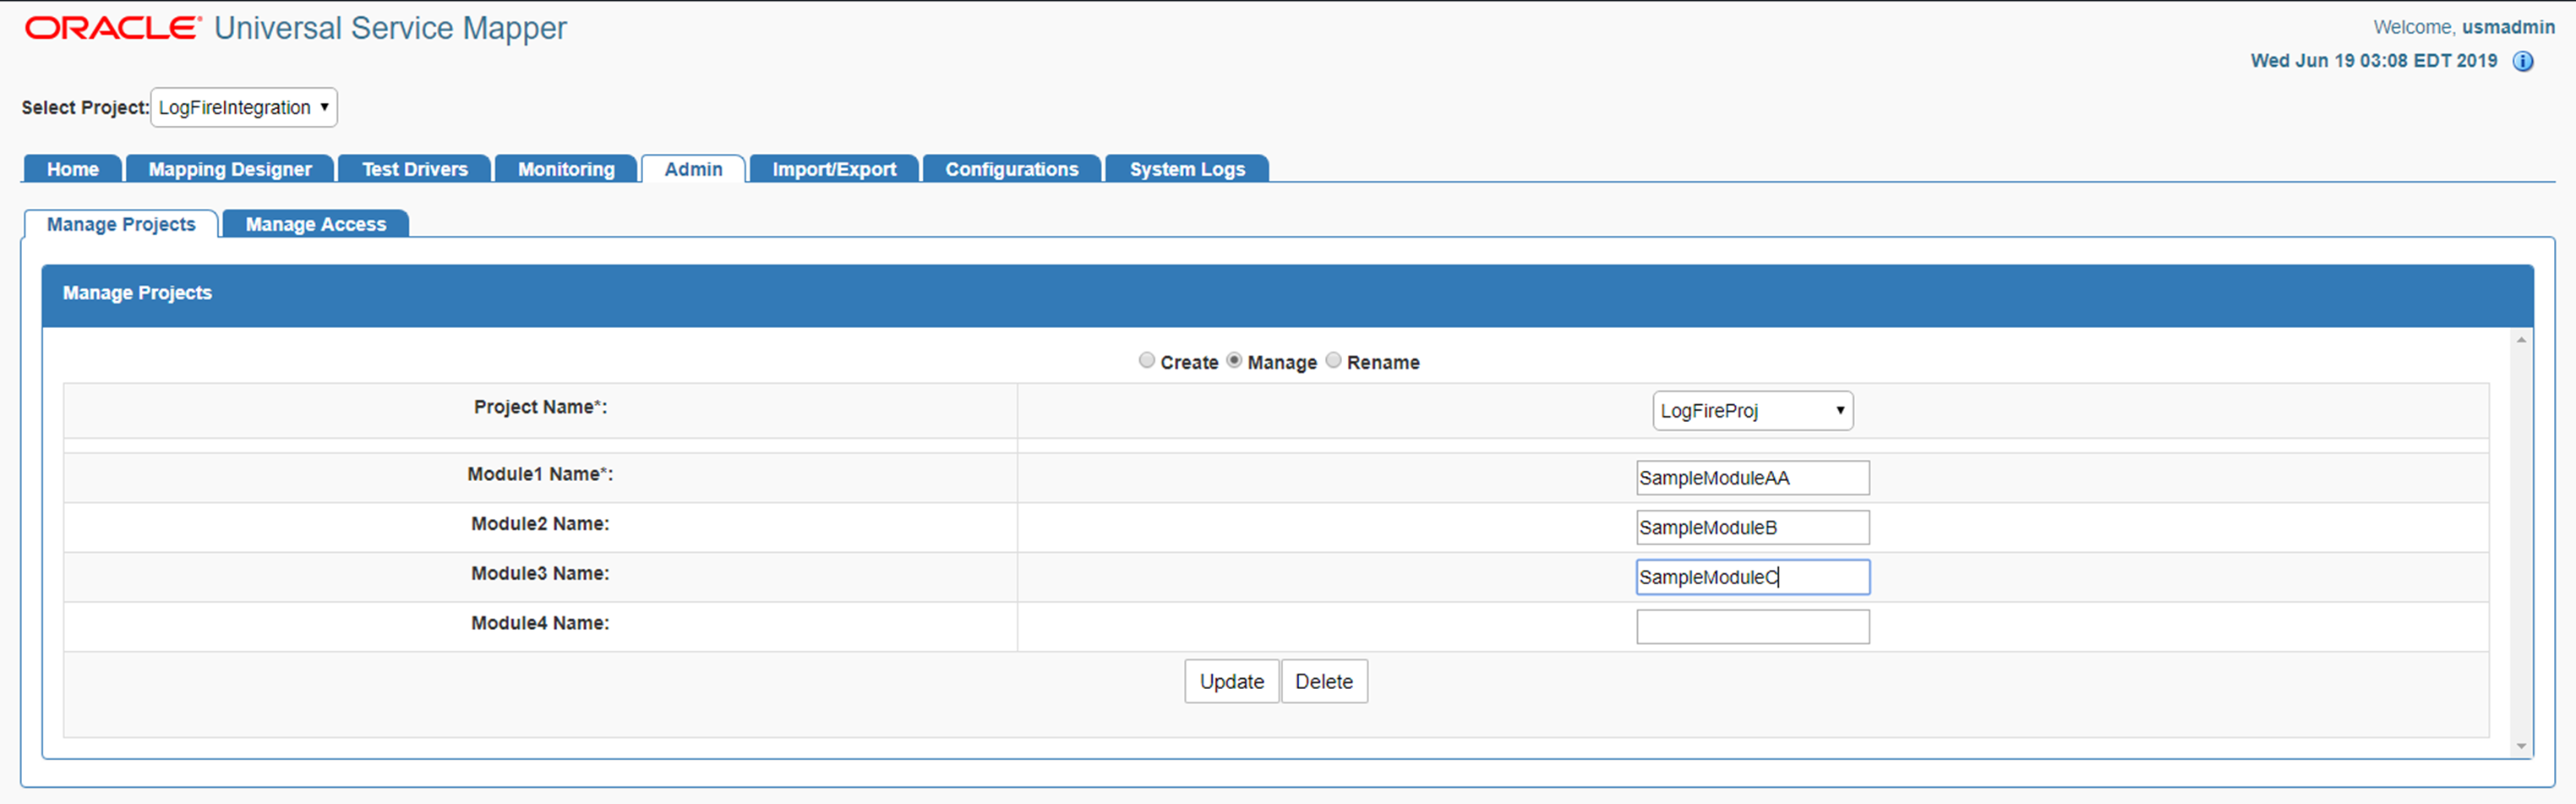
Click the Update button once done.
Now the Project has been updated with new Modules.
In the Admin Tab, go to the Project sub-tab.
Click on the Manage radio button.
Select the Project Name from drop down.
Click the Delete button.
A confirmation dialog appears, click on the Okay button.

Now the selected project is deleted.
In the Admin tab, go to the Project sub-tab.
Click on the Rename radio button.
Select Project Name from the drop down list box.
Enter the new project name in the New Project Name textbox.
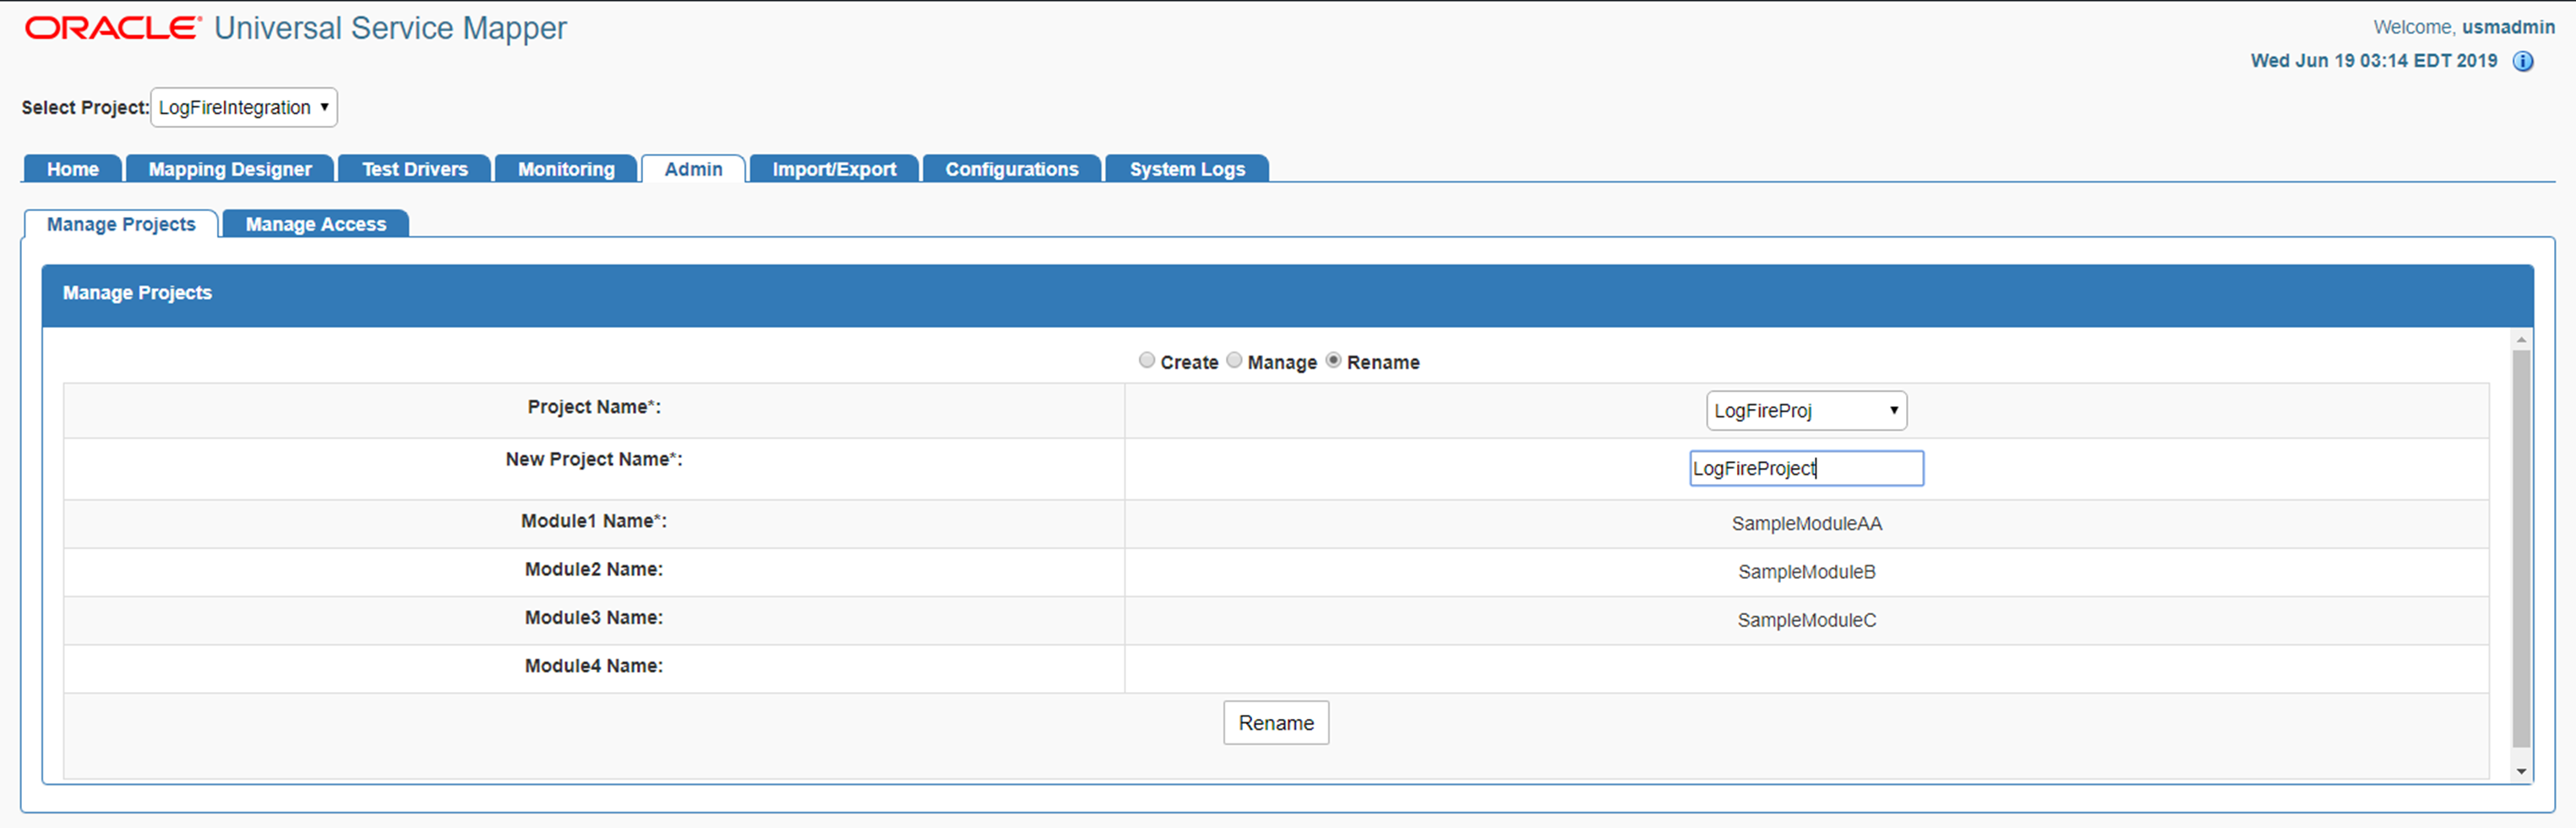
Click on Rename button to rename the project.
In the Admin tab, go to Access sub-tab.
Select the Project Name from the drop down list box for which access has to be given.
Enter the Username Alias and Username to which access has to be granted.

Click the Save button.
The user now has access to the project.
Go the Mapping Designer tab.
Open the Add Service Mappers sub-tab.
Select the module name from the drop down list box and click on next.
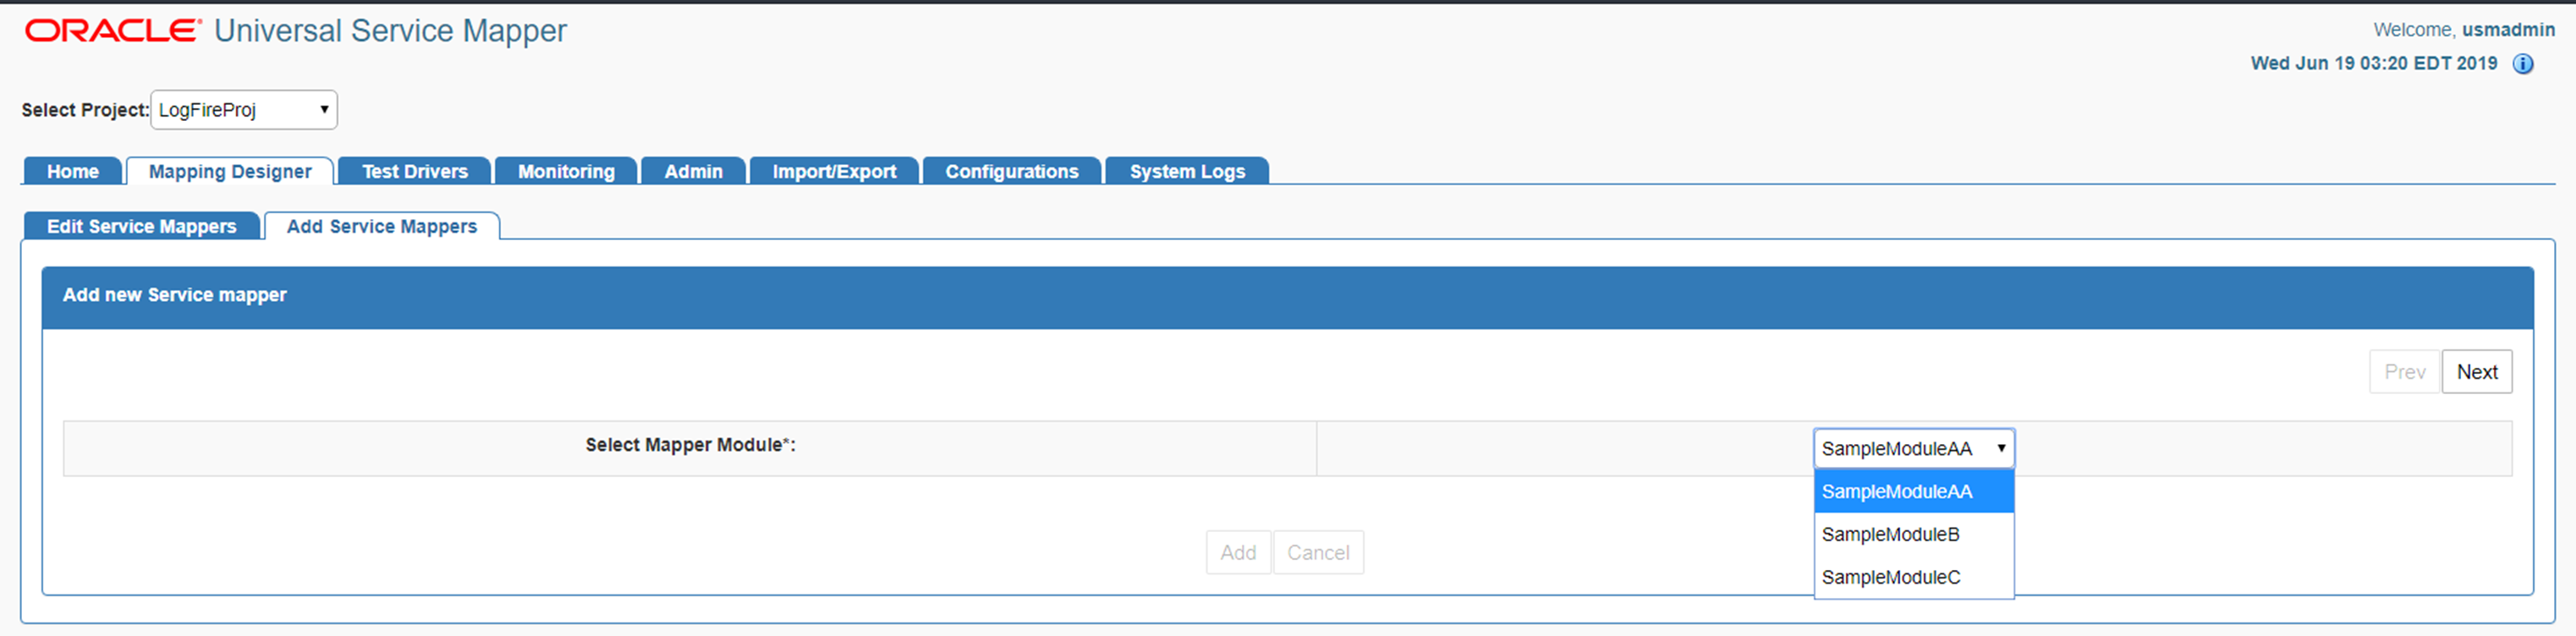
Enter the Service Mapper name of your choice and click Next.
Enter the Message Types that are to be supported by the service mapper, in a comma separated format.
Click on the Add button.
Now the new Service Mapper is created with all the necessary files.
Go the Edit Service Mapper sub-tab in the Mapping Designer tab.
Select the service mapper prefix from the drop down list box on the left side of the screen.
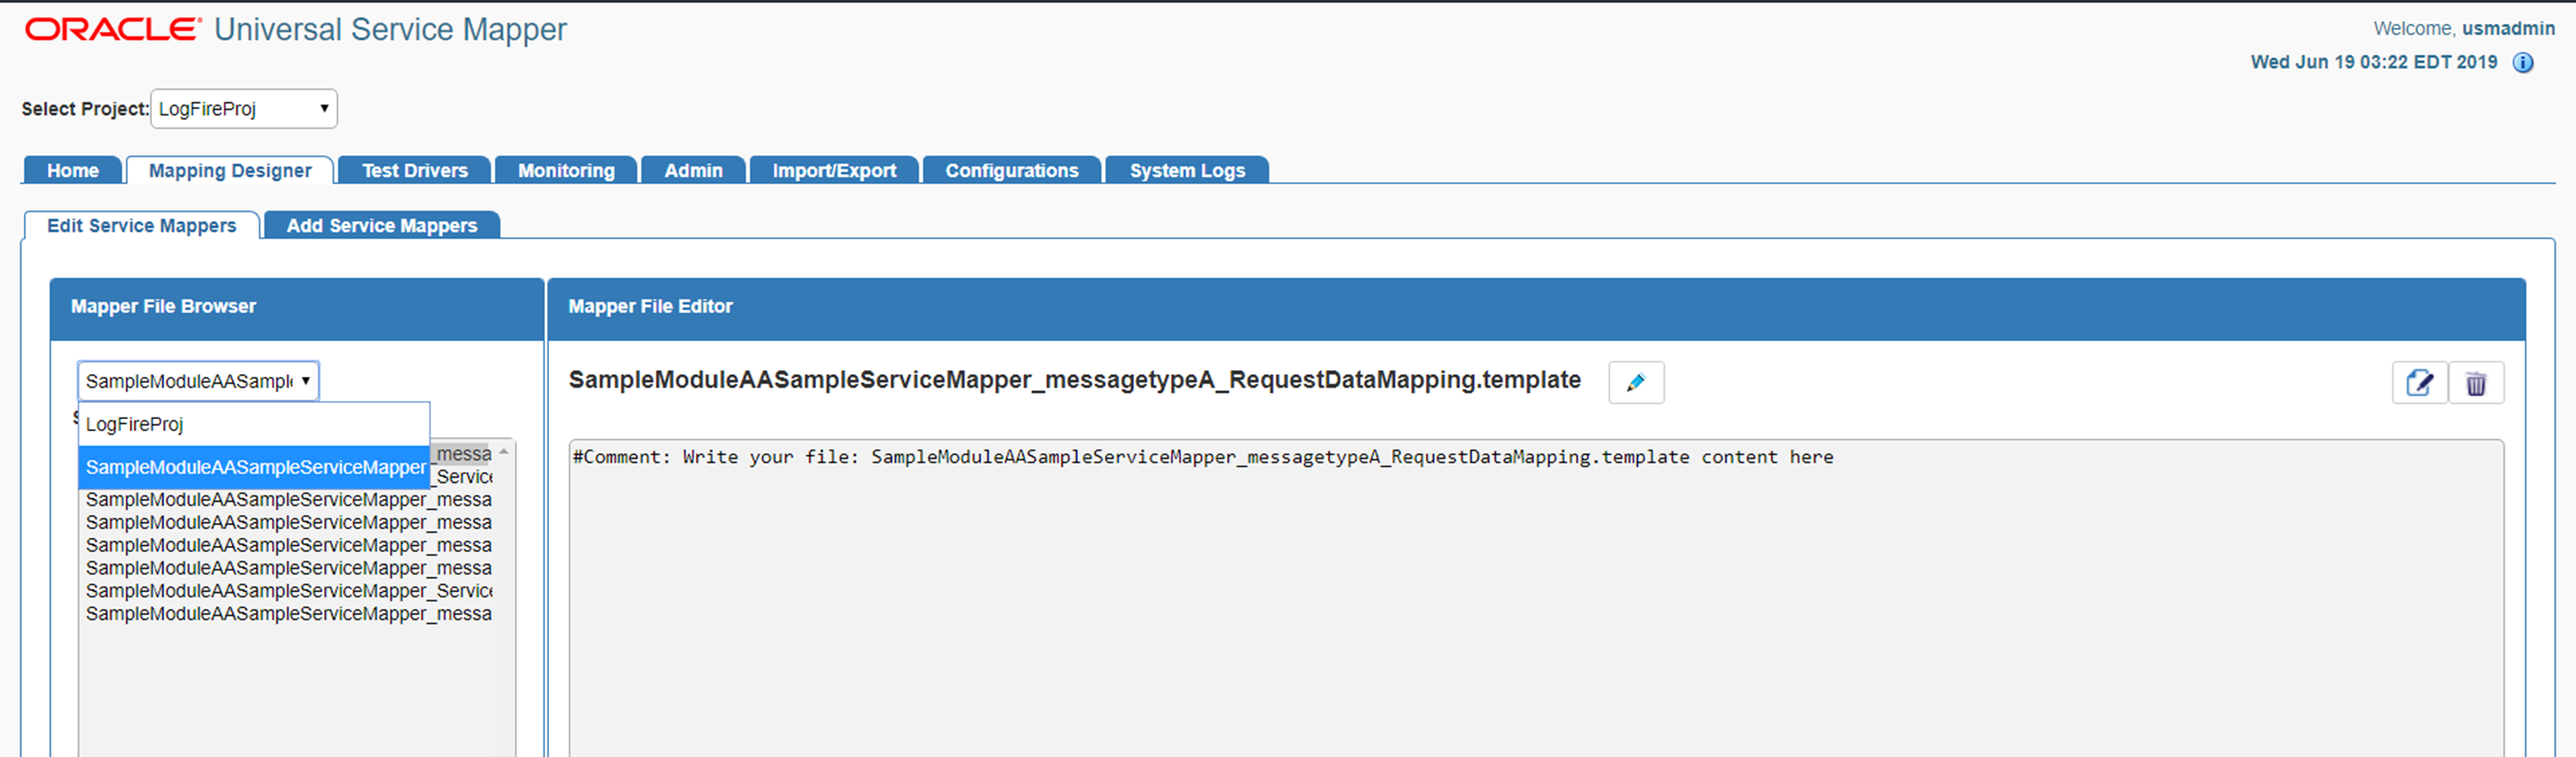
Select the mapper file name from the list that appears below it.
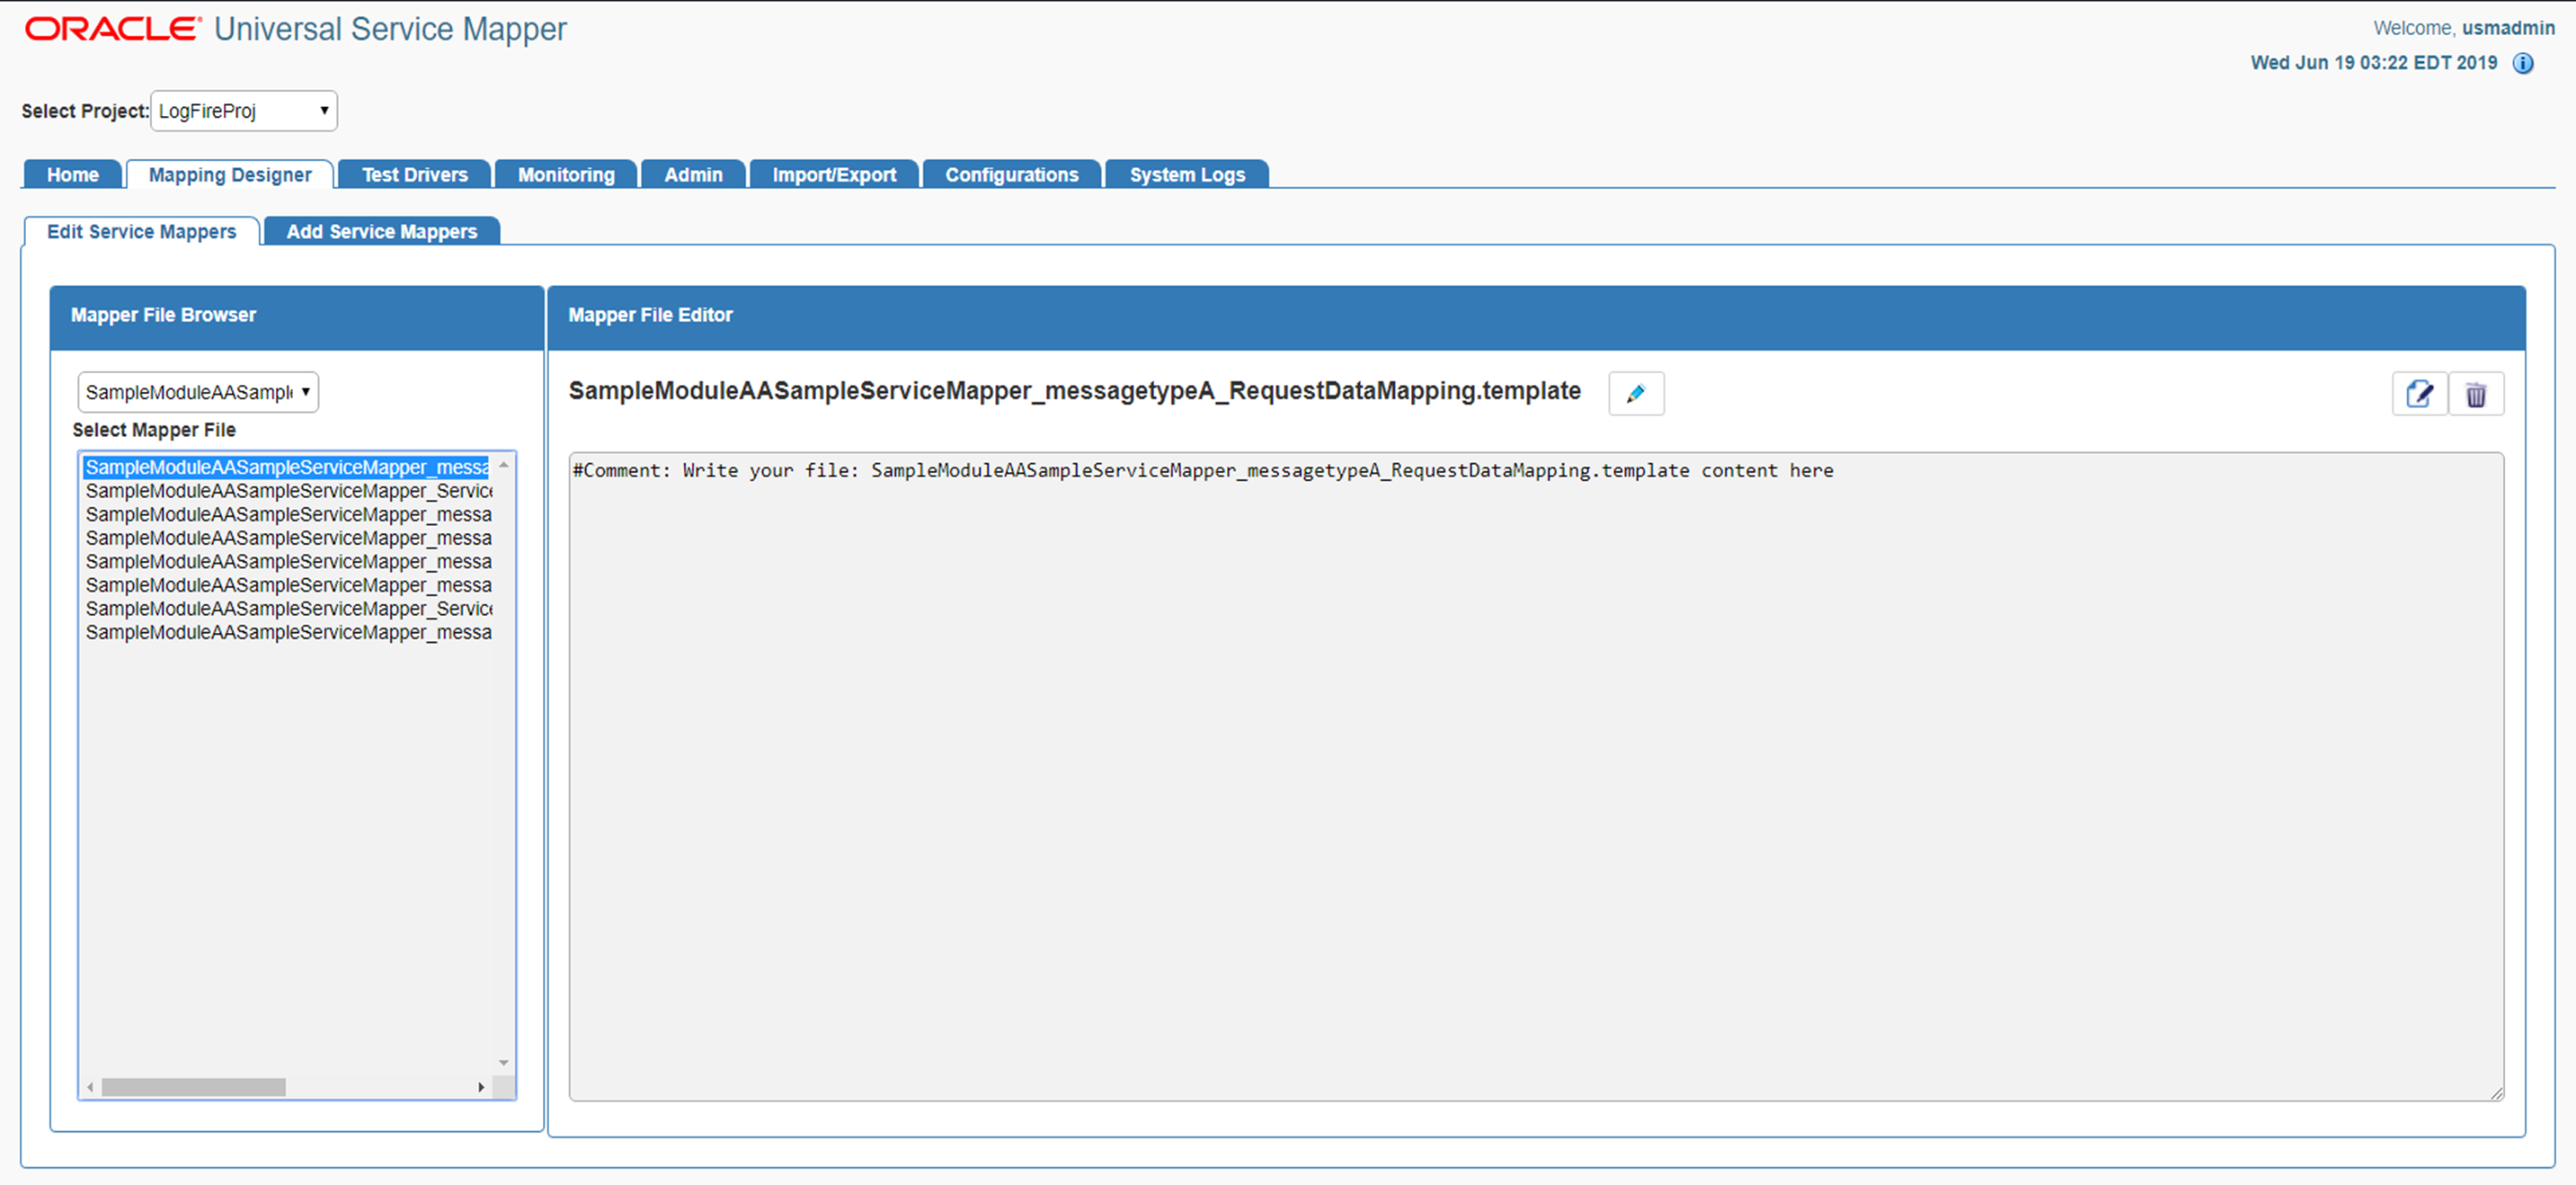
Once the file loads, click on the Edit icon on the right side of the screen.
The text field should be enabled for editing.
Edit the content as desired.
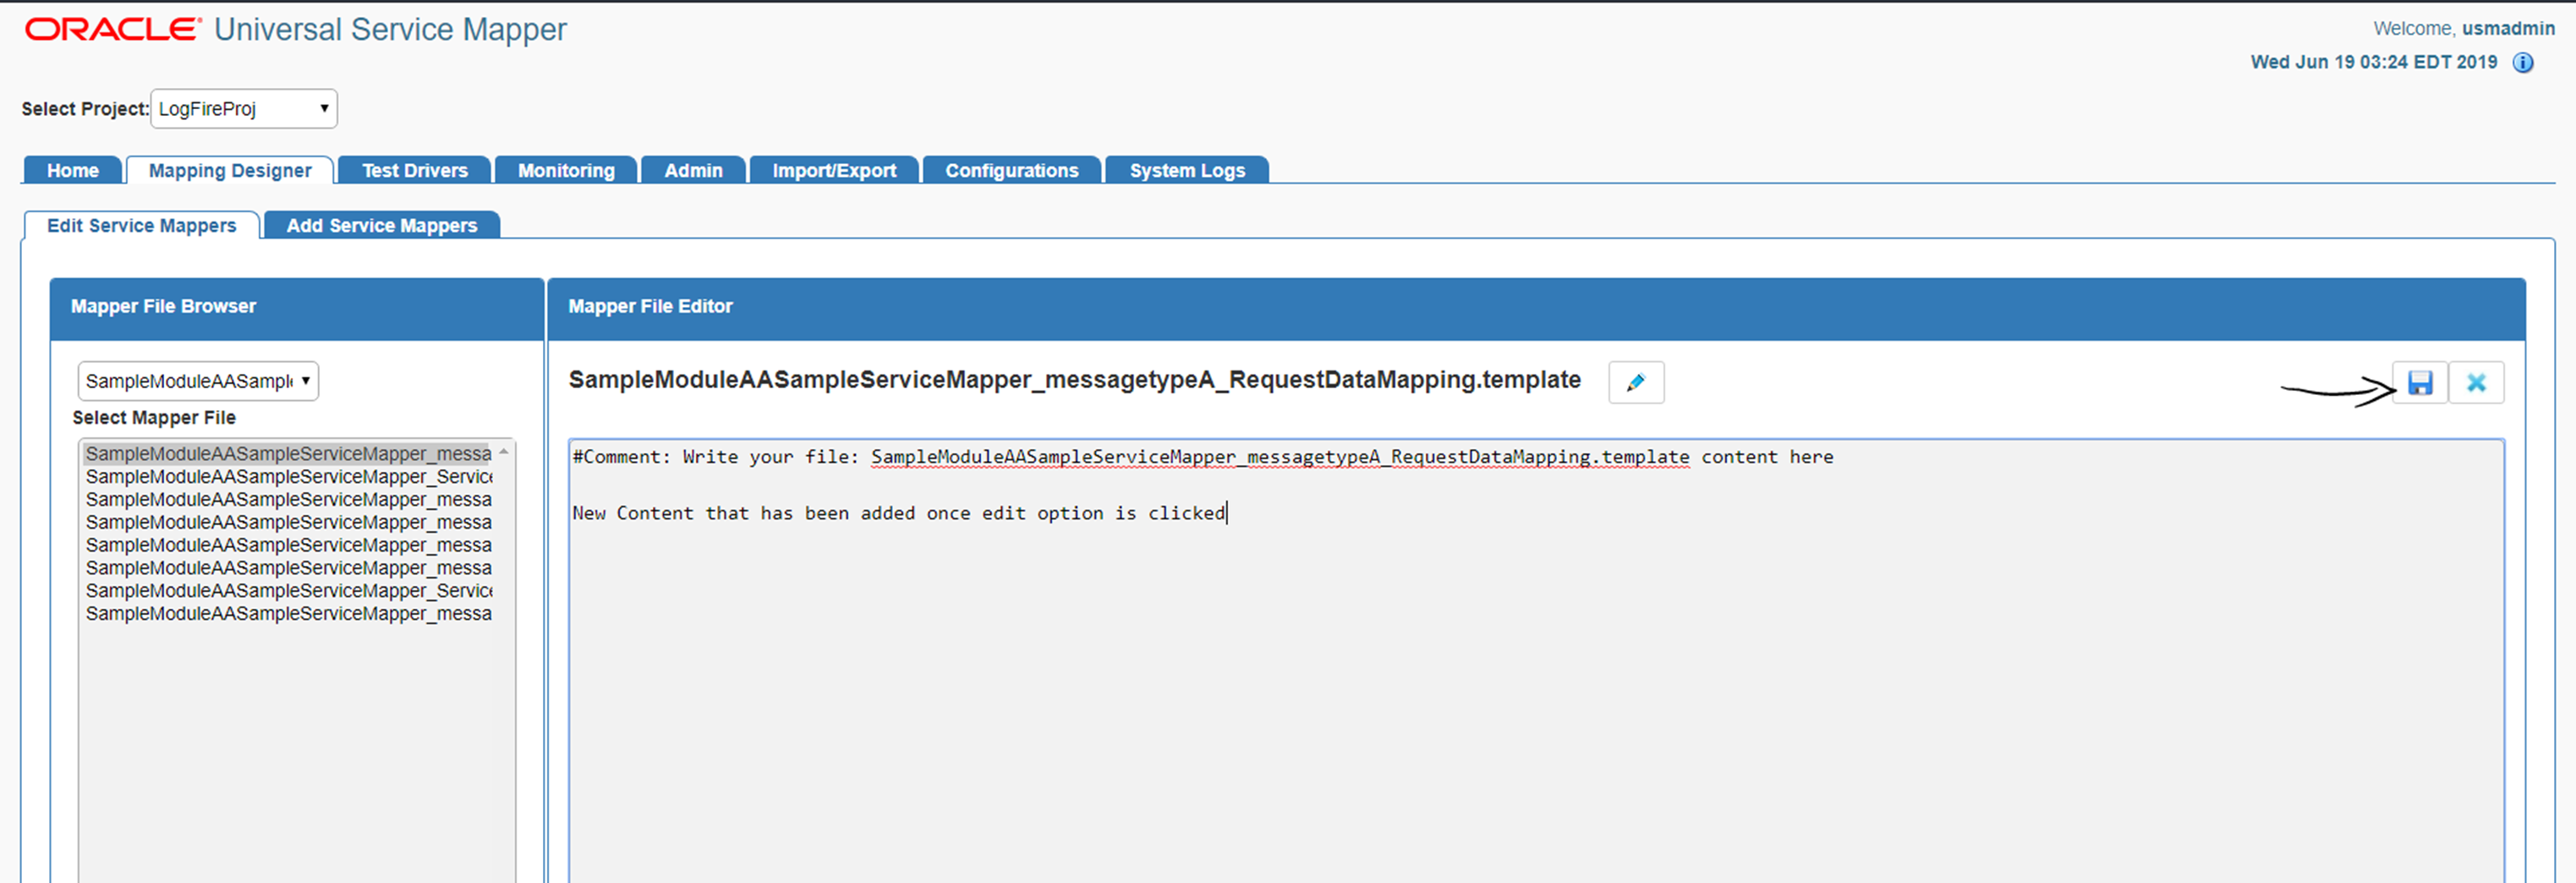
Once the editing is done, click the Save icon (it replaced the Edit button).
The updates to the service mapper are saved.
Go to the Edit Service Mapper sub-tab in the Mapping Designer tab.
Select the service mapper prefix from the drop down list box.
Select the mapper file whose name has to be changed.
Once the file is loaded, click the pencil icon next to the name of the service mapper on the right pane.
An Edit box opens.
Change the name of the mapper file as required.
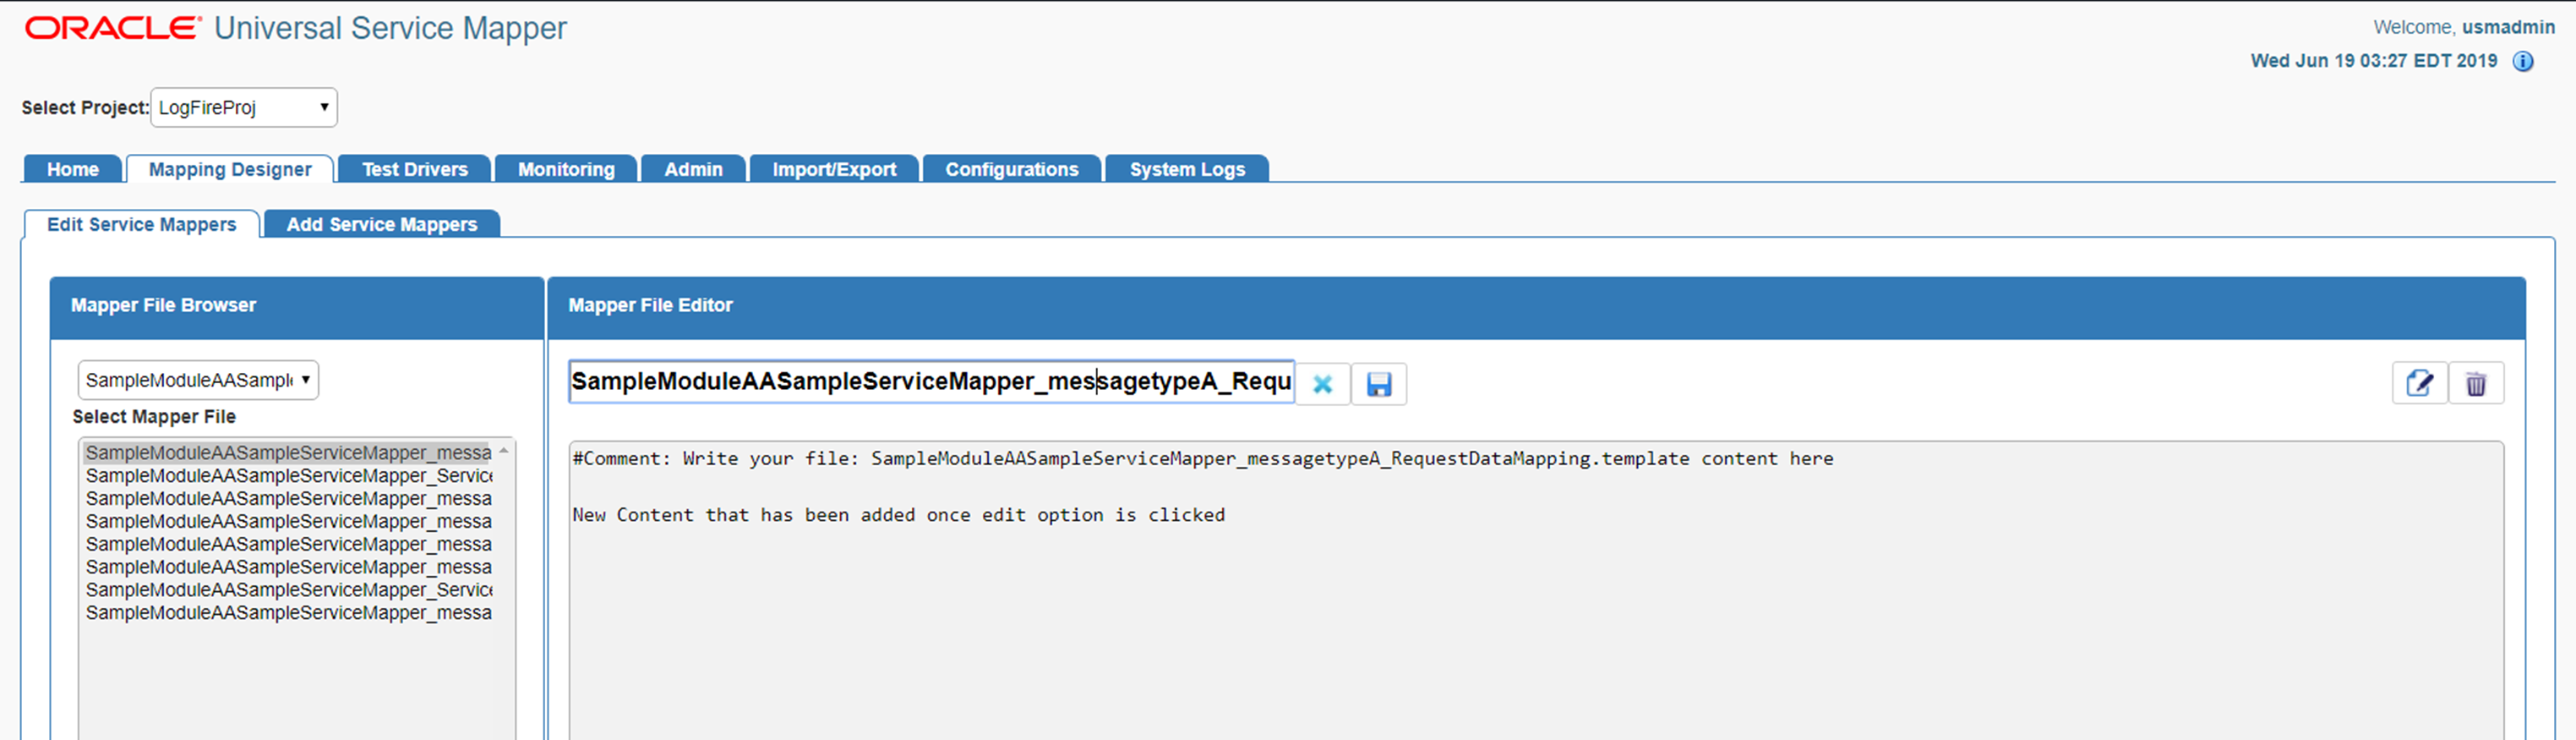
Click the Save button (it replaced the Edit button).
The mapper file has been renamed.
Go to the Edit Service mapper sub-tab in the Mapping Designer tab.
Select the mapper prefix from the drop down on the left side of the screen.
Select the mapper file to be deleted once the list below loads.
Once the selected mapper file loads, click the Delete icon on the far right end of the screen on the right pane.
A confirmation dialog appears.
Click Okay to continue.
The mapper file is deleted.
Go to the Test Driver tab.
Click the Manage Driver sub-tab.
Click the Create radio button.
Select the module name from the drop down.
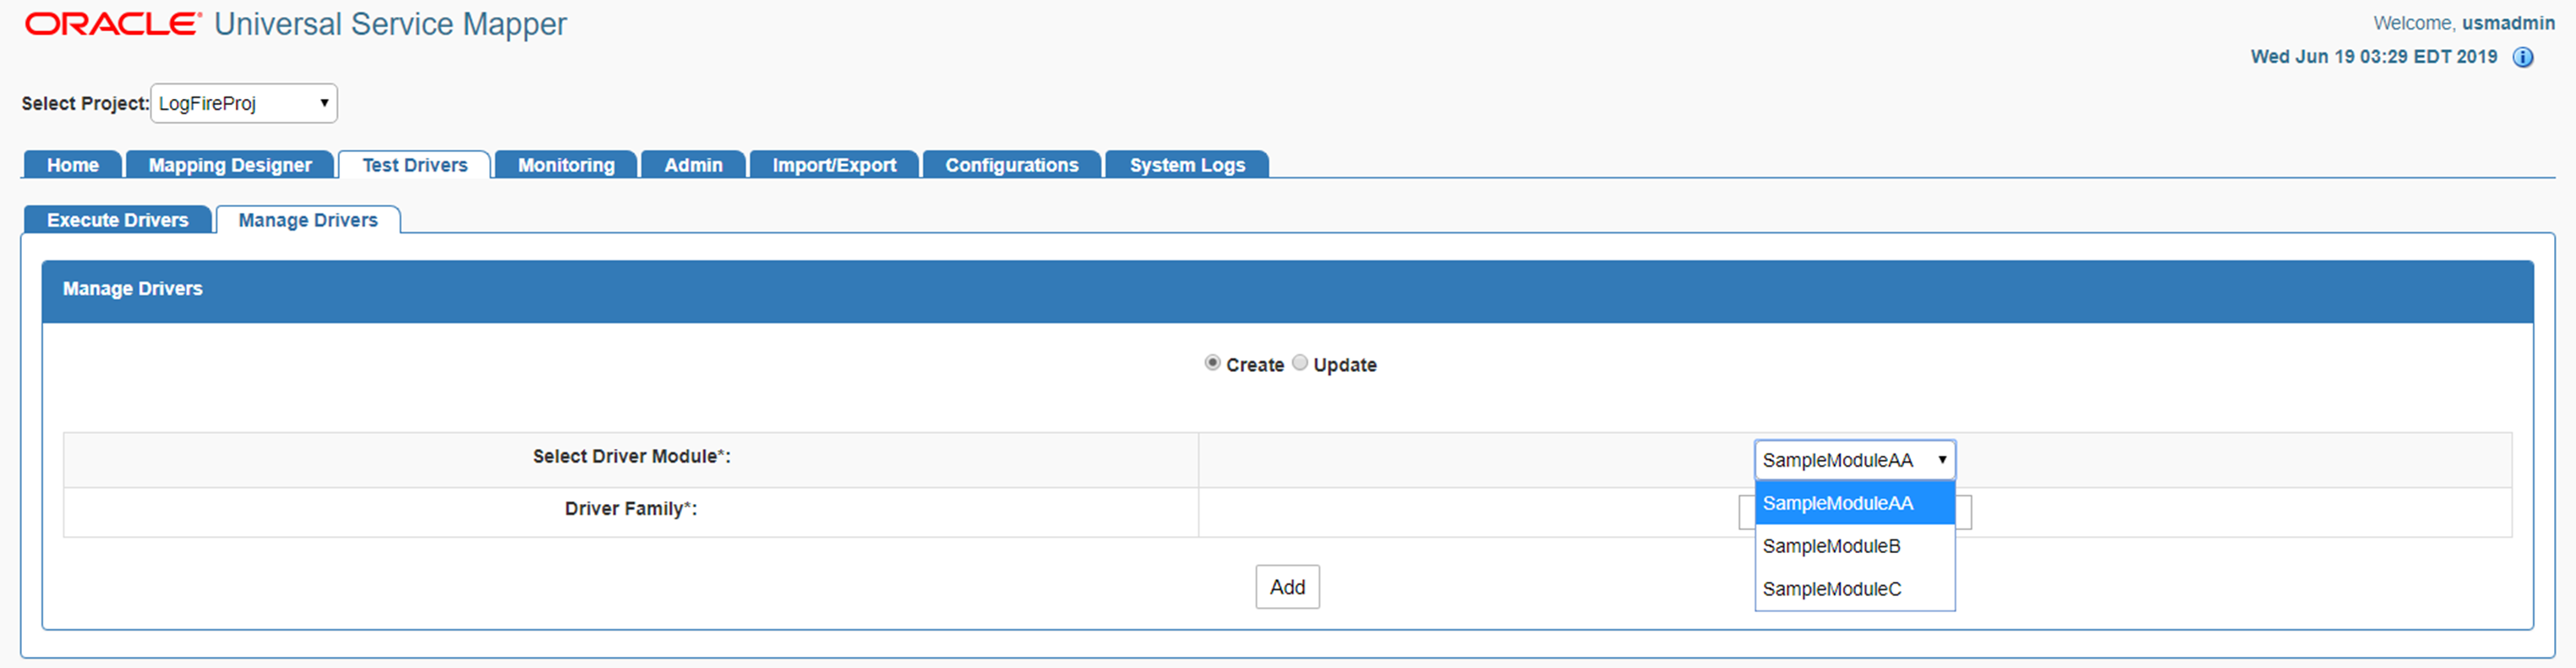
Enter the Driver Family name.
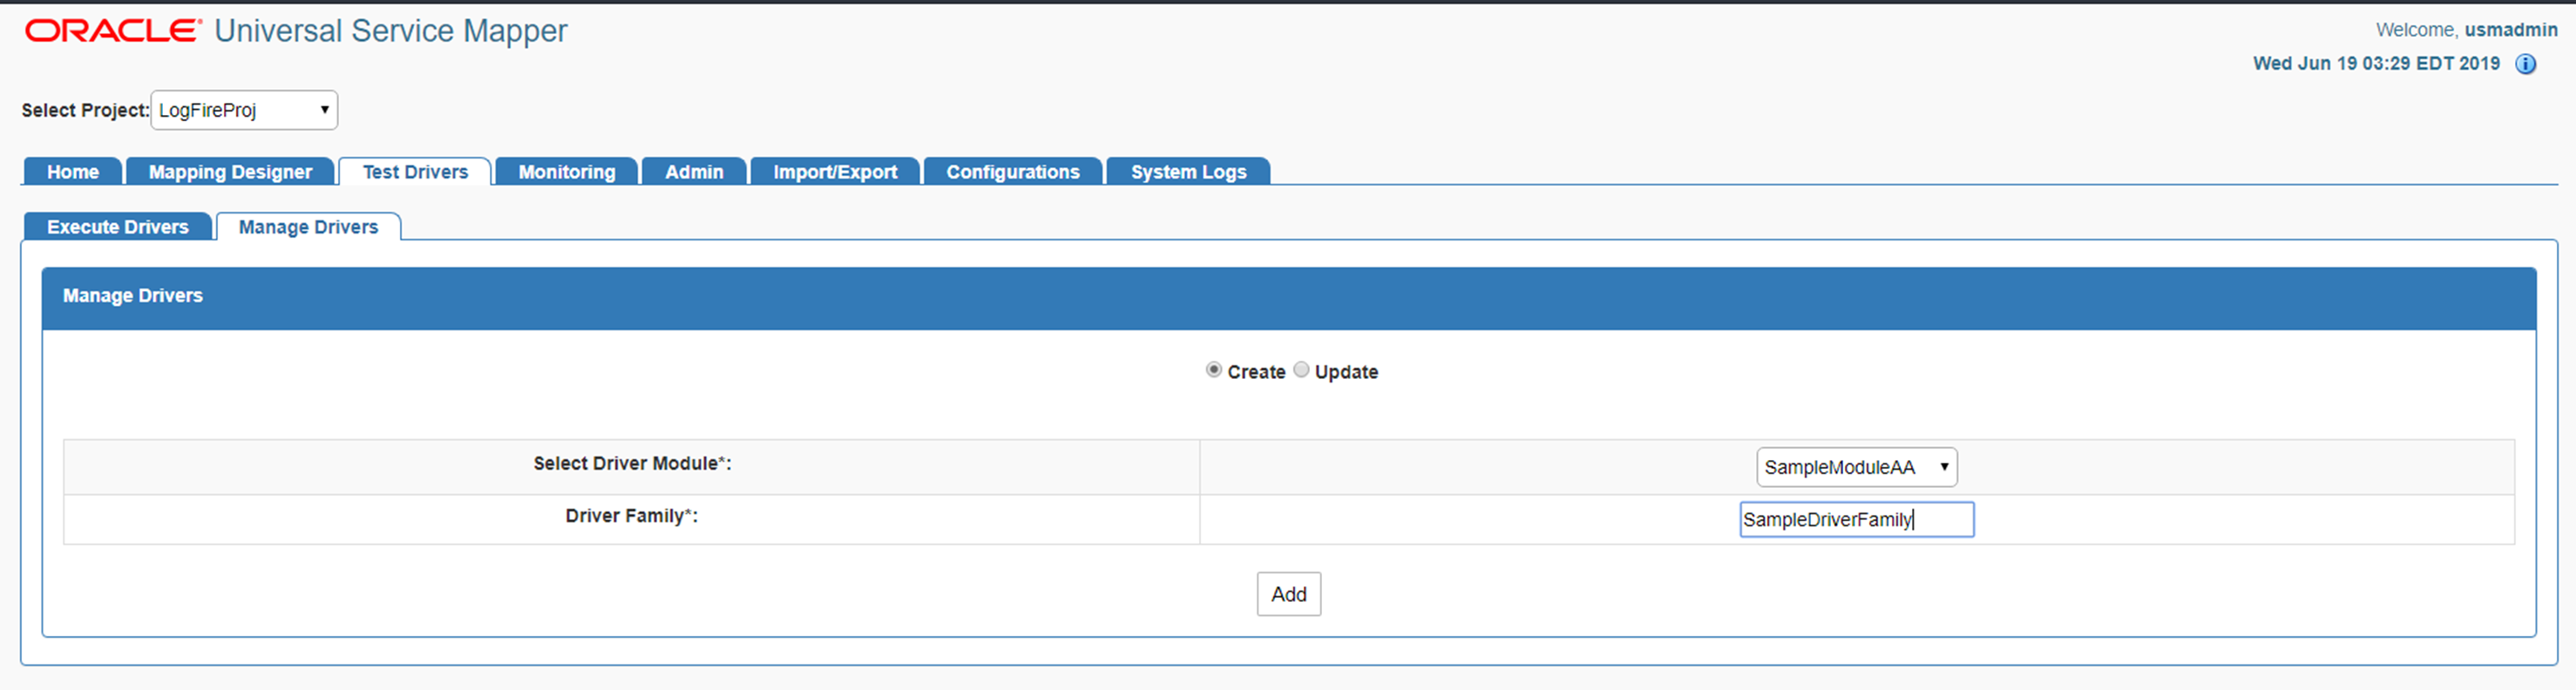
Click the Add button.
Go to the Execute Driver sub-tab in the Test Driver tab.
Select the driver name from the drop down list box.
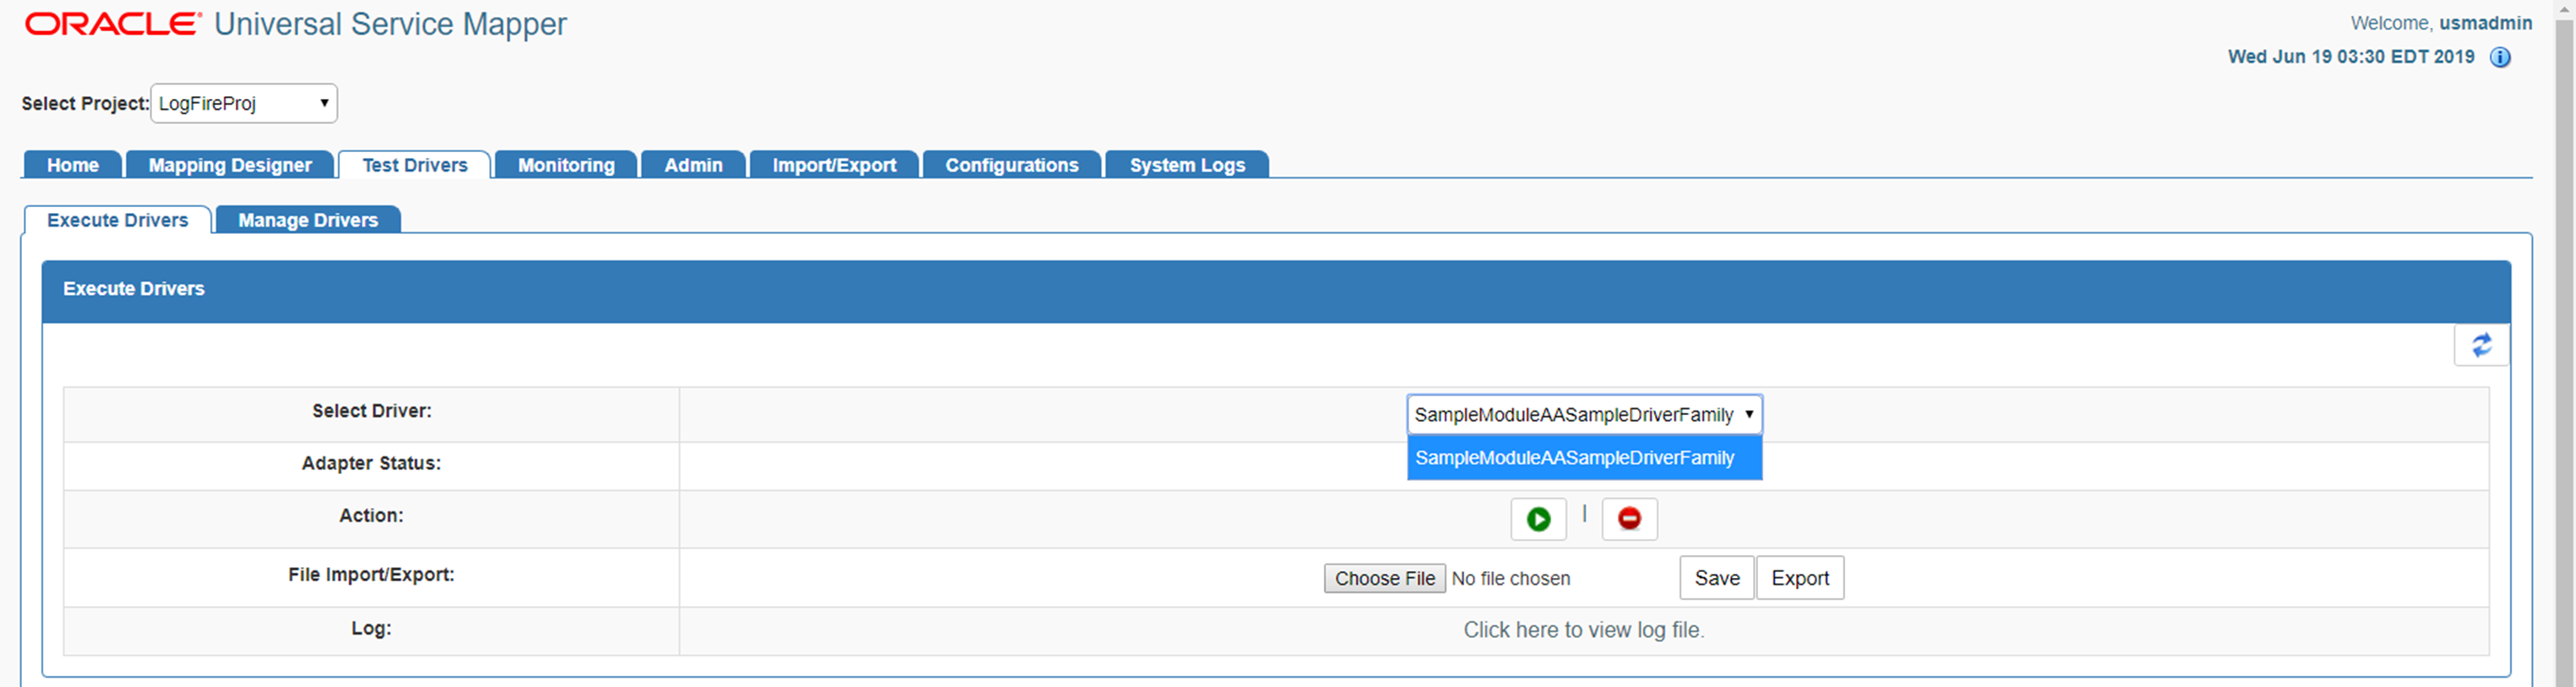
Select a Data Driver File or Driver Request Data Mapping Template from the drop down list box.

In the editing panel below, click on the Edit icon on the right side of the screen.
Edit the contents of the file as desired.
Once done, click the Save icon to save the changes to the file.
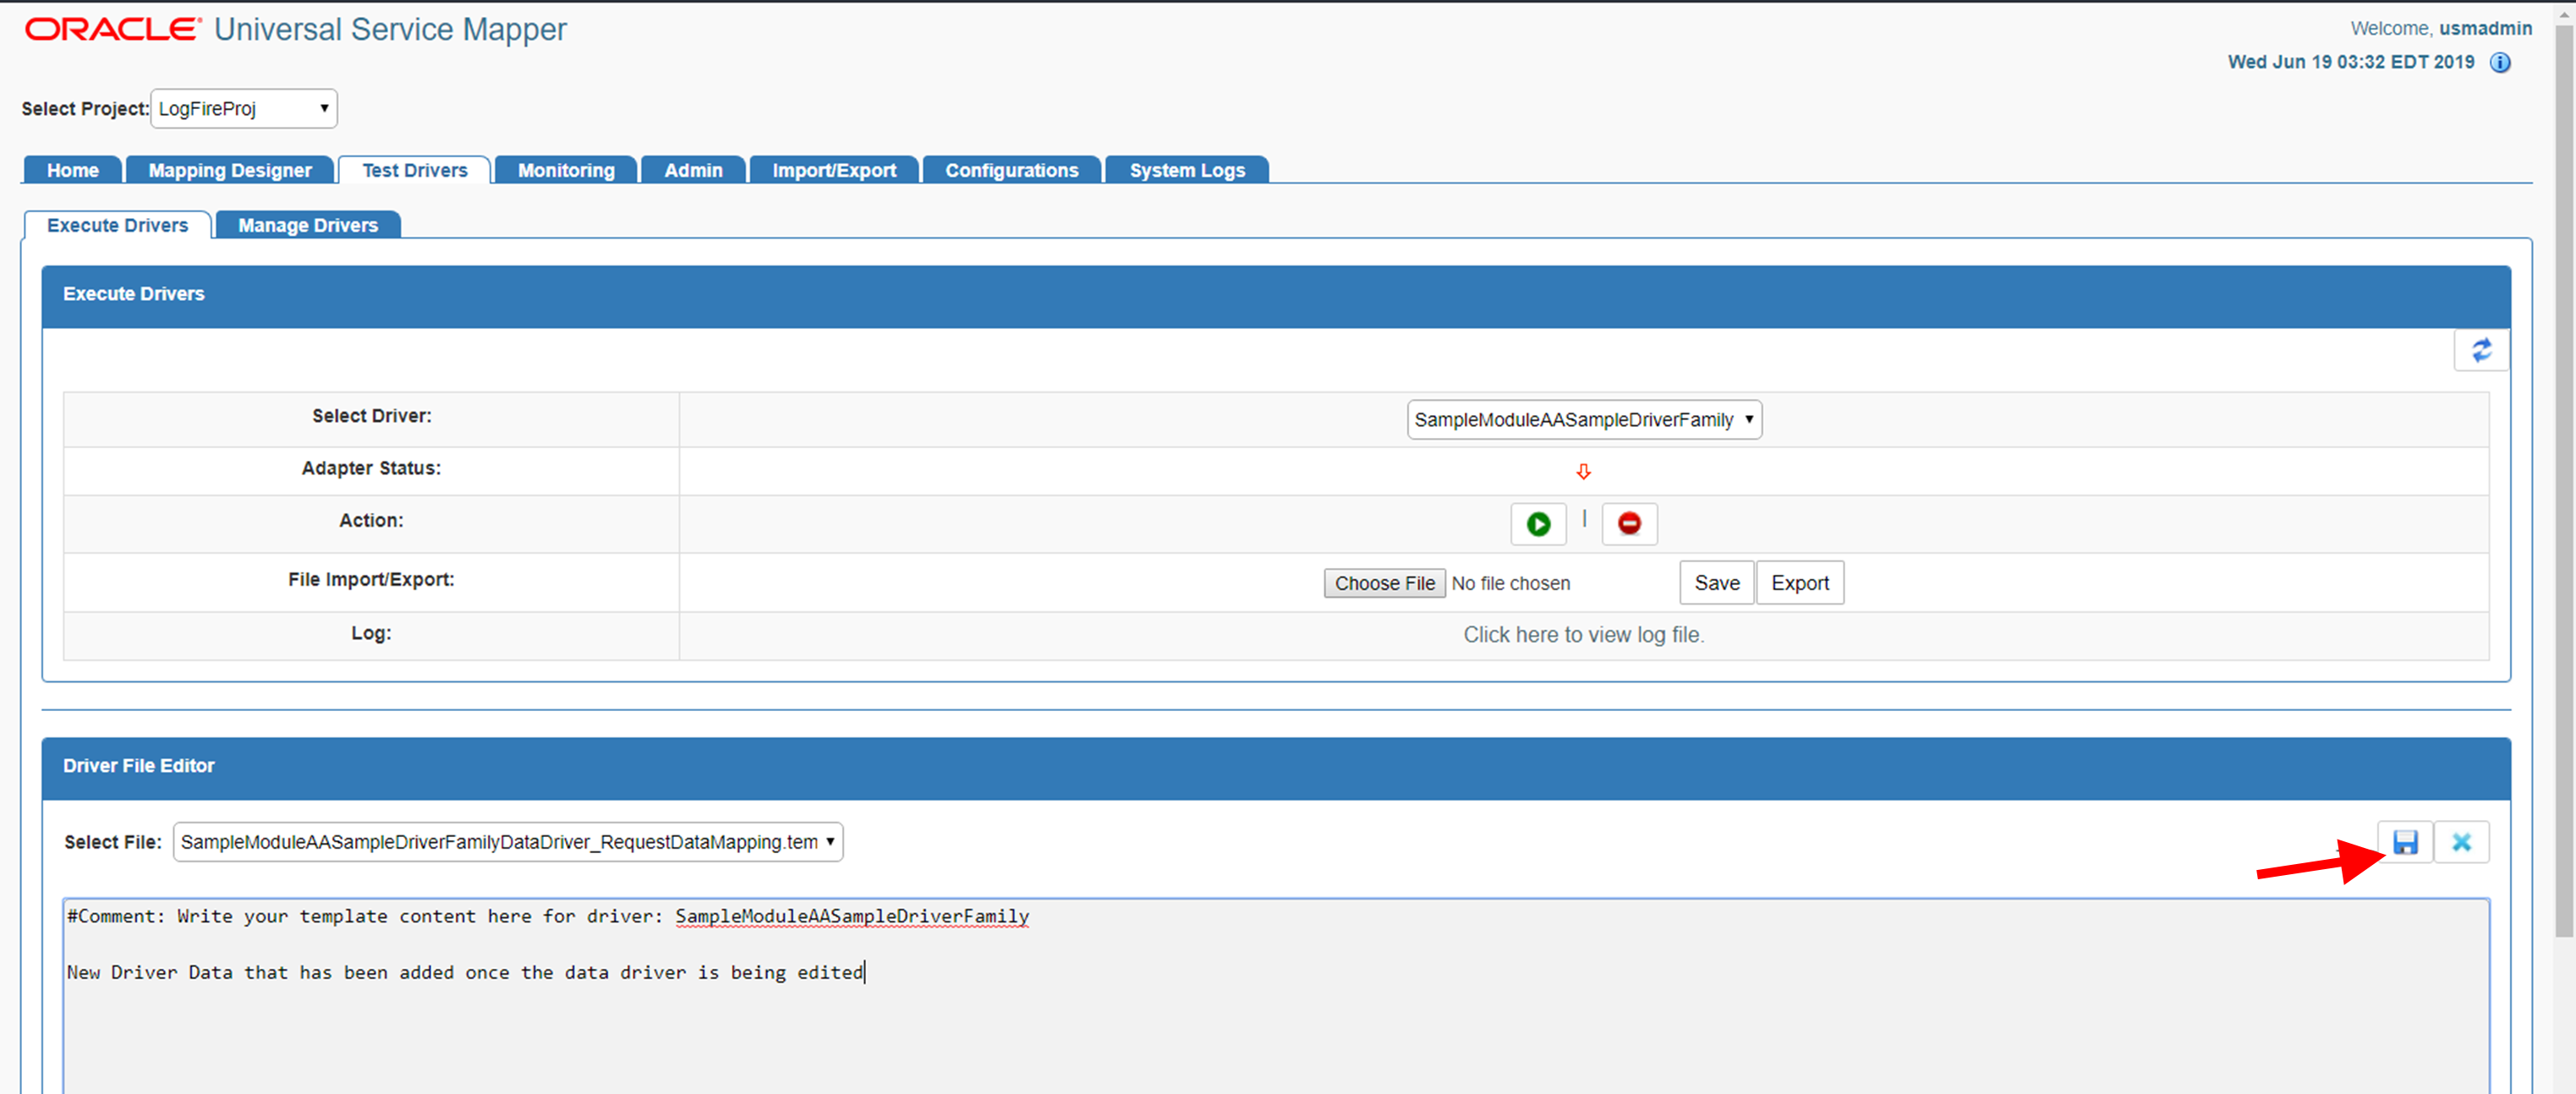
The file has been updated.
Go to the Manage Driver sub-tab in the Test Driver tab.
Click the Update radio button.
Select the Driver Name from the drop down list box.
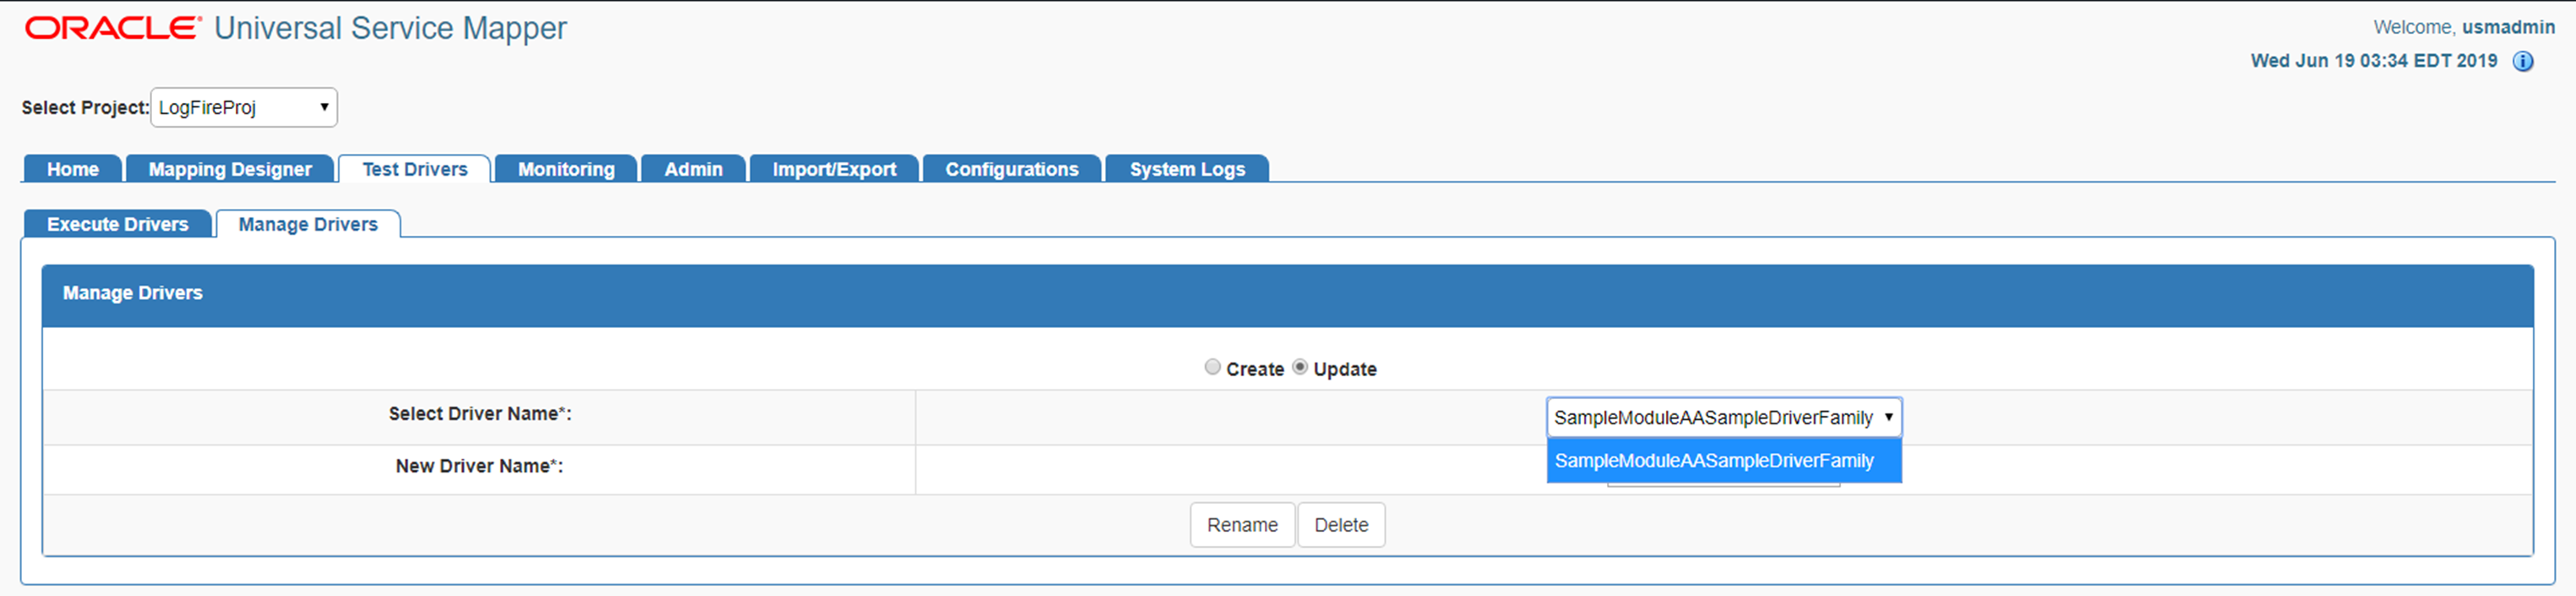
Enter a new name for the driver as required.
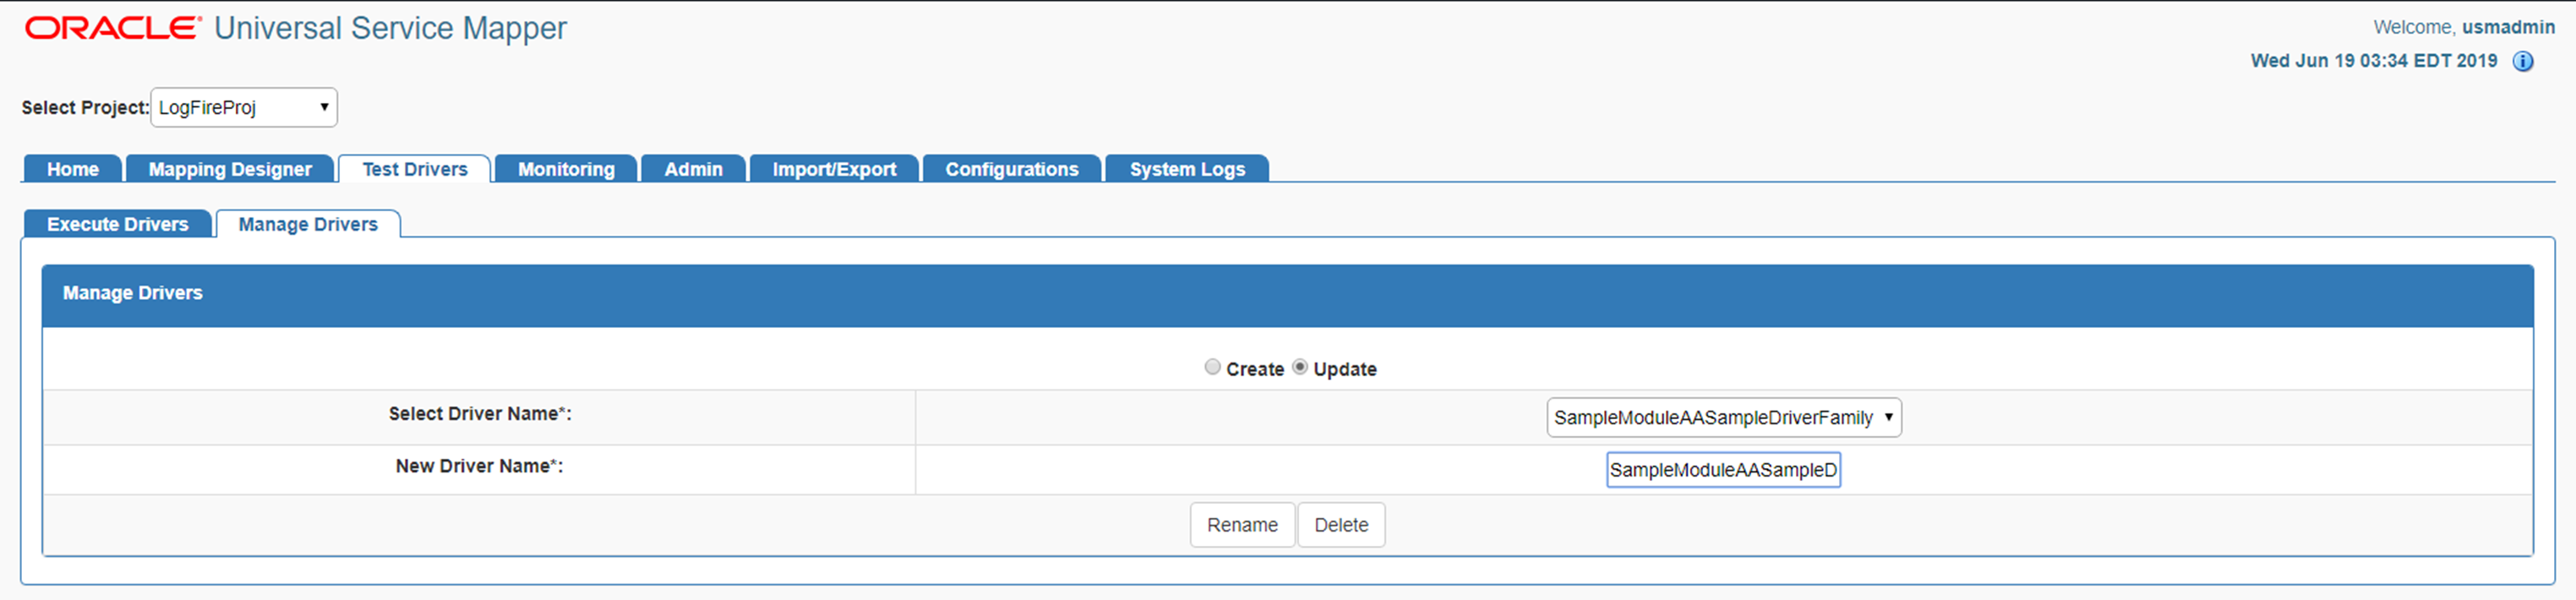
Click the Rename button.
The driver is renamed.
Go to the Manage Driver sub-tab in the Test Driver tab.
Click the Update radio button.
Select the driver name from the drop down list box.
Click the Delete button.
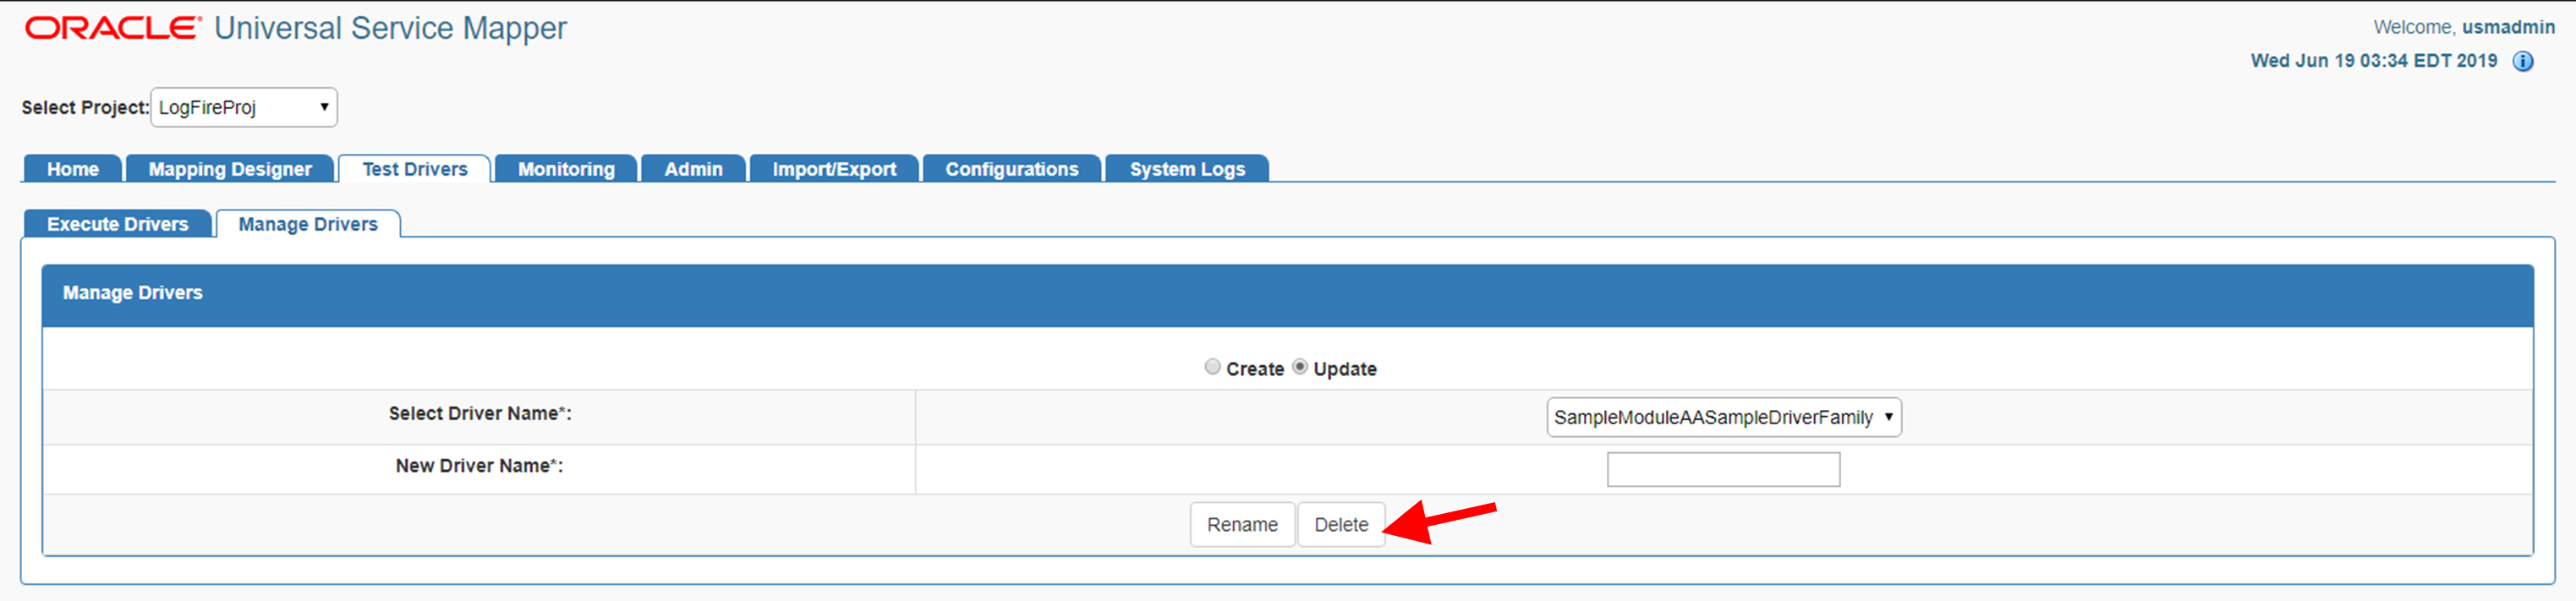
A confirmation dialog box opens.
Click Okay.
The driver file is deleted.
Go to the Edit USM Configuration sub-tab in the Configurations tab.
Click the Edit button icon on the right side of the screen.
Edit the contents of the file as desired.
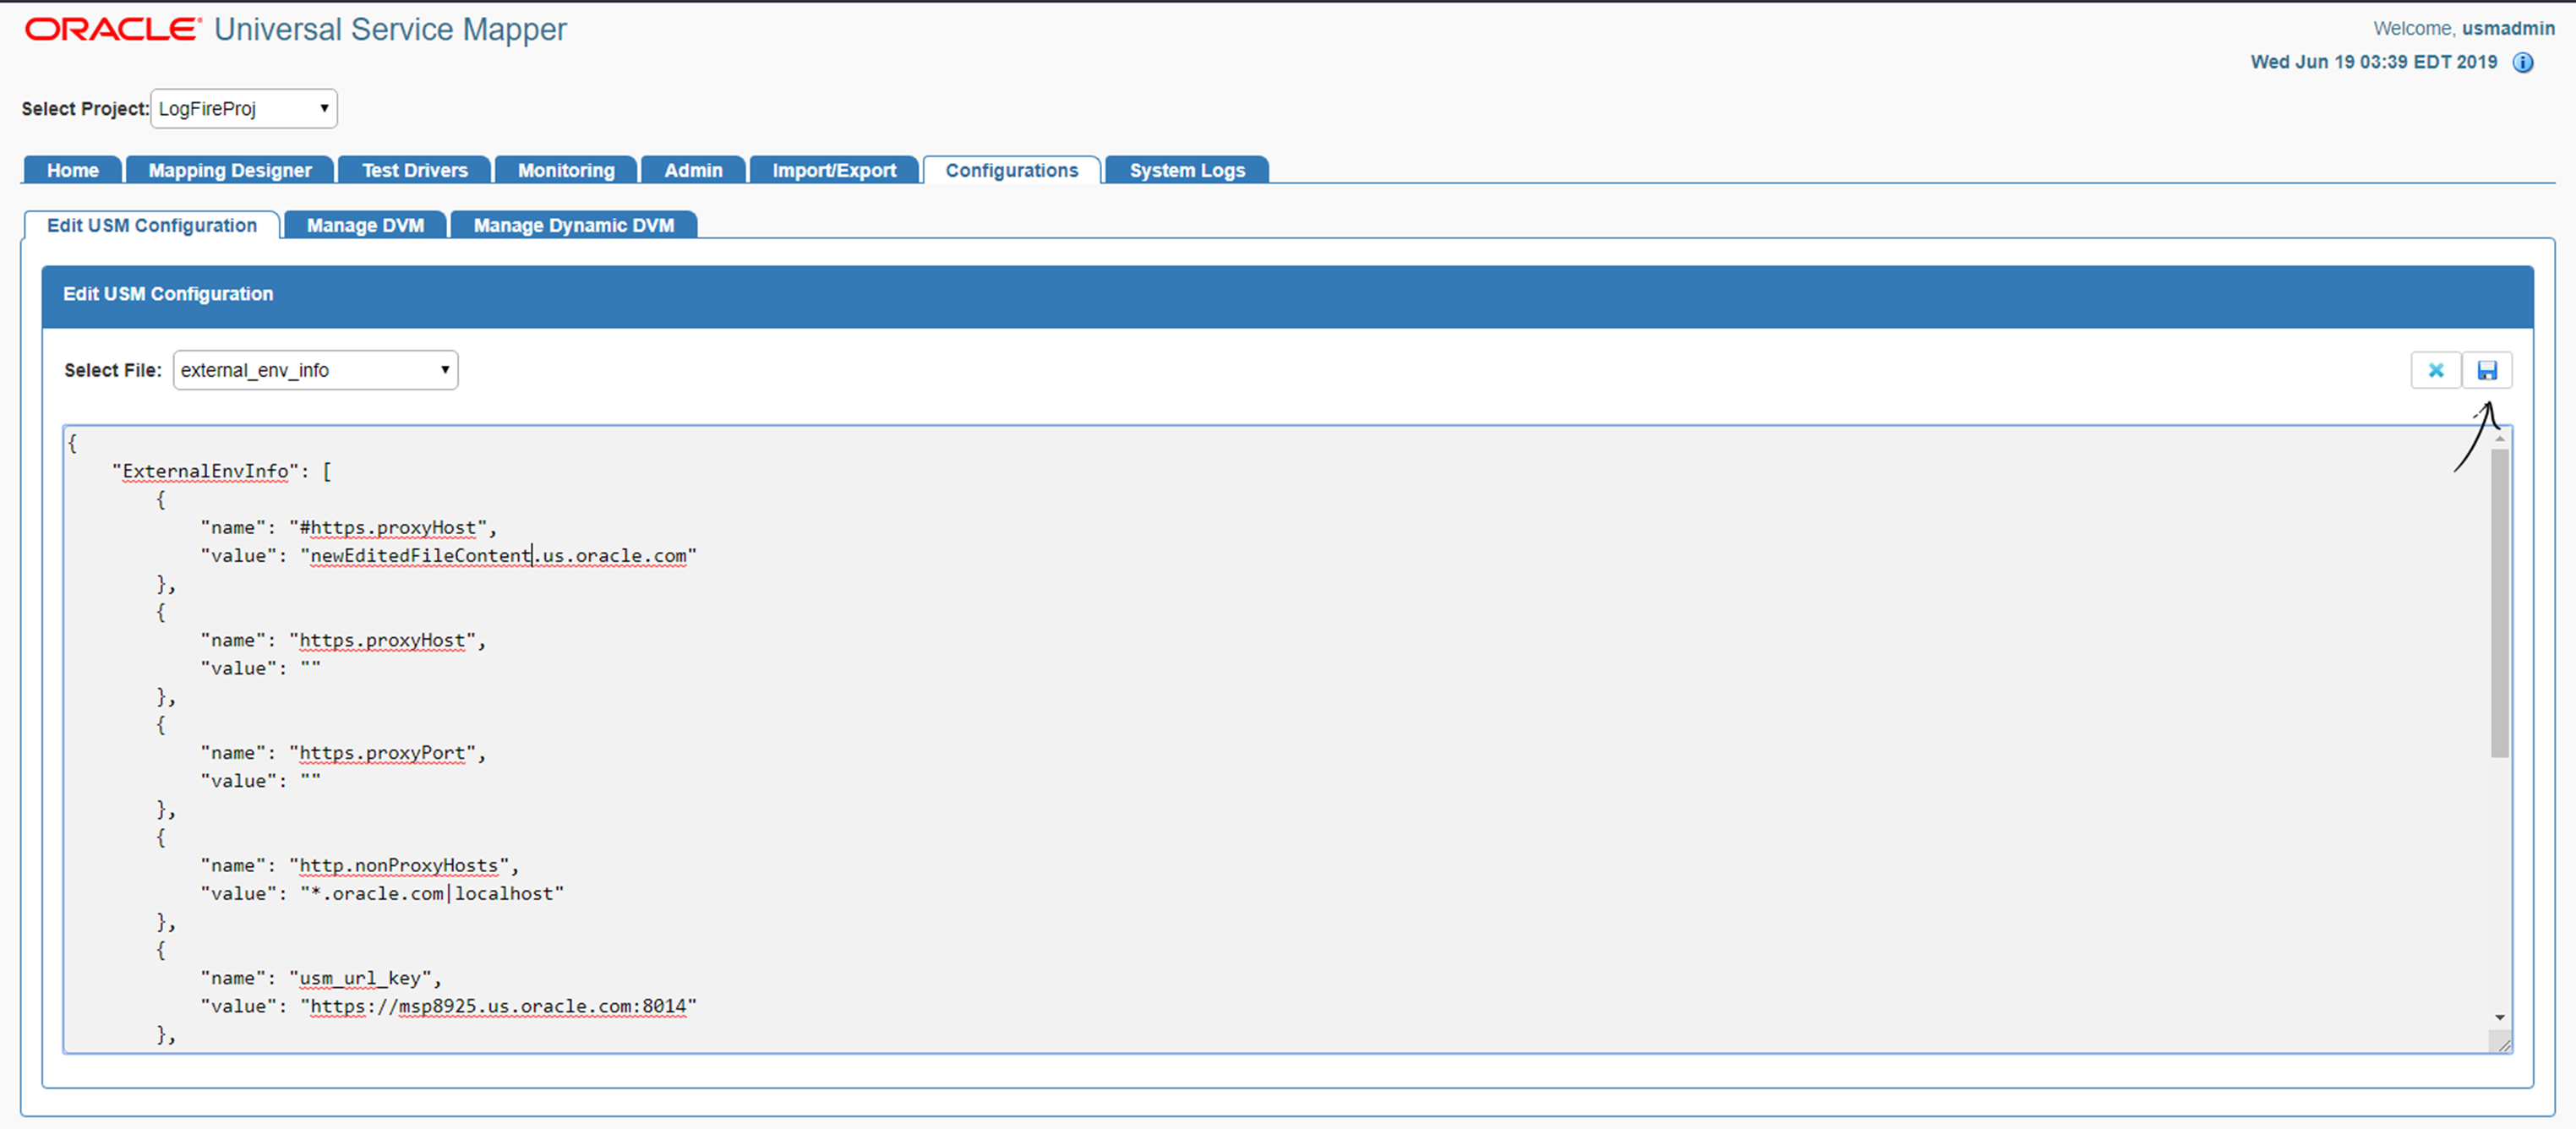
Once done, click the Save button.
The Configuration file is now updated.
Go to the Manage DVMs sub-tab in the Configurations tab.
Click on the Create radio button.
Enter the DVM Name and key in the text boxes.
Click on the Add icon to add more keys or remove unneeded keys from the list by click on the Remove icon next to a key.
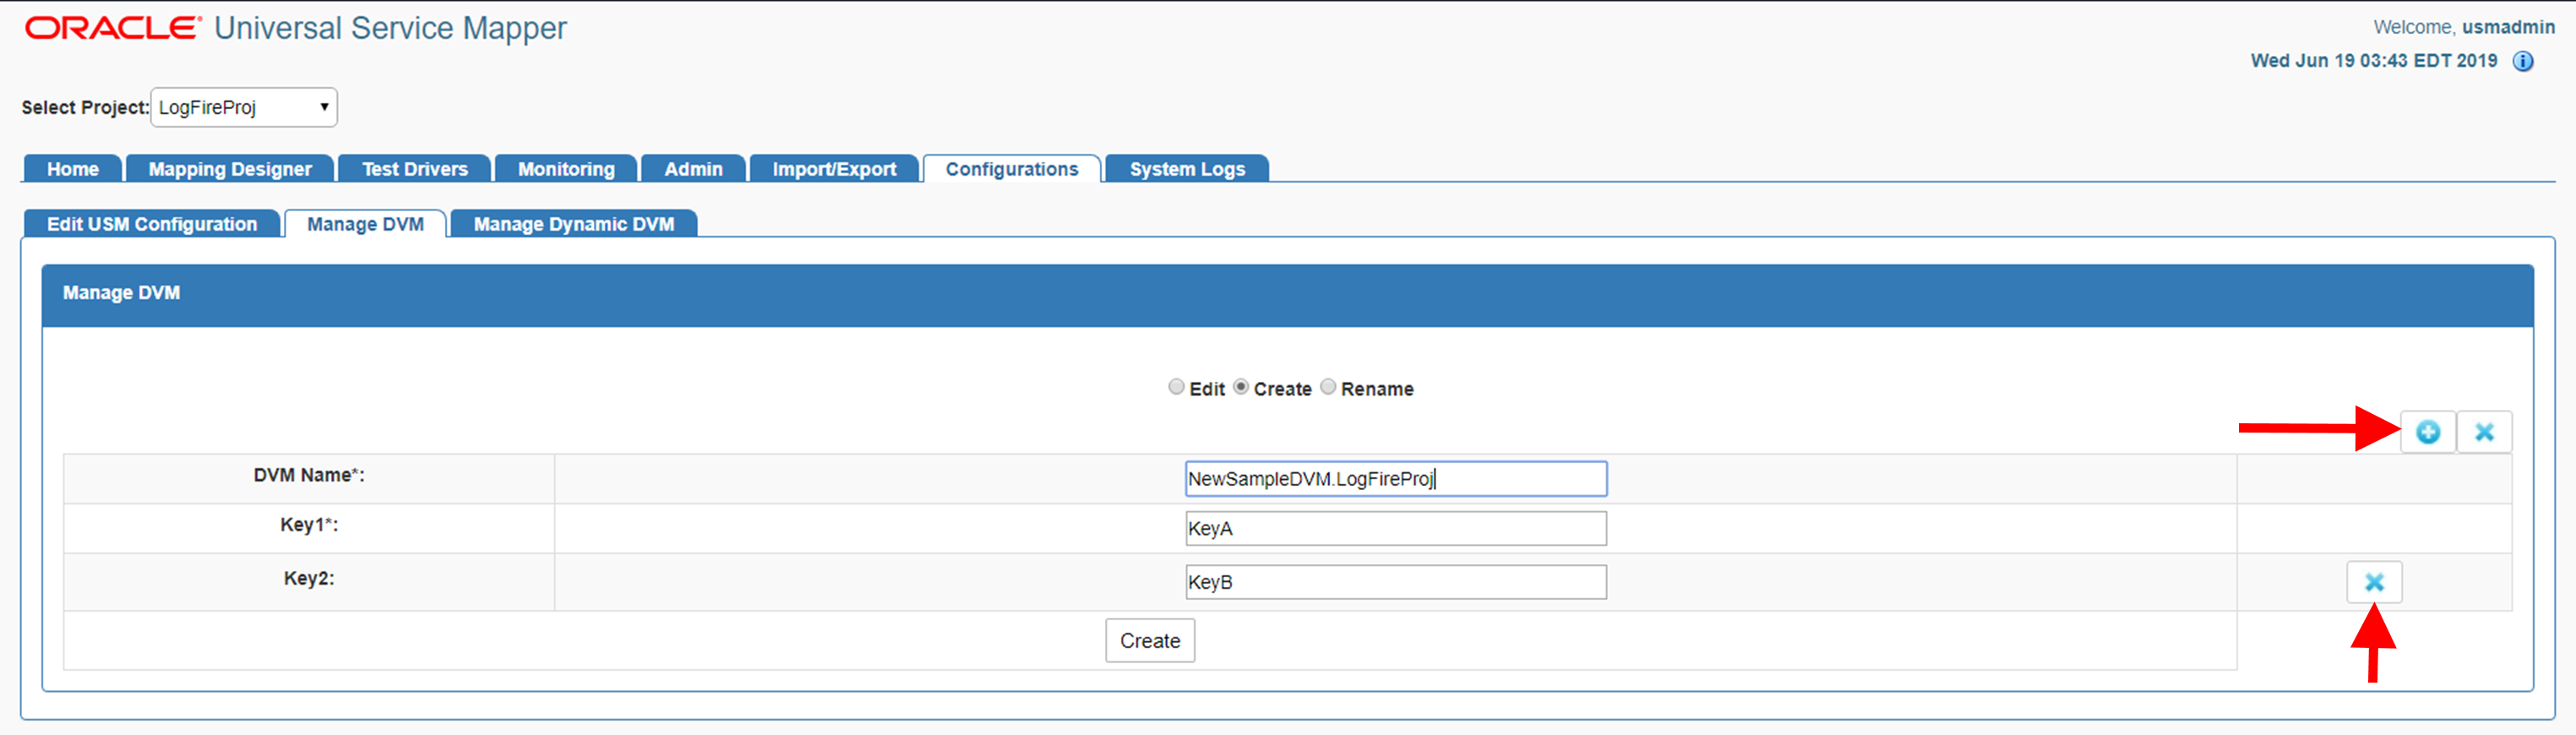
Once done, click on Save to create the DVM.
Now the new DVM is created.
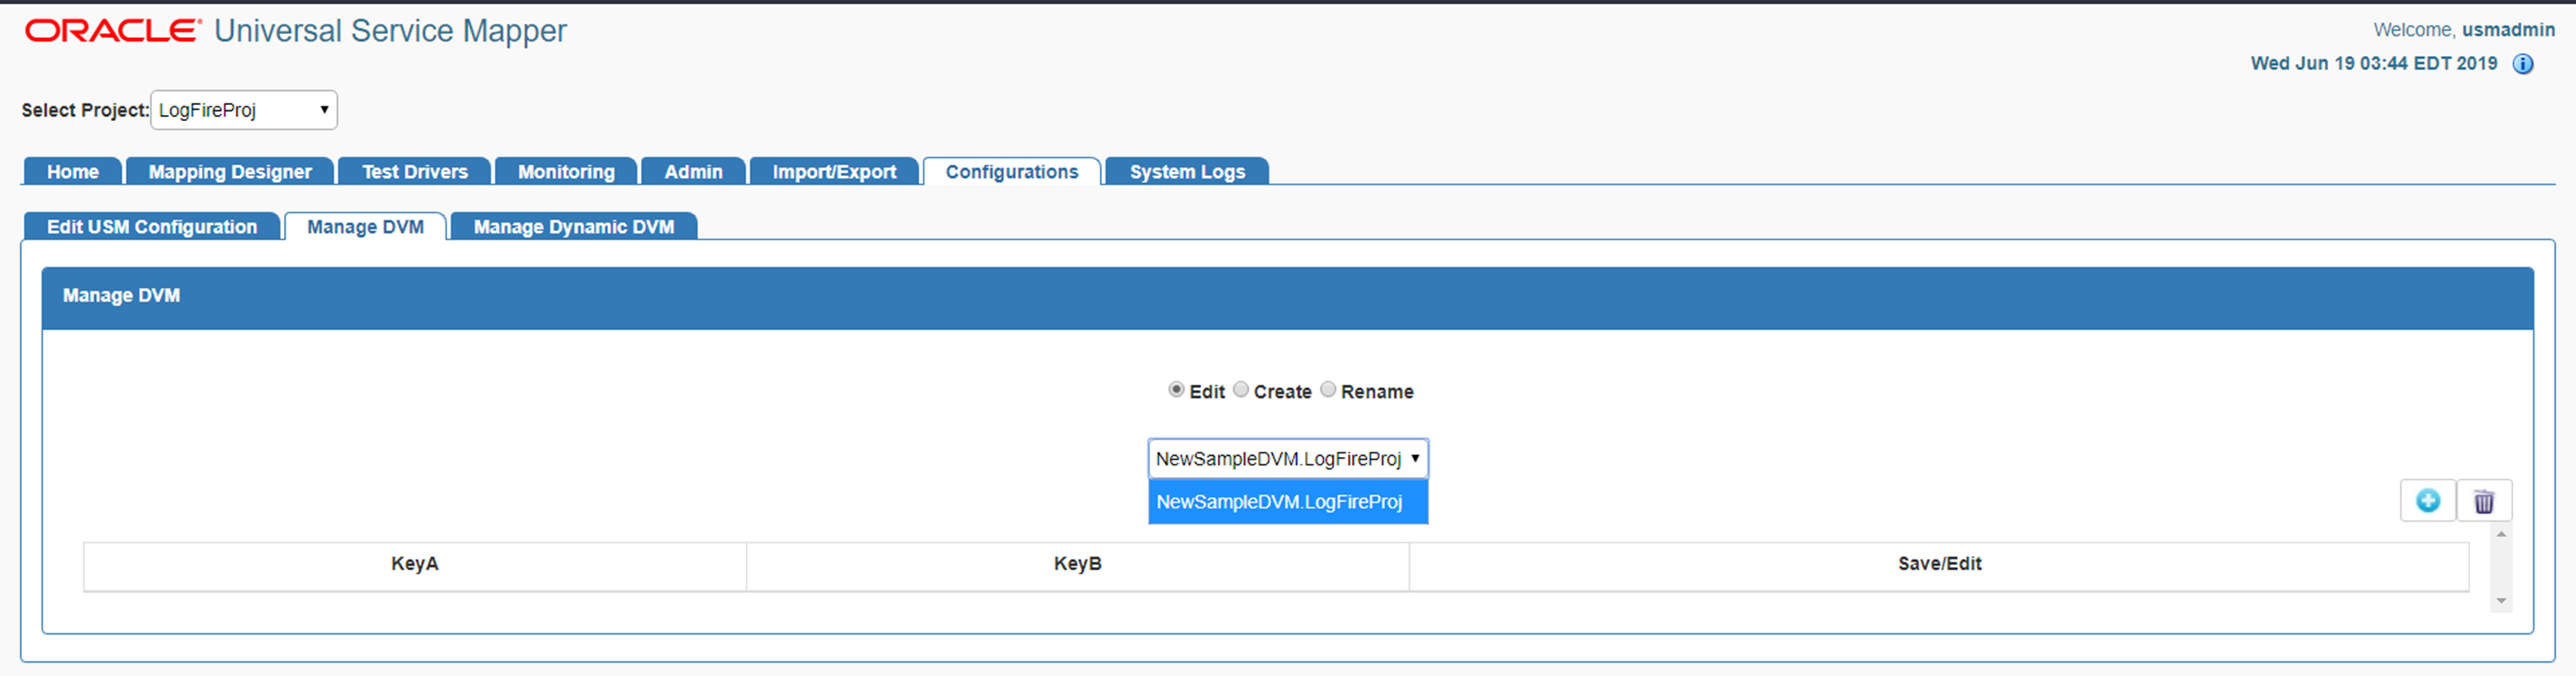
Go to the Manage DVM sub-tab in the Configurations tab.
Click the Edit radio button.
Select the DVM Name to be edited from the drop down list box.
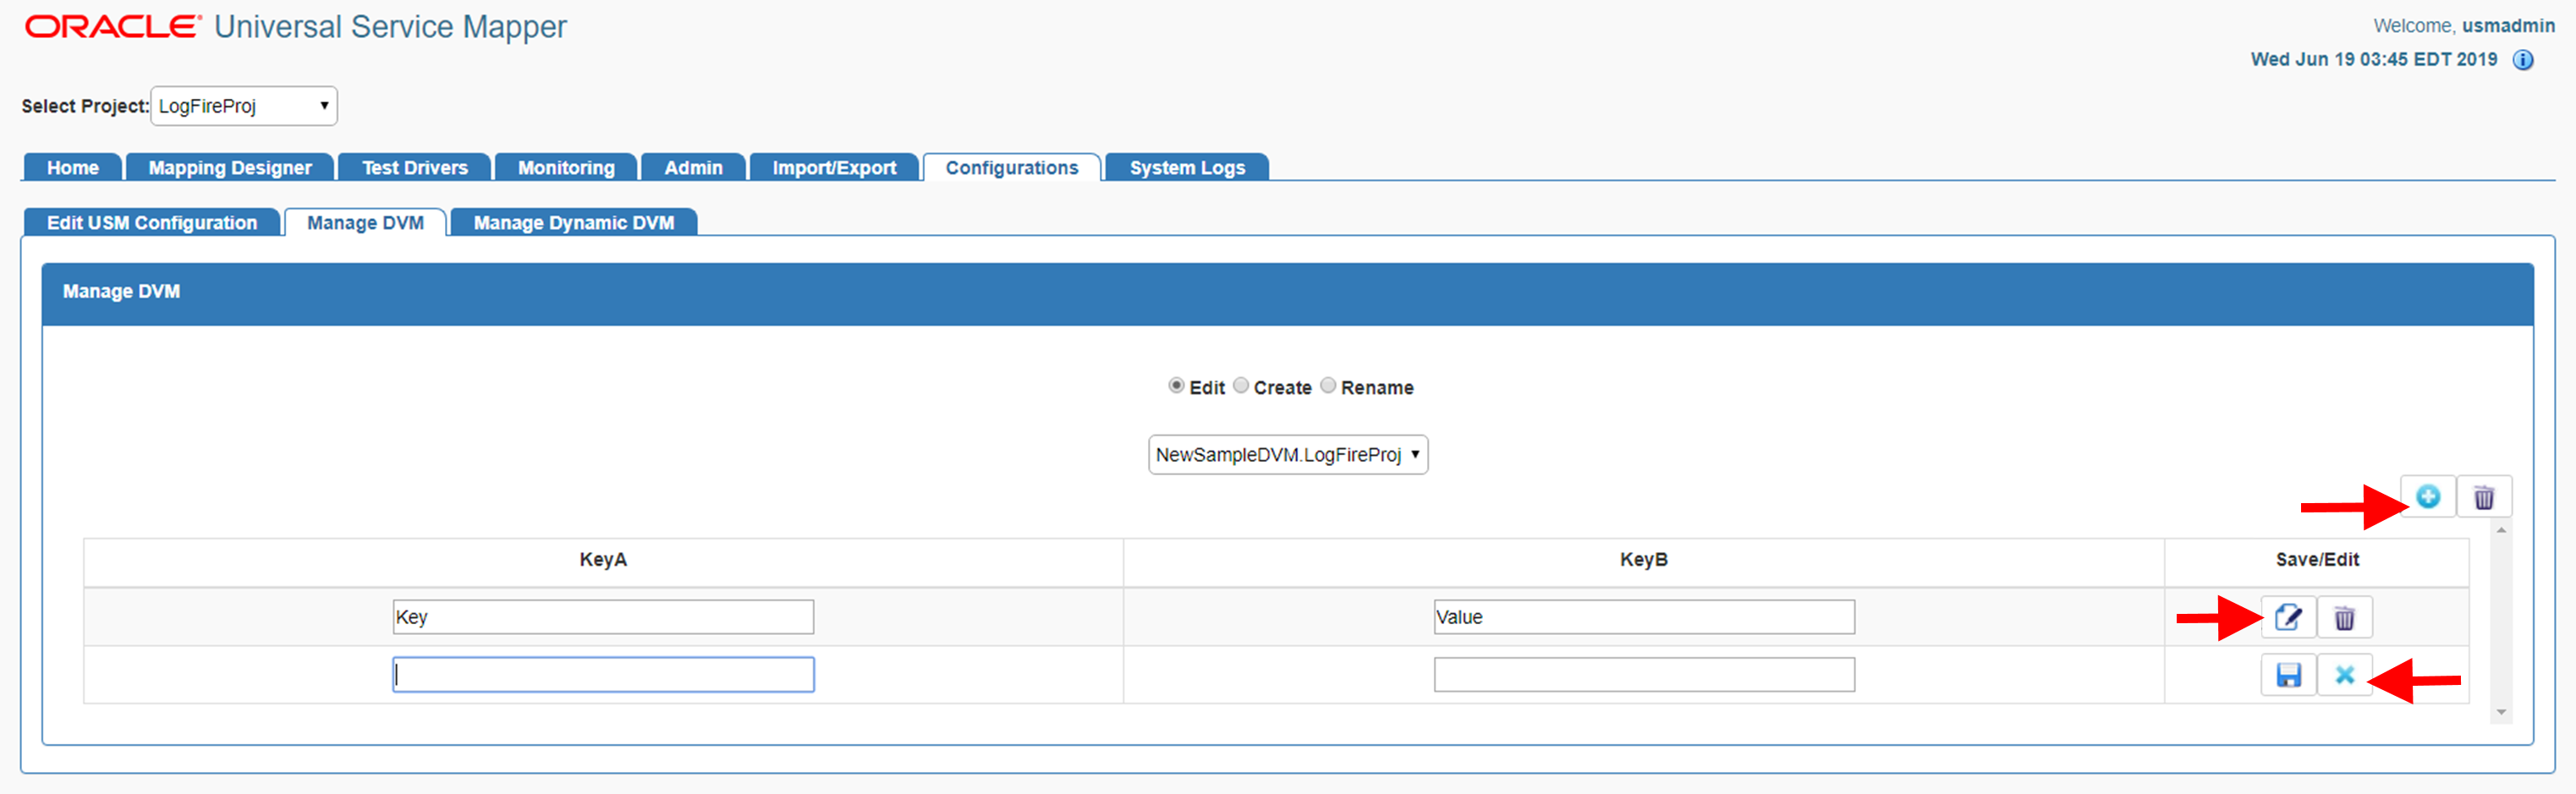
Changes are made to the DVM as rows are added, edited, or deleted:
Click the Edit icon to edit the DVM row.
Click the Delete icon to delete the row.
Click the Insert icon on the top right corner of the table view to add more DVM rows.
Go to Manage DVM sub-tab in the Configurations tab.
Click the Edit radio button.
Select the DVM Name from the drop down list box.
Click the Delete button on the top right corner of the table view.
A delete confirmation dialog appears, click OK to confirm the operation.
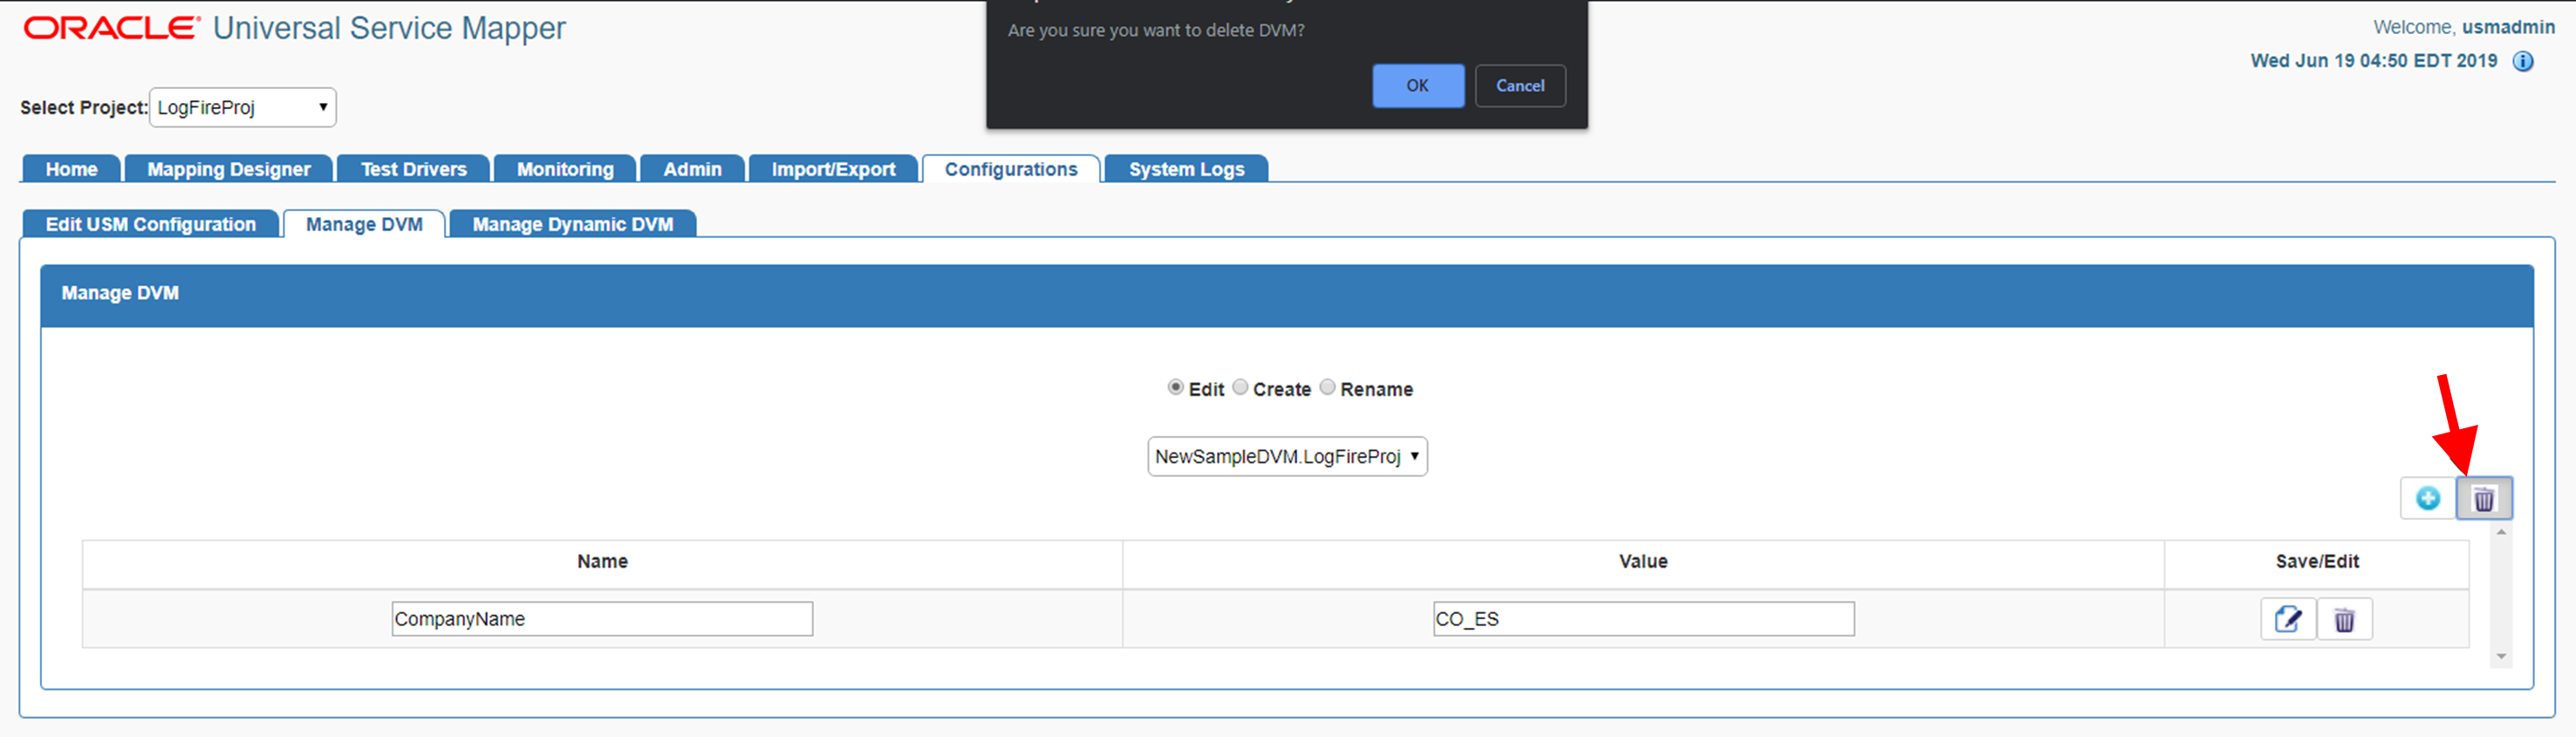
The DVM table is deleted.